20 DIY Party Decorations You Can Make at Home
Walk into any party shop and you will feel the pull: aisles of matching decorations, priced as if joy were a luxury good. Here is the secret those aisles hope you never learn, the most charming parties are rarely the bought ones. They are the made ones. Paper chains in exactly your colors, jars you painted on a Tuesday evening, bunting sewn from fabric with a history: handmade decorations carry a warmth that no matching set in a plastic packet has ever produced.
The second secret is that "handmade" does not mean "hard." Nearly everything in this guide is scissors, paper, glue, balloons, and fabric scraps, most projects take under an hour, all of them forgive beginners, and many can be made by the very children the party is for. A few are one evening investments, like fabric bunting, that return for every party your family throws for the next decade.
Twenty DIY party decorations fill the pages below, garlands, backdrops, centerpieces, and the small details that make a room feel designed, each with how it works, where it looks best, an example worth copying, and the beginner mistake that spoils it. You will also find the decorating mistakes almost everyone makes, budget friendly ways to fill a whole room, styling tips, and answers to the questions new party decorators ask most.
What are the easiest DIY party decorations to make at home?
The easiest DIY party decorations are paper chains, tissue pom poms, paper fan backdrops, confetti balloons, and fairy light jars: five projects, all from paper, balloons, and jars you already own, that together decorate a whole party room. Add one focal point, a balloon garland or a ribbon curtain behind the cake table, and the room reads as professionally styled for a fraction of shop prices.
One starter set always works: paper chains across the ceiling, a paper fan backdrop behind the food table, tissue pom poms in the corners, painted jars of flowers on the table, and fairy lights as evening falls. Total cost, mostly paper and balloons; total making time, one relaxed afternoon.
Paper Chain Garlands
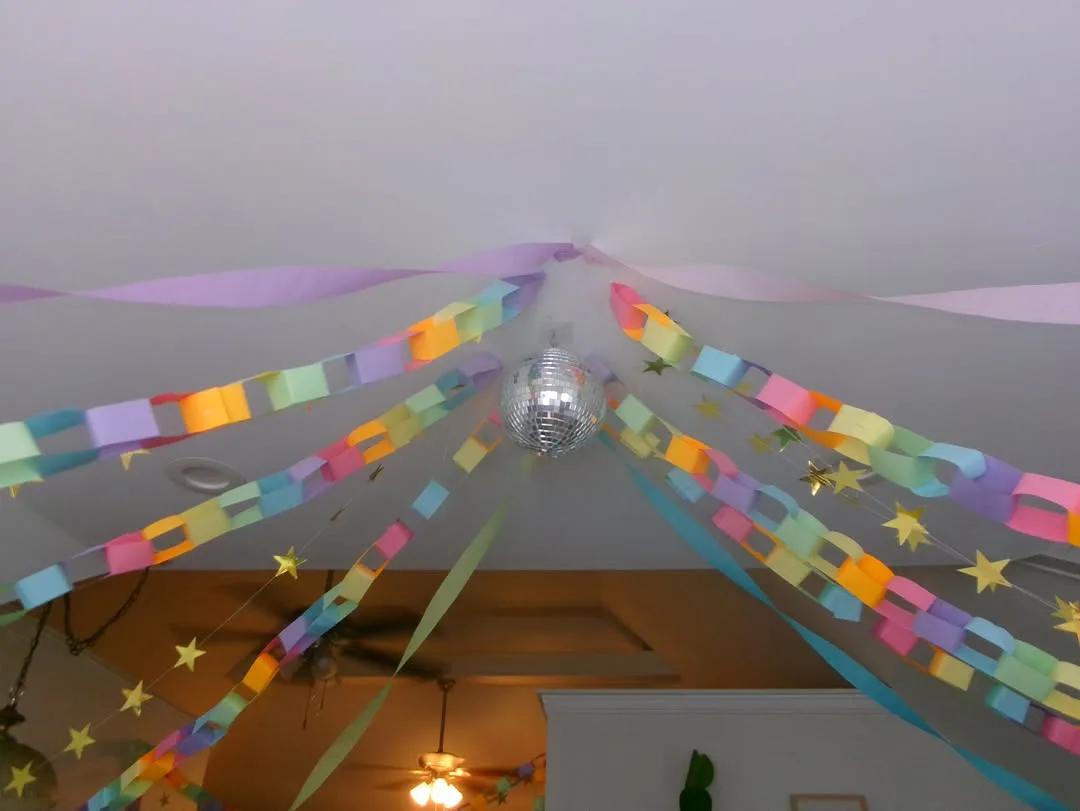
The paper chain is the original party decoration, strips of paper looped and linked into garlands that can run across ceilings, up staircases, and around doorways. It costs pennies, needs no skill beyond a glue stick, and fills more space per dollar than any decoration ever sold.
Chains work because of rhythm and color. Cut even strips in a tight palette, two colors alternating, or a planned ombre from light to dark, and a chain stops looking like a classroom craft and starts looking like a design decision. The loops catch light and movement as guests pass, which is why rooms with chains feel alive in photographs.
Paper chains are best for large areas to cover cheaply: ceilings, halls, stair rails, garden fences. They are also the definitive project to make with children, because a child can produce meters of garland and see it hung an hour later, which is pride you cannot buy.
Make strips uniform with a ruler or paper trimmer; uniformity is the entire secret. Hang chains in gentle swags with slack, never pulled tight. Among all DIY party decorations, chains give you the most coverage for the least money.
The common mistake is glitter or metallic paper everywhere, which sheds onto food and guests. Keep glitter to one accent run of chain, or none, and choose matte papers in your palette for a look that photographs soft and expensive.
Tissue Paper Pom Poms
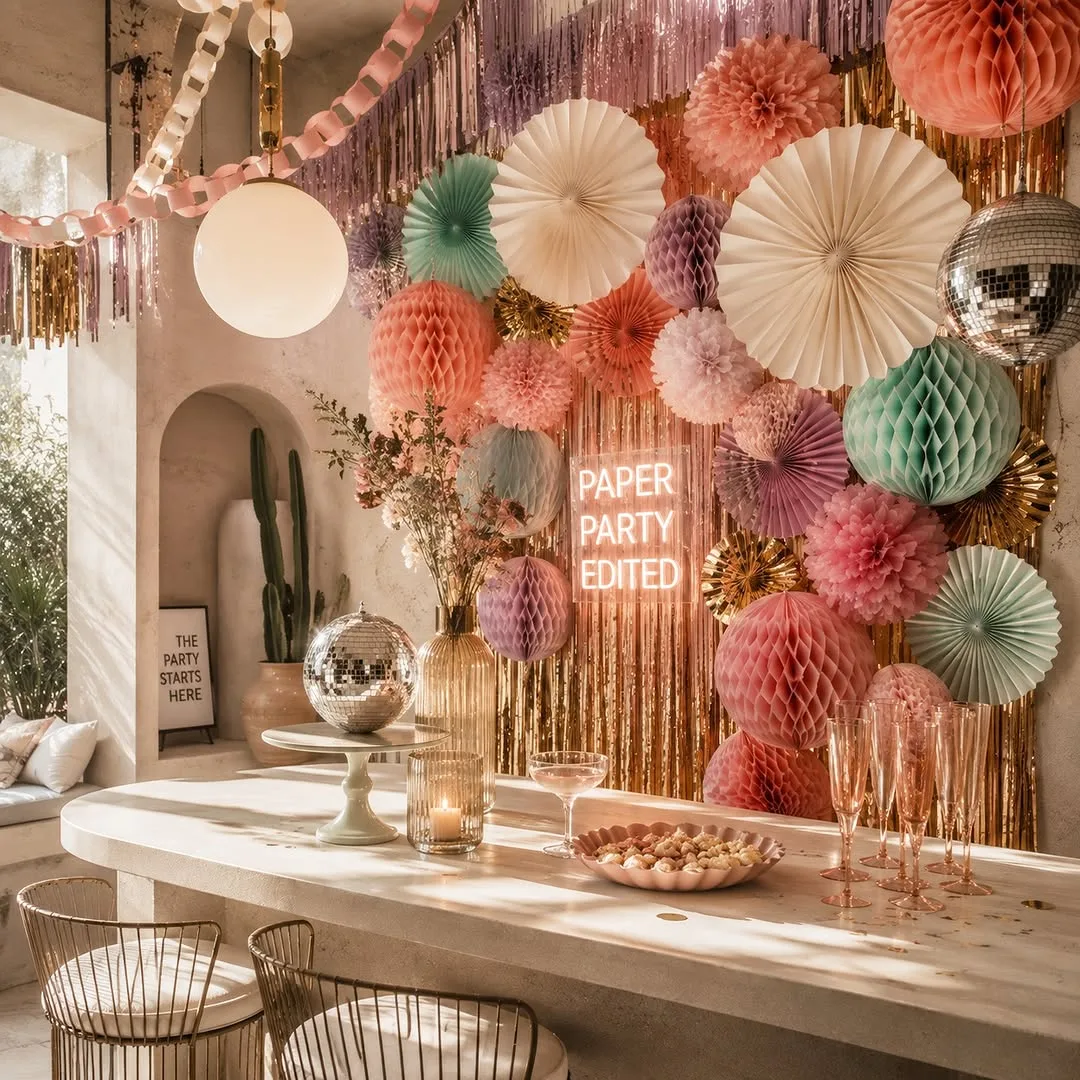
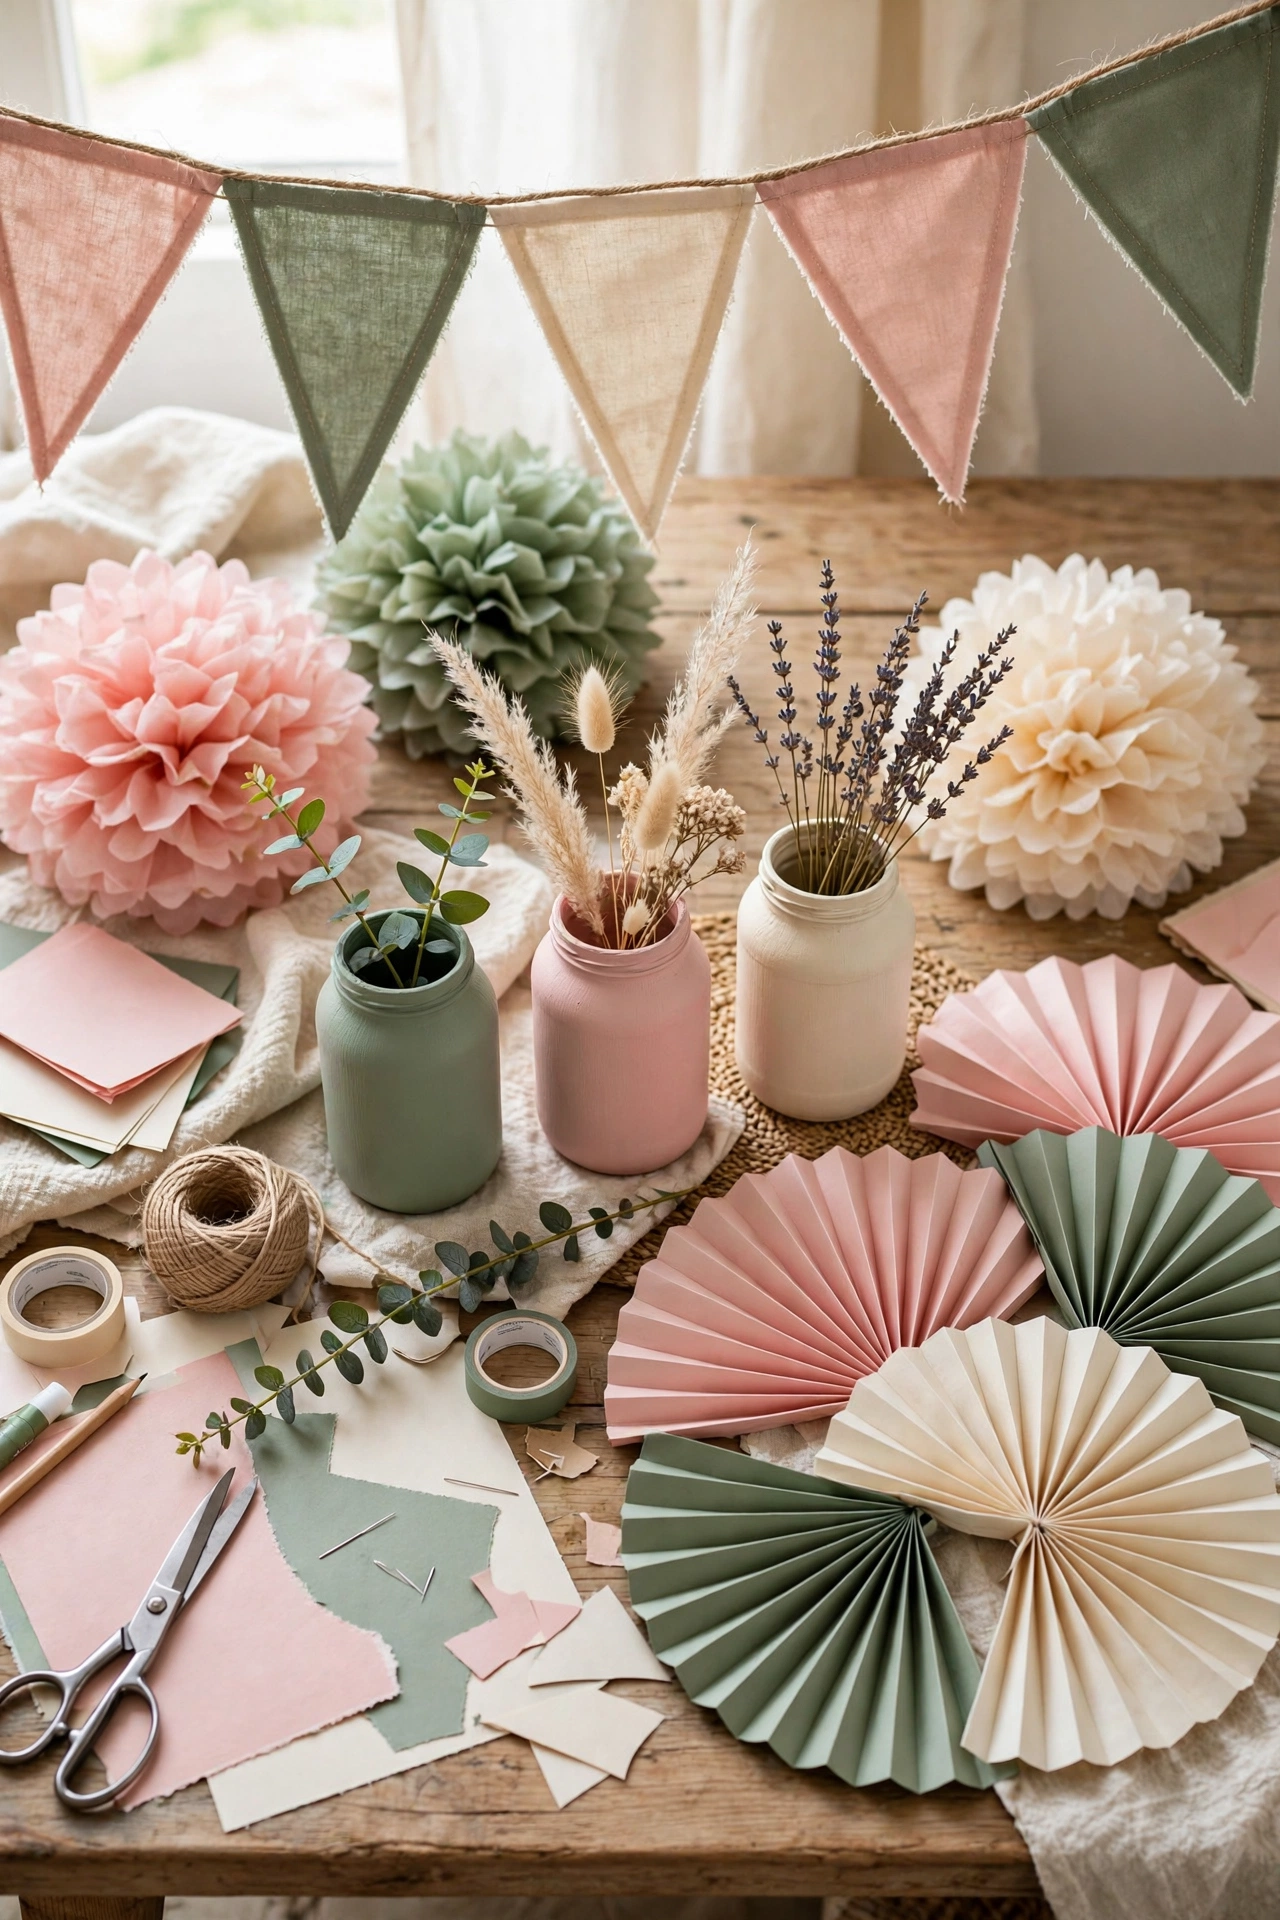
Tissue pom poms are the fluffy clouds of the party world: layers of tissue paper, folded like a fan, tied in the middle, and teased open into full round blooms. Hung in clusters at different heights, they turn a plain ceiling into a celebration.
They work because they give you volume, big, soft, light catching volume, for almost no money and no weight, which means they hang safely from a thread anywhere: over the table, in corners, above a photo spot, along a window. One pom pom cluster in your palette is also the fastest way to make a plain hall or a bare room feel decorated.
Pom poms are best made the day before or the morning of the party, because they store flat until fluffed and fluff best fresh. Make odd numbers, threes and fives, in two or three sizes, and mix in one pom in a contrasting accent color per cluster.
Hang them at varied heights over the cake table and you have a photo backdrop guests will pose under without being asked.
The mistake is rushing the fluffing. Separate the tissue layers gently, one at a time, from both sides; torn layers come from impatience, and a half fluffed pom looks like a cabbage. Slow hands, full blooms.
Paper Fan Backdrop
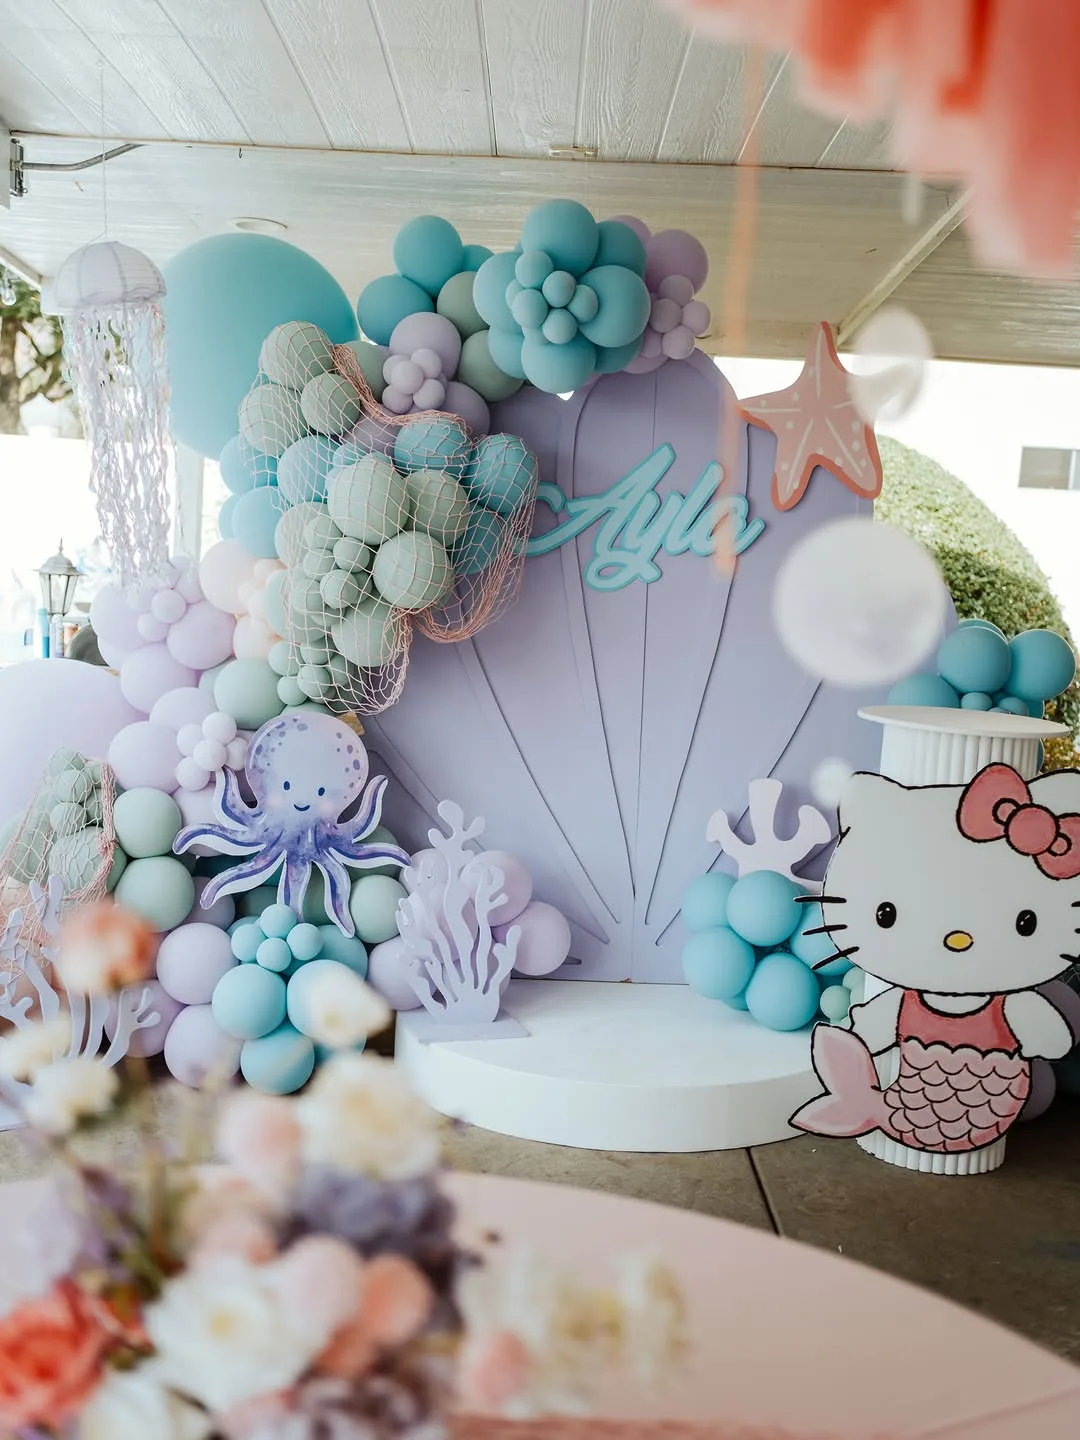
Paper fan backdrops, circles of folded paper in graduated sizes arranged in a cluster on the wall, are the photo wall of the budget decorator's dreams. Fans in your palette, layered from large to small, create a display that looks like a professional installation and costs a pack of paper.
Fans work because circles are celebration geometry: they echo balloons, plates, and confetti, and a wall of them at different sizes creates instant pattern. The backdrop also solves the "blank wall behind the cake table" problem that haunts party photographs, one fan cluster and every picture has a designed background.
Hosts place fans best behind the food or cake table, over a gift table, or framing a doorway. Use sturdy paper or light card so fans hold their shape; fix them with removable putty or pins into a board if the wall matters.
Arrange the cluster on the floor first and photograph it before hanging, fan arrangements are much easier to balance lying down than on a ladder.
The common mistake is fans all one size in a straight row. Fans want to cluster like flowers: biggest low in the visual center, smaller ones radiating, one or two overlapping. Symmetry makes them look like targets; clustering makes them look like art.
Honeycomb Style Balls from Paper
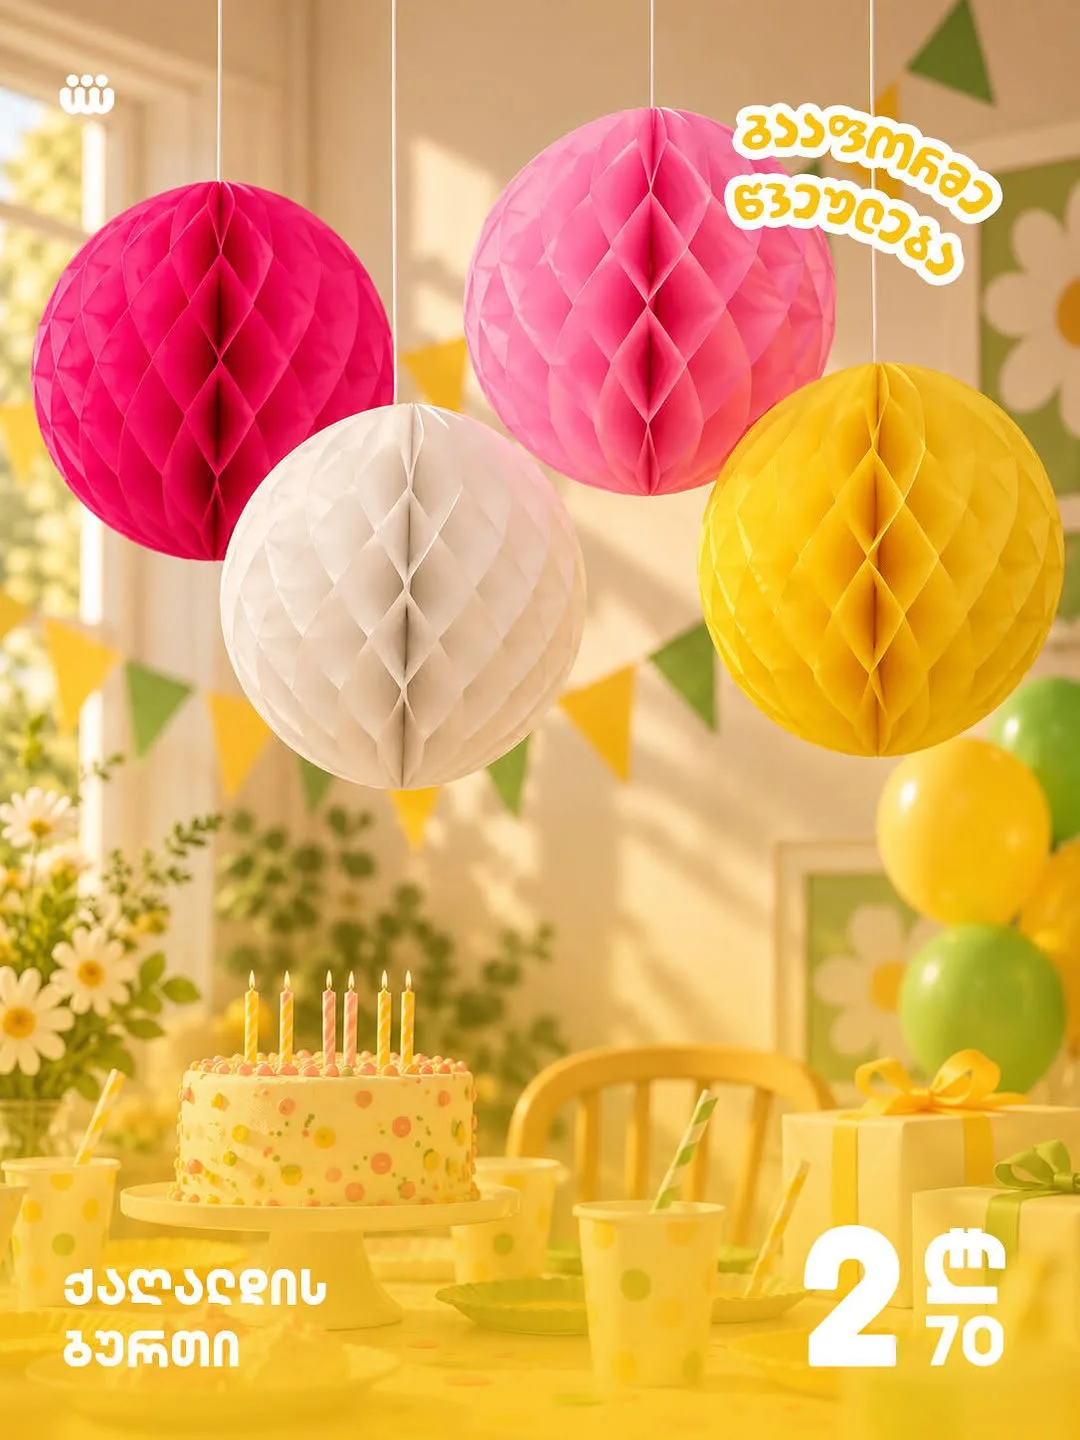
Honeycomb balls, the paper spheres that open into latticed globes, look like pure party shop luxury, and the homemade versions, built from layered tissue or paper semicircles, deliver the same sculptural effect for craft drawer money.
They work because they are three dimensional pattern: the honeycomb texture catches light and shadow in a way flat paper never does. Hung among pom poms or standing on the table in a bowl, they add the "expensive decor" note to a handmade room. Balls in graduated sizes create the rhythm professional stylists charge for.
Honeycomb balls are best for hanging clusters, table bowls, and mantel displays, anywhere a round, textured object earns its place. Choose colors firmly inside your palette and repeat each color at least three times across the room; repetition is what reads as "styled."
Keep balls away from drinks and damp; paper honeycomb wilts in humidity. Made and stored dry, they collapse flat and return for years of parties.
The mistake is scale timidity, one small ball alone looks lost. Balls perform in families: five or more, in two sizes, grouped with intention.
Confetti Balloons

Confetti balloons are clear balloons with paper confetti inside, and each one might be the highest delight per penny object in party history. Shaken, displayed, and eventually popped (the confetti shower is a planned party moment in our house), they make guests of every age behave like delighted children.
They work because they add sparkle without mess, the confetti stays sealed until the chosen moment, and because clear balloons read as "modern styled party" in every photograph. Push confetti in with a funnel or a rolled paper cone, inflate, and rub the balloon to make static hold the pieces against the walls so they show.
Confetti balloons are best as table centerpieces (one weighted balloon per table), photo props, and the party's closing pop for the guest of honor. Use biodegradable paper confetti in your palette; metallic confetti photographs beautifully but lingers in gardens forever.
Make them the day of the party, static fades and confetti settles after a day, though a fresh rub revives the effect.
The mistake is overfilling: a spoonful or two of confetti per balloon shows best. A balloon dense with confetti looks muddy and pops like a small weather event.
Fabric Scrap Bunting
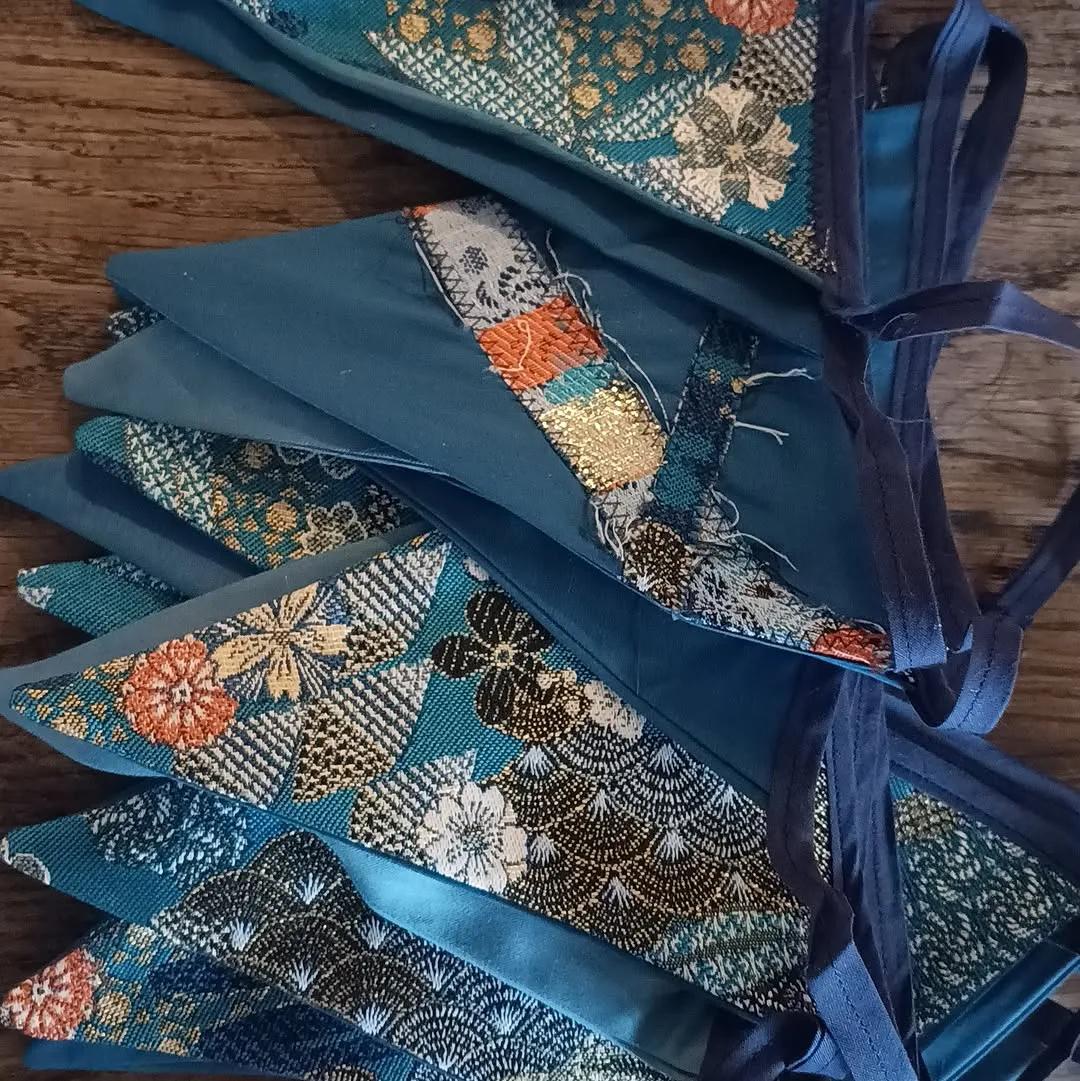
Fabric bunting, triangles of cloth strung along a line, is the heirloom of party decorations. Sewn once (our step by step fabric banner tutorial covers templates and finishing in detail), it returns for decades of birthdays, gradually becoming part of the family's furniture of celebration.
It works because cloth has weight, movement, and memory that paper cannot imitate. One scrap fabric bunting carries your home's actual textile history, the curtain fabric, the dress, the beloved shirt, along the mantel. No sew versions, with triangles cut by pinking shears and glued or tied along twine, deliver most of the charm in an afternoon.
Bunting is best over the cake table, across doorways and windows, along stair rails and garden fences, anywhere a gentle swag of color transforms a line into a celebration. It also survives outdoor parties that destroy paper decor in one shower.
Cut flags evenly with a template, vary fabrics but never the palette, and hang with a soft curve; bunting pulled drum tight loses its joy.
The common mistake is sparse flags. Bunting should look abundant, flags nearly touching. A stingy string reads as washing day; a generous one reads as a festival.
Ribbon Curtain Backdrop
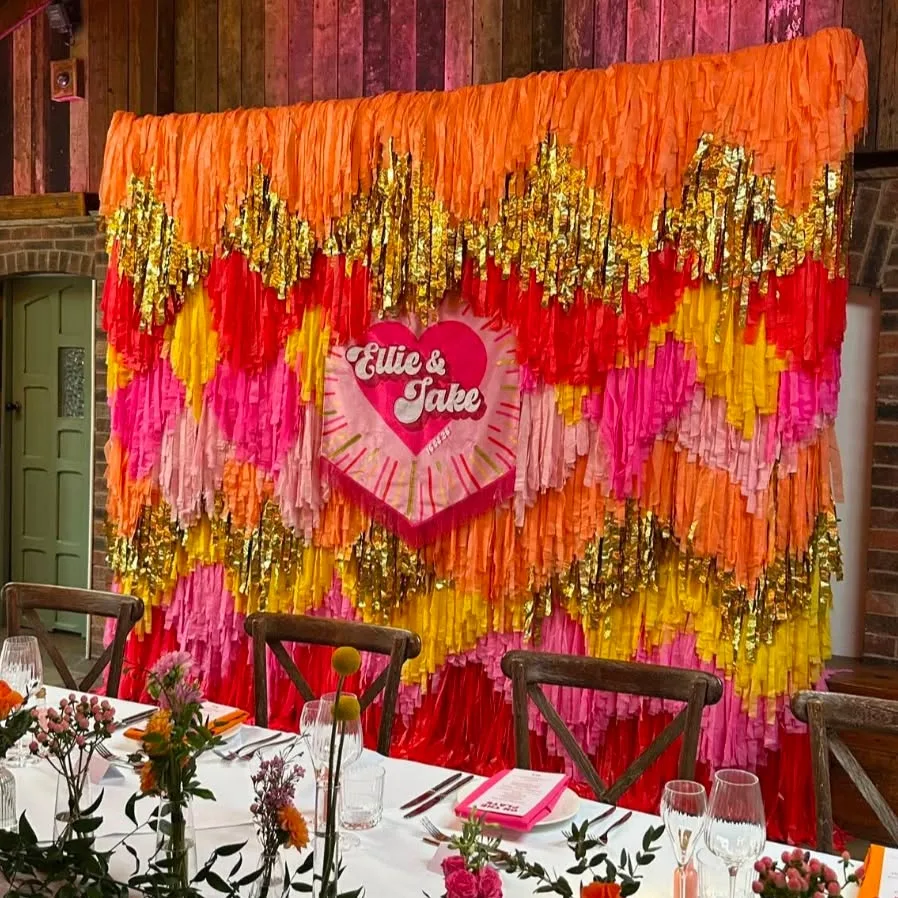
Ribbon curtains, lengths of ribbon, fabric strips, or crepe streamers hanging side by side from a line or pole, are the most forgiving photo backdrop ever devised. It moves, it shimmers, it hides any wall completely, and it takes twenty minutes to hang.
It works because vertical lines of color photograph beautifully and flatter people standing in front of them, the ribbons become rays around every guest. Mix widths and textures inside your palette: satin, grosgrain, torn fabric strips, a little tulle. Movement in a breeze or from passing guests keeps it alive all party long.
Ribbon curtains are best behind the cake table, at a photo booth spot, or across a doorway guests pass through (walking through ribbons is a tiny ceremony children adore). Outdoor versions on a washing line or branch are summer party magic.
Count lengths generously, a sparse ribbon curtain shows the wall; a dense one is a waterfall of color. Overlap the top edge completely.
The mistake is ribbons cut to identical length with military precision. A gentle variation at the hem looks organic and styled; a ruler straight hem looks like a shop blind.
Tulle Table Skirt
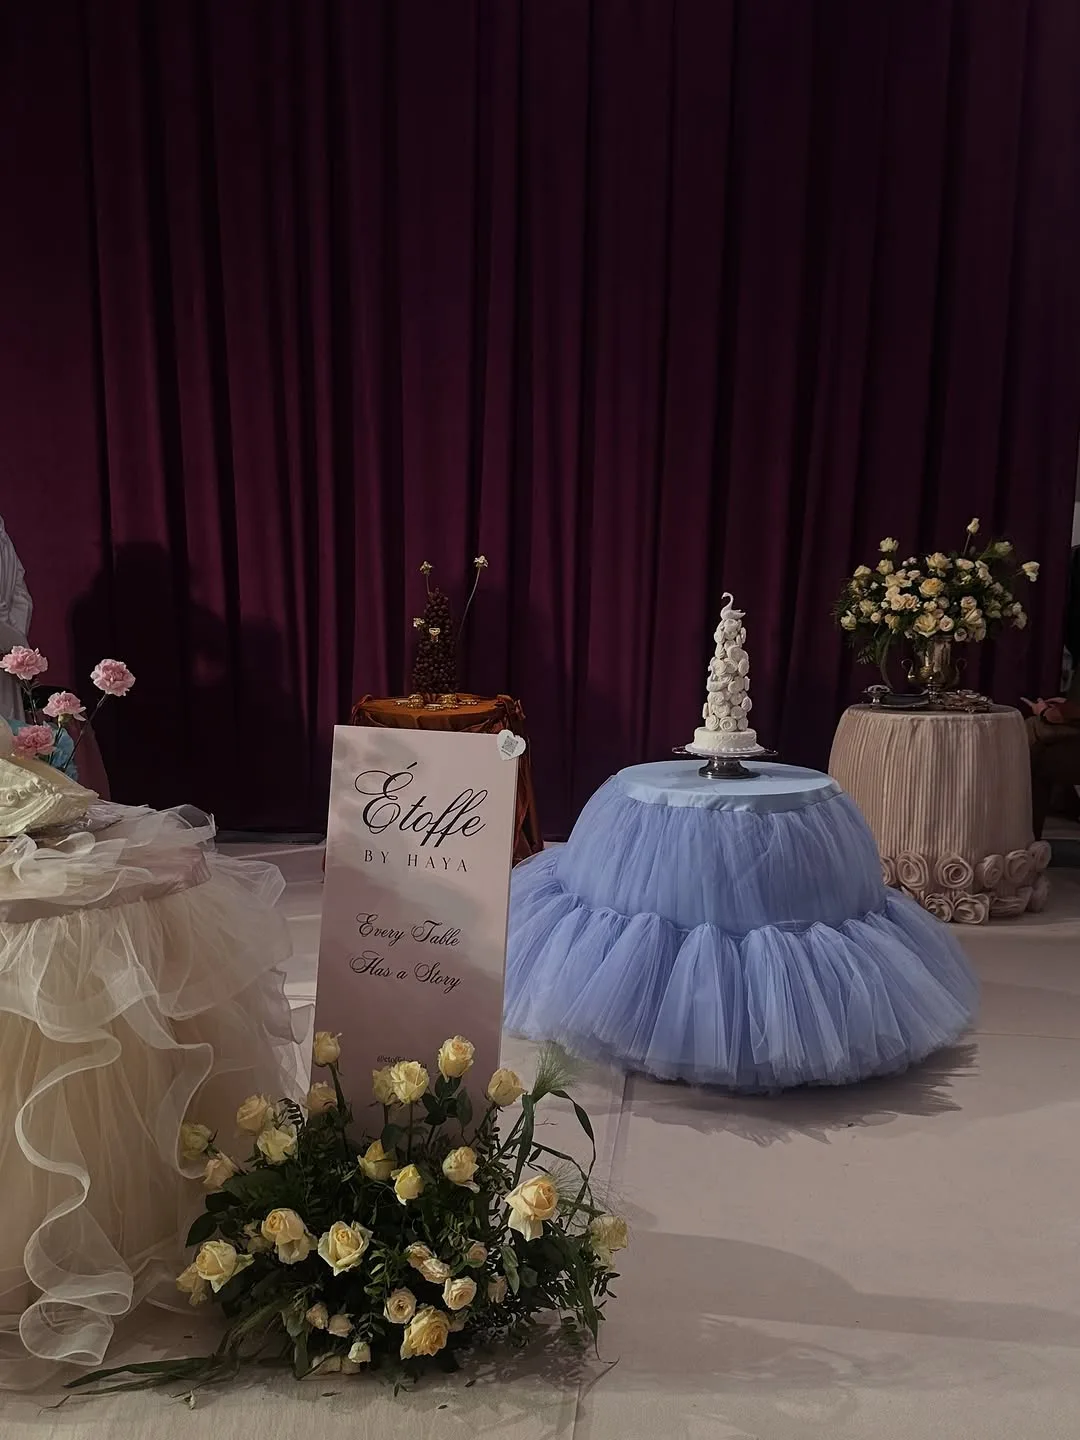
Tulle table skirts, strips or gathered lengths of soft tulle attached around a table's edge, turn the most ordinary folding table into a ballerina. It is the cake table's couture: floating, layered, and unmistakably "occasion."
It works because tulle is volume without weight and translucency without shine, which photographs like a dream around cakes and gift tables. Layers of two close colors (blush over cream, white over sage) give the depth of a styled shoot for the price of a few meters of net.
Tulle skirts belong on the cake or gift table specifically, because one hero table dressed fully beats every table dressed thinly. Skirts like these suit baby showers, birthdays, tea parties, and any pastel or princess themed celebration.
Attach strips densely along a ribbon or elastic line pinned under the table's edge cloth, working in handfuls so the skirt is full from the start. Trim the hem to just kiss the floor.
The mistake is tulle on a working food table, it tangles in serving, small hands, and chair legs. Reserve tulle for display tables guests approach from the front only.
Burlap and Lace Table Runner
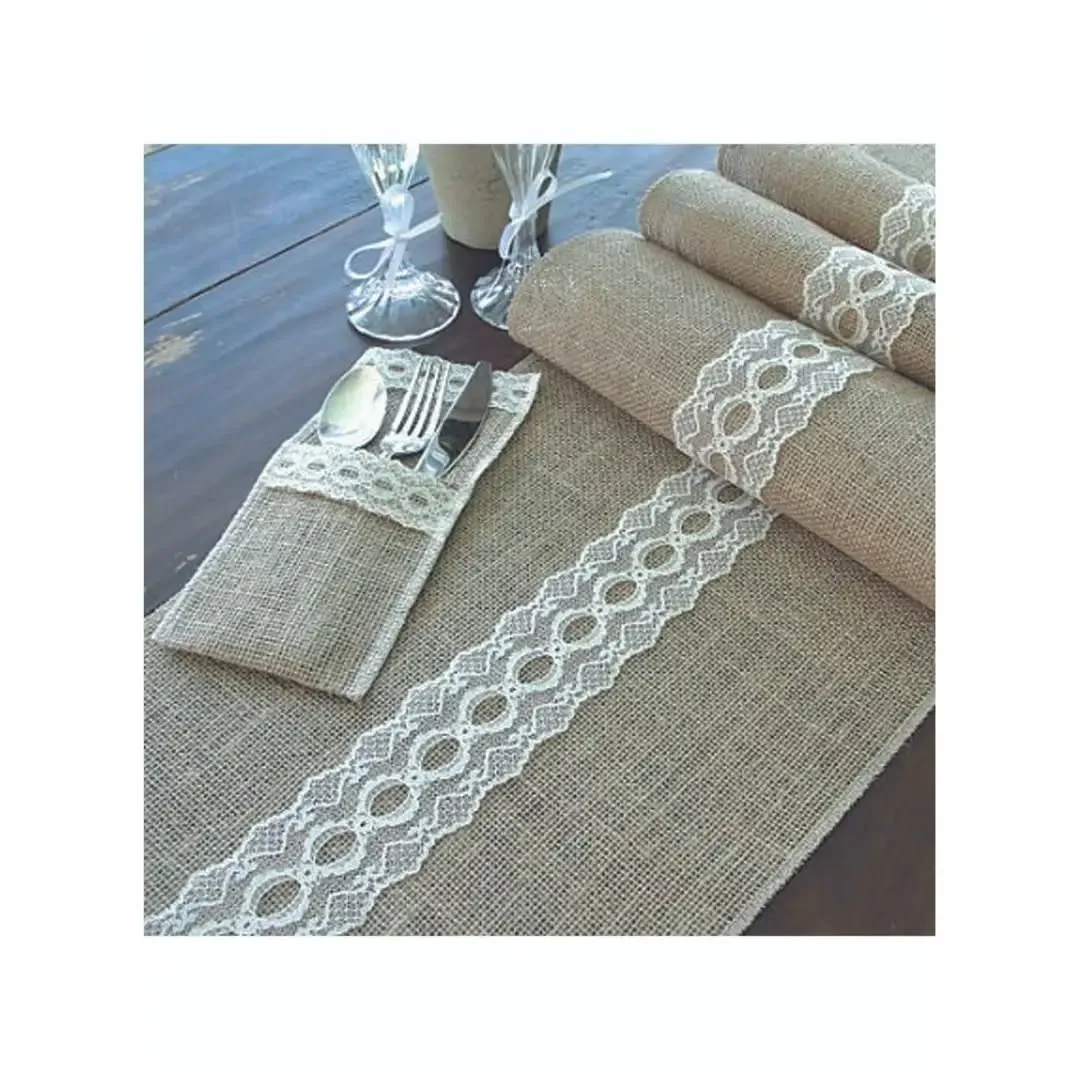
Burlap strips (hessian) laid down the table's center, edged or layered with lace, are the rustic decorator's signature: instant texture, warmth, and a base that makes everything placed on it look intentional. Jars, candles, and plain white dishes all gain charm on burlap.
It works because contrast is elegance: rough against smooth, natural against white, handmade against plain. The runner also defines the table's "stage", decorations live on the runner, serving space lives off it, which is the quiet rule behind every styled table you have ever admired.
Burlap and lace suit garden, farm, vintage, and autumn parties, and any table that is lovely wood you do not want to hide under a full cloth. Cut the runner long enough to drape slightly over the ends.
Wash and iron burlap before first use (it softens and loses its warehouse smell), and hem or pink the edges to control shedding.
The mistake is raw burlap against fine food presentation, crumbs and fibers mingle. Place serving boards and stands between food and runner, and the texture stays where it belongs: under the show, never in it.
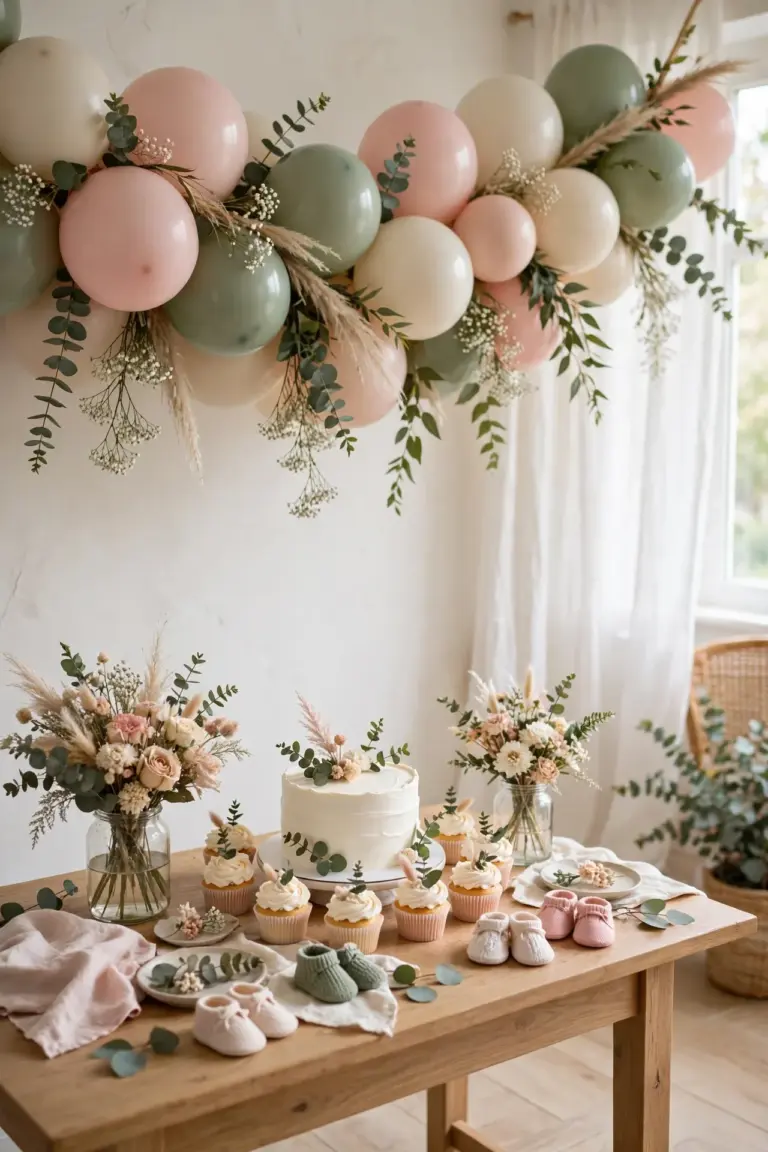
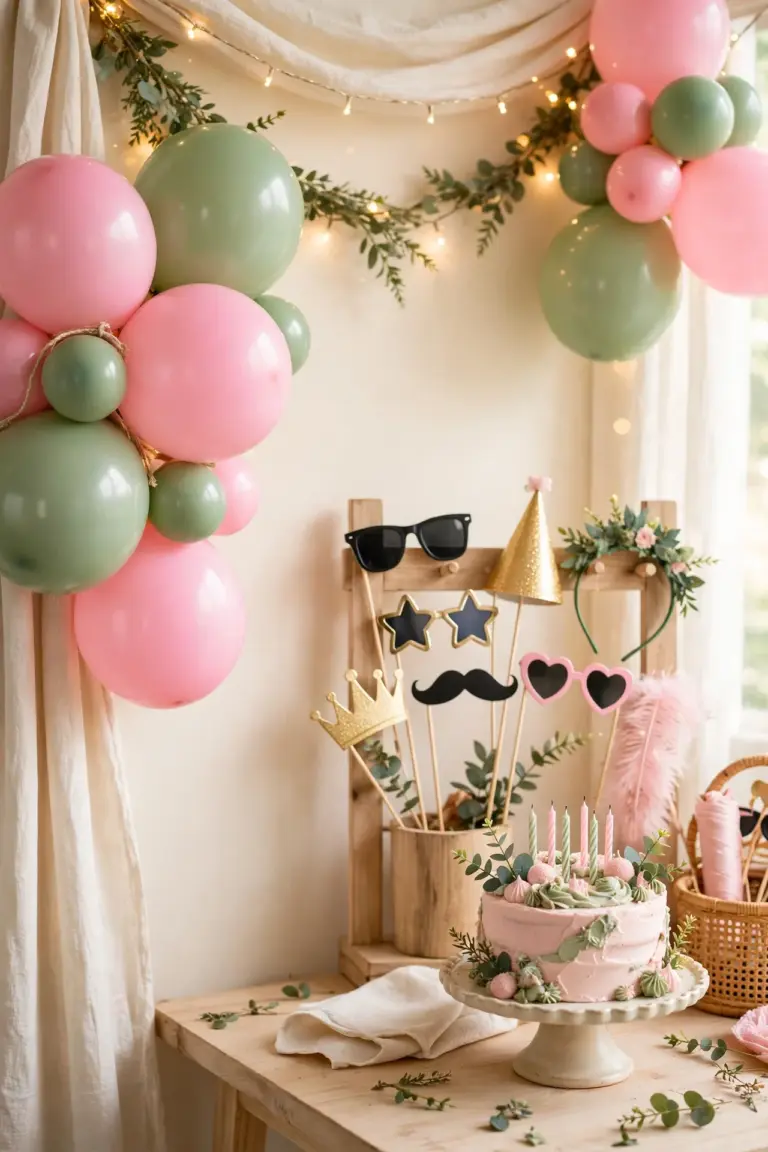
Balloon Garland
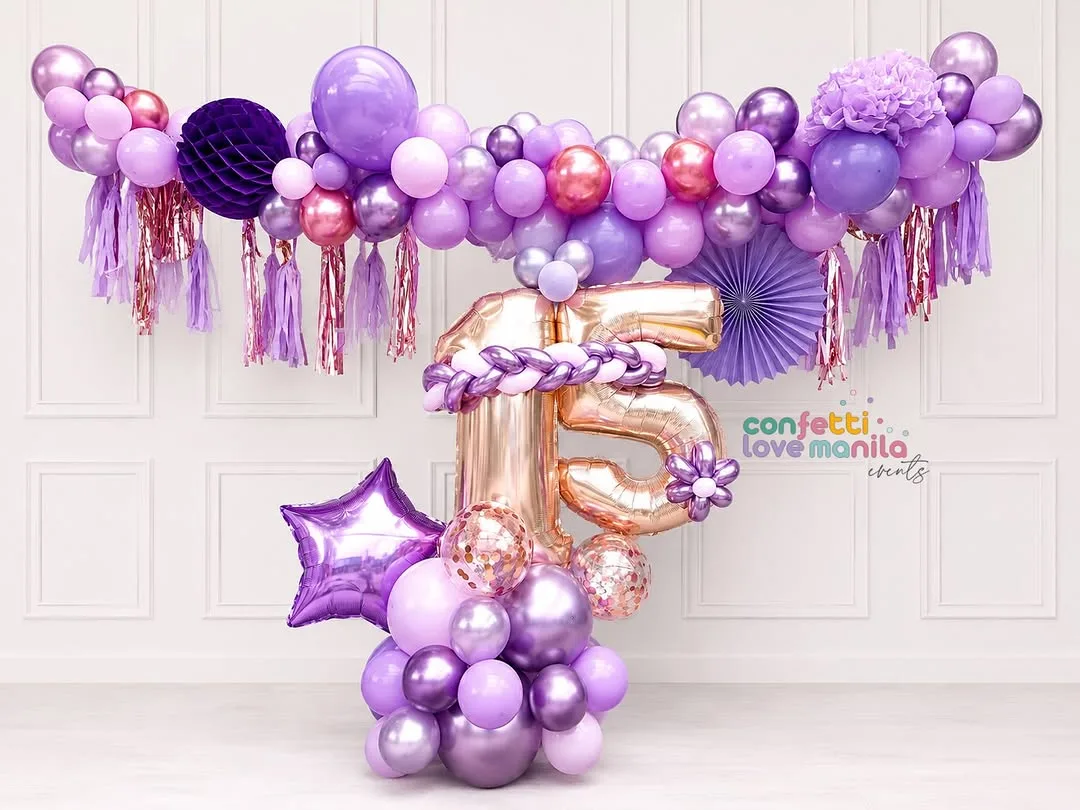
Balloon garlands, balloons in varied sizes clustered along a line into an organic, flowing arch or swag, are the defining party decoration of the last decade, and it is entirely a DIY proposition: balloons, a strip or line, and the patience to cluster generously.
It works because it is architecture made of color. A garland over the cake table, around a door, or up a staircase creates the "wow" photograph of the party, and its organic unevenness (big, medium, small balloons in waves) is a style that forgives beginners completely, irregular is correct.
Balloon garlands are best as THE focal decoration: one grand garland, in a two or three color palette, does more for a room than ten small decorations scattered. Of all DIY party decorations, a garland delivers the biggest visual payoff for the work involved. Build it the day before (balloons hold overnight indoors) and hang it where it frames people, over the table or the photo spot.
Cluster in odd groups, tuck small balloons into gaps at the end for the professional finish, and step back often; the garland is judged from across the room, not from the ladder.
The mistakes are uniform balloon sizes (monotone rhythm, no flow) and outdoor sun, which pops and dulls balloons within hours. Shade and mixed sizes are the whole craft here.
Balloon Table Centerpieces
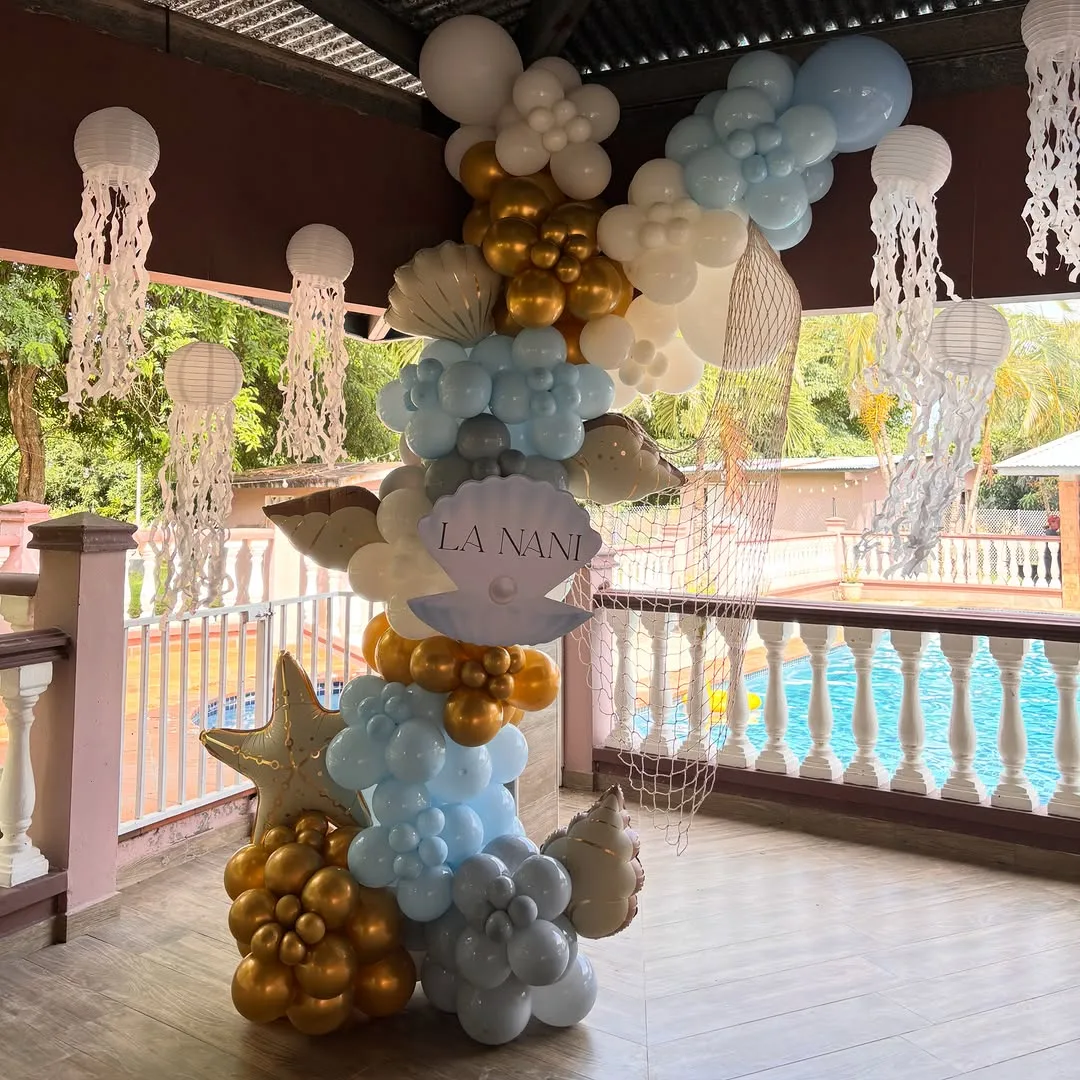
Balloon centerpieces, small clusters of balloons on a weighted stick or a mini balloon bunch in a jar, give every table its own celebration at eye level. Unlike one big garland, centerpieces spread the theme to wherever guests actually sit.
They work because they bring the party's colors down to the table, where the food, the photos of people, and the conversation are. A single balloon on a stick in a painted jar, with a curl of ribbon, costs almost nothing and looks deliberate; three balloons at varied heights look designed.
Centerpieces are best for seated parties, multiple tables, and venues where walls and ceilings cannot be touched. They also solve the "big room, small party" problem, dressed tables make gatherings feel intimate at any scale.
Keep centerpieces low or very high, never at face height: guests must see each other across the table. Balloon on stick designs solve this elegantly, the balloon floats above heads while the jar sits below sightlines.
The mistake is latex balloons for guests with latex allergies and near hot food. Check your guest list, keep balloons back from serving dishes, and the centerpiece stays charming all party.
Giant Number or Letter Balloons as a Photo Prop
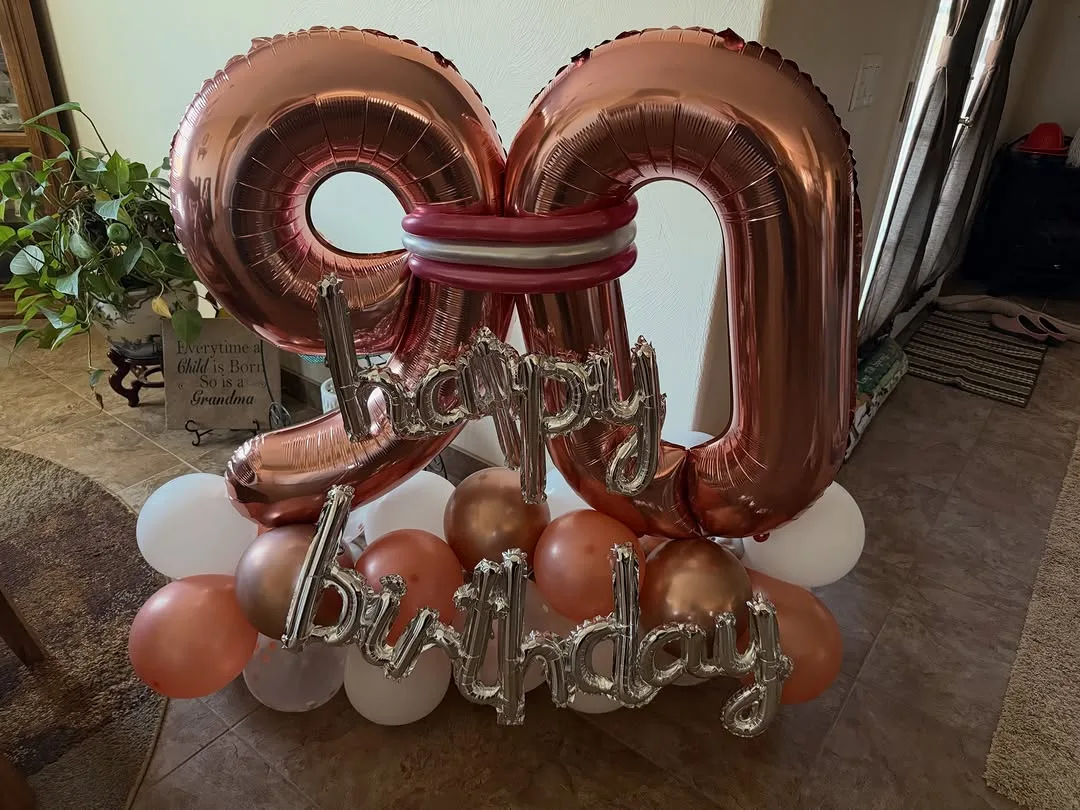
One giant foil number or letter balloon, the age, the initial, is the hero prop of modern party photography. It anchors the photo spot, announces the celebration in every picture, and costs less than a cake.
It works because it gives guests something to pose WITH: held, hugged, pointed at. Every photograph of the day gains a caption without a word written. Kept after the party, the deflated balloon goes in the memory box, and its photos mark the year forever.
The giant balloon is best bought for milestones and birthdays specifically (other parties can use a star or heart). Order or buy it a few days early, inflate it the morning of the party, and anchor it where the light is good and the background is clean, it will draw a queue.
Pair it with one simple backdrop (your ribbon curtain or paper fans) rather than a cluttered wall, and let the balloon do the talking in every frame.
The mistake is outdoor wind: a giant balloon is a sail. Keep it indoors or firmly weighted in shelter, or your hero prop will be photographed departing over the fence.
Painted Jar Vases
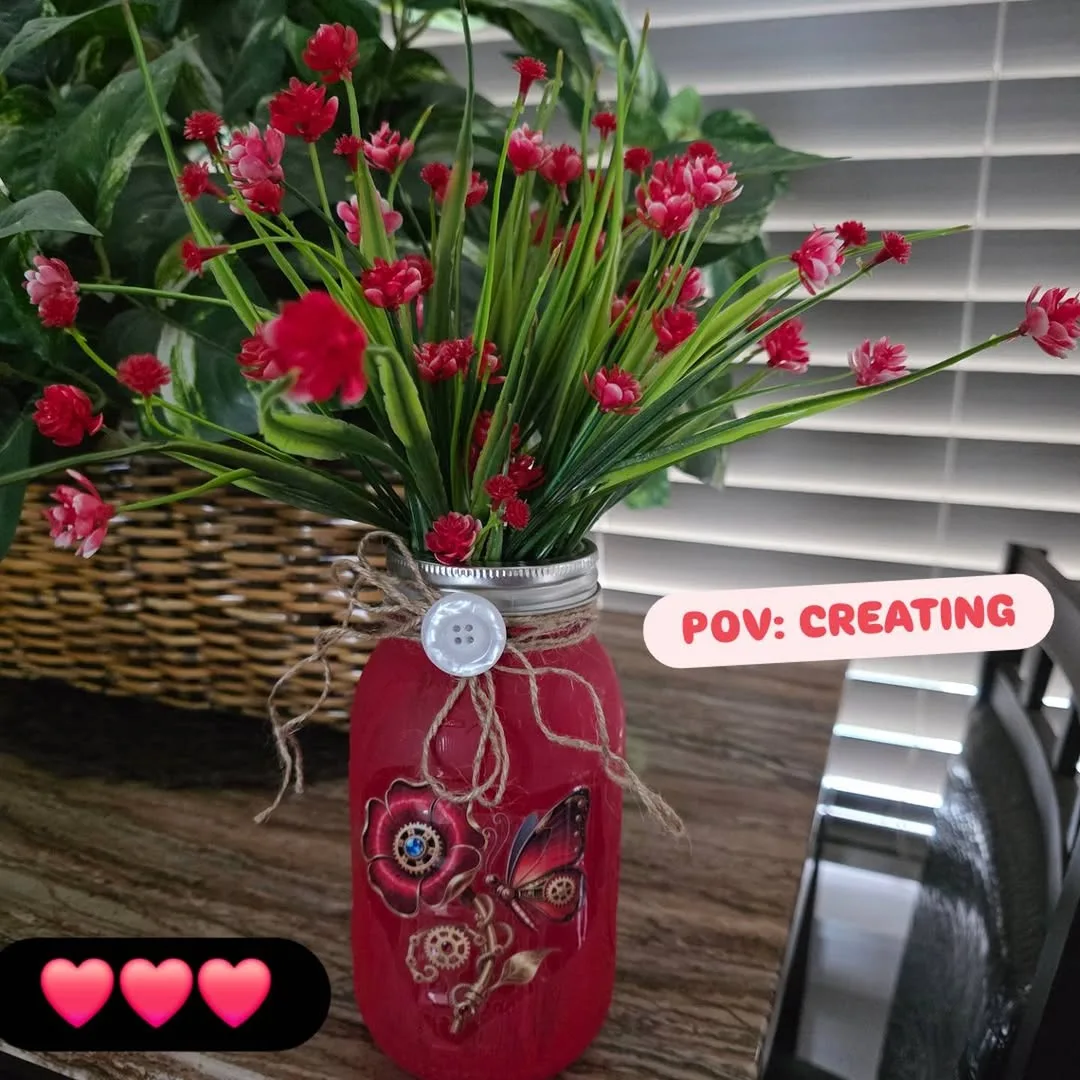
Save your jars. Painted inside or out in your palette, tied with twine or ribbon, a jam jar becomes a vase, a candle holder, a cutlery pot, and a favor container, the hardest working decoration in this entire guide.
Painted jars work because glass plus matte color reads as boutique. A row of jars in three palette shades, holding garden flowers, greenery, or even just fairy lights, lines a mantel or table center with rhythm and repetition, the two things that make decor look "styled." Acrylic paint poured inside and swirled gives a smooth professional finish with no brush marks.
Jars are best collected over months (ask friends to save theirs), painted in one batch session, and used at every party your family throws for years. They suit every theme on earth because the paint color IS the theme. Honestly, few DIY party decorations earn their keep at every single party the way these jars do.
Fill with real flowers when you can, greenery when you cannot, and a battery tealight when the party runs into evening, one object, three shifts of duty in a single day.
The mistake is paint that flakes into food zones: seal painted jars used near food, keep painted surfaces out of drink contact, and let jars cure fully before their first party.
Photo Garland
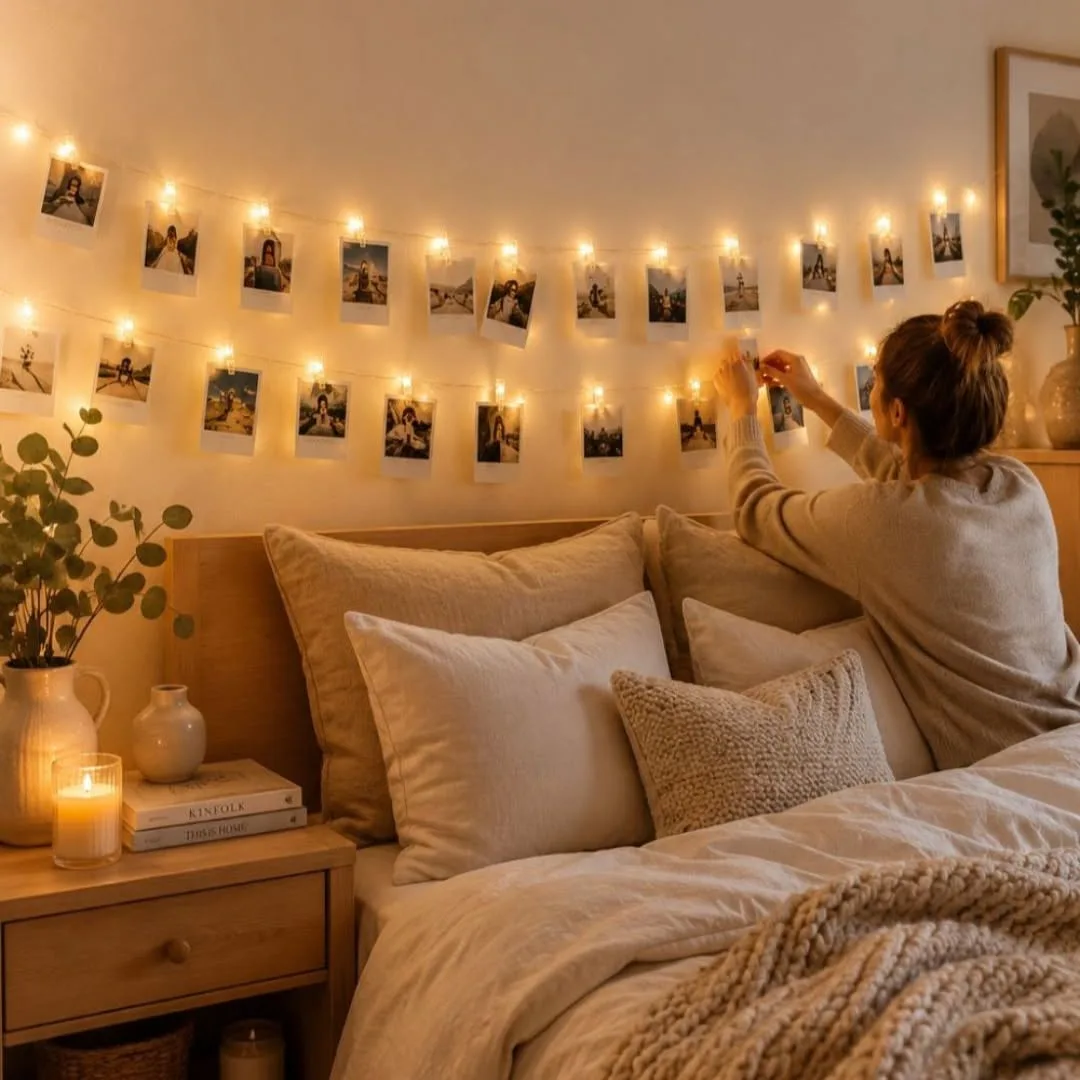
Photo garlands, printed photographs pegged along a string, are the decoration guests stand in front of longest. The birthday person's year in pictures, a couple's story, a grandmother's decades: the garland turns a wall into the party's heart.
It works because it is personal in a way no bought decoration can approach. Guests find themselves in the photos; stories start; the guest of honor sees their life celebrated literally along the wall. Print at home or cheaply in bulk, in one size, and peg them in chronological order for the full effect.
Photo garlands are best for milestone birthdays, anniversaries, graduations, and family reunions, celebrations whose subject is a person's story. Add a few blank cards and a pen so guests can add wishes beside the photos, and the garland becomes a guest book.
Hang it where people gather but do not queue, over a sideboard, along a hallway, so the crowd it draws does not block the party's arteries.
The mistake is printing too few, too small, too dark. Photos print darker than screens show; choose bright images, print a test strip, and give the garland at least twenty pictures, a life in five photos looks like a rumor.
Fairy Light Jars and Bottles
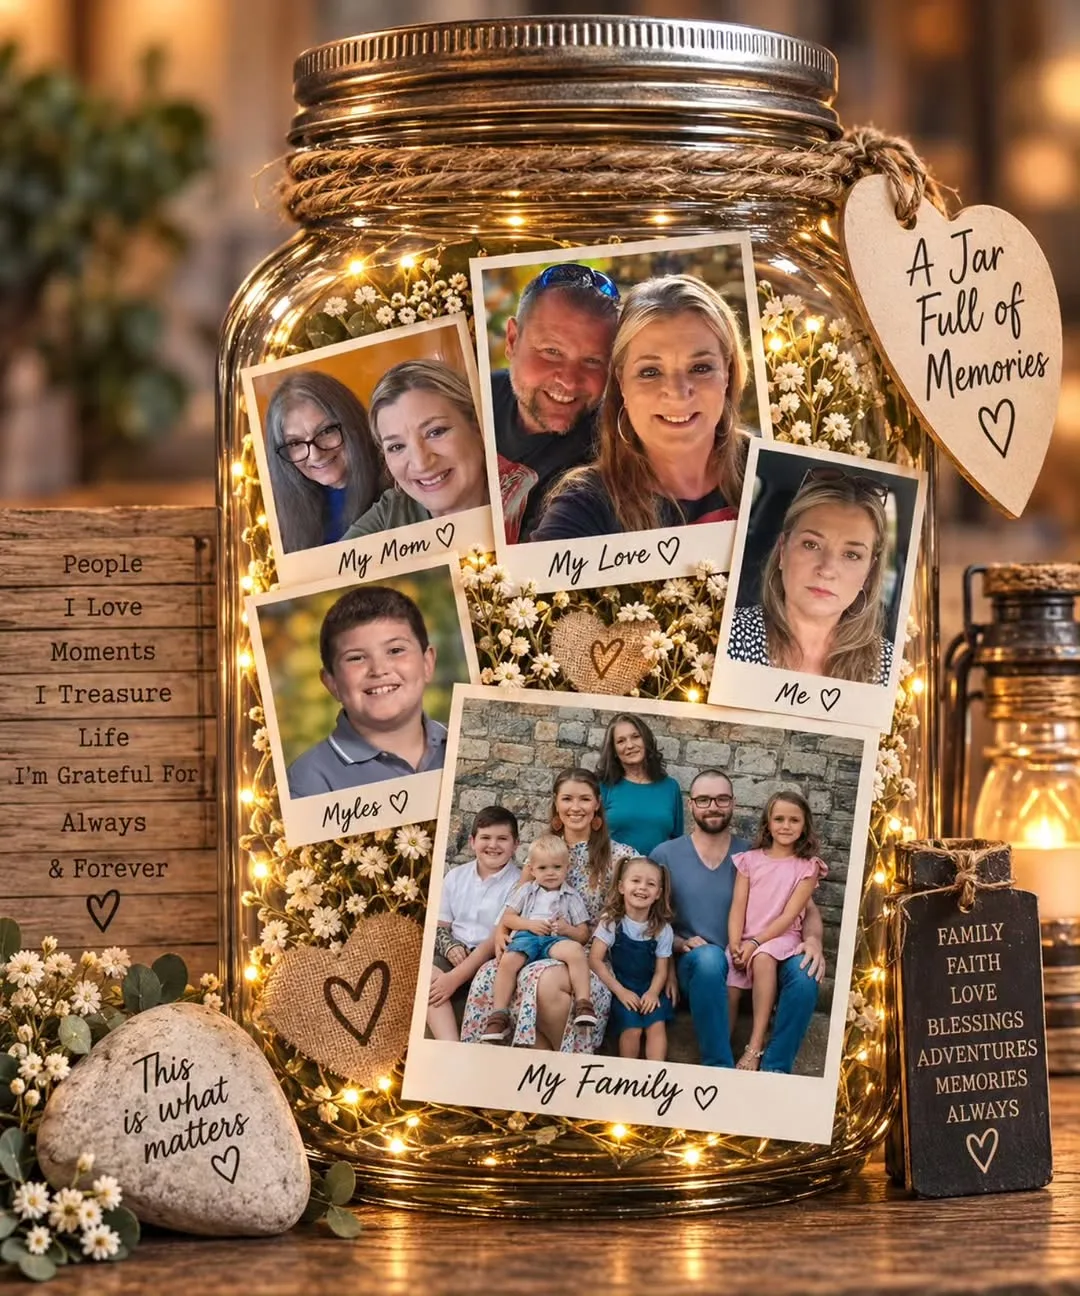
Battery fairy lights coiled inside jars and bottles turn evening parties into candlelit scenes without a single flame. As daylight fades, the jars begin to glow, on tables, along paths, up stairs, and guests invariably ask how you did it.
They work because warm points of light at low height are the most flattering, festive lighting there is, and because jars contain the effect safely anywhere: grass, tablecloths, children's reach. Group them in odd numbers, vary the jar sizes, and let some stand empty between the glowing ones for rhythm.
Fairy light jars are best for evening and winter parties, garden paths, mantels, and anywhere candles are banned or unwise. The same jars from your painted collection do double duty, clear ones glowing brightest.
Use warm white lights only, colored or cool white lights break the candlelight illusion instantly, and switch them on before guests arrive so the party is discovered already glowing.
The mistake is cheap light strings with visible battery packs flopping out of the jar. Coil the pack into the jar's base under the lights, or choose bottle cork lights made for exactly this, and the magic stays seamless.
Paper Lantern Clusters
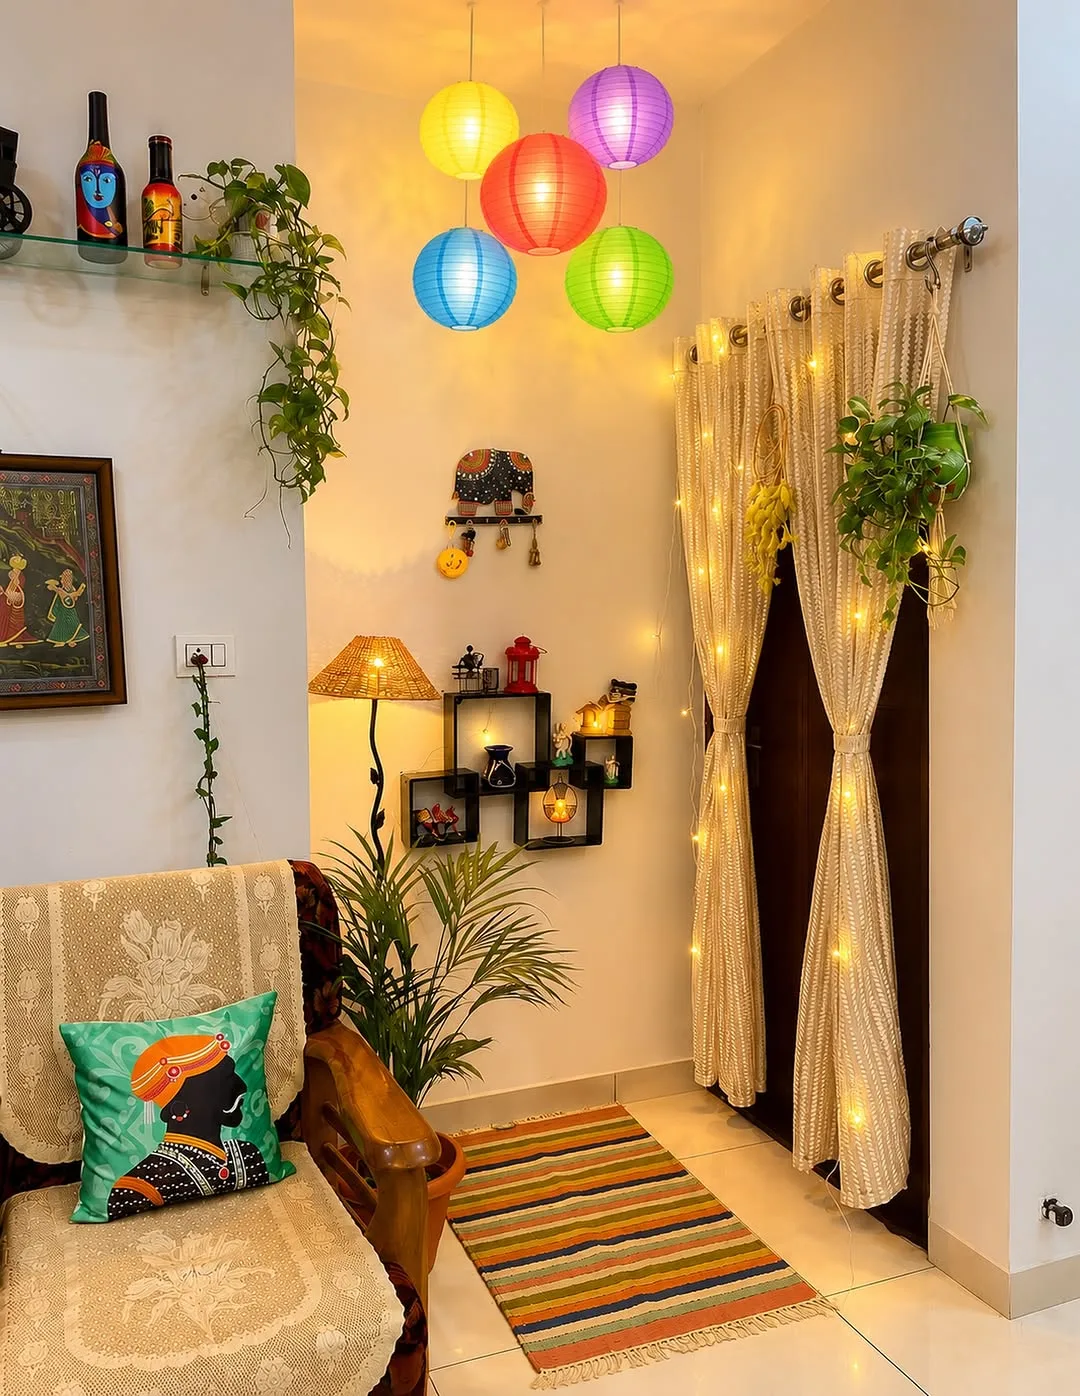
Paper lanterns, the round, ribbed, fold flat kind, hung in clusters bring instant festival scale to a room. Big, round, and soft, they fill ceiling space the way balloons fill walls, and they store flat in a drawer between parties for years.
They work because of scale and softness: a 12 inch lantern does the visual work of fifty small decorations, and their matte glow (over a bulb or simply in daylight) reads as designed. Cluster three to five in a corner or over the table, in your palette with one white for every two colors.
Lanterns are best indoors or under cover, over the main table, in hallways and porches, anywhere height is available and wind is not. Mix sizes within a cluster (8, 12, 16 inches) for the professional rhythm.
Hang clusters at genuinely different heights, with the lowest safely above heads and serving paths; a level row of lanterns looks like stock storage, a varied cluster looks like a party.
The mistake is lanterns near heat bulbs or real candles below them. Paper stays away from heat, battery lights inside lanterns only, or none at all; daylight lanterns are decoration enough.
Hand Lettered Welcome Sign
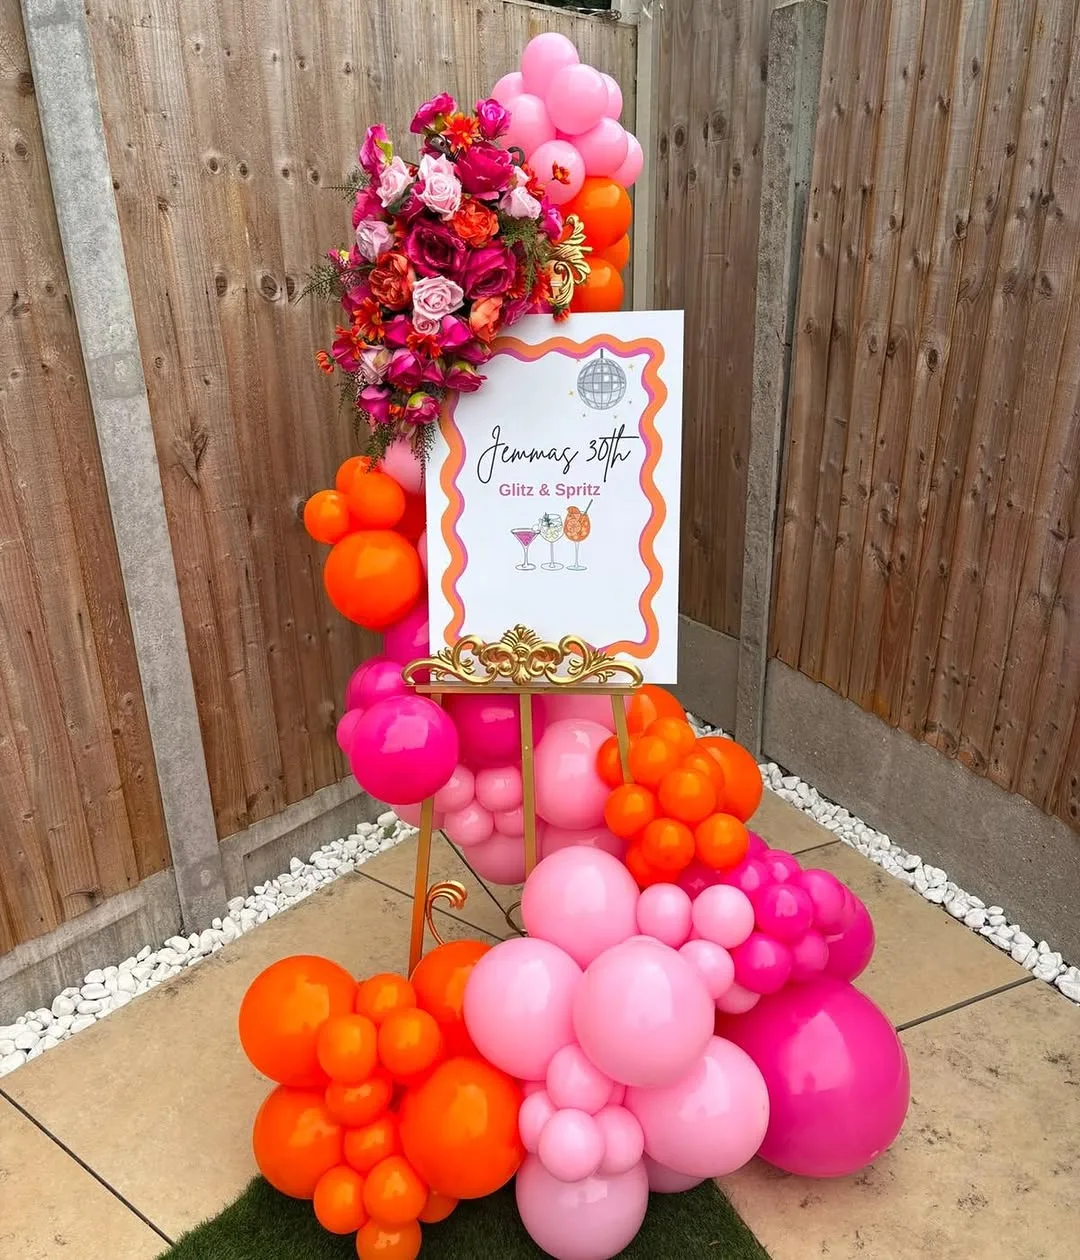
Welcome signs at the door, carrying the guest of honor's name, the party's theme, an arrow, a joke, are the party's handshake. Hand lettered on a board, a chalkboard, or good card, the sign tells arriving guests they have found the right house and the right mood.
It works because it starts the party ten seconds early: guests smile at the door, photograph the sign, and walk in already inside the theme. The sign also quietly solves logistics, "party in the garden →" has prevented a thousand doorbell rings.
Smart hosts make the sign on something reusable: a chalkboard or a painted board you letter again each party, in your best unhurried handwriting or with a simple printed design transferred and traced. Imperfect lettering is charming; rushed lettering is just hard to read, make it the day before.
Match the sign's colors and lettering style to the theme inside so the door promises what the room delivers; a sign is a trailer for the party.
The mistake is information overload. Name, occasion, one warm line, one arrow if needed. A sign that reads like a noticeboard gets read like one, not at all.
Labeled Food Cards
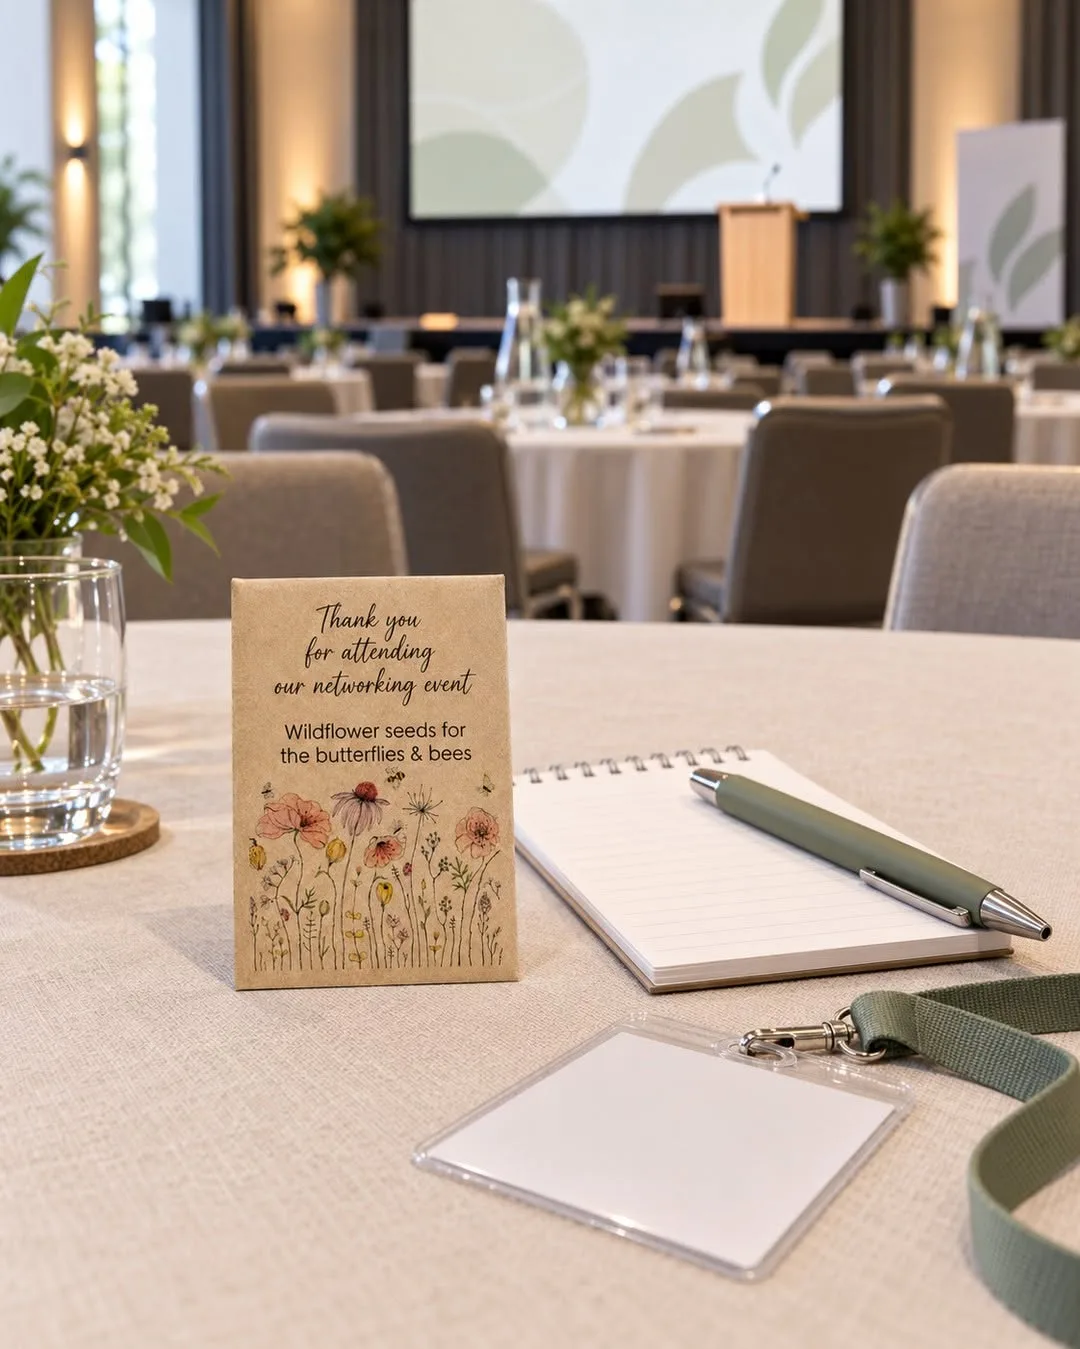
Folded cards in front of dishes, naming the food in the theme's language, are the smallest decoration with the largest effect. "Dino nuggets." "Princess punch." "Grandma's famous rolls." The cards turn a buffet into a story and a table into a theme.
They work on three levels: children choose food faster when it has a story name; parents can spot ingredients for allergies when the plain description sits under the fun name; and photographers (every guest) capture a table that reads as an event. Cards cost pennies, take twenty minutes, and can be kept flat and reused for repeat themes.
Food cards suit every party with more than two dishes, and they are essential at themed parties where the food names carry half the theme. Write them in one hand or one printed style, on one card stock, in your palette, consistency is the design.
Place a card for EVERY dish, including water and the plain option; a table where only some dishes are named looks half finished in the exact photographs the cards were meant to improve.
The mistake is cleverness that hides the food: theme name on top, plain truth underneath ("contains peanuts" is not fine print, it is the point). Charm up front, clarity below, always.
A Themed Cake Topper You Make Yourself
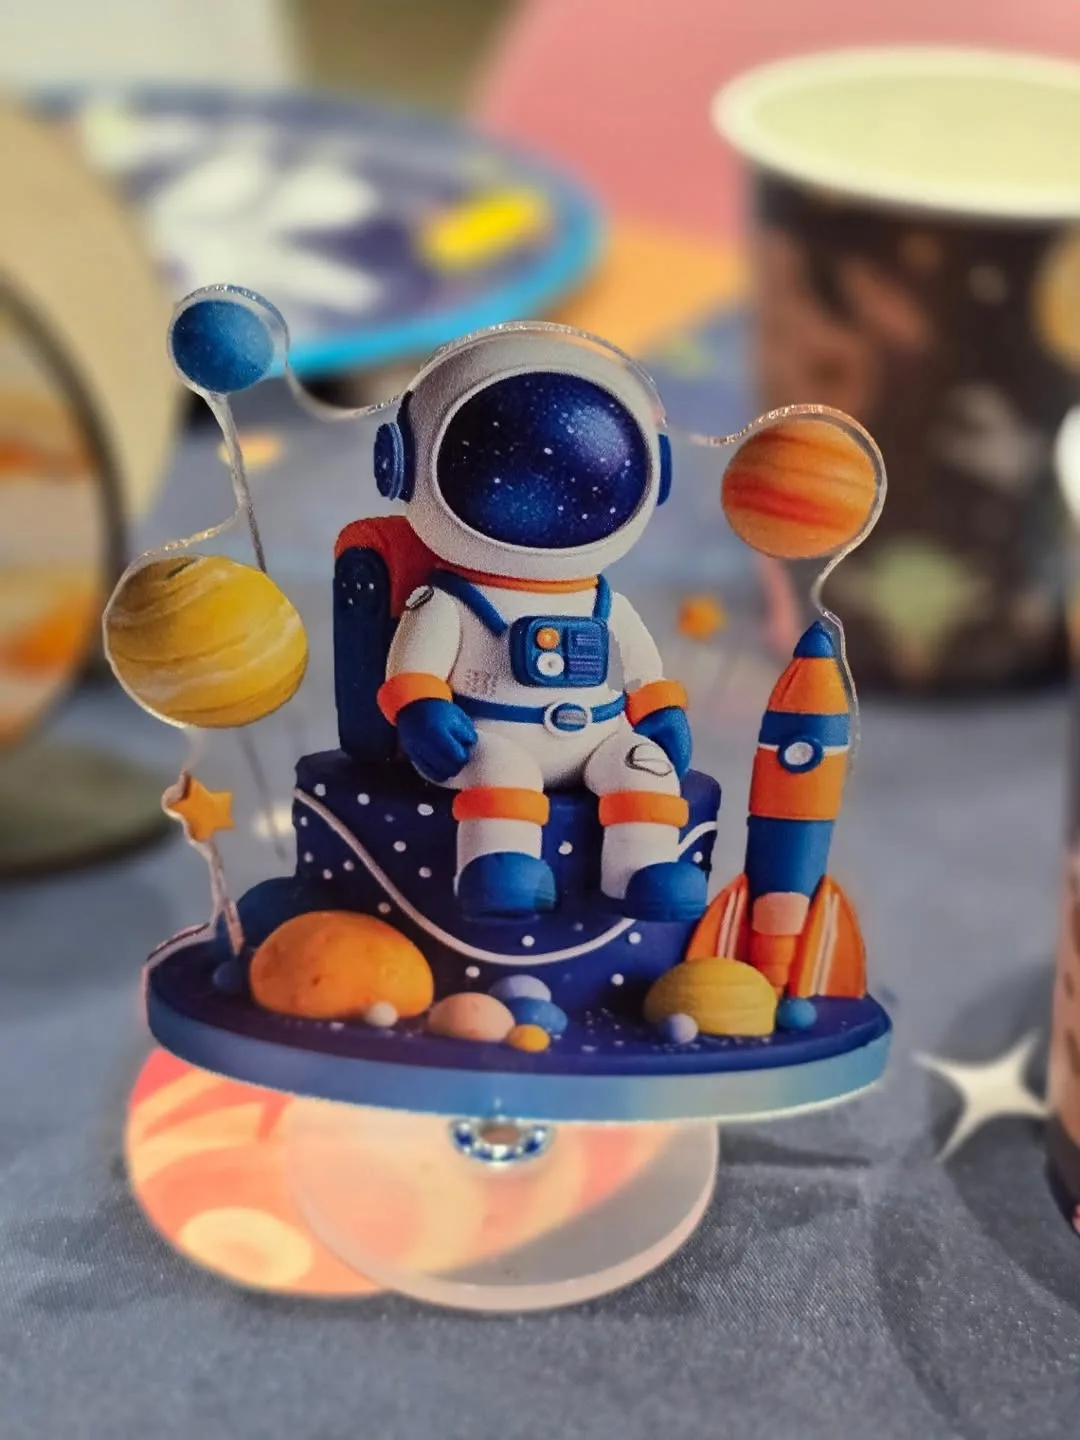
Your cake is the party's most photographed object, and its topper is the photograph's headline. Handmade toppers, paper flags on sticks, the name in card letters on skewers, a tiny fabric bunting, a small painted figure, give a plain cake a designed, personal crown for pennies.
It works because the topper carries the theme in miniature: it can match the bunting, echo the invitations, spell the name in the palette's colors. A simple shop cake plus a handmade topper reads as "custom cake" in every photo, the best value transformation in party decorating.
Toppers are best made a few days early, tested for size against the actual cake (or its tin), and kept in a box until the cake's entrance. Paper and card toppers on food safe sticks weigh nothing and suit any cake; heavier creations need a sturdy cake and a confident hand.
Make the name legible from two meters, that is the distance of every cake photograph ever taken. Big, bold, high contrast against the icing.
The mistake is a topper taller than the cake is wide, which topples in transit or in the first breeze of singing. Keep proportions modest, and secure sticks deep into the crumb.
A Memory or Wishes Jar
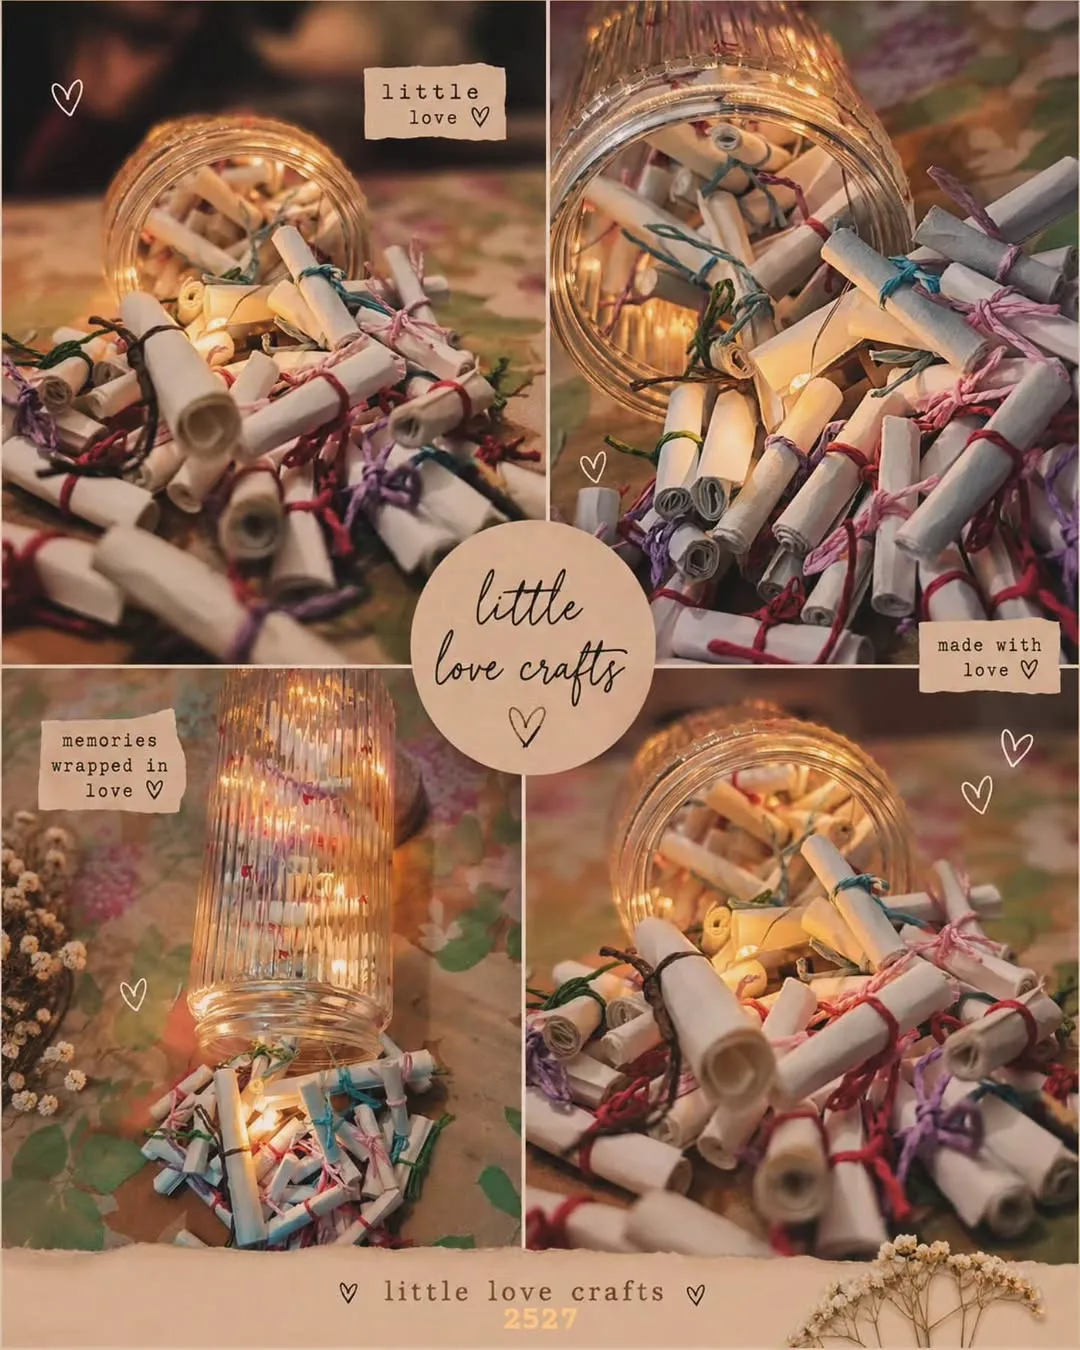
Memory and wishes jars, pretty jars with slips of paper and pens and a small sign inviting guests to write a memory, a wish, or advice, are the decorations that become keepsakes. By the party's end it holds the day in the guests' own words.
It works because it gives guests a meaningful thing to do in the party's quiet minutes, and because its value compounds: read that evening with tears and laughter, kept for years, it becomes the most treasured object the party produced, more than any photograph, because the handwriting is in it.
The jar suits milestone birthdays, baby showers (advice for the parents), weddings, graduations, and leaving parties. Dress the jar in the theme, ribbon, a painted finish, a beautiful label, and set it where guests pass slowly: by the photo garland, near the drinks, beside the guest book if you keep one.
Prompt well: the sign should give an example ("Tell Sara about a time she made you laugh") because a blank instruction produces blank slips. Twenty prompted slips beat two hundred blank ones distributed hopefully.
The mistake is hiding the jar in the decorations. It needs its own small stage, jar, slips, pens that work, sign, and space to write, checked twice during the party and topped up with paper.
Common Mistakes to Avoid With DIY Party Decorations
First comes the mistake of no palette. Twenty lovely decorations in twenty unrelated colors look like a jumble sale. Choose two or three colors plus a neutral before you make anything, and check every project against the palette, cohesion, not complexity, is what makes handmade look expensive.
Second, hosts fall for decorating everywhere a little instead of somewhere a lot. One glorious focal point, the garland wall, the dressed cake table, the glowing mantel, photographs and impresses more than the same effort sprinkled thinly across five rooms. Choose the hero spot where guests gather and photos happen, and spend your budget there first.
Third is starting on party day. Almost everything in this guide can be made days or weeks ahead, paper fans, chains, painted jars, bunting, signs, cards. Parties decorated in advance have hosts who slept; parties decorated in a morning panic have hosts in the photographs looking like it.
Fourth, beware unsafe shortcuts: paper near candles, lanterns over heat, balloon sails in wind, overloaded sockets because the fairy lights "needed" one more string. Beauty that risks the house is not beautiful. Battery light is your friend; sensible placement is your craft.
Finally, avoid decorating for the camera instead of the room. If a decoration cannot survive a bumped table, a small guest, or a gust through the door, it will not survive the party either. Choose sturdy, soft, and secure, and put the one fragile treasure up high, where it can be admired and left alone.
Budget Friendly DIY Party Decoration Ideas
The free tier is bigger than you think: painted jars from the recycling, photo garlands printed at home, paper from one pack in your palette, fabric scraps as bunting, garden greenery in every jar. A party can be three quarters decorated before a single purchase, and gathered, made decor reliably looks richer than its cost.
Spend the budget on the reusable skeleton: good balloons for the garland, a glue gun, decent card and paper in your palette, ribbon, fairy lights, and storage boxes. These serve every party for years; the perishable beauty on top of them (fresh flowers, the giant number balloon, the cake) is the only annual spend.
One focal point is a budget strategy, not just a style one. A single balloon garland over the cake table lets the rest of the room be chains, jars, and light, and guests will describe the party as "gorgeous" based on that one wall and the warmth of the whole.
Buy paper, balloons, and basics in your palette once, in quantity, and keep a party box. Stocked well, the box makes DIY party decorations cheaper every year, because most of what you need is already waiting in it. The most expensive decoration is the one bought in a panic at full price on party morning; the cheapest is the one already in the box from last time.
DIY Party Decoration Tips for a Room That Looks Styled
Decorate in layers. Background (backdrop, garland), middle (table dressing), details (cards, jars, signs). Rooms decorated in layers look deep; rooms with only details look scattered.
Repeat every color at least three times. One red thing is an accident; three red things are a scheme.
Work at guest eye level first. What guests see standing and sitting matters more than ceilings, dress the hero wall and the table before the corners.
Light the decorations. Fairy jars, a lamp behind the backdrop, candles (safely) near the jars, decor that is lit performs twice as hard after dusk.
Make an odd number of everything. Threes and fives of pom poms, jars, and lanterns arrange themselves; even numbers need effort.
Photograph your test setup. A phone photo of the hero wall shows imbalance your eyes forgive; fix it before guests arrive.
Stop one decoration earlier than planned. A room at 90% decorated with a rested host beats 100% with a frazzled one, guests remember the host's smile more than the last paper fan.
FAQ
How far in advance can I make DIY party decorations?
Most of this guide keeps for weeks or years: paper fans and chains (store flat), painted jars, fabric bunting, signs, lanterns, and toppers can be made whenever you have a free evening. Balloons are the exception, garlands hold a day or two indoors, confetti balloons are best made on the day, and foil balloons inflate the morning of the party.
What are the cheapest party decorations to make?
Paper chains and fans, painted jars, photo garlands, ribbon curtains from fabric scraps, and food cards, all cost pennies per party meter of effect. The balloon garland is the cheapest "wow" per photograph, and fairy light jars reuse the same jars and lights for years.
How do I make DIY decorations look professional, not crafty?
You need a tight palette, repetition, and one focal point. Limit colors to two or three, repeat each at least three times across the room, make multiples identical where the design asks for it (even chain strips, uniform flags), and concentrate effort on one hero area. Finish edges, hide tape and string ends, and press or smooth everything, the last 10% of care is the visible difference.
What decorations work best in a small room or apartment?
Think vertical and light: a paper fan or ribbon backdrop on one wall, a photo garland, fairy light jars, one balloon cluster rather than a full garland, and the table dressed as the hero. Skip floor standing items and ceiling pieces that lower the room; small spaces reward one beautiful wall over many small objects.
Can children help make the decorations?
Yes, and the party is better for it. Paper chains, pom pom fluffing, jar painting, photo garland pegging, card writing, and bunting flag sorting are all child sized jobs with real results. Give children the projects whose imperfections add charm, keep the hero focal piece for adult hands, and let them sign their work somewhere.
How do I store decorations between parties?
Flat, dry, and labeled. Paper pieces flat in a box with tissue; fabric bunting folded loosely; jars nested with paper between; lanterns collapsed in their box; fairy lights coiled around card. One labeled party box per theme or palette turns next year's decorating into an afternoon of unboxing rather than a week of making.
Conclusion
Hand decorated parties have something no shop can sell: evidence of care, visible in every room. Paper chains in the right colors, jars you painted, bunting that has seen ten birthdays, photographs along a string, these DIY party decorations are not budget substitutes for "real" decorations. They are the real thing, and bought decor is the substitute.
Choose three or four projects from this guide for your next party, one for the wall, one for the table, one for the light, one that means something, and make them early, in your palette, with people you like helping. The room will look designed, the photographs will glow, and you will have spent your money on food, cake, and the people, which is where party money belongs.
Then pack it all away in a labeled box, and feel quietly smug: next year's party is already half decorated.