15 Handmade Valentine Card Ideas to Make and Send
Cards made by hand carry something no shop shelf can copy: the time and thought of the maker, visible in every wobble and choice. Valentines Day asks for exactly that kind of giving, and one folded sheet of card is all the invitation anyone needs.
Good cards grow from one clear idea, a short message and materials already in the craft box. Gentle handmade valentine card ideas thinking picks one technique per card, repeats a small palette of red, pink and cream, and leaves plenty of clean space around the design.
Inside this guide, fifteen practical card ideas move from painting and printing to stitching and folding, each with real materials, budget friendly options, and the one small mistake that quietly spoils the finish. Most cards suit one calm afternoon at the table.
What handmade valentine card ideas suit a complete beginner at card making?
Cards built from one shape and one technique suit beginners best, including stamped hearts, washi tape hearts and fingerprint prints. Short messages, sturdy card and a practice run on scrap paper remove nearly every beginner fear before the real card begins.
Picture one table by mid afternoon: blank cards wait in a neat stack, hearts dry on a tray, pens rest in a mug, and one finished card stands open as the example. Makers sit down calmly when the goal is visible and the steps are few.
Disclosure: As an Amazon Associate I earn from qualifying purchases. Some of the links below are affiliate links, which means Bloomie Living may earn a small commission if you buy through them, at no extra cost to you.
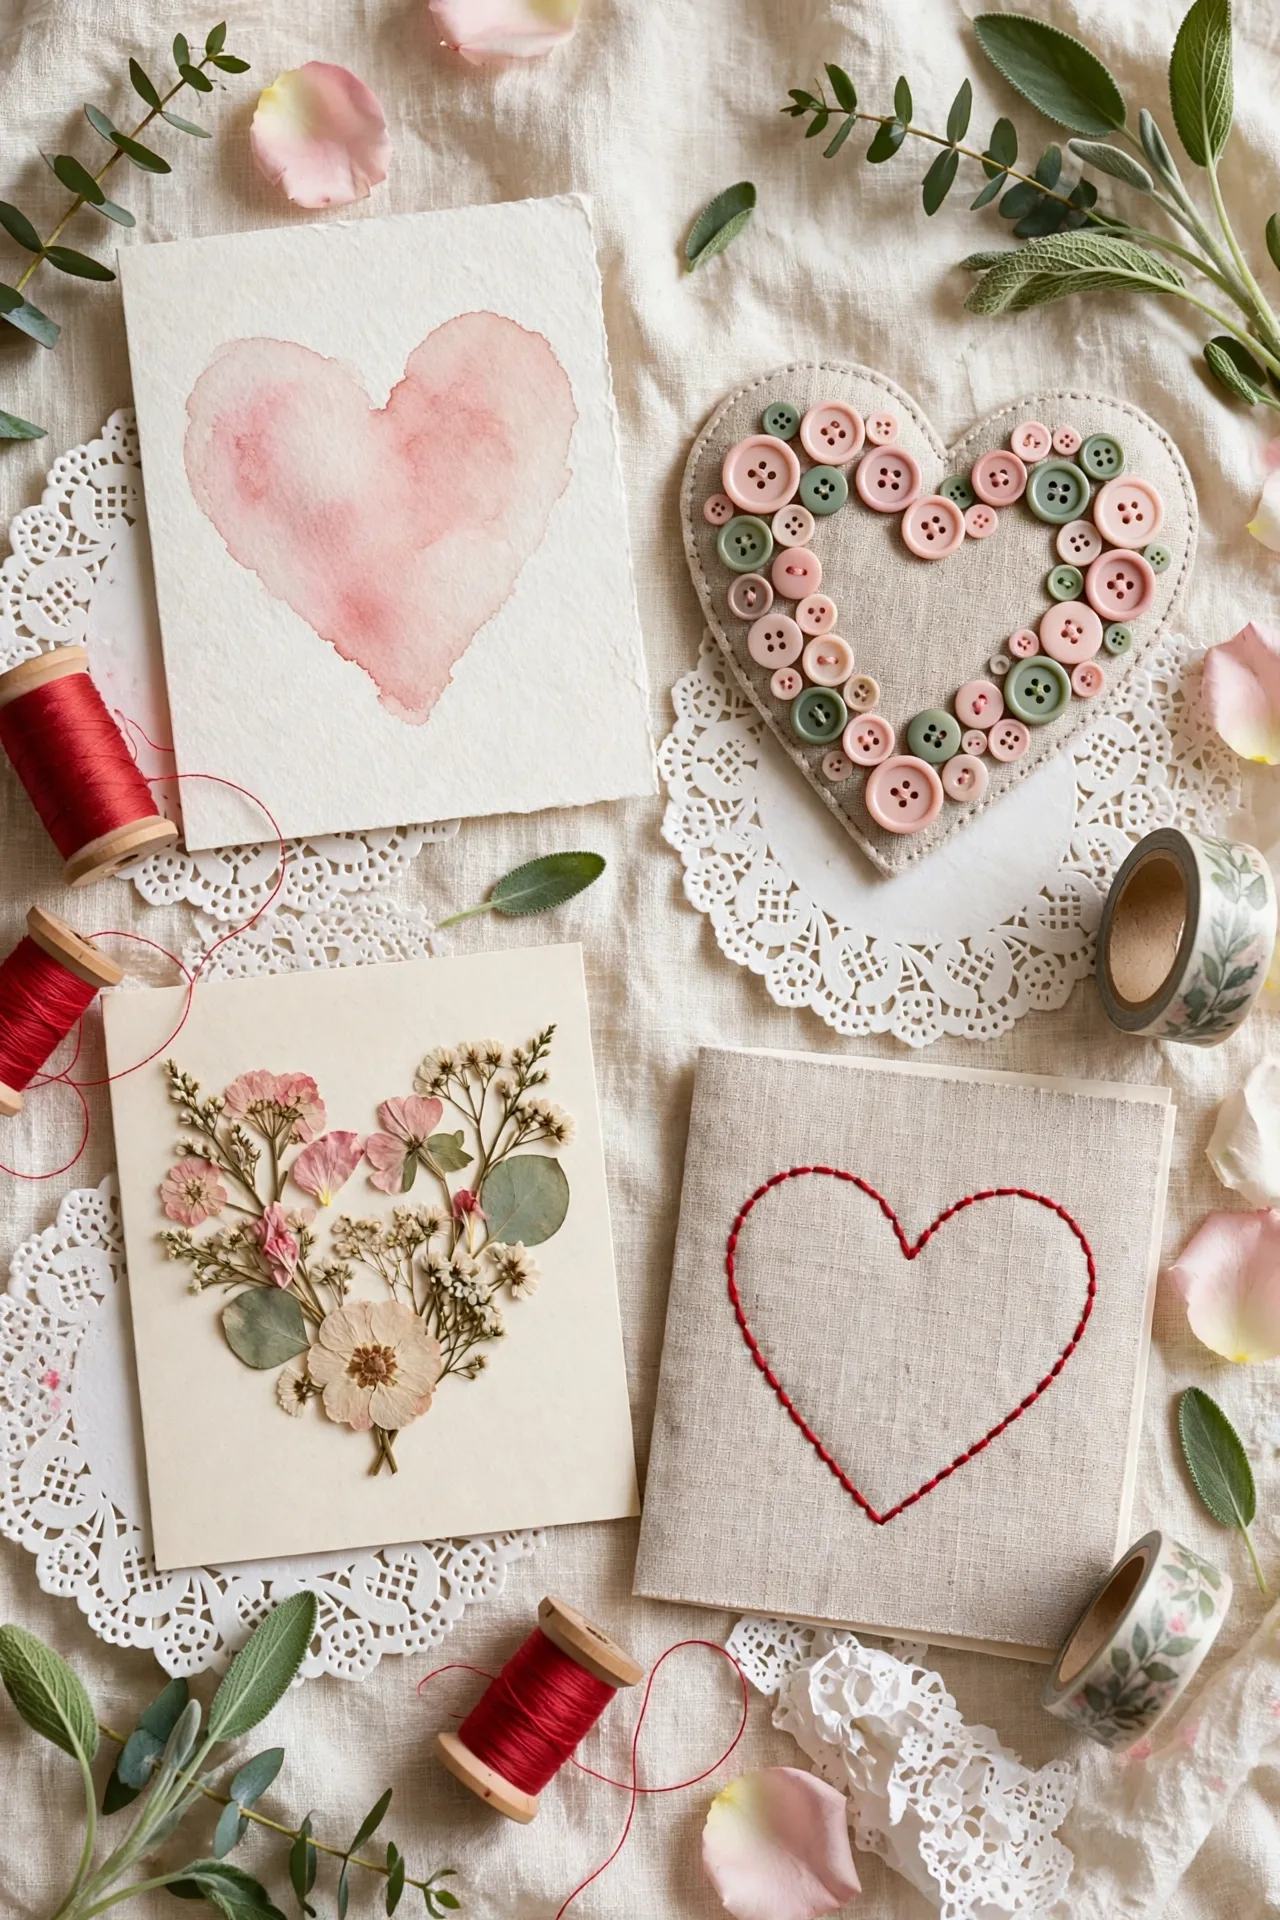
Watercolor heart card
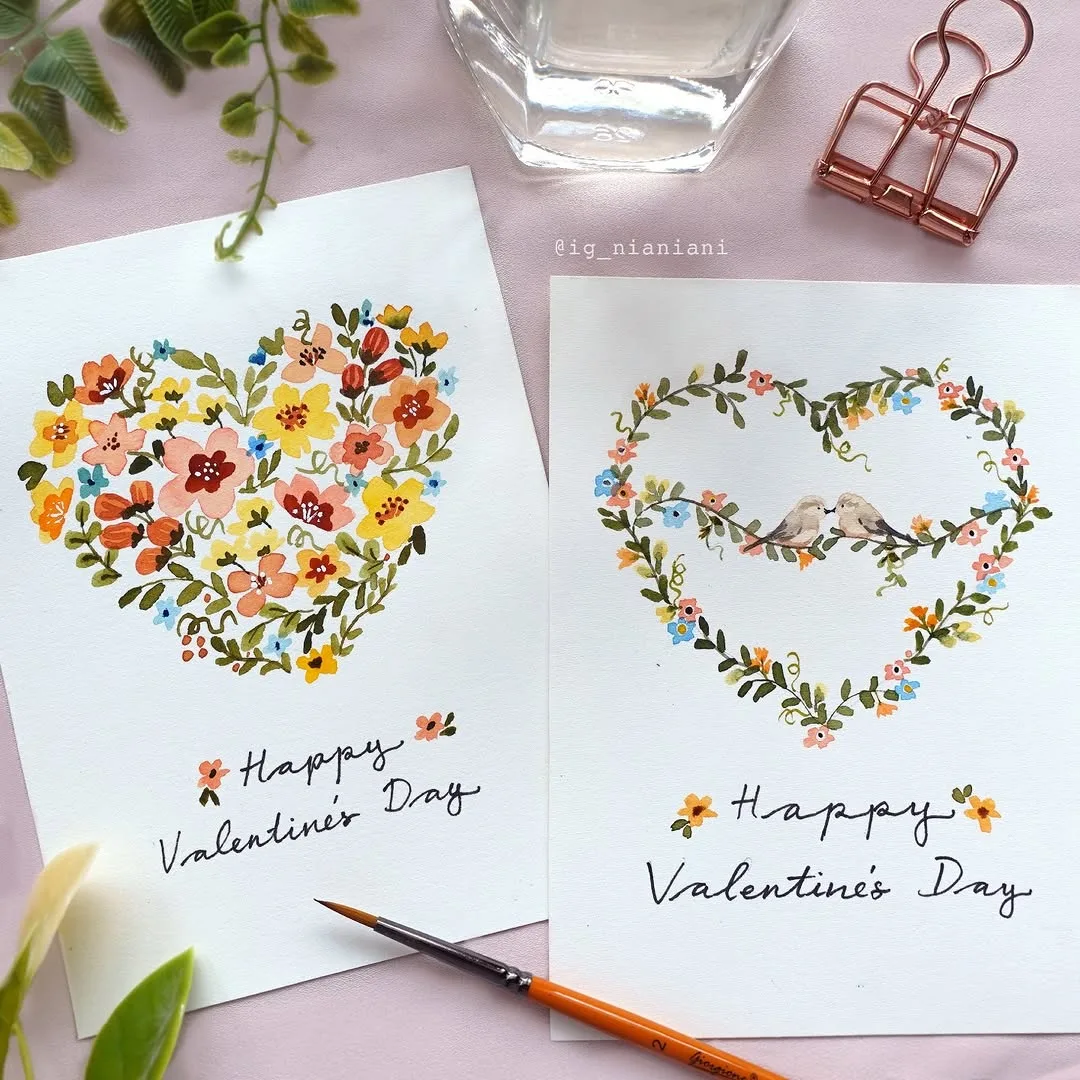
Good projects grow from painting a watercolor heart card with soft bleeding colors, so one simple shape carries the whole design. Small hands stay busy, simple skills grow quietly, and every maker finishes with something to show.
Practical planning keeps effort realistic. Fold thick watercolor paper into a card, paint one large heart with wet red and pink washes, let colors bleed gently at the edges, dry the card flat under a book, and write the message once fully dry. Cover the table first, pour small amounts of paint or glue at a time, and refill bowls as makers finish.
Happiest users are makers who enjoy painting more than cutting and gluing. Success comes from matching the project to the maker sitting at the table, not to a photo online.
Picture the routine in real life. One painted card dried so prettily that its maker produced ten more for the whole family that evening. Photos of the finished pieces looked joyful, because the projects matched real makers instead of a magazine shoot.
Watch out for soaking the paper with too much water, because puddles wrinkle thin card and blur the heart beyond rescue. Change one part at a time, watch what happens for a week, and adjust sizes before buying more.
Watercolor Paint Set 36 Colors with Water Brush: Thirty six rich cakes blend from pale blush to deep red and the refillable water brush keeps painted hearts neat at any table.
Button heart card
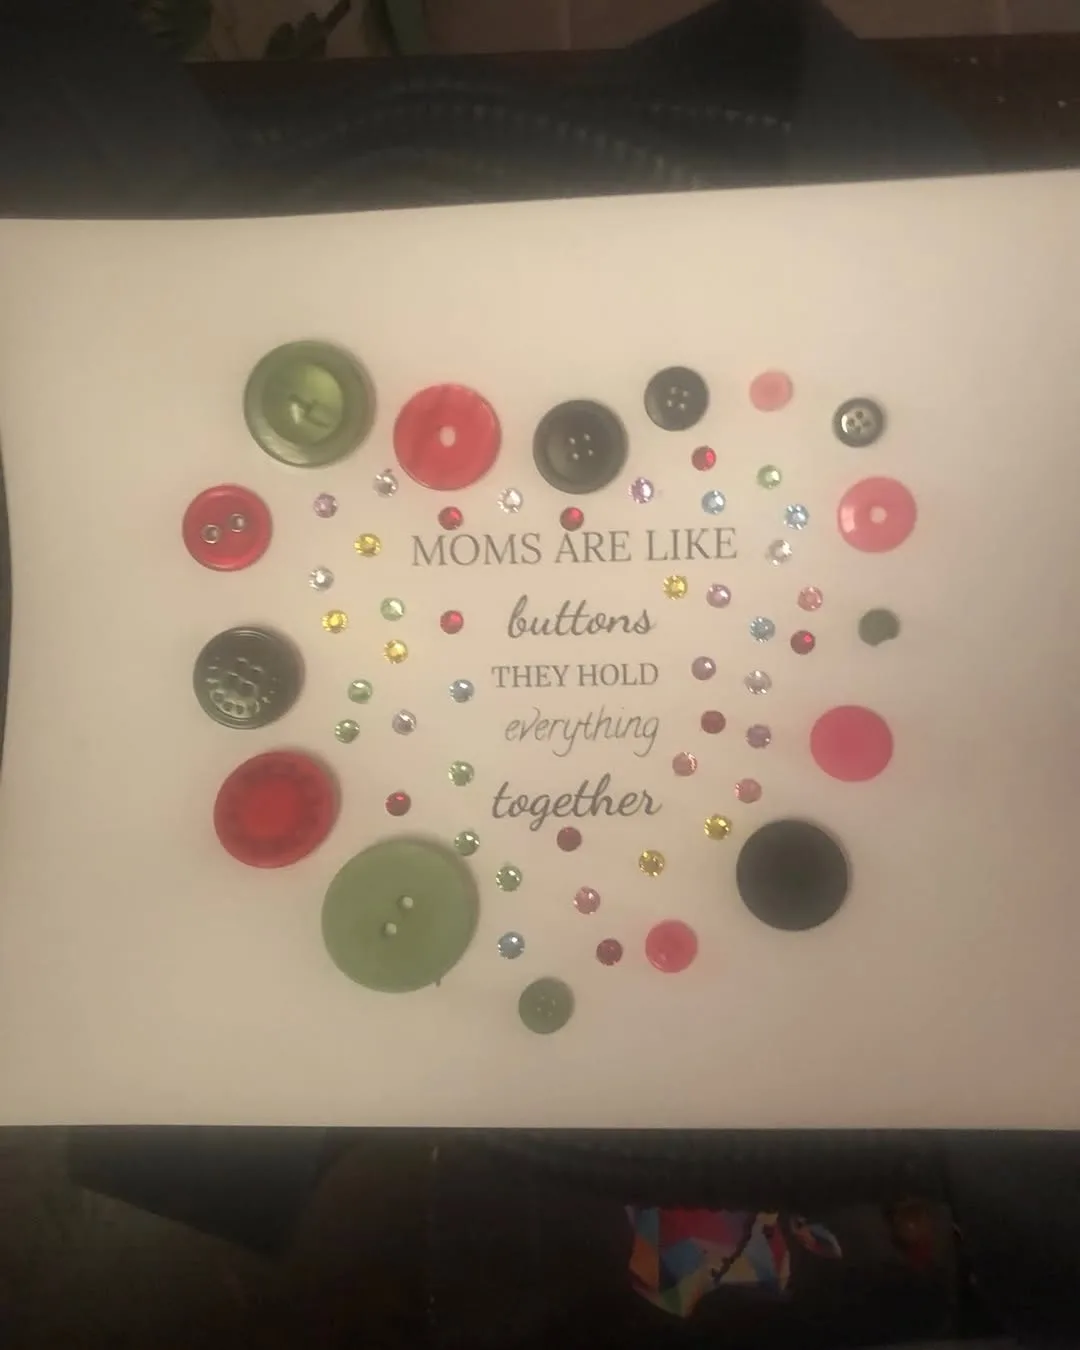
Proud makes begin with gluing a button heart card with mixed old buttons, so the button tin becomes the decoration. Tables stay calmer, steps feel easy, and even first attempts come out looking sweet.
Practical planning keeps effort realistic. Draw a light heart outline on a blank card, sort buttons by color family, glue the largest buttons along the outline first, fill the middle with smaller ones, and let the card dry flat overnight. Sort supplies into small bowls by step, because hunting for pieces breaks the making mood.
Strongest fit is makers with a family button tin waiting for a purpose. Small groups gain the most, because help arrives fast and nobody waits long for shared supplies.
Picture the routine in real life. One card used buttons from a grandfather coat, and the gift carried a story no shop card could match. Praise from family members kept the idea in the regular rotation long after craft day ended.
Watch out for piling heavy buttons near the fold, because weight there cracks glue and drags the card open. Write the rule on a label or note, because visible reminders protect good systems from quiet drift.
Assorted Resin Buttons 650 Pieces Multicolor: Hundreds of smooth resin buttons in mixed sizes glue or stitch into a bold heart that fills the whole card front.
Quilled paper heart card
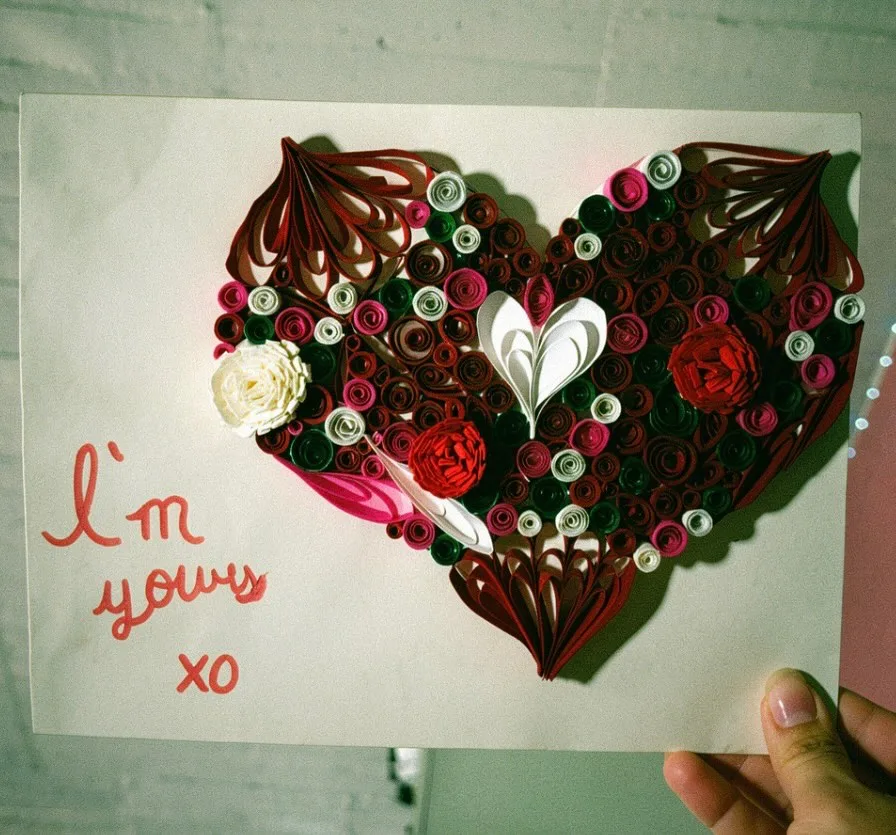
Calm crafting comes from rolling a quilled paper heart card from thin strips, so patience turns into lace like detail. Materials stretch further, mess stays manageable, and cleanup afterwards takes only minutes. Strong handmade valentine card ideas habits keep designs simple, messages short and finishes neat.
Practical planning keeps effort realistic. Cut or buy thin red and pink paper strips, roll tight coils with a slotted tool or a toothpick, pinch some coils into teardrops, arrange them inside a heart outline, and glue each coil by its edge. Test one finished sample before the group starts, because a clear example prevents most confusion.
Best results come for patient makers who enjoy slow, detailed work. Simple steps, forgiving materials and quick finishes matter more than perfect technique.
Picture the routine in real life. One quilled card took a quiet Sunday afternoon, and its receiver kept it standing on a shelf all year. Teachers and parents asked for the idea again, and it joined the regular craft day list.
Watch out for flooding coils with glue, because excess glue collapses the delicate rolls and stains the card front. Slow down, fix the setup first, and repeat the small version until the habit holds on busy days too.
Paper Quilling Kit 45 Colors 900 Strips with Tools: Nine hundred paper strips in forty five colors plus every tool needed roll into tight coils for a raised quilled heart.
Pop up heart card
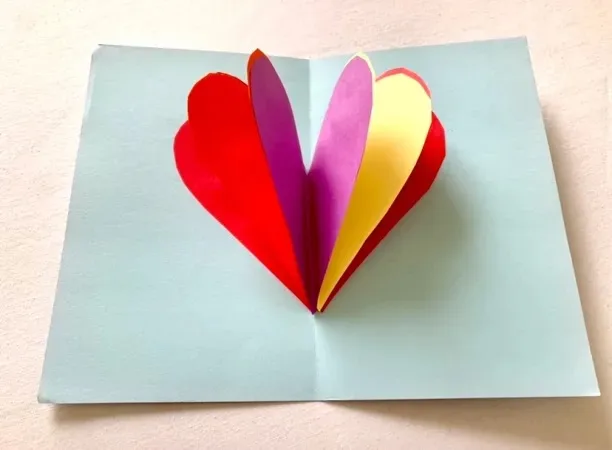
Lovely results follow from cutting a pop up heart card that springs open, so the surprise lives inside the card. Confidence builds with every finished piece, and the craft box empties in the happiest way.
Practical planning keeps effort realistic. Fold an inner card, cut two short parallel slits across the fold, push the strip inward to form a step, glue a paper heart onto the step, and glue the inner card inside a plain cover so cuts stay hidden. Keep a damp cloth and a scrap bin on the table, so small spills never become big stops.
Happiest users are children and playful adults who love moving parts. Success comes from matching the project to the maker sitting at the table, not to a photo online.
Picture the routine in real life. One pop up heart made a whole table of adults open and close the card five times each. Photos of the finished pieces looked joyful, because the projects matched real makers instead of a magazine shoot.
Watch out for cutting slits too close to the card edge, because weak edges tear the first time the card opens. Change one part at a time, watch what happens for a week, and adjust sizes before buying more.
Pop Up Card Making Kit Makes 10 Cards with Scissors: Ten ready to fold card bases with printed guides and safe scissors help small hands build pop up hearts that spring open.
Stitched heart card
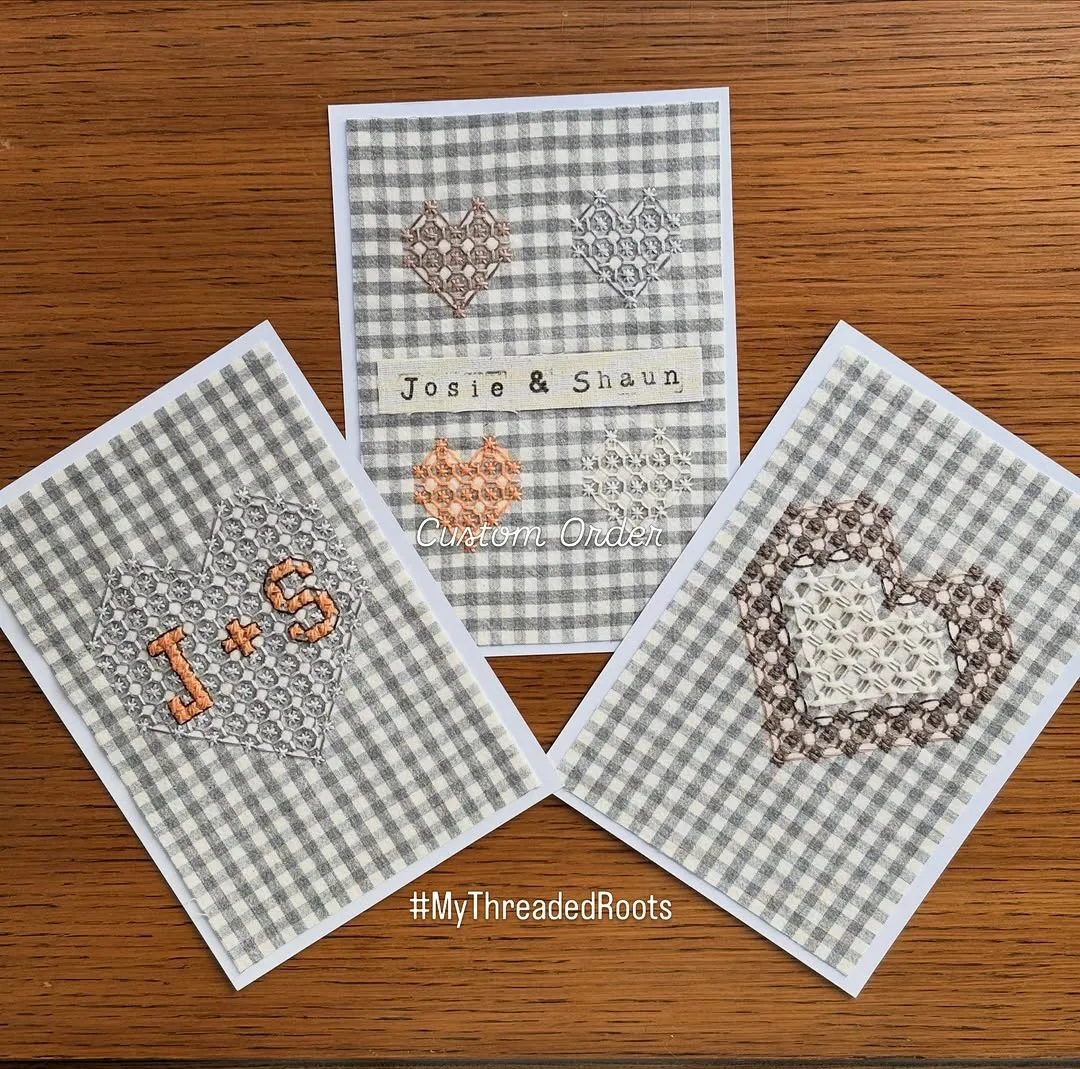
Happy crafting starts with sewing a stitched heart card with thick thread, so simple running stitches draw the design. Finished pieces look neat, makers feel proud, and every project leaves the table ready to give or display.
Practical planning keeps effort realistic. Draw a heart on sturdy card, pierce holes along the line with a needle over a cork or foam mat, stitch through the holes with red yarn or embroidery thread, and tape thread ends neatly at the back. Cut pieces in batches, lay out one finished sample, and keep glue, scissors and wipes within easy reach.
Strongest fit is sewers and older children learning needle control. Small groups gain the most, because help arrives fast and nobody waits long for shared supplies.
Picture the routine in real life. One stitched card used thread left from a Christmas project, and the maker loved giving scraps a second life. Praise from family members kept the idea in the regular rotation long after craft day ended.
Watch out for spacing holes too closely on thin card, because close holes tear into one long slot under thread tension. Write the rule on a label or note, because visible reminders protect good systems from quiet drift.
Embroidery Starter Kit Learn 28 Stitches with Hoop: Printed practice cloths and twelve thread colors teach twenty eight stitches so a simple running stitch heart looks neat and even.
Fingerprint heart card
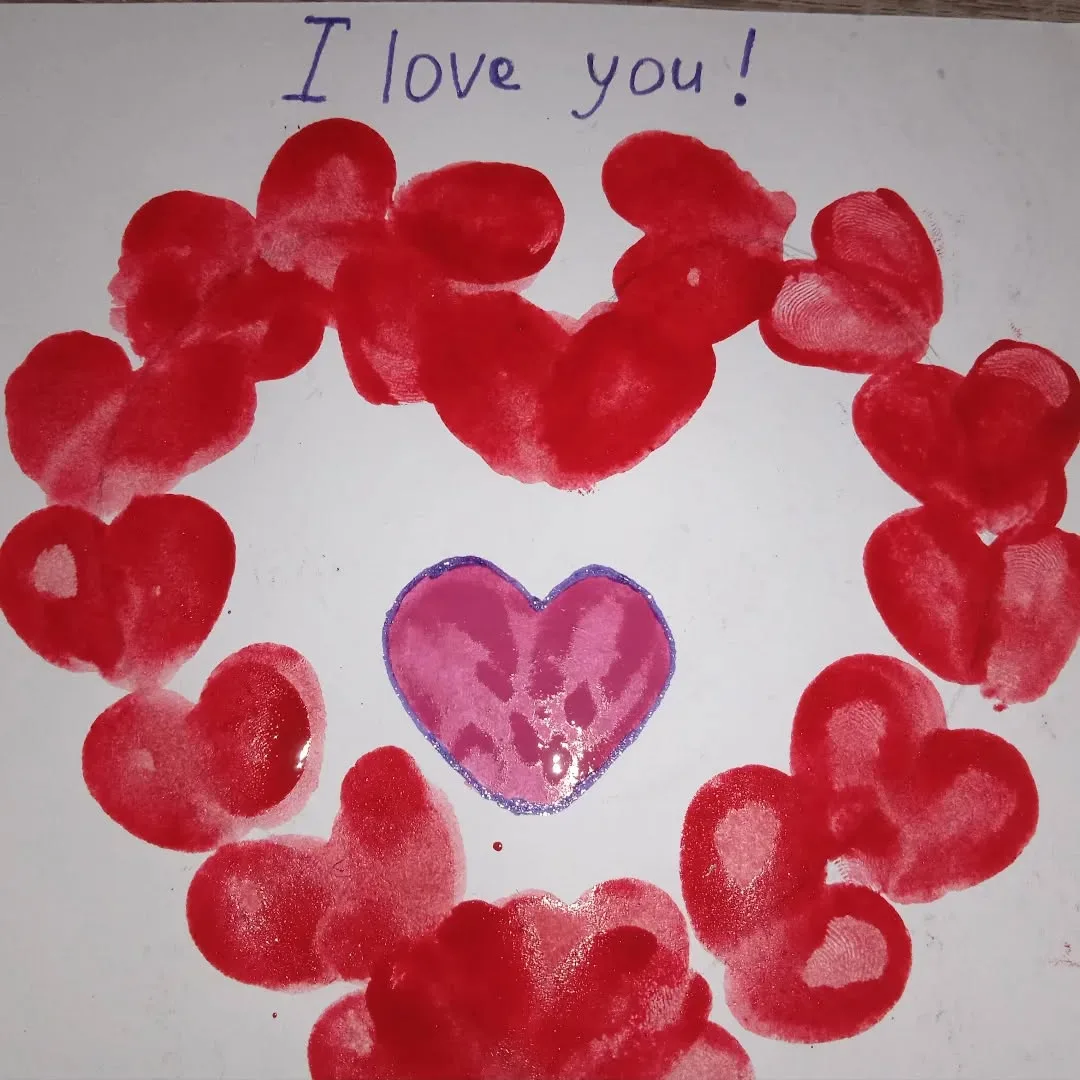
Good projects grow from printing a fingerprint heart card with two angled thumbprints, so the smallest makers can sign their love. Small hands stay busy, simple skills grow quietly, and every maker finishes with something to show. Strong handmade valentine card ideas habits keep designs simple, messages short and finishes neat.
Practical planning keeps effort realistic. Press a thumb or fingertip into a washable pink ink pad, print two prints angled together so they form a heart, let the print dry, add names underneath, and draw tiny arms or a face if the maker likes. Cover the table first, pour small amounts of paint or glue at a time, and refill bowls as makers finish.
Best results come for toddlers and grandparents who treasure tiny prints. Simple steps, forgiving materials and quick finishes matter more than perfect technique.
Picture the routine in real life. One card carried prints from three grandchildren in a row of growing hearts, and it went straight onto the fridge. Teachers and parents asked for the idea again, and it joined the regular craft day list.
Watch out for pressing prints before testing ink on scrap, because flooded pads give blobs instead of clear little hearts. Slow down, fix the setup first, and repeat the small version until the habit holds on busy days too.
Washable Finger Ink Pads 20 Colors: Twenty washable pads in bright colors ink little fingers for overlapping prints that form one big heart.
Paper doily lace card
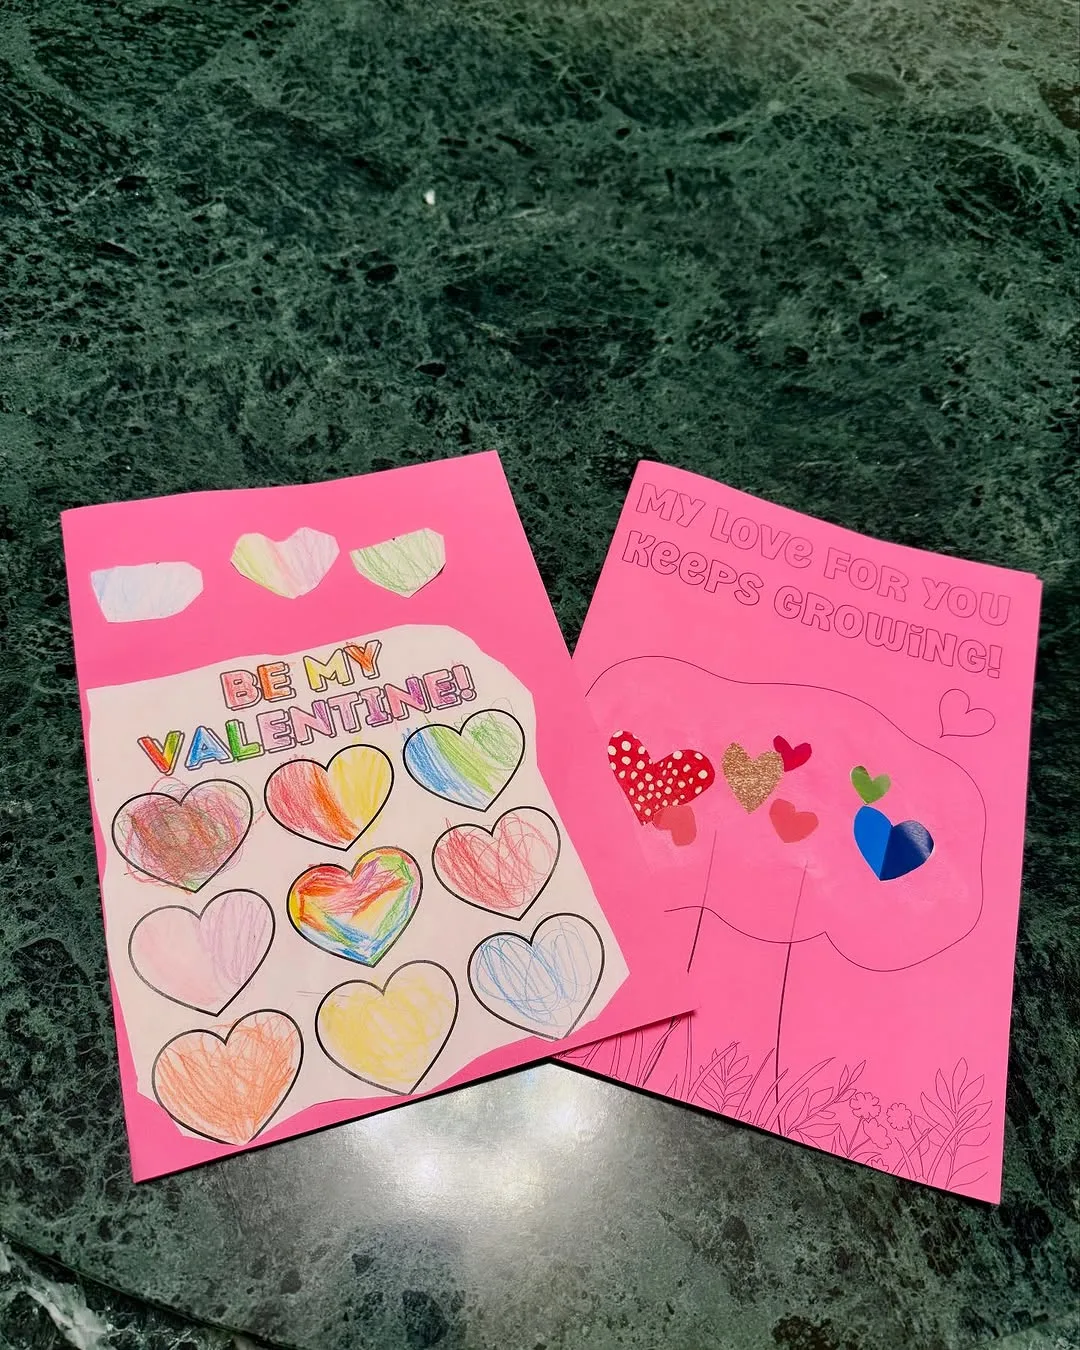
Proud makes begin with layering a paper doily lace card with soft circles, so cheap doilies read as delicate lace. Tables stay calmer, steps feel easy, and even first attempts come out looking sweet.
Practical planning keeps effort realistic. Glue a whole or half paper doily onto a colored card, add a smaller heart or circle at the center, finish with one ribbon bow or a tiny tag, and keep glue thin so doily holes stay visible. Sort supplies into small bowls by step, because hunting for pieces breaks the making mood.
Happiest users are vintage loving makers who want fast elegant results. Success comes from matching the project to the maker sitting at the table, not to a photo online.
Picture the routine in real life. One doily card cost pennies, yet its receiver asked which boutique it came from. Photos of the finished pieces looked joyful, because the projects matched real makers instead of a magazine shoot.
Watch out for drowning doilies in glue, because soaked doilies tear, wrinkle and lose their lace pattern entirely. Change one part at a time, watch what happens for a week, and adjust sizes before buying more.
Heart Paper Doilies 96 Count 10 Inch Red Pink and White: Ninety six lace hearts in red pink and white layer under photos and greetings for a soft frilly card front.
Heart garland card
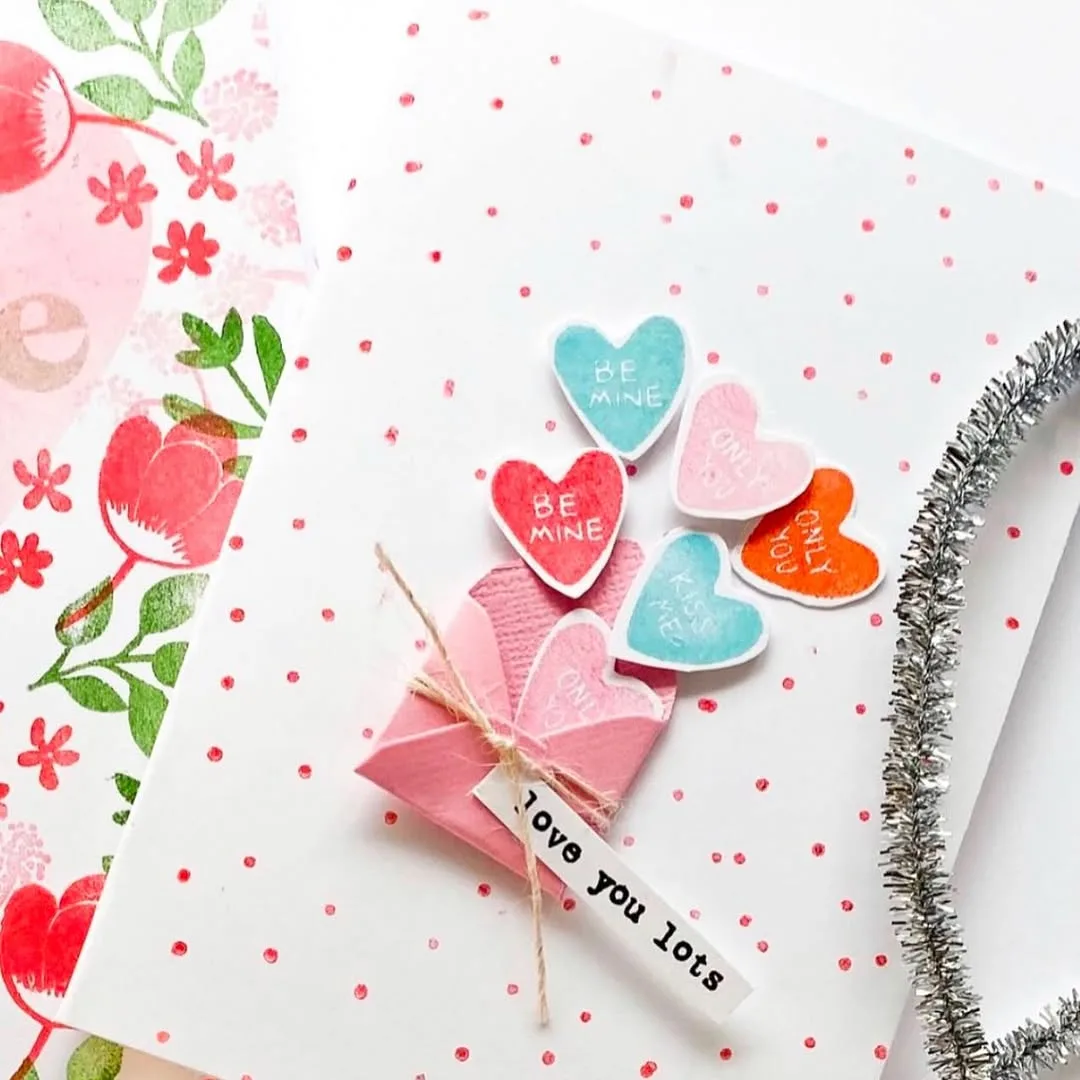
Calm crafting comes from stringing a tiny heart garland across a card front, so the card wears its own bunting. Materials stretch further, mess stays manageable, and cleanup afterwards takes only minutes.
Practical planning keeps effort realistic. Cut six to eight tiny hearts from colored paper, thread them along a short length of fine string or thread, fix the string ends at the card top corners with small tape folds, and let the garland curve gently. Test one finished sample before the group starts, because a clear example prevents most confusion.
Strongest fit is makers who love the garland look from party decor. Small groups gain the most, because help arrives fast and nobody waits long for shared supplies.
Picture the routine in real life. One garland card hung its hearts so sweetly that the receiver later strung it across a mirror. Praise from family members kept the idea in the regular rotation long after craft day ended.
Watch out for cutting hearts too large for the string, because heavy hearts slide together and the curve collapses. Write the rule on a label or note, because visible reminders protect good systems from quiet drift.
Mini Wooden Clothespins with Jute Twine 100 Pieces: One hundred mini pegs on a long jute string clip tiny hearts and notes into a swag that folds flat inside the card.
Puzzle piece card
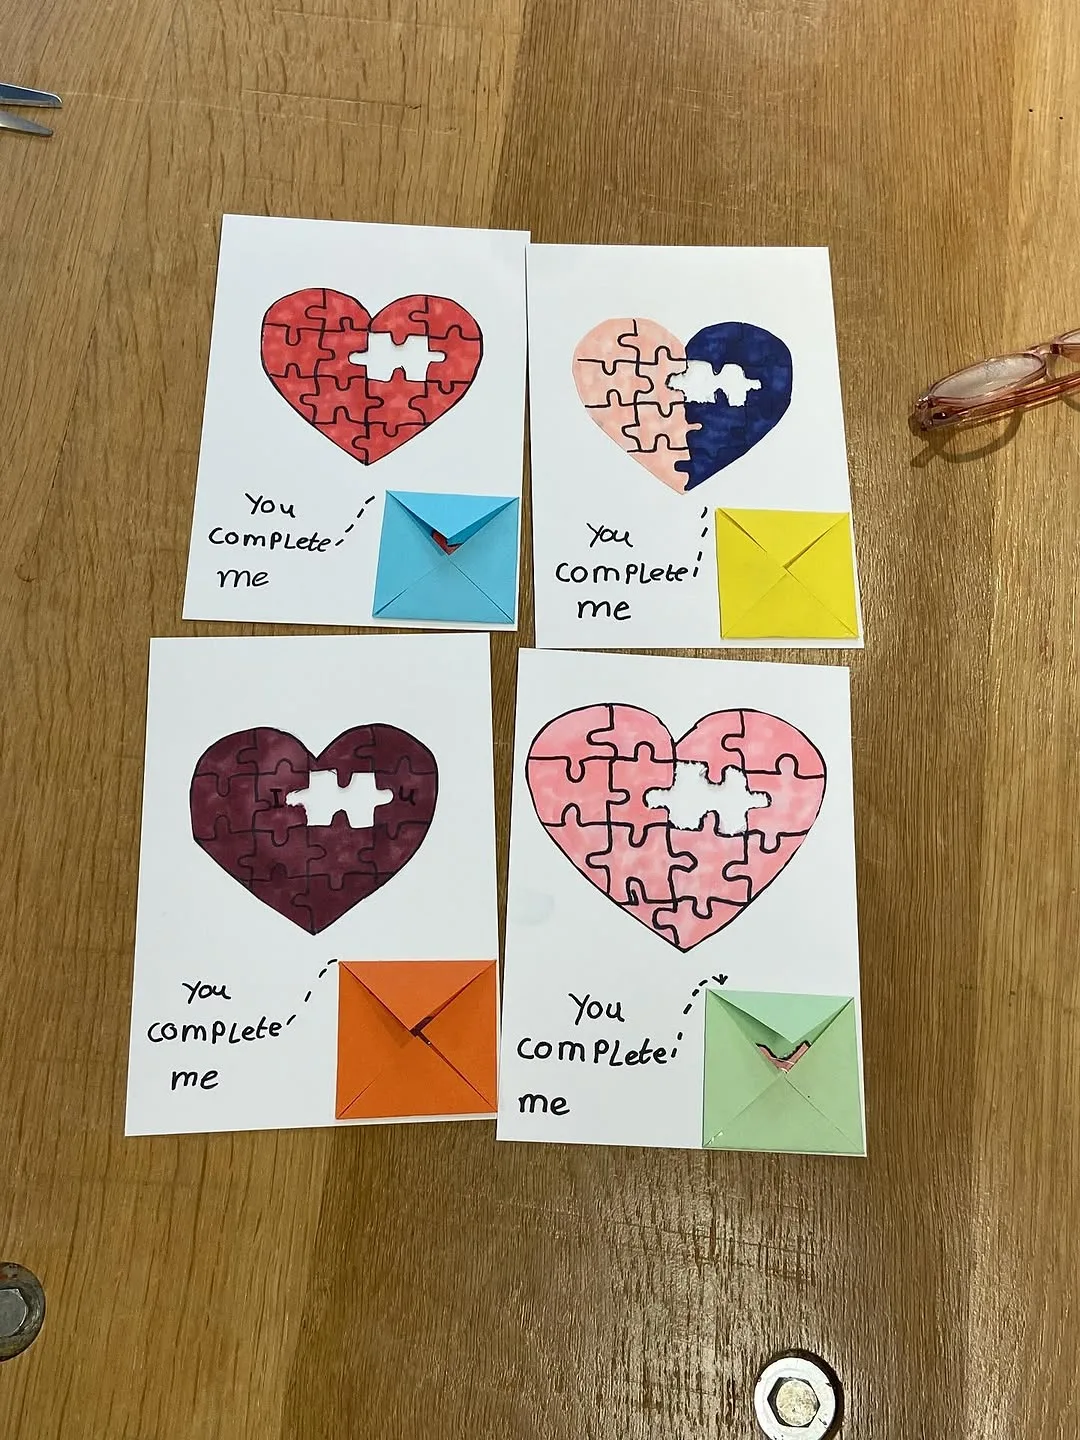
Lovely results follow from building a puzzle piece card from two fitting shapes, so the message plays on missing pieces. Confidence builds with every finished piece, and the craft box empties in the happiest way. Strong handmade valentine card ideas habits keep designs simple, messages short and finishes neat.
Practical planning keeps effort realistic. Cut two large puzzle piece shapes from colored card, glue one piece flat on the card front, rest the second piece slightly raised beside it, and write a short line about fitting together underneath. Keep a damp cloth and a scrap bin on the table, so small spills never become big stops.
Best results come for couples and friends who share an inside joke about puzzles. Simple steps, forgiving materials and quick finishes matter more than perfect technique.
Picture the routine in real life. One puzzle card went to a jigsaw loving partner, who framed it above the puzzle table at home. Teachers and parents asked for the idea again, and it joined the regular craft day list.
Watch out for writing long messages on the front, because the puzzle shapes need clean space to read clearly. Slow down, fix the setup first, and repeat the small version until the habit holds on busy days too.
Blank Puzzles 63 Piece 24 Pack to Decorate: Twenty four blank puzzles with sixty three pieces each take paint and marker well and break apart for a card the reader builds.
Hand lettered quote card
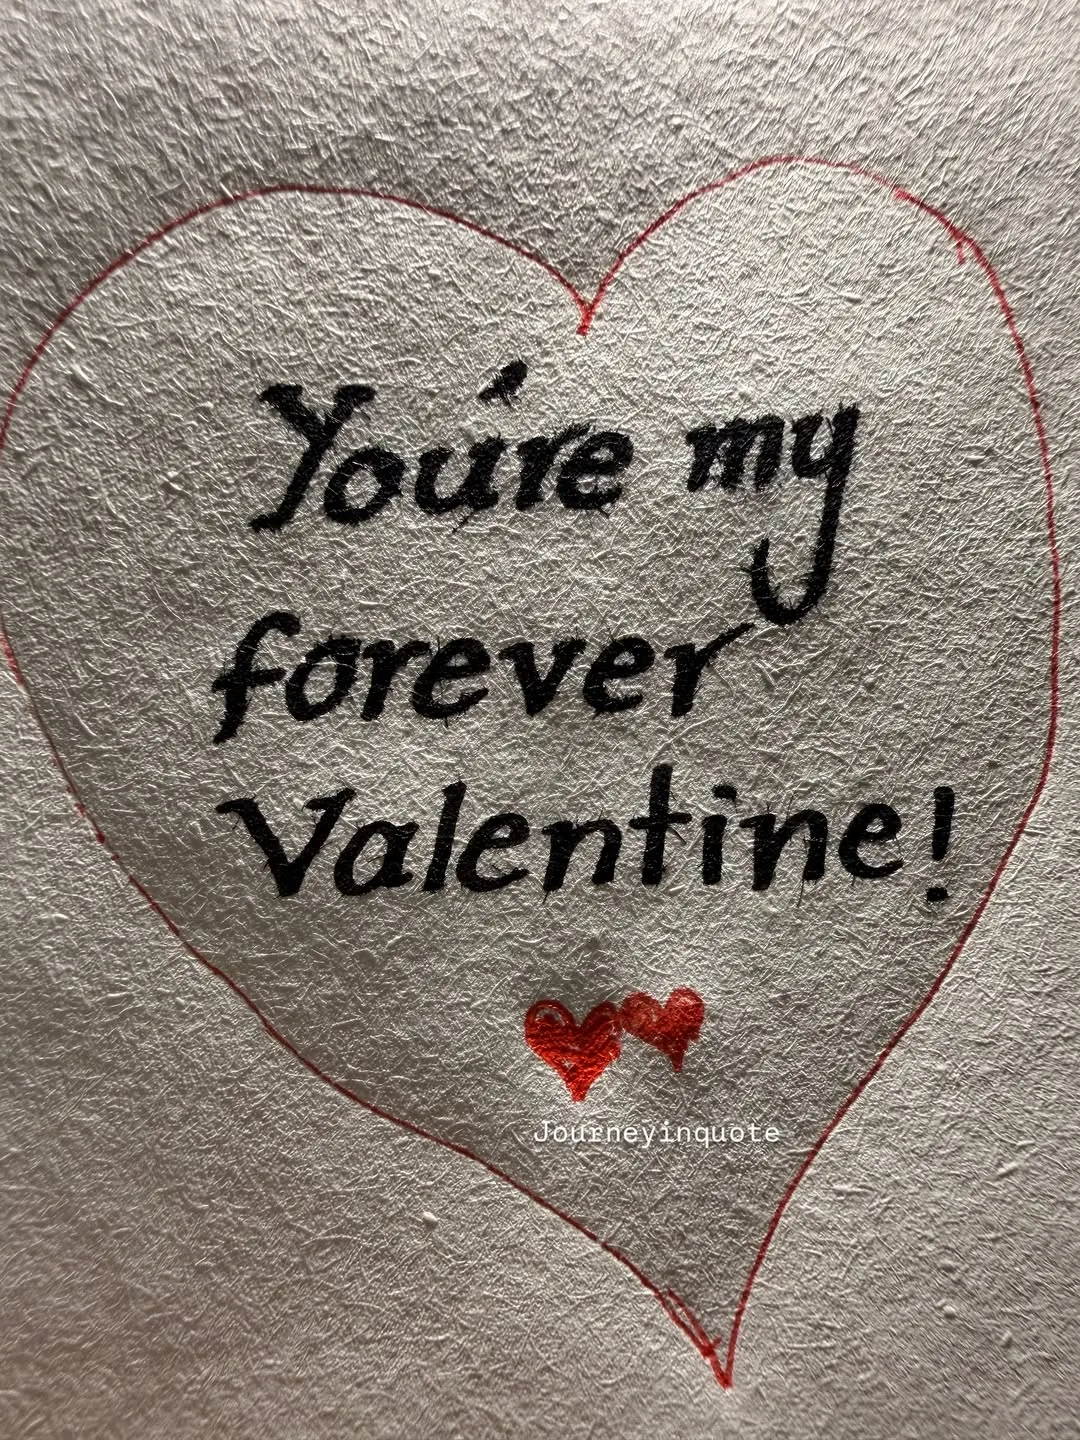
Happy crafting starts with writing a hand lettered quote card with one short line, so honest words become the whole decoration. Finished pieces look neat, makers feel proud, and every project leaves the table ready to give or display.
Practical planning keeps effort realistic. Choose one short kind line, practice it twice on scrap paper, rule faint pencil guides on the card, write slowly with a brush pen or a good marker, and erase guides gently once ink dries fully. Cut pieces in batches, lay out one finished sample, and keep glue, scissors and wipes within easy reach.
Happiest users are makers with neat handwriting or a love of lettering practice. Success comes from matching the project to the maker sitting at the table, not to a photo online.
Picture the routine in real life. One card carried a line from a favorite song, and its receiver read it aloud twice before hugging the maker. Photos of the finished pieces looked joyful, because the projects matched real makers instead of a magazine shoot.
Watch out for choosing a long quote in a small card, because crowded letters shrink and the line loses its calm. Change one part at a time, watch what happens for a week, and adjust sizes before buying more.
Hand Lettering Pens 15 Pack Black Ink: Fifteen pens from fine tips to soft brushes make thick downstrokes and thin upstrokes for hand lettered love notes.
Washi tape heart card
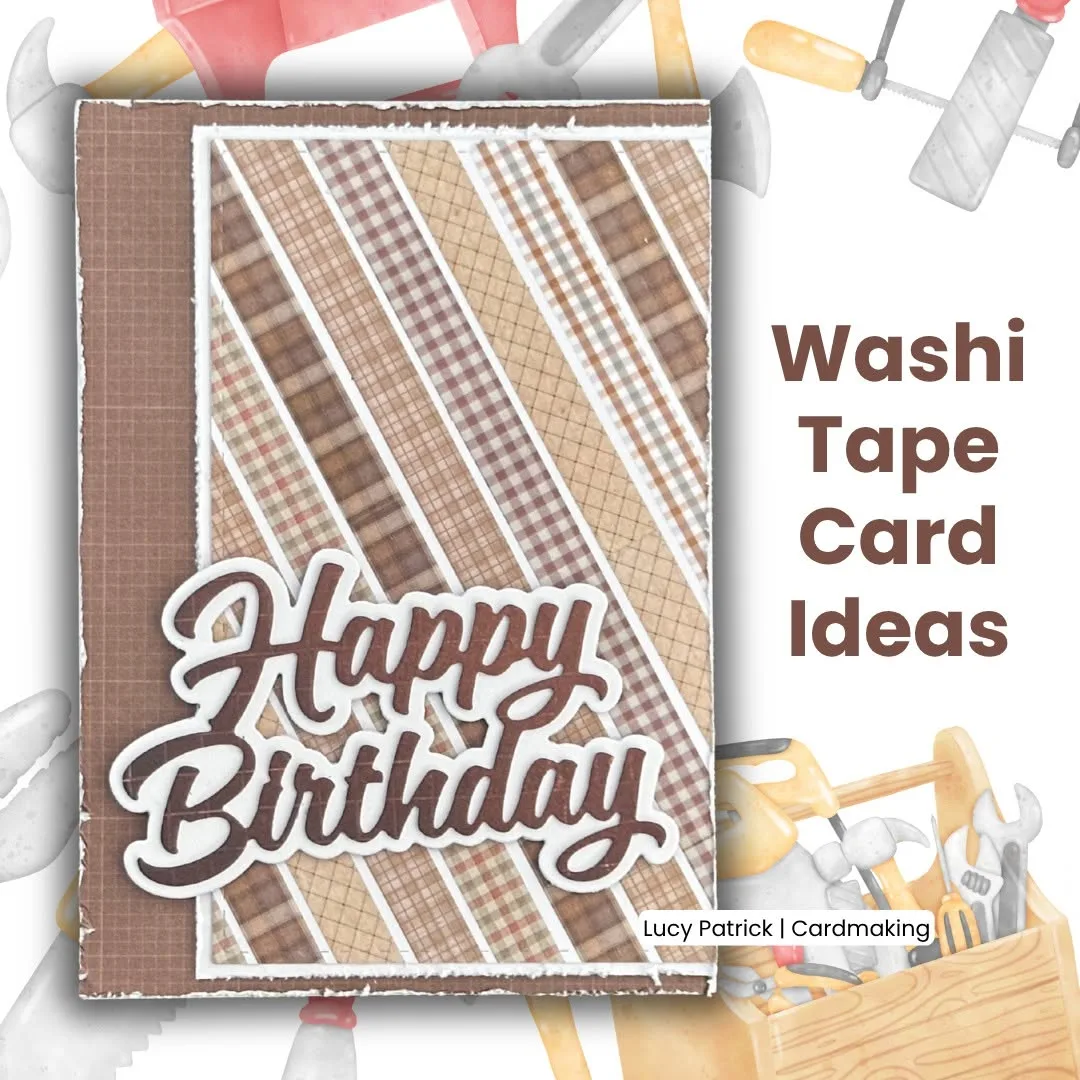
Good projects grow from striping a washi tape heart card with patterned tapes, so no paint or glue mess appears at all. Small hands stay busy, simple skills grow quietly, and every maker finishes with something to show.
Practical planning keeps effort realistic. Draw a light heart outline on a blank card, fill it with strips of washi tape in reds, pinks and patterns, trim tape edges along the outline with scissors, and smooth every strip firmly with a fingertip. Cover the table first, pour small amounts of paint or glue at a time, and refill bowls as makers finish.
Strongest fit is beginners and children who want tidy fast results. Small groups gain the most, because help arrives fast and nobody waits long for shared supplies.
Picture the routine in real life. One washi card finished in ten minutes during a lunch break, and it looked like a print from a card shop. Praise from family members kept the idea in the regular rotation long after craft day ended.
Watch out for using old tape that lost its stick, because lifting edges make the heart look tired within days. Write the rule on a label or note, because visible reminders protect good systems from quiet drift.
Washi Tape Set 12 Rolls Gold Foil Floral: Twelve rolls of gold foil floral tape tear by hand and frame card edges or build a shiny tape heart with no glue mess.
Heart shaped pocket card
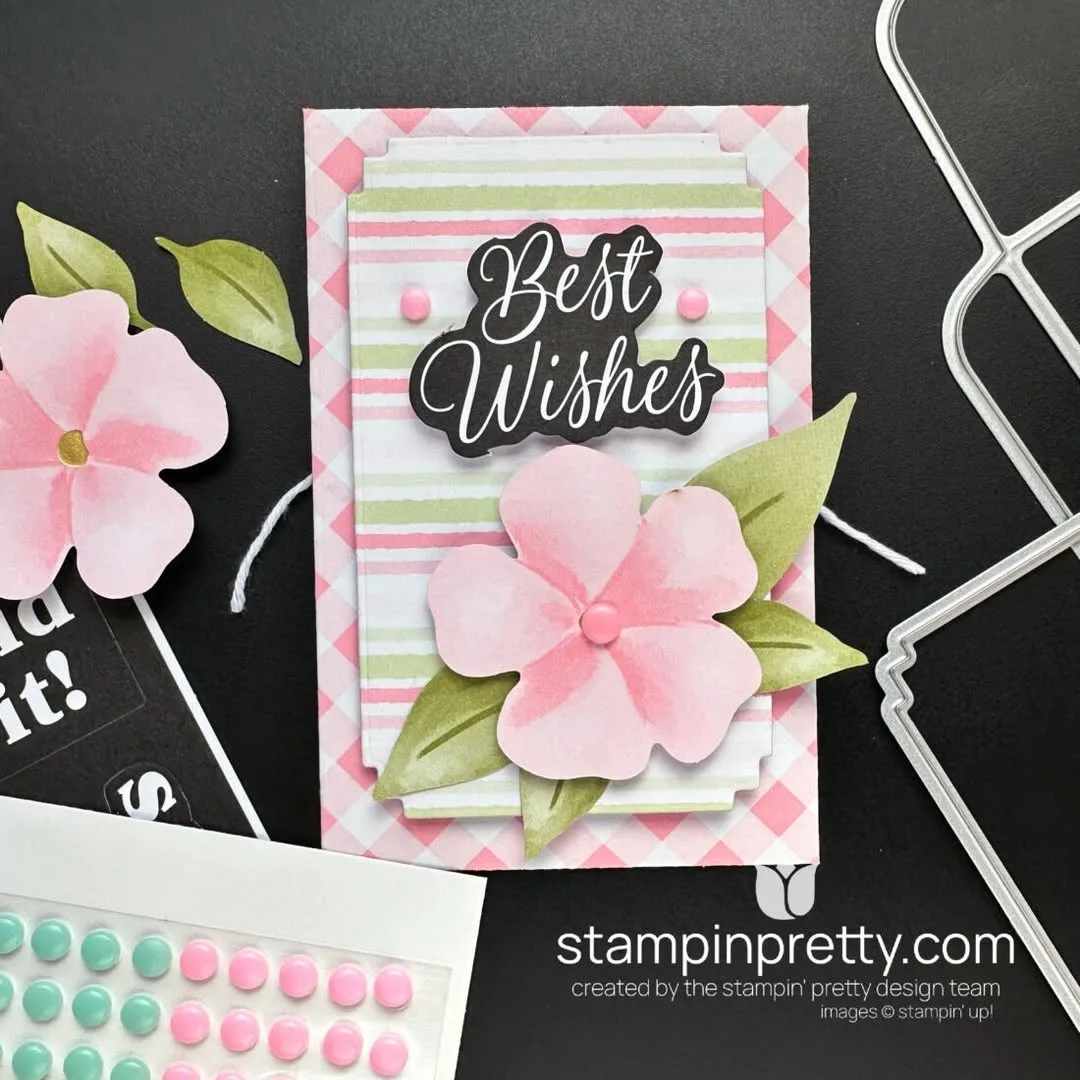
Proud makes begin with folding a heart shaped pocket card that holds a tiny note, so the card itself becomes the envelope. Tables stay calmer, steps feel easy, and even first attempts come out looking sweet. Strong handmade valentine card ideas habits keep designs simple, messages short and finishes neat.
Practical planning keeps effort realistic. Cut a large heart from sturdy paper, fold both sides and the bottom point inward to form a pocket, tuck a tiny folded note inside, seal with a sticker, and write the name across the front. Sort supplies into small bowls by step, because hunting for pieces breaks the making mood.
Best results come for makers giving small notes, tickets or gift cards. Simple steps, forgiving materials and quick finishes matter more than perfect technique.
Picture the routine in real life. One pocket card hid theater tickets inside, and the note revealed the surprise only after the heart opened. Teachers and parents asked for the idea again, and it joined the regular craft day list.
Watch out for folding thin paper that cracks at the creases, because pocket cards need sturdy sheets to survive opening. Slow down, fix the setup first, and repeat the small version until the habit holds on busy days too.
Blank Cards and Envelopes A5 Pack of 25 White: Twenty five thick white cards with matching envelopes give every design in this list a sturdy base and a clean finish.
Pressed flower heart card
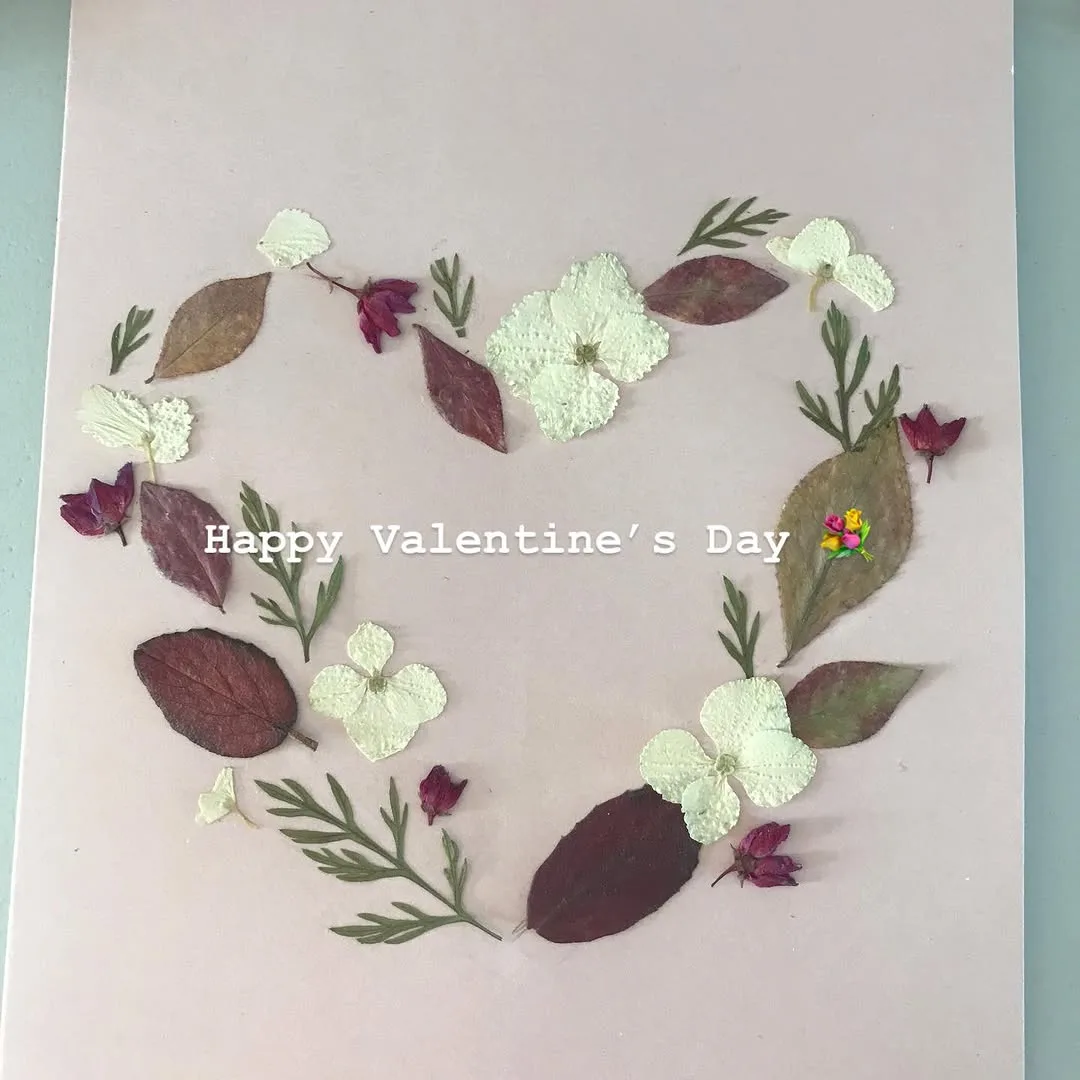
Calm crafting comes from arranging a pressed flower heart card with real petals, so a garden becomes the picture. Materials stretch further, mess stays manageable, and cleanup afterwards takes only minutes.
Practical planning keeps effort realistic. Press small flowers and petals flat for a few days between book pages, arrange them in a heart shape on the card, fix with tiny glue dots, cover with clear contact film if protection is wanted, and trim edges neatly. Test one finished sample before the group starts, because a clear example prevents most confusion.
Happiest users are gardeners and makers who plan a few days ahead. Success comes from matching the project to the maker sitting at the table, not to a photo online.
Picture the routine in real life. One card carried petals from a summer garden, and its receiver said February suddenly smelled like June. Photos of the finished pieces looked joyful, because the projects matched real makers instead of a magazine shoot.
Watch out for gluing flowers before they dry fully, because damp petals brown inside the card within a week. Change one part at a time, watch what happens for a week, and adjust sizes before buying more.
Dried Pressed Flowers 140 Pieces with Tweezers: One hundred forty real pressed blooms and leaves with tweezers glue under clear tape or varnish for a garden heart that lasts.
Photo booth strip card
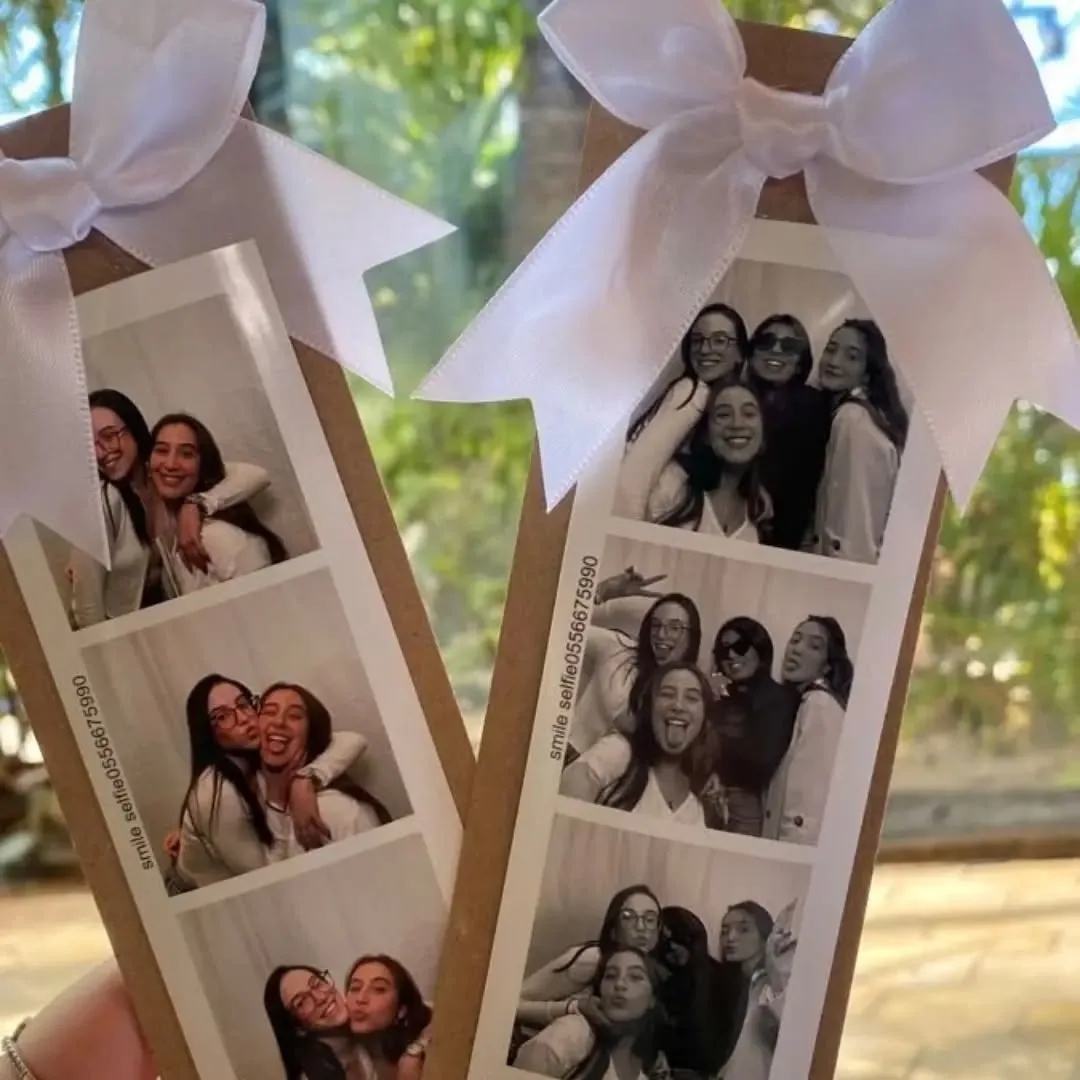
Lovely results follow from mounting a photo booth strip on a card front, so shared memories do the talking. Confidence builds with every finished piece, and the craft box empties in the happiest way.
Practical planning keeps effort realistic. Print three or four small photos in a vertical strip, glue the strip down the center of a sturdy card, add one short caption under each picture if space allows, and finish with a small heart at the top. Keep a damp cloth and a scrap bin on the table, so small spills never become big stops.
Strongest fit is couples and friends with phones full of shared photos. Small groups gain the most, because help arrives fast and nobody waits long for shared supplies.
Picture the routine in real life. One strip card used silly faces from a wedding photo booth, and it earned the loudest laugh of the day. Praise from family members kept the idea in the regular rotation long after craft day ended.
Watch out for printing photos too dark, because small prints lose faces quickly and reprinting costs little. Write the rule on a label or note, because visible reminders protect good systems from quiet drift.
Instant Mini Film Bundle Pack 60 Shots: Sixty instant shots print credit card sized photos on the spot so fresh photo booth strips slide straight into the card pocket.
Seed paper heart card
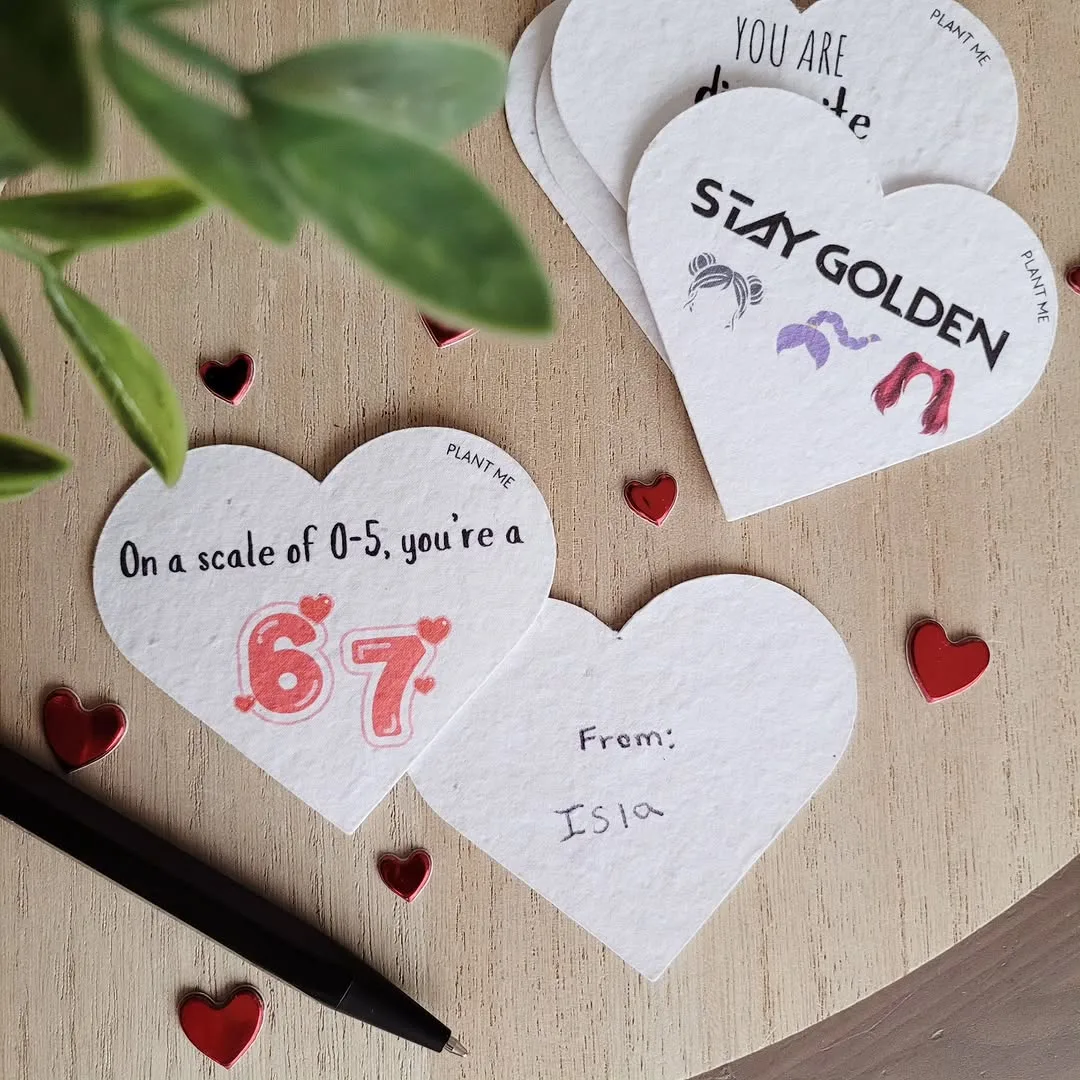
Happy crafting starts with making a seed paper heart card that grows after gifting, so the card becomes flowers by spring. Finished pieces look neat, makers feel proud, and every project leaves the table ready to give or display. Strong handmade valentine card ideas habits keep designs simple, messages short and finishes neat.
Practical planning keeps effort realistic. Blend soaked paper scraps into pulp, stir in small flower seeds, press the pulp into heart shapes on a cloth, dry hearts fully, glue one heart lightly onto a plain card, and add planting instructions inside. Cut pieces in batches, lay out one finished sample, and keep glue, scissors and wipes within easy reach.
Best results come for gardeners and makers who love gifts that keep going. Simple steps, forgiving materials and quick finishes matter more than perfect technique.
Picture the routine in real life. One seed heart planted in April bloomed by June, and the receiver sent photos back with thanks. Teachers and parents asked for the idea again, and it joined the regular craft day list.
Watch out for using a hot oven or iron to speed drying, because heat kills seeds and the card grows nothing. Slow down, fix the setup first, and repeat the small version until the habit holds on busy days too.
Plantable Seed Paper Hearts Pack of 50 Wildflower: Fifty handmade hearts packed with wildflower seeds turn the card into a gift the reader plants and watches bloom.
Common Mistakes to Avoid
Cramming three techniques onto one card muddles every design, because stitched, painted and glued elements fight for the same small space. Choosing one technique per card keeps fronts calm and lets each skill shine properly.
Writing the message first and decorating around it causes crowding, since ink leaves too little room for hearts and borders. Planning the front design first, then writing inside on a measured space, protects both halves of the card.
Using flimsy paper for folded or pop up cards ends in torn creases, because moving parts stress weak sheets at every opening. Sturdy card, scored folds and one test card on scrap prevent most structural disasters.
Budget Friendly Ways to Make Handmade Cards
Smart spending starts with the craft box at home, including blank cards, paper scraps, buttons, ribbons, old greeting cards and leftover thread. Honest supplies already owned beat rushed craft shop trips, and scraps often carry the best stories.
One pack of blank cards, one ink pad and one roll of washi tape cover half the designs on this list for very little money. Buying shared basics, rather than one kit per design, keeps the table full and the receipt short.
Garden and recycling finds stretch money further, since pressed petals cost nothing, cereal boxes give sturdy card, and fabric scraps become hearts. Saving on bases leaves room for one nice extra, like a brush pen, that improves every card it touches.
Simple Tips That Polish Every Card
Score. Score every fold line with a ruler and a blunt edge before folding, because scored folds crack less and sit crisp and straight. Crisp folds make even the simplest card look shop made.
Test. Try each new technique once on scrap paper, because one practice heart reveals ink, glue and spacing problems while fixes cost nothing. Scrap practice saves the good card stock for successes.
Extra guidance on handmade valentine card ideas comes from making one sample card slowly, timing each step and noting where glue, ink or folds behave badly. Fixes found on the sample save every real card after it.
Dry. Let finished cards dry flat and open, spaced on a tray, because stacked wet cards stick, smudge and break maker hearts. One drying tray protects a whole afternoon of making.
Sign. Sign the back of every card with your name and the year, because handmade cards become keepsakes and dates matter later. Signed backs turn cards into dated treasures.
Remember that strong handmade valentine card ideas choices respect short messages, honest budgets and drying time nobody can hurry. A card carried to the mantel and kept there matters far more than a complicated front.
Write. Draft the inside message on scrap first, then copy it slowly, because one crossed out word can spoil a perfect card. Copied messages keep handwriting calm and even.
Post. Post cards three or four days before Valentines Day, because postal delays steal more romance than any design flaw ever could. Early posting guarantees the card lands on the day.
FAQ
What size card works best for these designs?
Standard folded cards from A5 or five by seven inch blanks suit nearly every design, because they leave room for one bold heart and a short message. Very small cards crowd detailed work like quilling and stitching.
How long does one handmade card take?
Simple stamped, washi and fingerprint cards finish within ten to twenty minutes, while quilled and stitched cards can take a calm hour. Drying time adds more, so plan glue heavy designs a day ahead.
What basic kit covers most card making?
Blank cards, colored paper, scissors, a glue stick, one ink pad, a fine black pen and a small ribbon stash cover most designs here. A brush pen and washi tape stretch the list further for very little money.
How can children join in card making?
Fingerprint hearts, washi tape hearts and sponge stamped designs suit children best, because steps are short and results arrive fast. Adult hands handle sharp cutting, piercing and hot steps at every age.
Can handmade cards be posted safely?
Sturdy cards travel well inside a plain envelope with a card protector or a spare sheet of card over the front. Raised designs like buttons and quilling prefer hand delivery or padded envelopes for safety.
What should the inside message say?
Short and true beats long and fancy every time, including one real memory, one honest thank you and one kind wish. Three sentences written slowly in your own words will always beat a copied poem.
Conclusion
Good cards grow from one clear technique, a short true message and materials treated with care. Strong handmade valentine card ideas choices respect your craft box, your budget and your drying tray, so every card leaves the table looking loved.
Pick three designs from this list, finish them fully this week, and let the rest wait until the card list and the calendar feel ready. Small finished batches build confidence and keep spending calm and sensible.
Enjoy the mantel rows that follow, and let one handmade card remind everyone why small made things deserve a date in the calendar every year. One heart, one stamp and one kind sentence at a time, a simple card becomes a keepsake.