15 Easy Paper Crafts for Kids to Make at Home
Paper is the friendliest craft material of all, because it costs little, cuts easily and forgives wobbly lines. Children love a material that turns into animals, cards and decorations within minutes, and parents love a project that needs no special tools.
Good paper sessions grow from simple shapes, short steps and supplies already in the drawer. Gentle easy paper crafts for kids thinking repeats one clear finished sample on the table, so children always know what they are aiming for.
Inside this guide, fifteen practical projects move from paper plate animals and paper chains to snowflakes, cards, masks and flowers, each with real quantities, budget friendly options and the one small mistake that quietly spoils the finish. Most projects suit ages four to ten at home or at school.
What easy paper crafts for kids suit children who are new to crafting?
Projects with one clear shape, three or four steps and a fast finish suit new crafters best. Paper chains, stamped art and fingerprint pictures forgive wobbly lines, while one finished sample on the table answers most questions before they are asked.
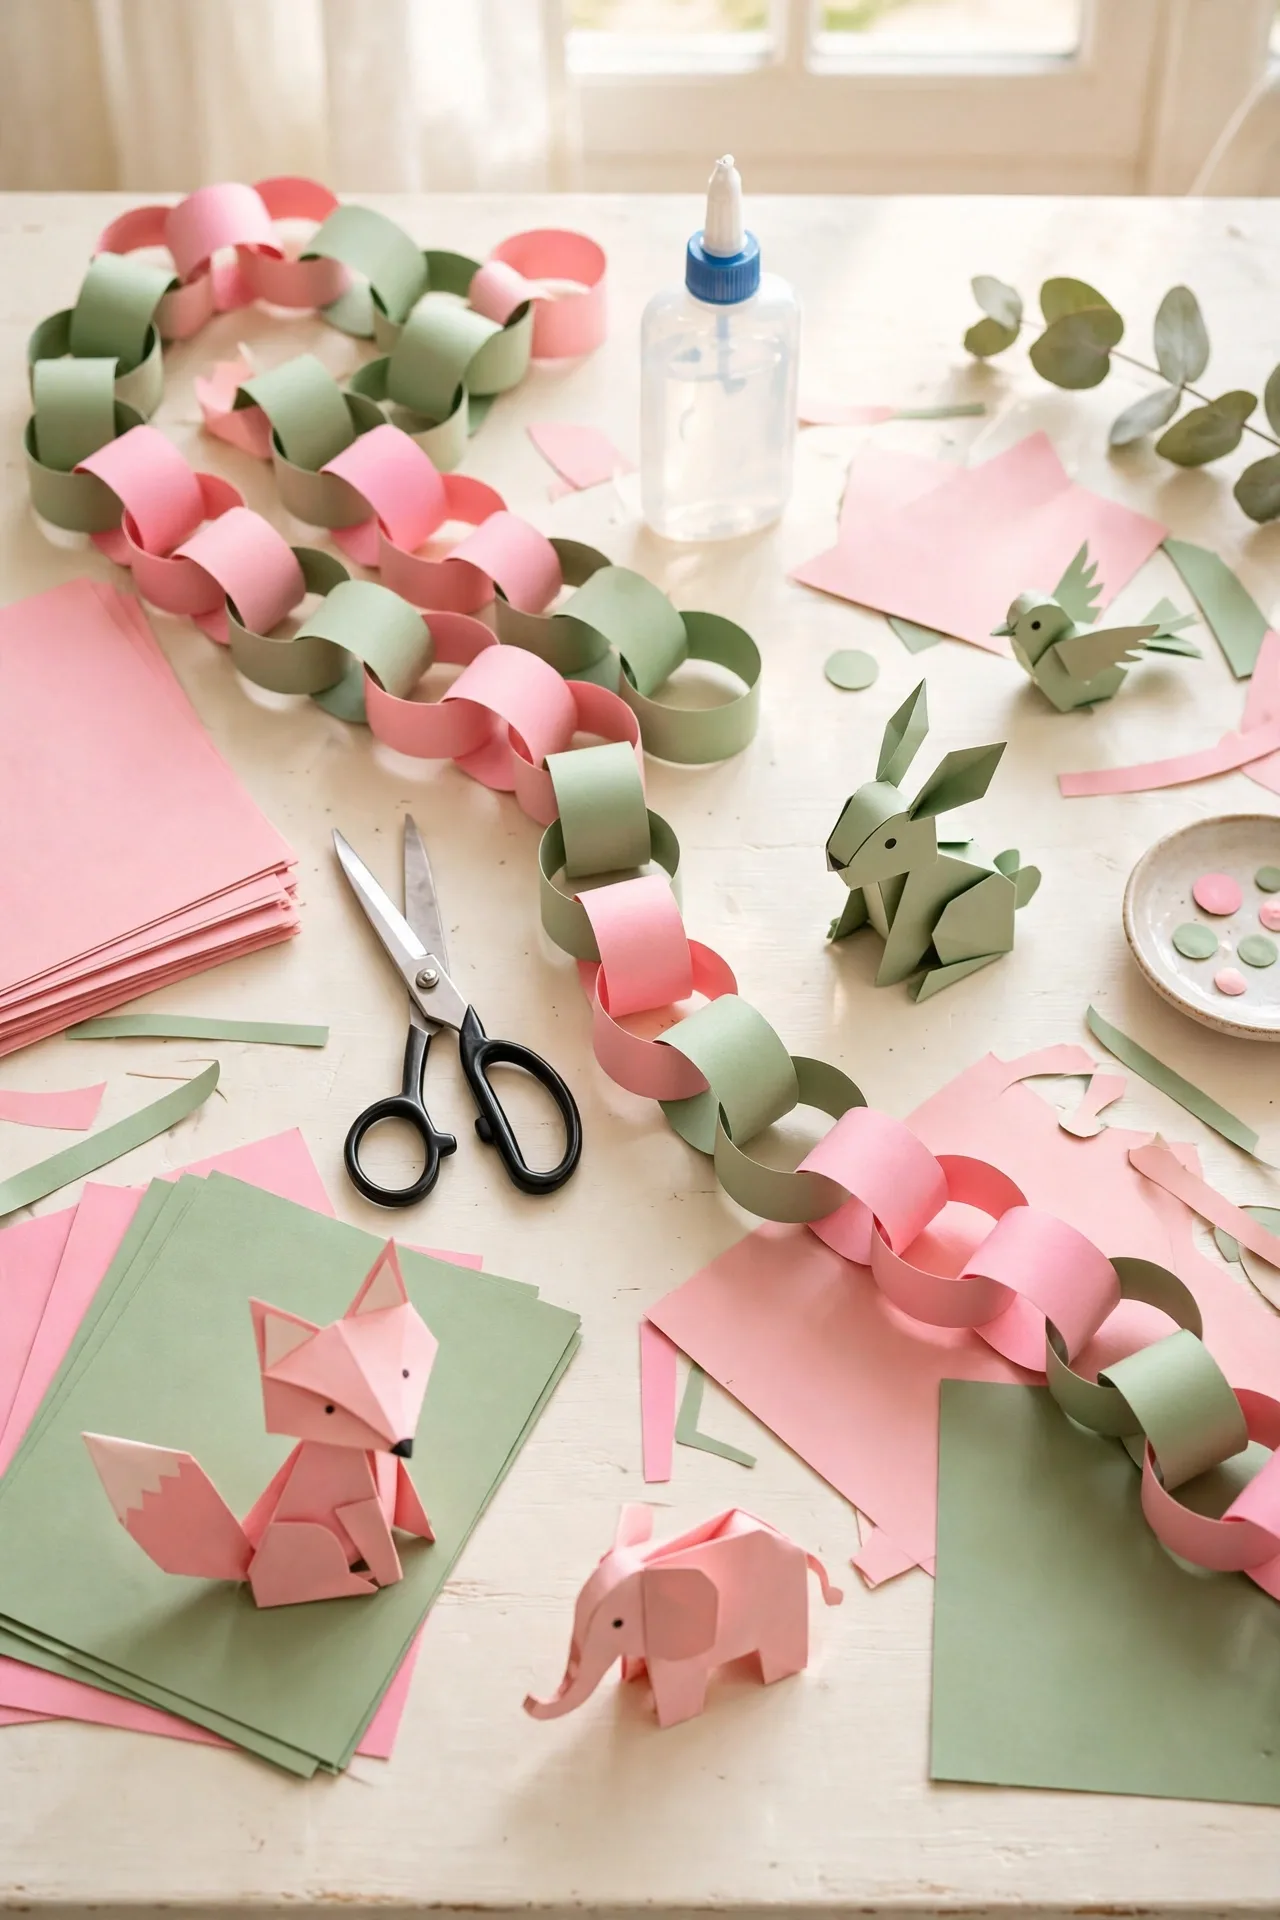
Picture one table by mid morning: colored paper waits in piles, scissors sit in a cup, a finished paper chain hangs above the window as the example, and children choose colors before anyone touches glue. Calm starts like these produce the proudest finishes.
Disclosure: As an Amazon Associate I earn from qualifying purchases. Some of the links below are affiliate links, which means Bloomie Living may earn a small commission if you buy through them, at no extra cost to you.
Paper Plate Animals
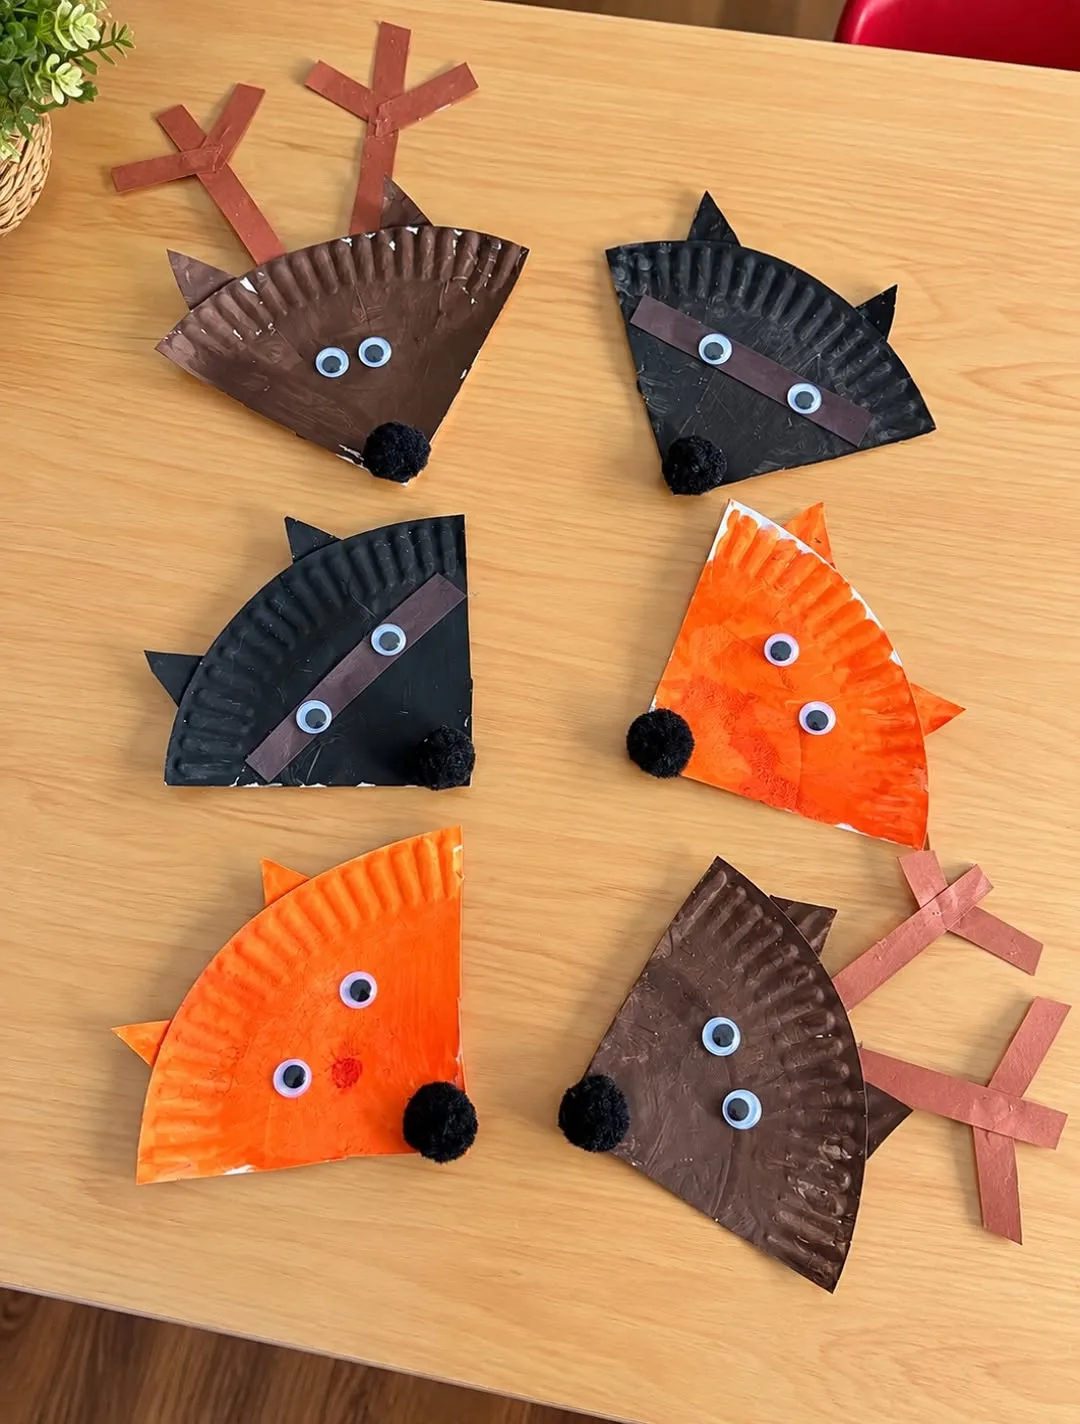
Good projects grow from turning paper plates into friendly animals with paint, paper ears and googly eyes, so every child finishes a full sized make. Small hands stay busy, simple skills grow quietly, and every maker finishes with something to show.
Practical planning keeps effort realistic. Paint a paper plate in the animal color, cut ears, nose and whiskers from colored paper, glue the pieces in place, add googly eyes, and write the maker name on the back. Cover the table first, pour small amounts of paint or glue at a time, and refill bowls as makers finish.
Happiest users are children aged four and up who enjoy painting and gluing. Success comes from matching the project to the maker sitting at the table, not to a photo online.
Picture the routine in real life. One class made a whole zoo of paper plate lions and cats, and the teacher hung them along the hallway. Photos of the finished pieces looked joyful, because the projects matched real makers instead of a magazine shoot.
Watch out for loading the plate with wet glue, because heavy plates sag and pieces slide before drying. Change one part at a time, watch what happens for a week, and adjust sizes before buying more.
White uncoated paper plates 9 inch 500 count: Sturdy plain plates make a great base for animal faces.
Colorful Paper Chains
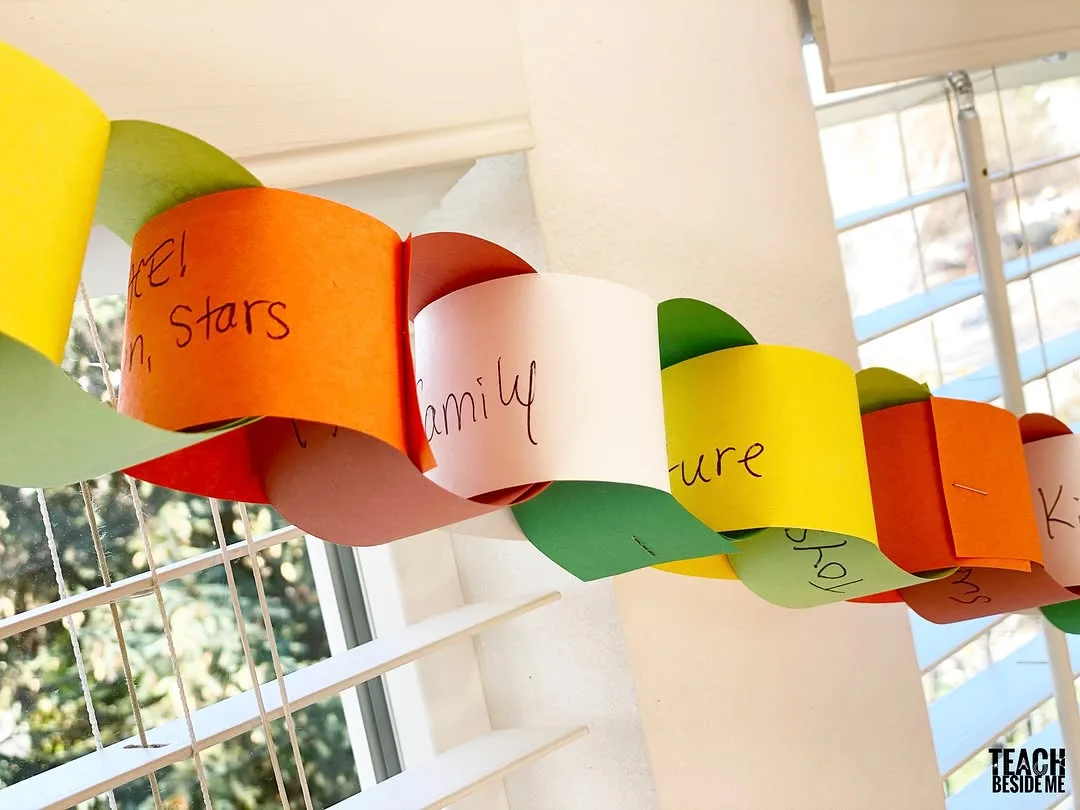
Proud makes begin with folding colorful paper chains from strips of paper, so one window or wall turns festive in minutes. Tables stay calmer, steps feel easy, and even first attempts come out looking sweet.
Practical planning keeps effort realistic. Cut paper into strips of equal size, loop the first strip into a ring, thread the next strip through and glue, repeat in changing colors, and tape test rings first to check the length. Sort supplies into small bowls by step, because hunting for pieces breaks the making mood.
Strongest fit is children aged four and up who enjoy cutting and gluing. Small groups gain the most, because help arrives fast and nobody waits long for shared supplies.
Picture the routine in real life. One class strung a paper chain across the reading corner, and the teacher said the room felt ready for the party. Praise from family members kept the idea in the regular rotation long after craft day ended.
Watch out for handing young children long strips without help, because tangles and tears end the fun faster than any other snag. Write the rule on a label or note, because visible reminders protect good systems from quiet drift.
Construction paper bulk pack 480 sheets 10 colors: Bright sheets in ten colors cover every chain and collage project.
Paper Snowflakes for Windows
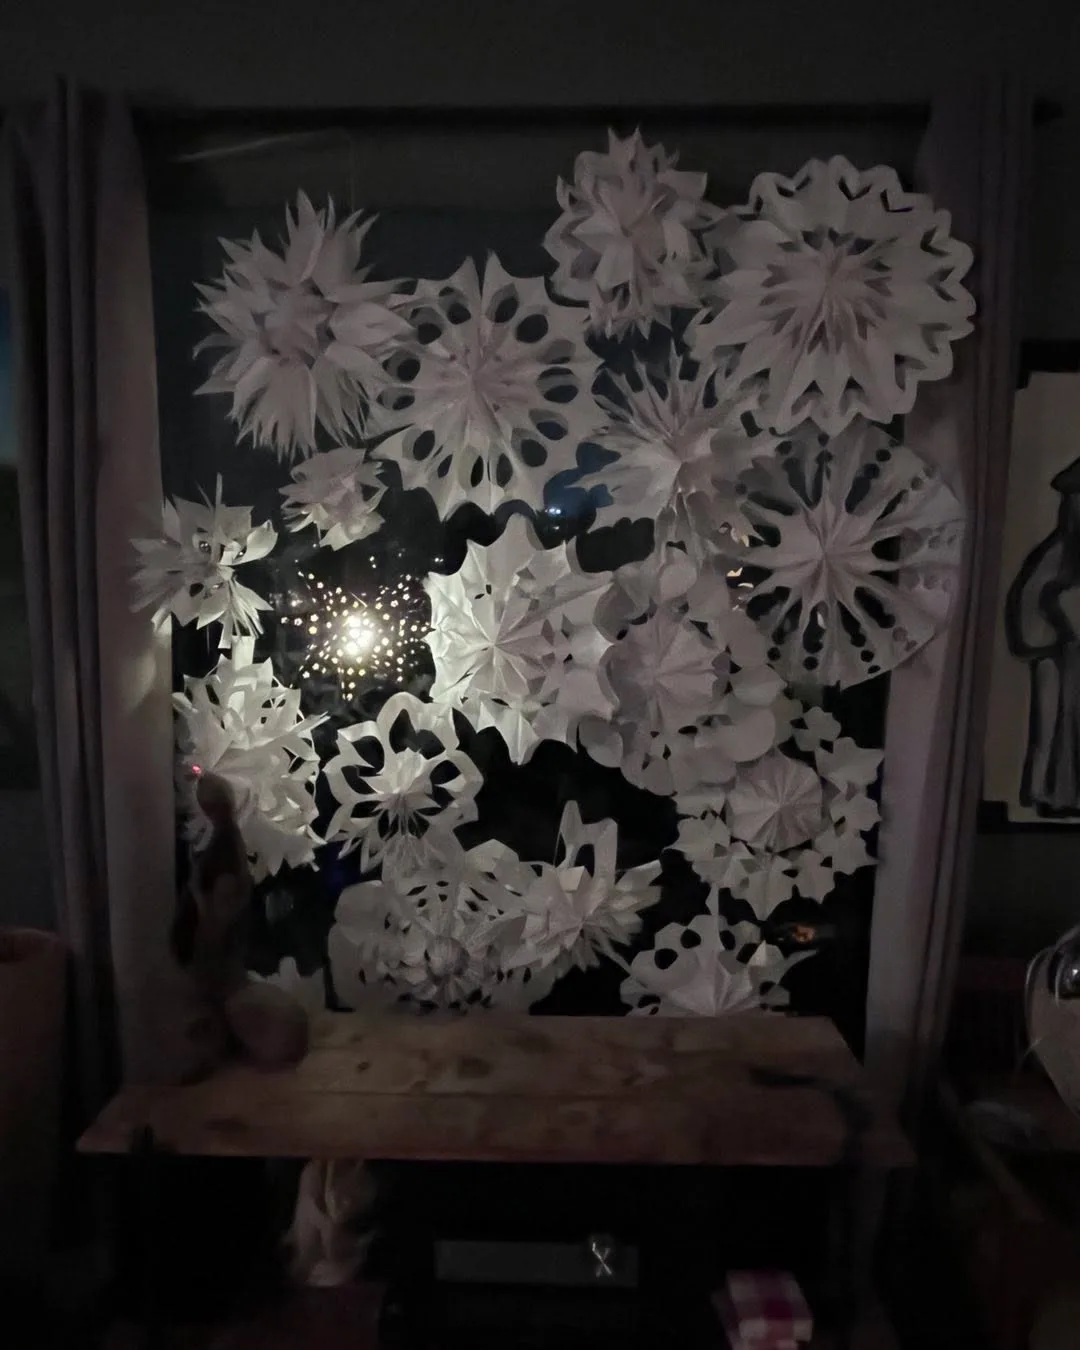
Calm crafting comes from folding paper snowflakes with simple cuts, so windows sparkle like a winter morning. Materials stretch further, mess stays manageable, and cleanup afterwards takes only minutes. Strong easy paper crafts for kids habits keep projects simple, cheerful and easy to repeat every week.
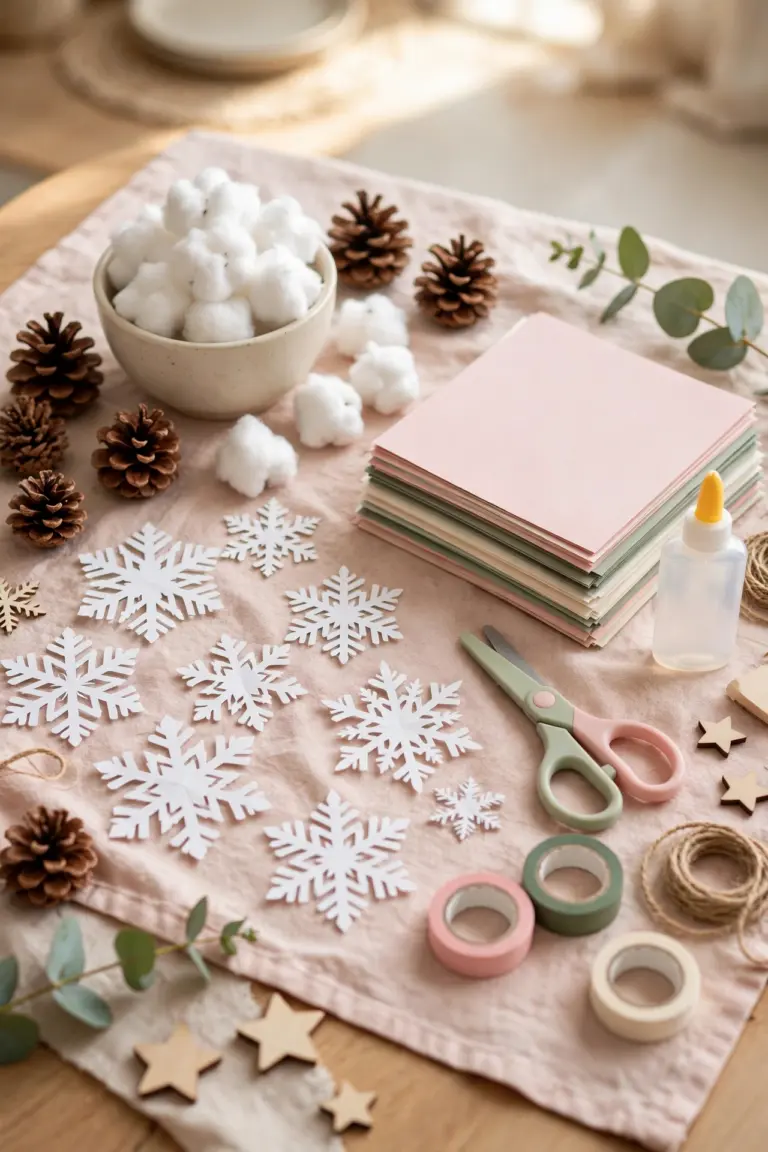
Practical planning keeps effort realistic. Fold square paper into triangles, cut small shapes from the folded edges, open gently to reveal the snowflake, press flat under a book, and hang on windows with tape. Test one finished sample before the group starts, because a clear example prevents most confusion.
Best results come for children aged five and up who love folding and cutting. Simple steps, forgiving materials and quick finishes matter more than perfect technique.
Picture the routine in real life. One row of snowflakes along a classroom window turned grey morning light into soft white all week. Teachers and parents asked for the idea again, and it joined the regular craft day list.
Watch out for cutting too close to the fold, because deep cuts split the paper and the snowflake falls apart. Slow down, fix the setup first, and repeat the small version until the habit holds on busy days too.
Hanging paper snowflake decorations 24 pieces: Ready cut snowflakes hang in windows for instant winter cheer.
Handmade Greeting Cards
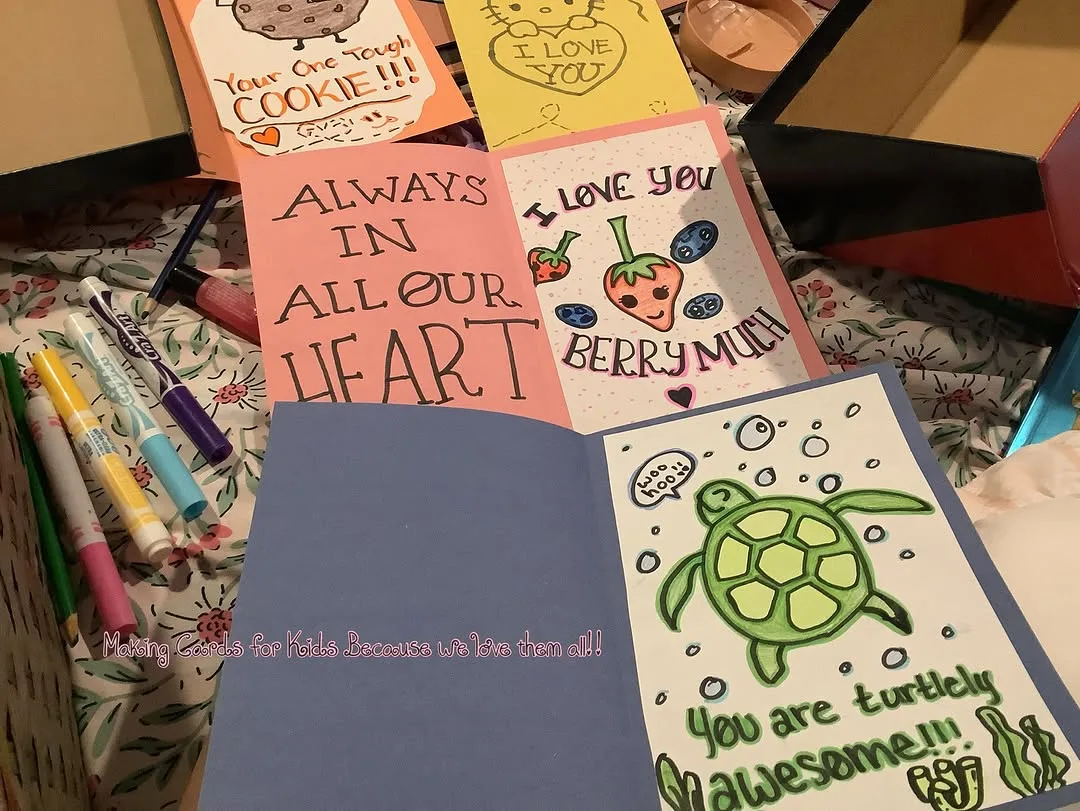
Lovely results follow from making handmade greeting cards with folded card, stickers and drawings, so children give a card that is truly their own. Confidence builds with every finished piece, and the craft box empties in the happiest way.
Practical planning keeps effort realistic. Fold card in half, draw or stick a picture on the front, write a short message inside with a thick marker, add stickers or paper shapes, and let the card dry fully before giving. Keep a damp cloth and a scrap bin on the table, so small spills never become big stops.
Happiest users are children aged four and up making cards for family and friends. Success comes from matching the project to the maker sitting at the table, not to a photo online.
Picture the routine in real life. One grandmother framed her card the same week, saying the drawing beat any shop card. Photos of the finished pieces looked joyful, because the projects matched real makers instead of a magazine shoot.
Watch out for rushing the message before paint dries, because damp cards smudge and small makers lose heart. Change one part at a time, watch what happens for a week, and adjust sizes before buying more.
Blank cards bulk with envelopes pastel 100 count: Blank pastel cards with envelopes are ready for any handmade message.
Paper Animal Masks
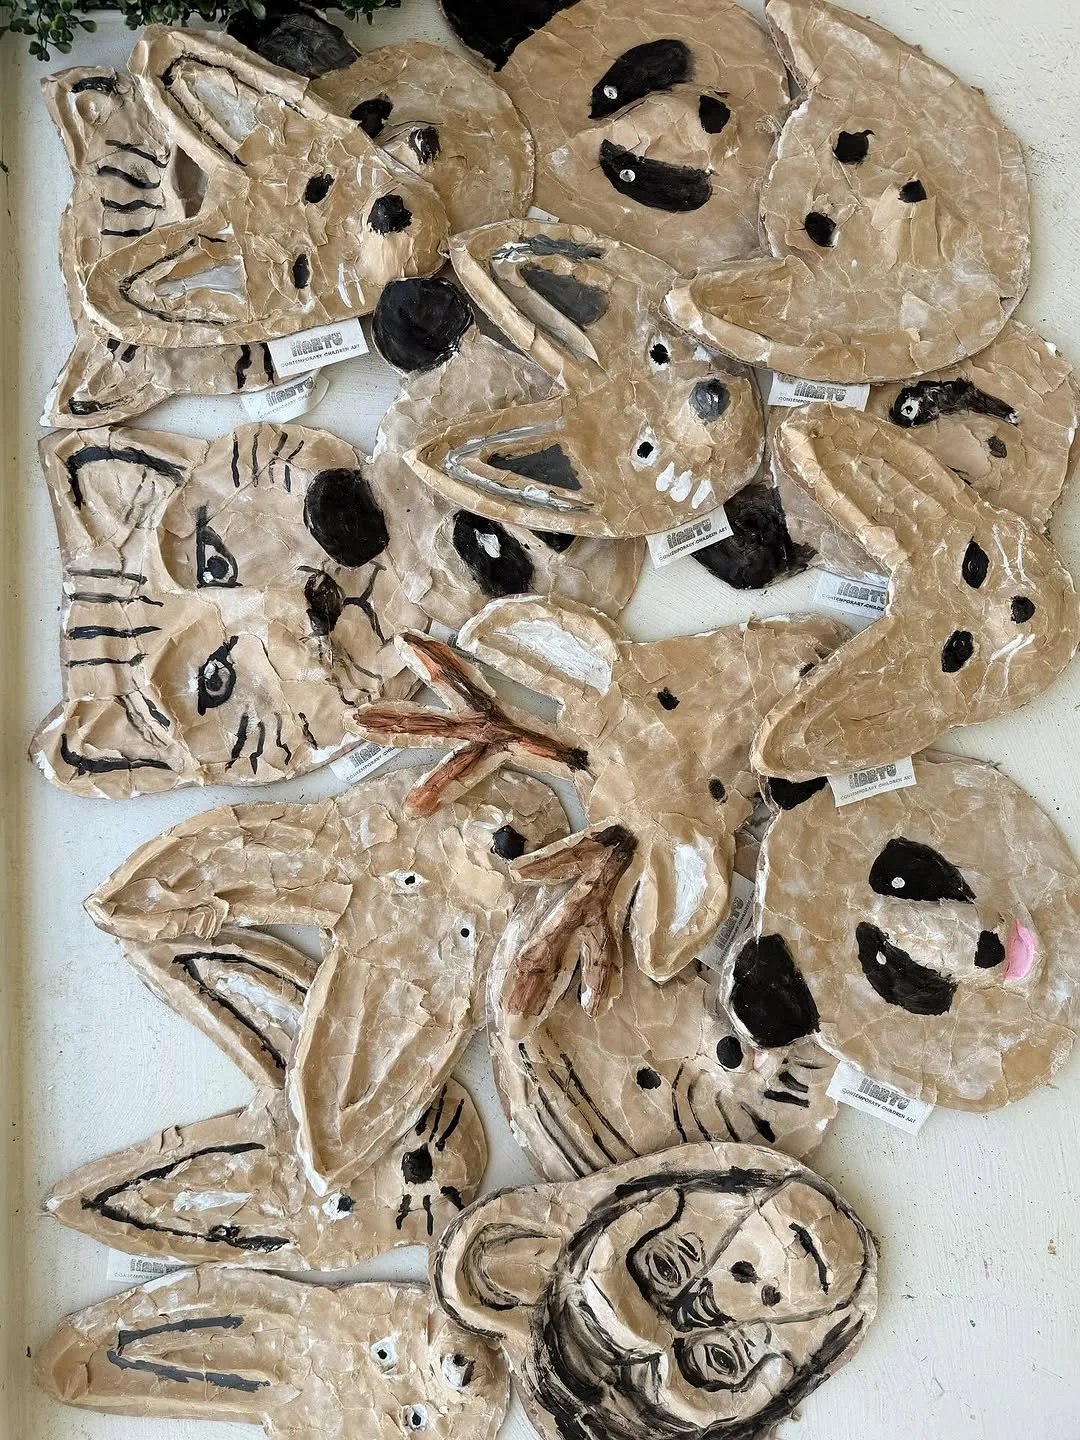
Happy crafting starts with cutting paper animal masks with eye holes and elastic, so dress up play starts at the craft table. Finished pieces look neat, makers feel proud, and every project leaves the table ready to give or display.
Practical planning keeps effort realistic. Cut a mask shape from strong card, cut eye holes carefully with adult help, decorate with paint, paper and feathers, punch holes at the sides, and thread elastic through. Cut pieces in batches, lay out one finished sample, and keep glue, scissors and wipes within easy reach.
Strongest fit is children aged five and up who love dressing up and pretend play. Small groups gain the most, because help arrives fast and nobody waits long for shared supplies.
Picture the routine in real life. One set of masks turned a rainy afternoon into a jungle adventure, and the children played for hours. Praise from family members kept the idea in the regular rotation long after craft day ended.
Watch out for cutting eye holes too small, because children need a clear view to play safely. Write the rule on a label or note, because visible reminders protect good systems from quiet drift.
Felt animal masks 10 pieces: Soft animal masks are ready to wear for dress up play.
Paper Flower Bouquets
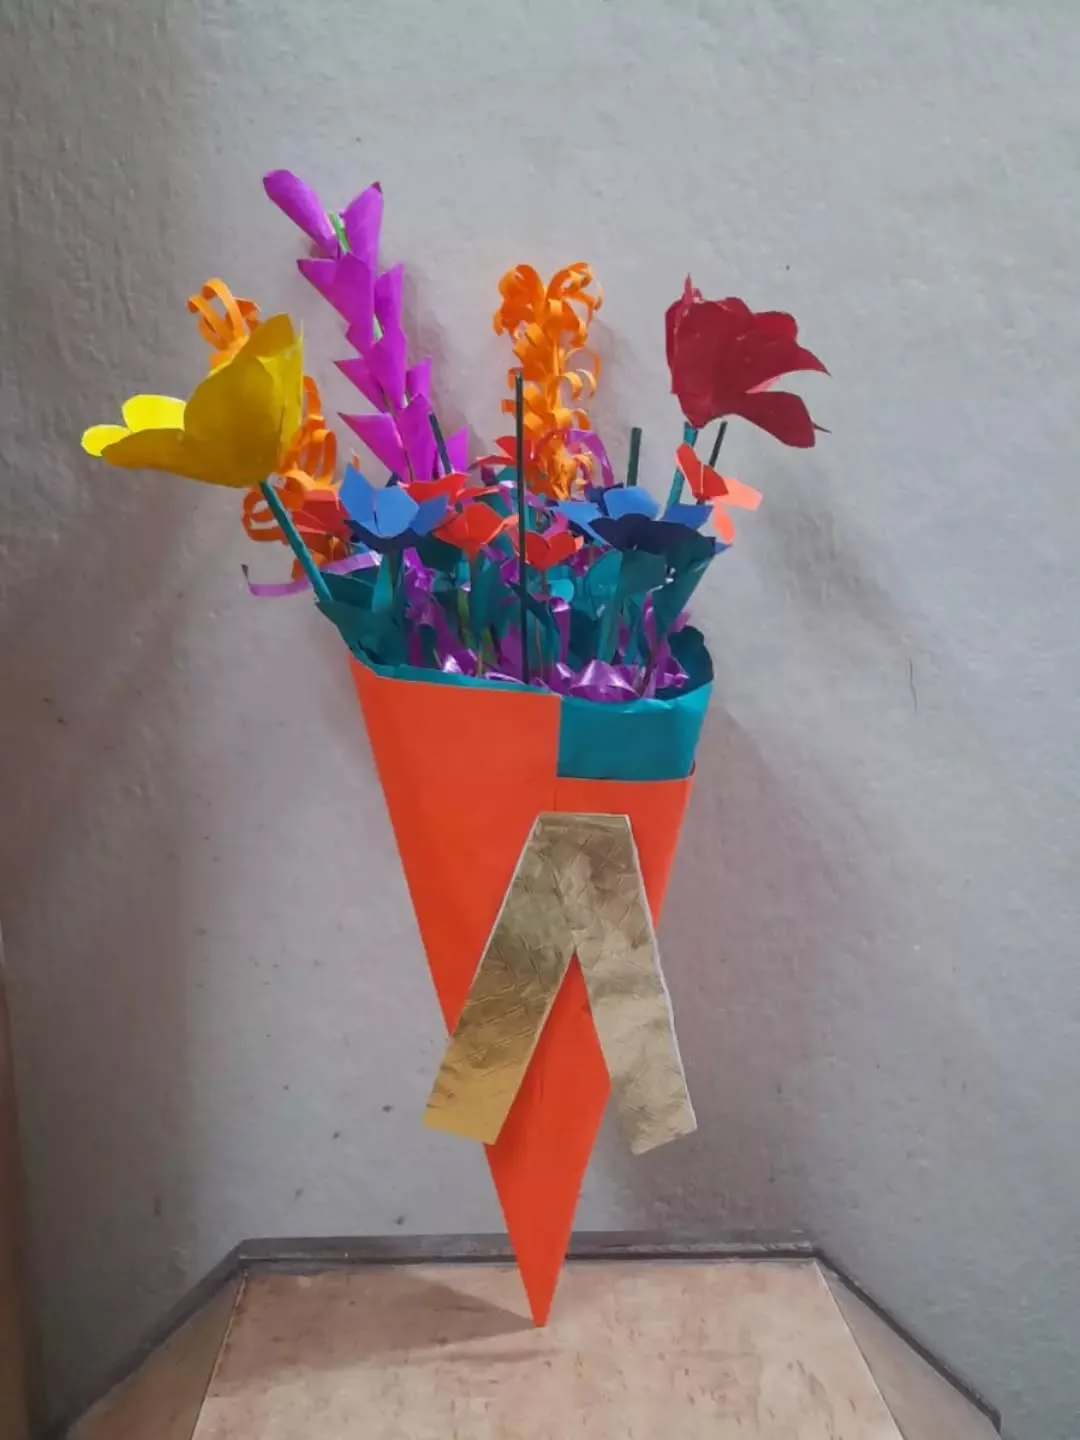
Good projects grow from folding paper flower bouquets from colored paper and pipe cleaners, so a bunch of flowers lasts all year. Small hands stay busy, simple skills grow quietly, and every maker finishes with something to show. Strong easy paper crafts for kids habits keep projects simple, cheerful and easy to repeat every week.
Practical planning keeps effort realistic. Cut petal shapes from colored paper, glue petals around a paper center, attach a pipe cleaner stem, make five or six flowers, and tie the bunch with ribbon. Cover the table first, pour small amounts of paint or glue at a time, and refill bowls as makers finish.
Best results come for children aged six and up who enjoy folding and arranging. Simple steps, forgiving materials and quick finishes matter more than perfect technique.
Picture the routine in real life. One bouquet of paper flowers sat on the kitchen table for months, and visitors asked where it came from. Teachers and parents asked for the idea again, and it joined the regular craft day list.
Watch out for gluing petals with too much glue, because wet paper wrinkles and the flowers droop. Slow down, fix the setup first, and repeat the small version until the habit holds on busy days too.
Tissue paper squares 1 inch 5400 pieces 36 colors: Tiny bright squares layer up into soft paper flower petals.
Paper Airplanes That Fly Far
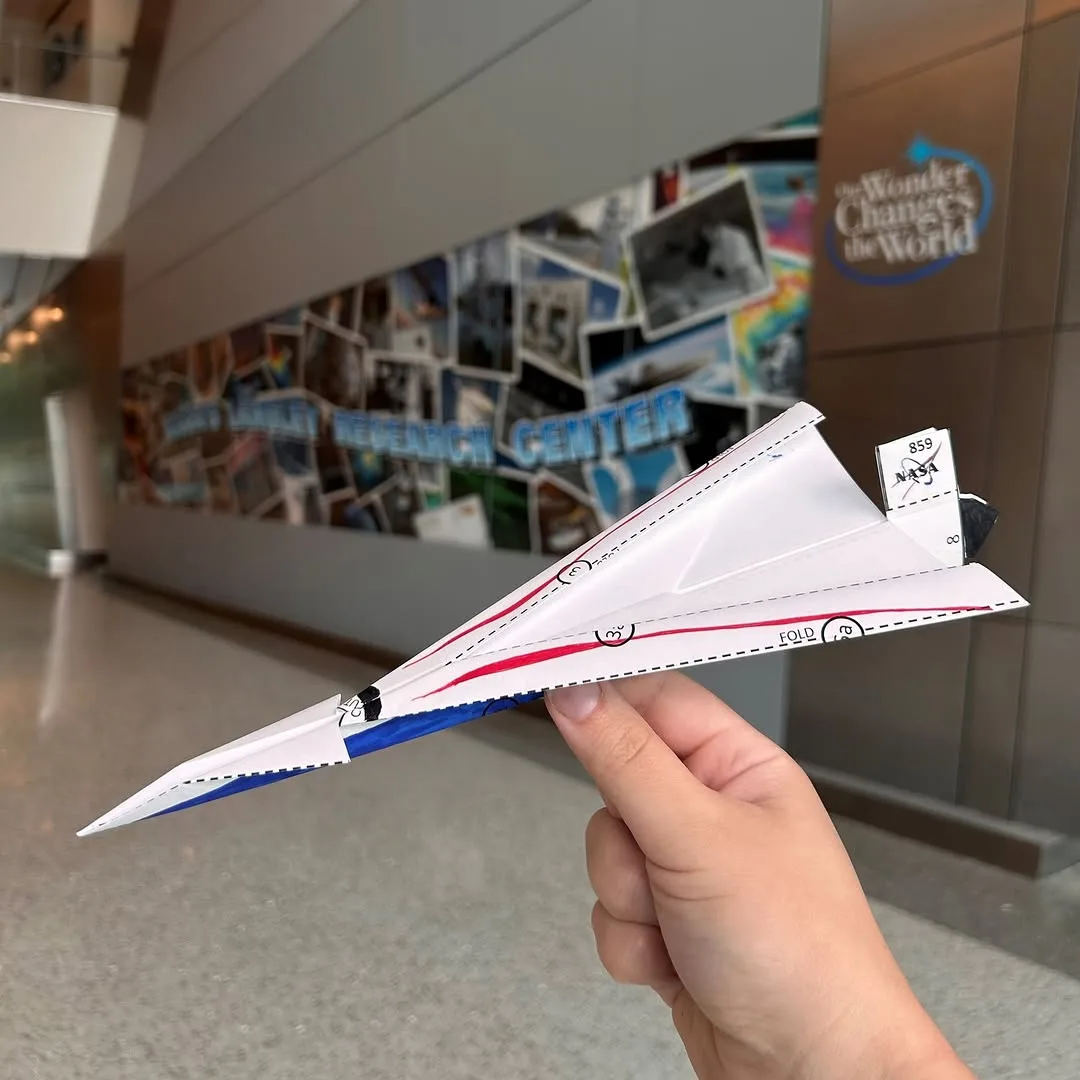
Proud makes begin with folding paper airplanes with neat creases, so a simple sheet becomes a flying toy. Tables stay calmer, steps feel easy, and even first attempts come out looking sweet.
Practical planning keeps effort realistic. Fold a sheet in half lengthwise, fold the top corners to the center, fold the new edges in again, fold the plane in half, and crease the wings sharply before the first flight. Sort supplies into small bowls by step, because hunting for pieces breaks the making mood.
Happiest users are children aged six and up who enjoy folding and testing. Success comes from matching the project to the maker sitting at the table, not to a photo online.
Picture the routine in real life. One class held a flying contest in the hall, and the winning plane flew the whole length. Photos of the finished pieces looked joyful, because the projects matched real makers instead of a magazine shoot.
Watch out for folding on a soft surface, because crisp creases need a hard table edge. Change one part at a time, watch what happens for a week, and adjust sizes before buying more.
Paper airplane book kit with 40 sheets: A book with foldable sheets teaches planes that really fly far.
Paper Bag Puppets
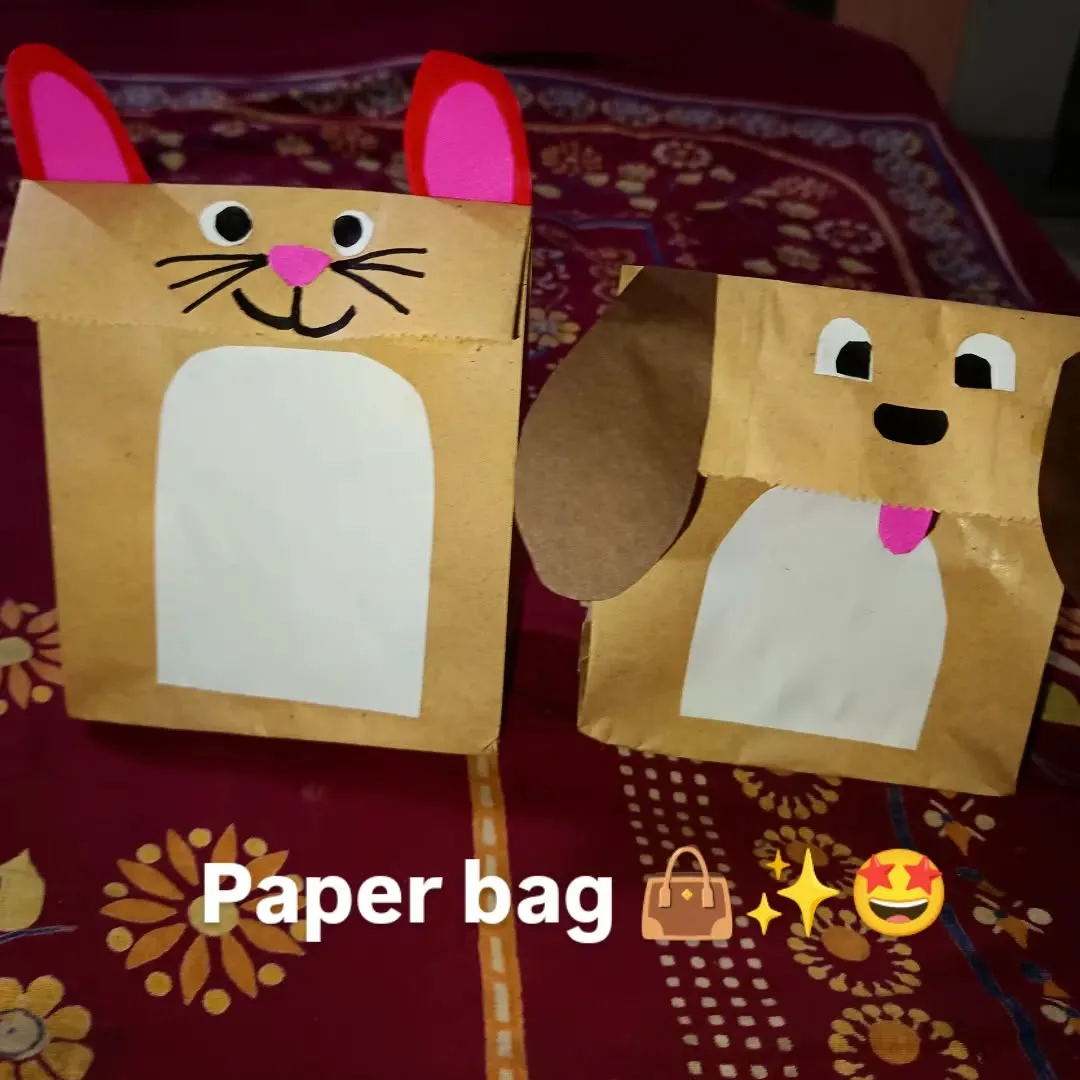
Calm crafting comes from turning paper bags into puppets with paper faces, so story time gains a cast of characters. Materials stretch further, mess stays manageable, and cleanup afterwards takes only minutes.
Practical planning keeps effort realistic. Paint or cover a paper bag, glue a paper face on the flap, add yarn hair and googly eyes, draw a mouth on the flap edge, and let the puppet talk when a hand moves inside. Test one finished sample before the group starts, because a clear example prevents most confusion.
Strongest fit is children aged four and up who love stories and voices. Small groups gain the most, because help arrives fast and nobody waits long for shared supplies.
Picture the routine in real life. One set of puppets performed a whole story for the family, and the youngest child played the hero. Praise from family members kept the idea in the regular rotation long after craft day ended.
Watch out for gluing the flap shut, because a puppet needs a moving mouth to tell its story. Write the rule on a label or note, because visible reminders protect good systems from quiet drift.
Kraft paper lunch bags 250 count 4 pound: Plain kraft bags fold into puppets with room for little hands.
Woven Paper Placemats
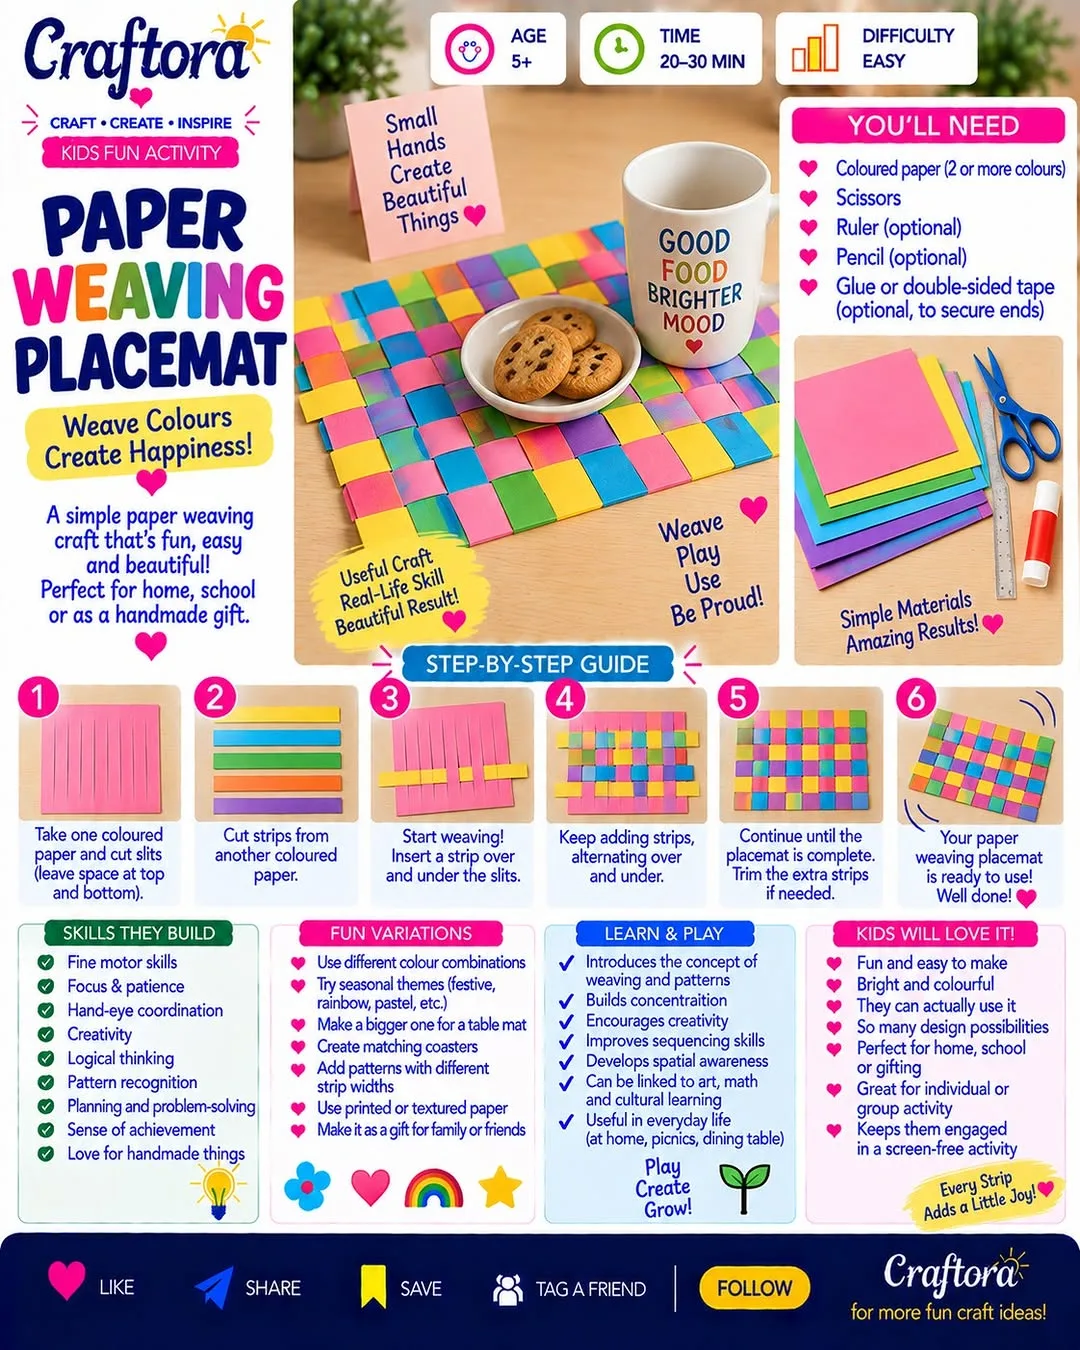
Lovely results follow from weaving paper placemats from strips in two colors, so lunch time gains a handmade touch. Confidence builds with every finished piece, and the craft box empties in the happiest way. Strong easy paper crafts for kids habits keep projects simple, cheerful and easy to repeat every week.
Practical planning keeps effort realistic. Cut a base sheet with slits, cut strips in a second color, weave strips over and under through the slits, trim the edges, and seal the sides with tape. Keep a damp cloth and a scrap bin on the table, so small spills never become big stops.
Best results come for children aged seven and up who enjoy weaving and patterns. Simple steps, forgiving materials and quick finishes matter more than perfect technique.
Picture the routine in real life. One set of placemats dressed the family table for a whole month, and guests asked how they were made. Teachers and parents asked for the idea again, and it joined the regular craft day list.
Watch out for cutting slits too close together, because thin strips tear when children weave firmly. Slow down, fix the setup first, and repeat the small version until the habit holds on busy days too.
Colored copy paper 100 sheets 10 colors: Ten bright colors weave into sturdy placemats for the table.
Paper Bookmark Corners
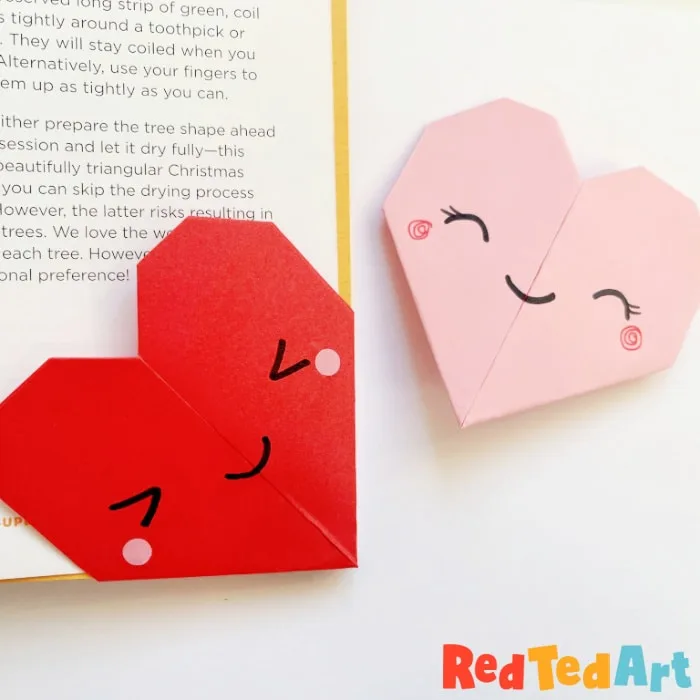
Happy crafting starts with folding paper bookmark corners that hug a page, so readers keep their place in style. Finished pieces look neat, makers feel proud, and every project leaves the table ready to give or display.
Practical planning keeps effort realistic. Fold a square of paper into a triangle, fold the corners to make a pocket, decorate with paper eyes or ears, slip the pocket over a page corner, and test the fit on a real book. Cut pieces in batches, lay out one finished sample, and keep glue, scissors and wipes within easy reach.
Happiest users are children aged six and up who love reading. Success comes from matching the project to the maker sitting at the table, not to a photo online.
Picture the routine in real life. One boy made three bookmarks in school colors, and his teacher used hers in the class reading book. Photos of the finished pieces looked joyful, because the projects matched real makers instead of a magazine shoot.
Watch out for choosing thin paper that tears at the folds, because floppy paper frustrates new folders. Change one part at a time, watch what happens for a week, and adjust sizes before buying more.
Origami paper 500 sheets 6 inch 20 colors: Crisp square sheets fold cleanly into bookmarks that hold a page.
Paper Chain Caterpillar
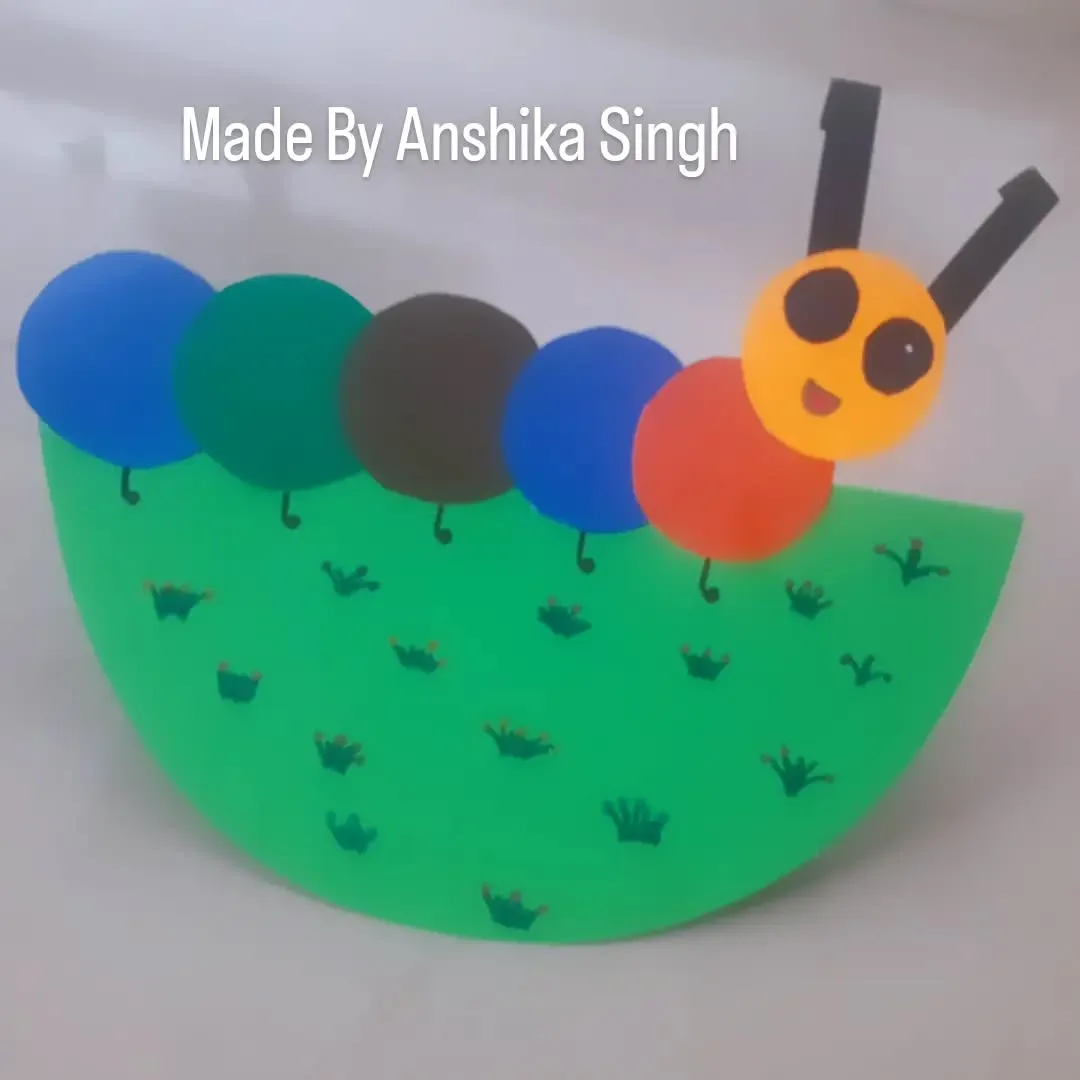
Good projects grow from folding a paper chain caterpillar with a smiling face, so cutting practice turns into a toy. Small hands stay busy, simple skills grow quietly, and every maker finishes with something to show.
Practical planning keeps effort realistic. Cut six equal circles in bright colors, glue them in a row overlapping slightly, draw a friendly face on the first circle, add paper antennae, and let makers name their caterpillar on the back. Cover the table first, pour small amounts of paint or glue at a time, and refill bowls as makers finish.
Strongest fit is younger children building scissor confidence. Small groups gain the most, because help arrives fast and nobody waits long for shared supplies.
Picture the routine in real life. One caterpillar chain stretched across a bedroom door, and its maker fed it paper leaves for a week. Praise from family members kept the idea in the regular rotation long after craft day ended.
Watch out for gluing circles with centers in mixed lines, because a tidy row needs every circle in the same line. Write the rule on a label or note, because visible reminders protect good systems from quiet drift.
Paper quilling kit 19 pieces 900 strips 45 colors: Thin strips roll into a bright caterpillar one coil at a time.
Paper Lanterns With Battery Lights
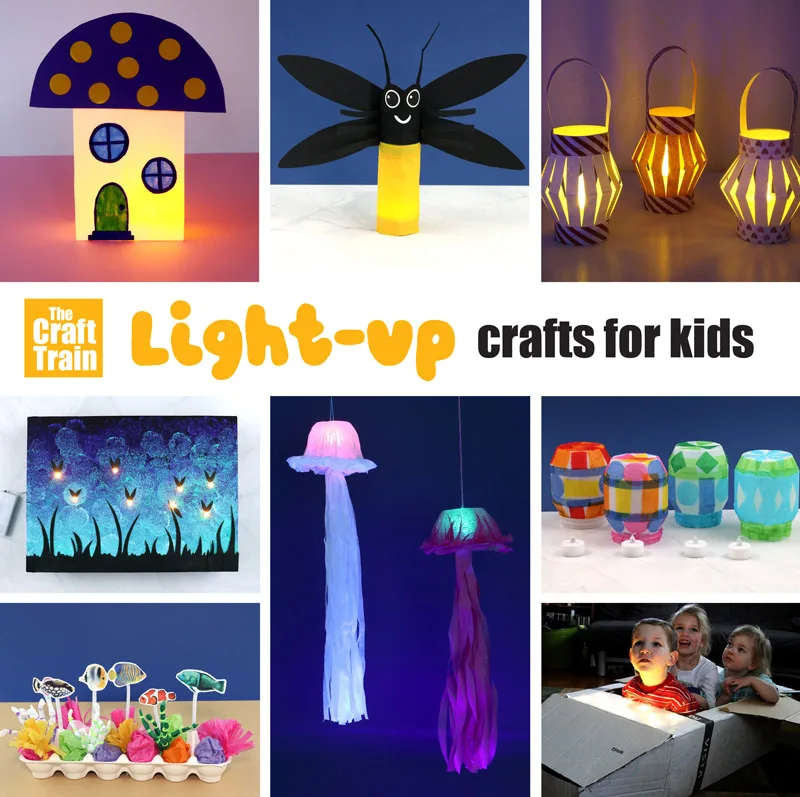
Proud makes begin with folding paper lanterns with safe battery lights, so bedrooms gain a soft glow. Tables stay calmer, steps feel easy, and even first attempts come out looking sweet. Strong easy paper crafts for kids habits keep projects simple, cheerful and easy to repeat every week.
Practical planning keeps effort realistic. Cut matching panels from sturdy paper, join edges with glue strips leaving the top open, add a handle of ribbon, place a battery tea light inside, and keep paper well away from any real flame. Sort supplies into small bowls by step, because hunting for pieces breaks the making mood.
Best results come for older children decorating their own rooms. Simple steps, forgiving materials and quick finishes matter more than perfect technique.
Picture the routine in real life. One lantern glowed on a bedside table for the whole month, and an adult refreshed its light each weekend. Teachers and parents asked for the idea again, and it joined the regular craft day list.
Watch out for putting real candles inside paper lanterns, because open flames and paper never belong together. Slow down, fix the setup first, and repeat the small version until the habit holds on busy days too.
White paper lanterns with LED lights 12 pieces: Paper lanterns glow softly with safe battery lights inside.
Paper Plate Sun Catchers
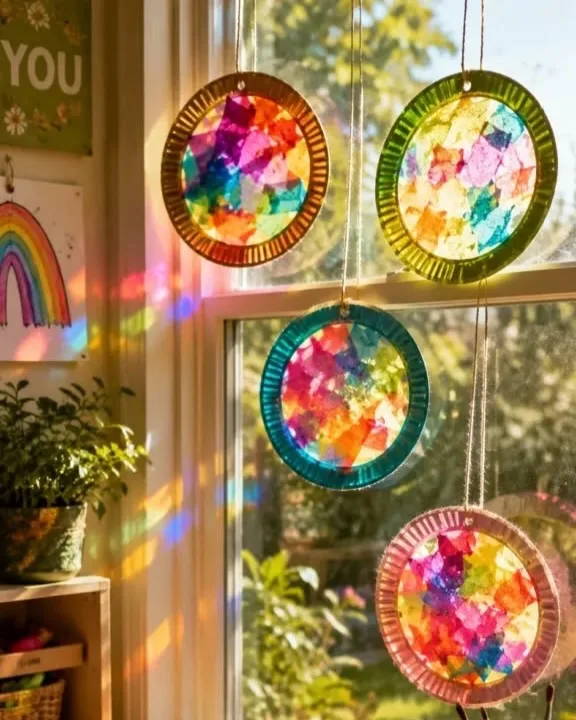
Calm crafting comes from layering tissue paper sun catchers on paper plate rings, so windows glow in color. Materials stretch further, mess stays manageable, and cleanup afterwards takes only minutes.
Practical planning keeps effort realistic. Cut the center from a paper plate, stick clear contact paper across the ring, let children press small tissue squares onto the sticky side, seal with a second sheet, and trim the edges once full. Test one finished sample before the group starts, because a clear example prevents most confusion.
Happiest users are children aged five and up who love color sorting. Success comes from matching the project to the maker sitting at the table, not to a photo online.
Picture the routine in real life. One row of sun catchers along a classroom window turned morning light into soft color all week. Photos of the finished pieces looked joyful, because the projects matched real makers instead of a magazine shoot.
Watch out for cutting tissue squares too large, because big pieces wrinkle and hide the ring shape. Change one part at a time, watch what happens for a week, and adjust sizes before buying more.
Clear matte adhesive covering roll 18 inch by 16 feet: Clear sticky film seals tissue art into a glowing sun catcher.
Pop Up Paper Cards
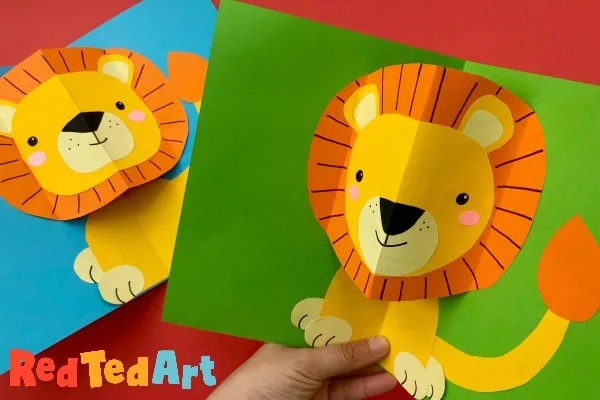
Lovely results follow from making pop up cards with folded paper shapes inside, so a simple card surprises everyone. Confidence builds with every finished piece, and the craft box empties in the happiest way.
Practical planning keeps effort realistic. Fold card in half, cut two small slits on the fold, push the cut tab inward, glue a paper shape onto the tab, decorate the front, and write the message inside. Keep a damp cloth and a scrap bin on the table, so small spills never become big stops.
Strongest fit is children aged eight and up with patience for careful folds. Small groups gain the most, because help arrives fast and nobody waits long for shared supplies.
Picture the routine in real life. One pop up card surprised a grandmother so much she kept it on the mantel for a year. Praise from family members kept the idea in the regular rotation long after craft day ended.
Watch out for cutting slits too deep, because long cuts weaken the card and the pop up collapses. Write the rule on a label or note, because visible reminders protect good systems from quiet drift.
Shaped pop up card making kit 8 cards: Eight shaped cards fold into standing scenes with foam pads and envelopes.
Paper Crowns for Dress Up
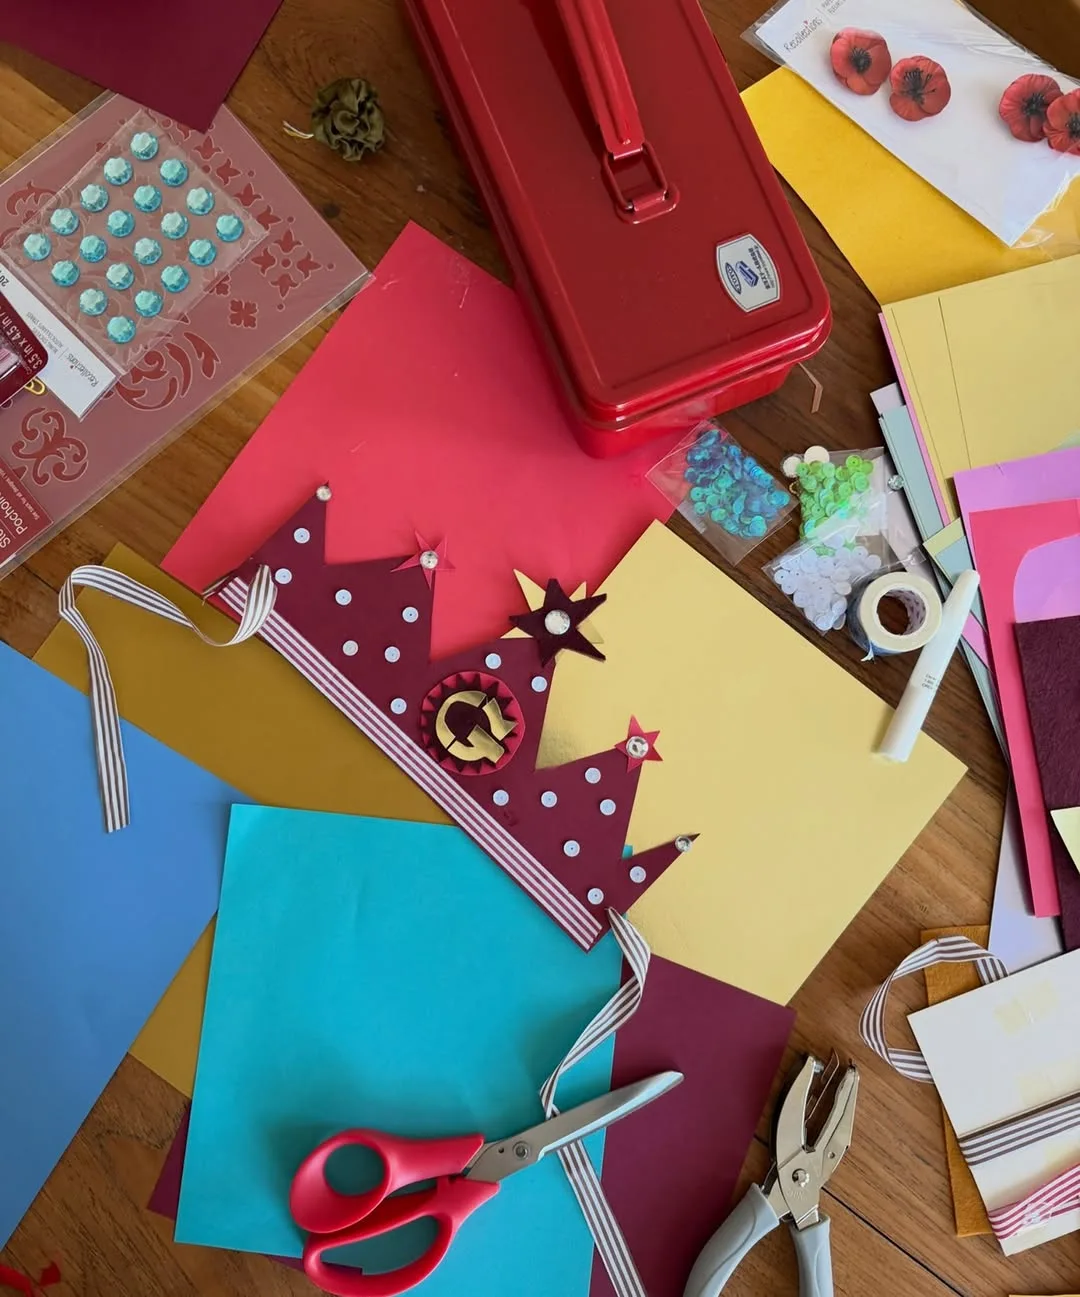
Happy crafting starts with making paper crowns with colored paper, stickers and gems, so every child becomes royalty for a day. Finished pieces look neat, makers feel proud, and every project leaves the table ready to give or display. Strong easy paper crafts for kids habits keep projects simple, cheerful and easy to repeat every week.
Practical planning keeps effort realistic. Cut a long strip of card, decorate with stickers, gems and crayon patterns, measure around the head, join the ends with tape, and add paper points or jewels on top. Cut pieces in batches, lay out one finished sample, and keep glue, scissors and wipes within easy reach.
Best results come for children aged four and up who love dressing up. Simple steps, forgiving materials and quick finishes matter more than perfect technique.
Picture the routine in real life. One set of crowns turned a birthday party into a royal court, and every guest wore one for photos. Teachers and parents asked for the idea again, and it joined the regular craft day list.
Watch out for making crowns too tight, because a tight crown slips down and spoils the fun. Slow down, fix the setup first, and repeat the small version until the habit holds on busy days too.
Gold mirror cardstock paper 60 sheets: Thick mirror gold sheets cut cleanly into crowns fit for dress up play.
Common Mistakes to Avoid
Choosing projects with ten steps for young children ends in tears, because attention fades long before the finish line appears. Matching step counts to ages keeps energy high, and older children can always add details to a simple base.
Pouring full bottles of glue onto the table wastes supplies and floods careful work. Small amounts, glue sticks and one refill station keep pieces clean and stretch one bottle across a whole group.
Skipping the finished sample causes twenty questions per project, since children cannot picture the goal from loose paper. One completed example, made slowly in front of the group, quietly answers shape, size and order questions.
Budget Friendly Ways to Craft With Paper
Smart spending starts with paper already at home, including colored paper, card scraps, old magazines, wrapping paper and the envelopes every drawer collects. Honest supplies already owned beat rushed craft shop trips, and children happily turn scraps into treasure.
Paper, tissue and pipe cleaners cost very little in supermarket craft aisles, especially when colors stay within a small palette. Buying one shared pack per material, rather than one kit per child, keeps the table full and the receipt short.
Recycling stretches money further, since sturdy cardboard boxes, cereal boxes and old greeting cards all arrive free. Saving on bases leaves room for one nice extra, like good felt tips or washable paint, that improves every project it touches.
Simple Tips That Keep Paper Craft Time Calm
Cover. Spread an old sheet or paper over the table before supplies come out, because one covered surface turns cleanup into a single shake outside. Covered tables keep good floors safe from glue and paint.
Sort. Put each color in its own small pile by step, so children reach instead of rummage and the table stays readable at a glance. Sorted piles save more time than any fancy storage box.
Extra guidance on easy paper crafts for kids comes from testing each project once with adult hands, timing the steps and noting where small fingers will struggle. Fixes made during the test save the whole session later.
Dry. Give finished pieces one clear drying tray or line, because wet work stacked in piles sticks together and breaks small hearts. One drying line protects a whole afternoon of effort.
Name. Write each maker name on the back of every piece as it finishes, because identical chains become mysteries within the hour. Names on backs settle every ownership question at once.
Remember that strong easy paper crafts for kids choices respect short attention spans, honest budgets and the drying time nobody can hurry. Finished pieces children carry away proudly matter far more than perfect edges.
Pace. Offer one project at a time instead of the whole list at once, because focus stays high when the next surprise waits its turn. Slow reveals keep excitement alive across the session.
Show. Hang or display finished work the same day, on a line, a door or the fridge, because makers work harder when an audience is promised. Fresh displays make children ask for craft day again.
FAQ
What age suits most of these projects?
Most projects suit ages four to ten with small adjustments, because younger children can cut, stick and print while older children fold, weave and build. Adult hands handle sharp cutting and hot steps at every age.
How long does one project take?
Plan on twenty to forty minutes for most projects, including drying time for paint and glue pieces. Folded and woven projects run longer, so save those for calm afternoons rather than short gaps.
What basic supplies cover most projects?
Colored paper, card, child safe scissors, glue sticks, washable paint, crayons and yarn cover nearly every project on the list. One small pack of pipe cleaners and a bag of stickers stretch the list even further.
How can teachers run these in a classroom?
Batch preparation does the heavy lifting, including pre cut shapes, sorted piles and one finished sample per table. Helpers at each table, a drying line and names written first keep thirty children moving calmly.
Can these crafts become gifts for family?
Nearly every project gives away beautifully, especially cards, bookmarks, paper flowers and masks. Adding the maker name and the date on the back turns a simple craft into a keepsake.
How do we keep craft time from becoming a mess?
Covered tables, small glue amounts, aprons and a scrap bin within reach contain most of the chaos honestly. Ending five minutes early for a group cleanup race keeps the last memory cheerful instead of scolding.
Conclusion
Good paper sessions grow from simple shapes, calm setup and projects matched to the hands at the table. Strong easy paper crafts for kids choices respect your supplies, your budget and your drying space, so every maker finishes proud instead of frustrated.
Pick three projects from this list, prepare them fully this week, and let the rest wait until the paper box and the calendar feel ready. Small finished pieces build confidence and keep spending calm and sensible.
Enjoy the proud faces that follow, and let one rainy afternoon remind everyone why making things by hand deserves a date in the calendar every week. One chain, one card and one kind gift at a time, a simple paper table becomes a tradition.