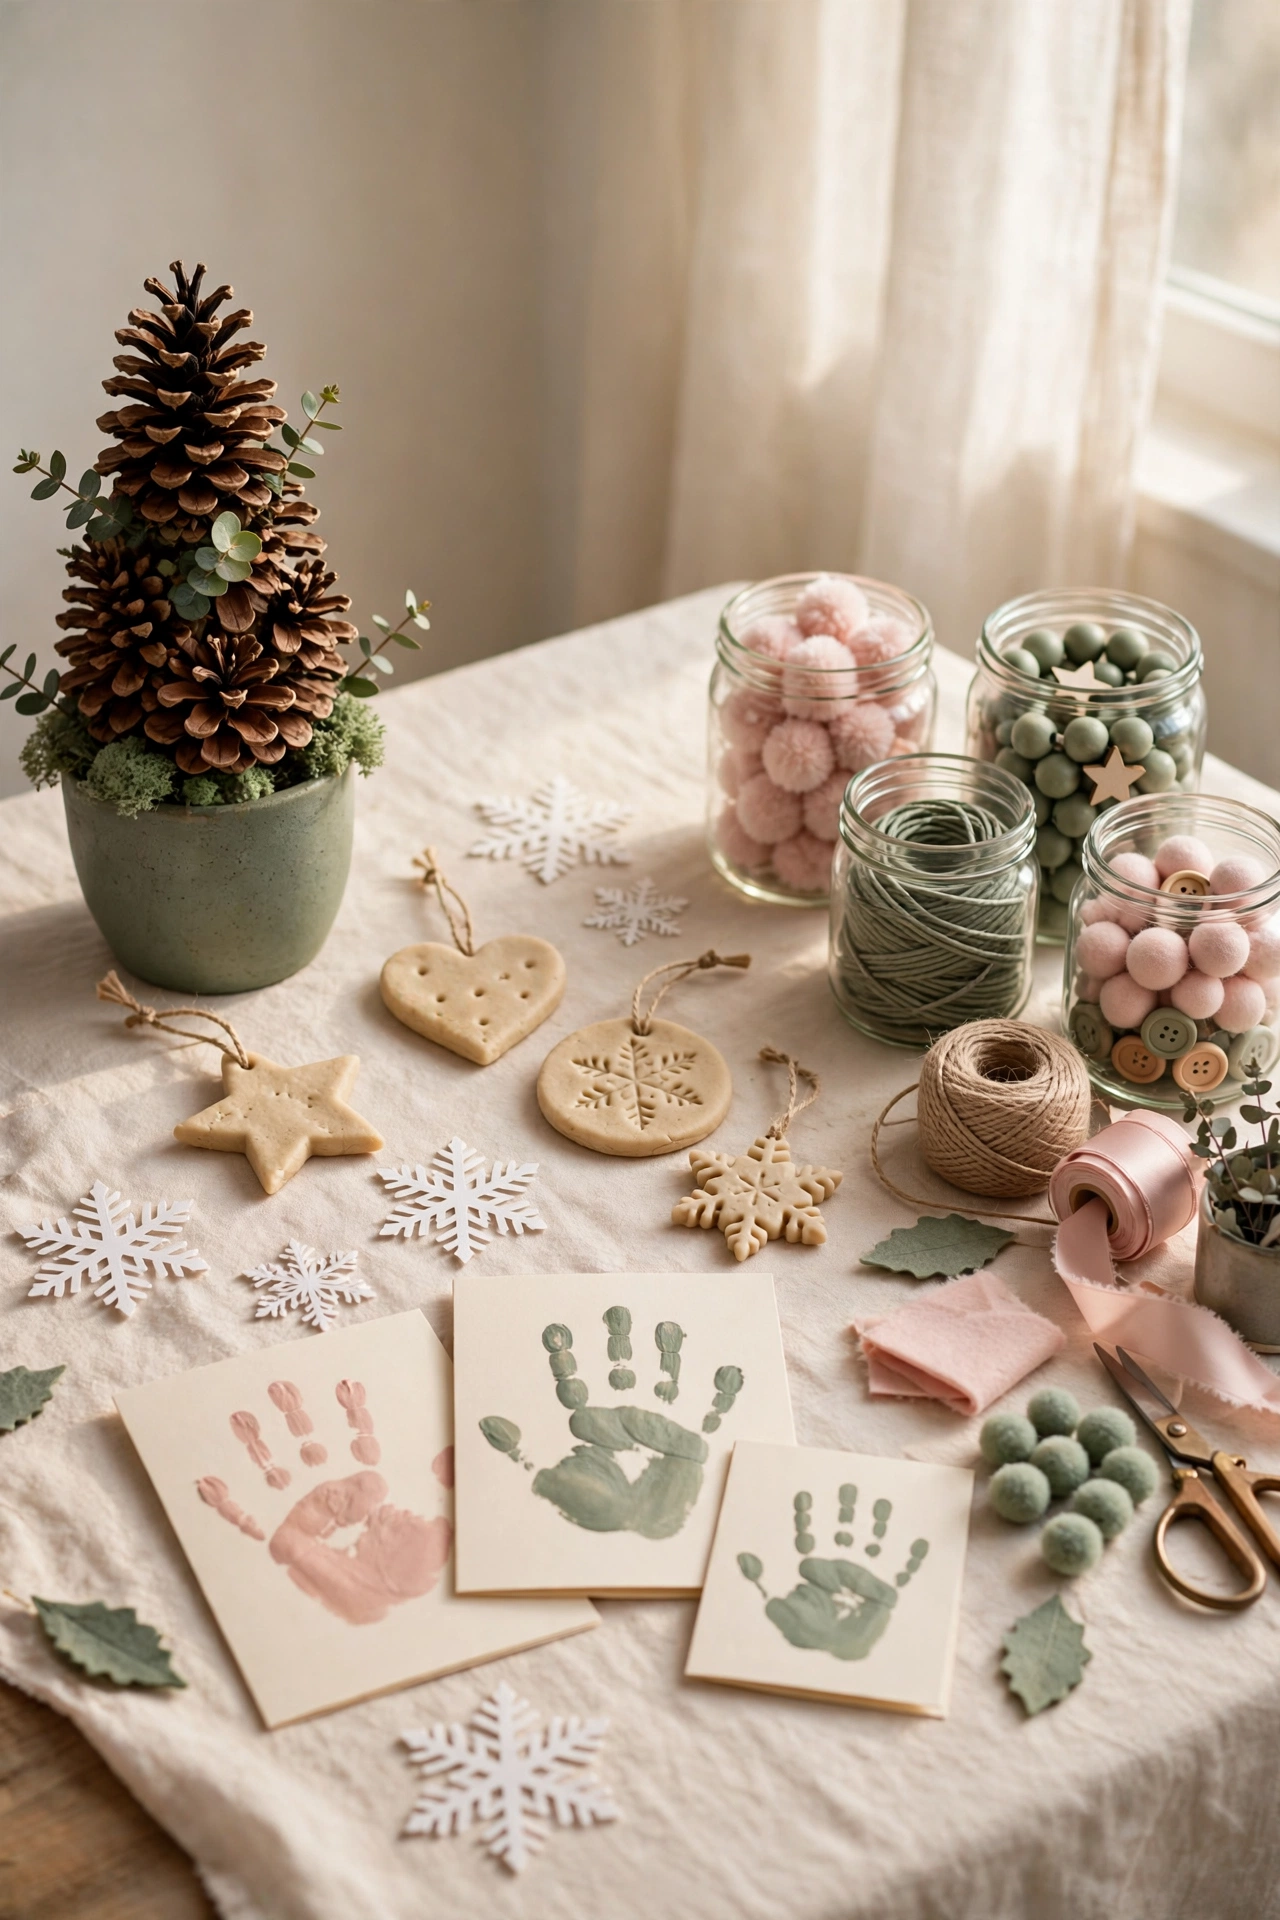
15 Easy Christmas Crafts for Kids and Adults
December craft time often begins with a beautiful plan and ends with glue on sleeves, glitter in the carpet, and one unfinished project drying on every surface. Parents picture calm children making perfect decorations, then real life arrives with short attention spans, missing scissors, and paint water knocked across the table within ten minutes.
Simple projects rescue the whole afternoon, because children care far more about finishing something than about following twelve complicated steps. Young crafters want to hold a result, show it to someone, and hang it up the same day. When a project fits small hands and short patience, the room stays cheerful and adults enjoy the session too.
Inside this guide you will find fifteen easy christmas crafts for kids and the adults who craft beside them, from dough ornaments and pinecone trees to snow globes in jam jars. Every idea comes with plain supplies, honest age guidance, one real example, and one mistake to skip. You will also find budget advice, mess control tips, and answers to common December questions.
What Christmas crafts can kids actually finish in one sitting?
Kids finish crafts that need few supplies, clear steps, and no long waits for glue or paint to dry between stages. Strong easy christmas crafts for kids share three habits: children start within minutes, see progress quickly, and hold a finished piece inside half an hour or so. Paper, dough, cones, cotton balls, and jars do most of the work.
Picture one December Saturday with four cousins aged three to nine gathered around a kitchen table while something good bakes nearby. You set out dough, cutters, and paint pens, and every child rolls, cuts, and decorates ornaments without waiting for special tools. Easy christmas crafts for kids shine on days like these, because success arrives before energy runs out.
Salt dough ornaments
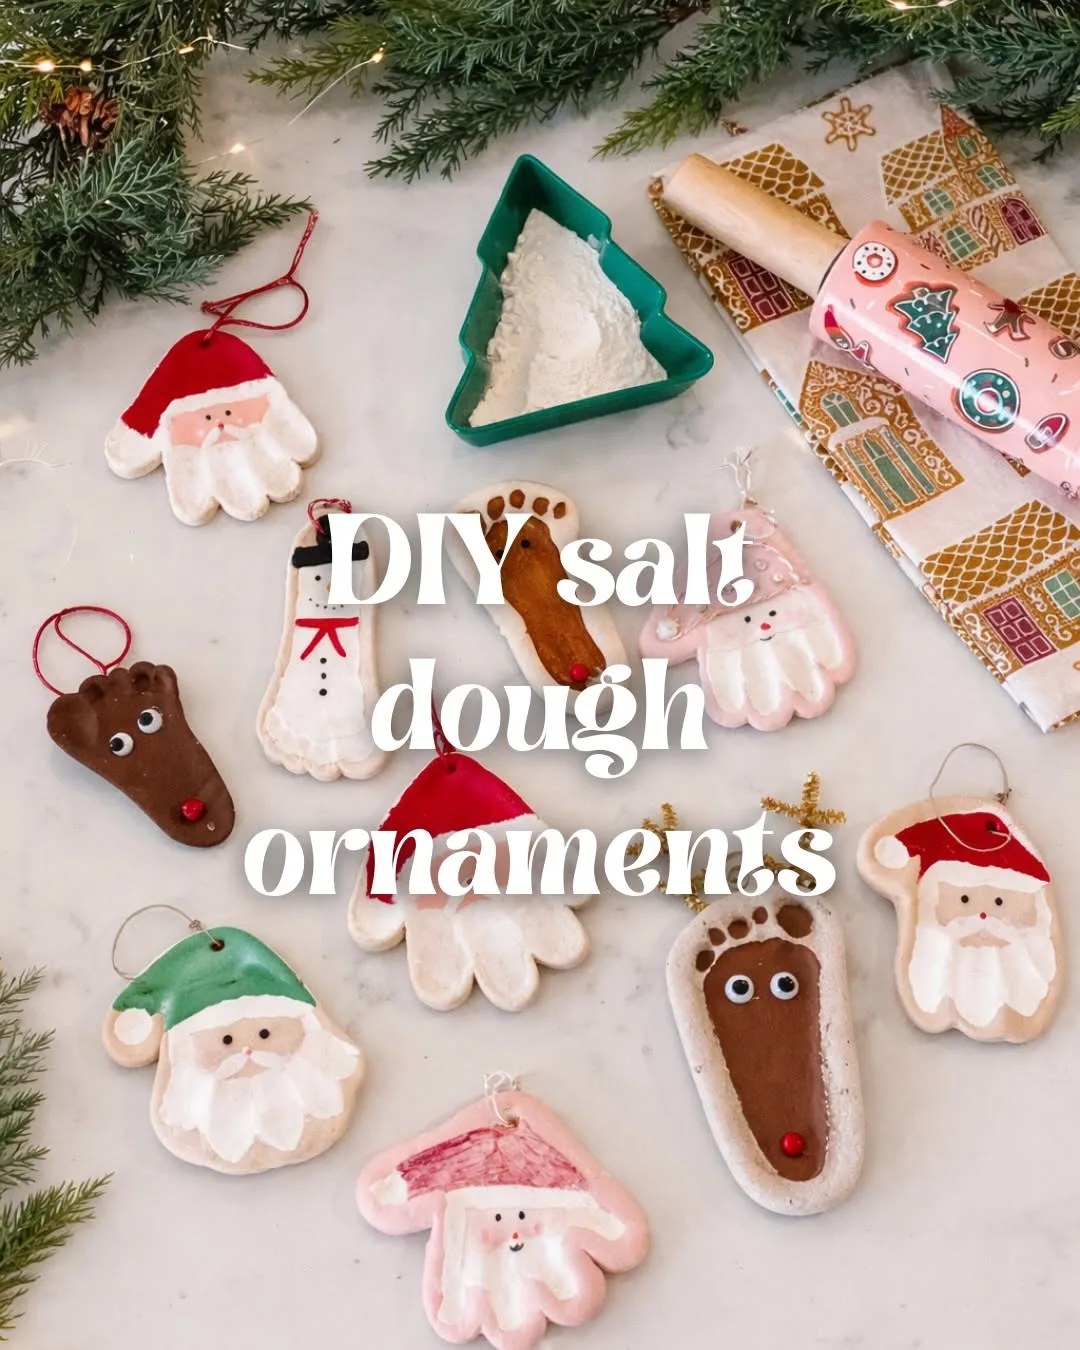
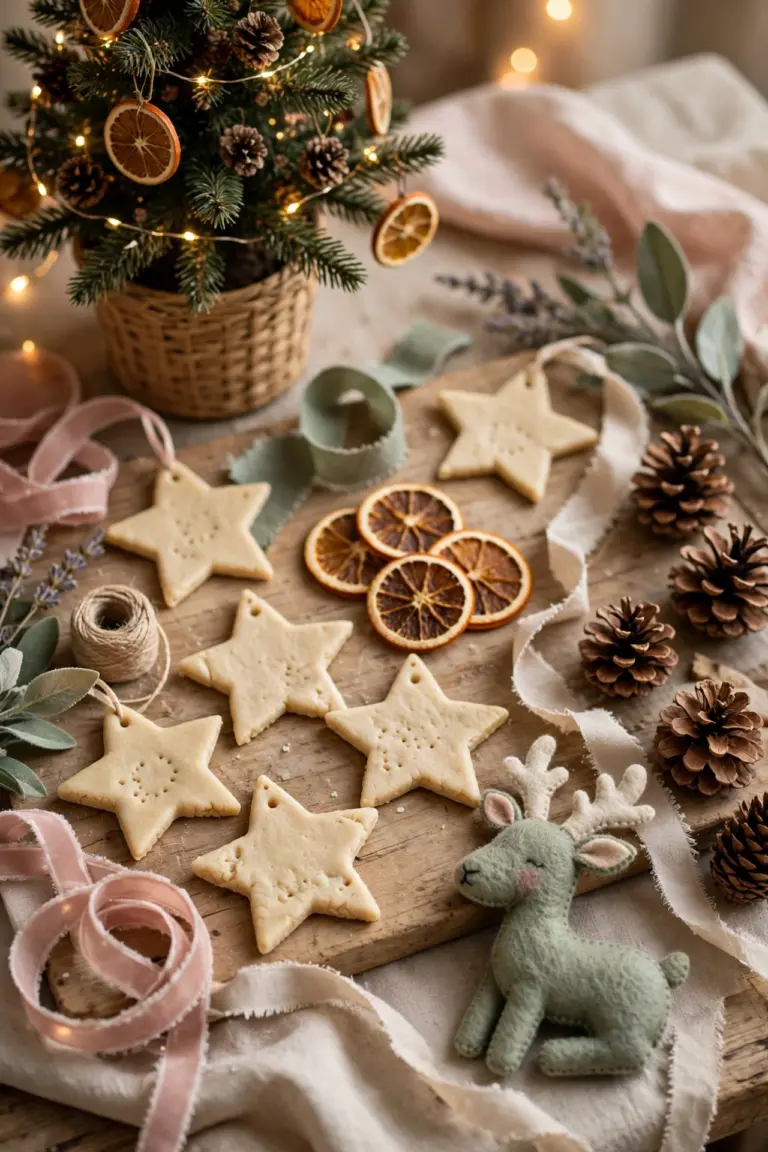
Salt dough ornaments turn flour, salt, and water into decorations children can hang on the tree for years. Dough feels friendly and familiar, almost like play, and thick pieces forgive wobbly cutting and uneven paint. Few easy christmas crafts for kids cost less per child or welcome beginners so kindly, because mistakes simply become part of the handmade charm.
Mix two cups of flour with one cup of fine salt and one cup of water, then knead until the dough feels smooth and firm. Roll the dough about as thick as your finger, cut shapes with cookie cutters, and poke one hole in each piece with a drinking straw. Bake pieces low and slow, or leave them to air dry for two days.
Children aged three and up can roll, cut, and paint with light help, while older children enjoy painting fine details and writing names or dates on the back. Dough sessions suit family afternoons, classroom parties, and grandparent visits equally well. Finished ornaments also make honest little gifts, because teachers and neighbors receive them warmly and store them easily.
Imagine a grandmother opening a box of dated ornaments and finding one from every year of a grandchild growing up. Common mistakes start with dough rolled too thin, which cracks in the oven or snaps during painting. Keep pieces thick, dry them fully, and let adults handle any clear varnish if you want the colors protected.
Paper plate Santa
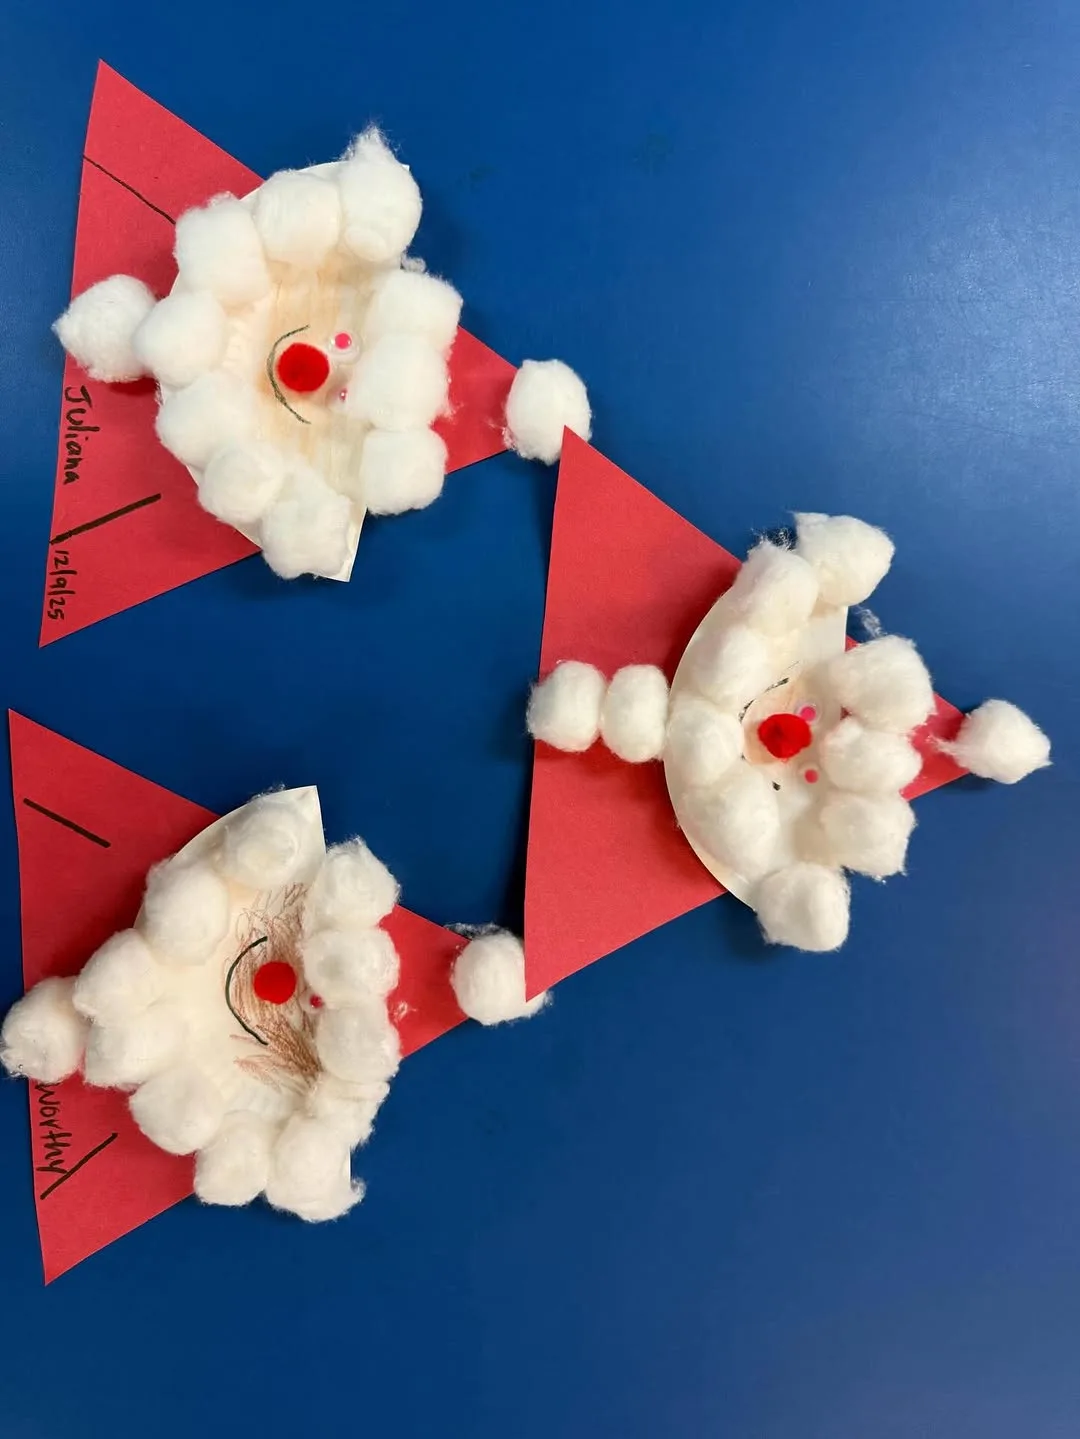
Paper plate Santa gives every child a big round canvas that turns into a friendly Santa face with a cotton ball beard and a red paper hat. Plates cost pennies, need no careful cutting from the child, and suit small hands that still struggle with small shapes. Finished Santas look cheerful lined up on walls, windows, and classroom boards.
Give each child one sturdy paper plate, red card or red paint for the hat, cotton balls, glue, and simple face pieces cut from paper. Children draw or stick on eyes and a pink nose first, then glue cotton balls around the lower half in rows for the beard. One triangle of red card across the top finishes the hat.
Preschool children aged two to five shine with this project, because every step uses big pieces and simple sticking. Teachers love it for December bulletin boards, and parents love it because the supply list already lives in most kitchens. Children with limited patience still finish, since a Santa looks complete with ten cotton balls or with forty.
Picture a classroom wall covered with Santas, every beard a different shape and every hat slightly crooked in the best way. Watery glue causes the classic failure here, because cotton balls slide down the plate and land in laps. Use thick school glue or glue dots, and press each ball down for a slow count of five.
Handprint reindeer cards
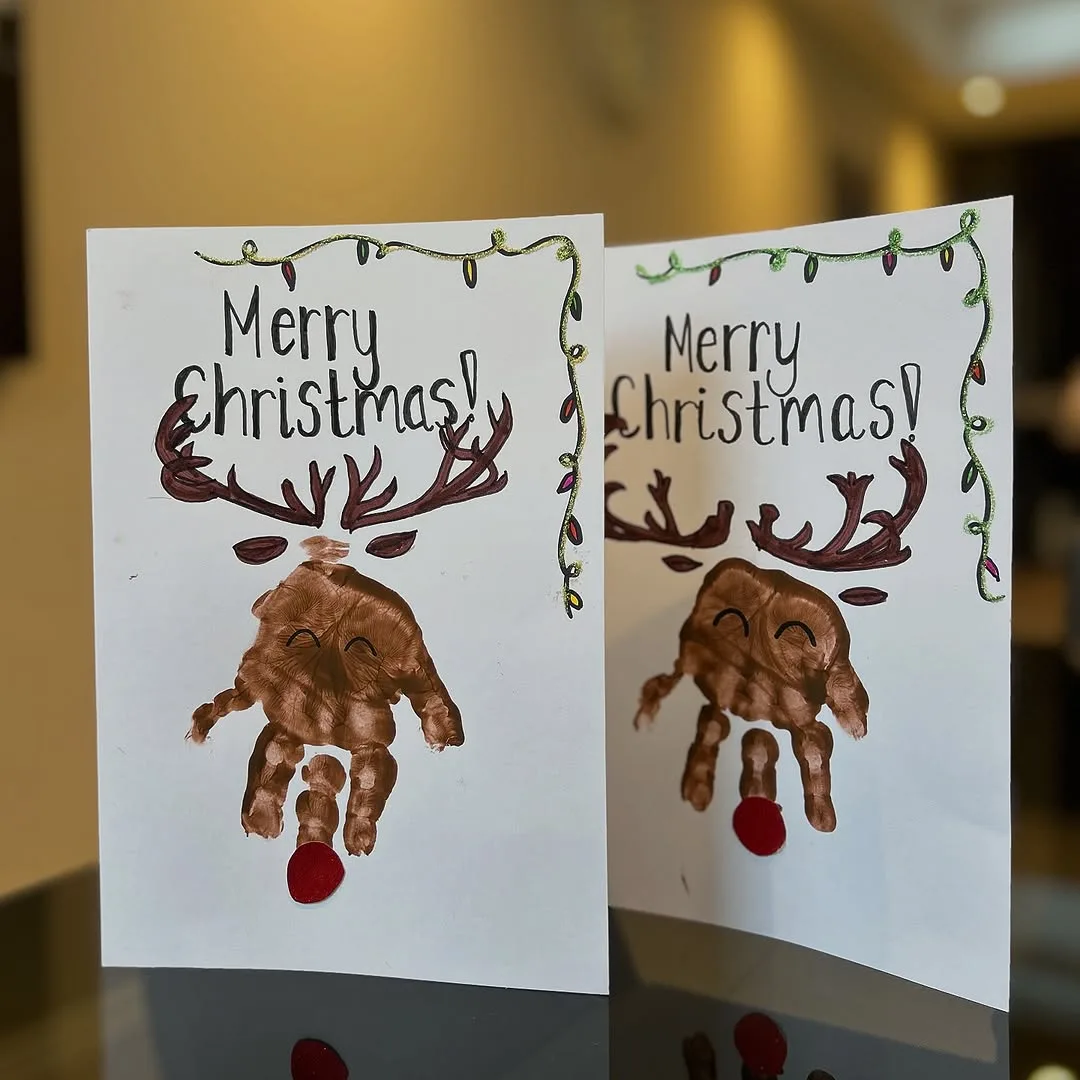
Handprint reindeer cards turn one painted handprint into a reindeer face, with fingers standing up as antlers and a red nose below the palm. Cards take minutes to print and carry a built in memory, because the size of the hand dates the card better than any written year. Grandparents treasure them long after shop bought cards get recycled.
Paint one hand with a thin layer of brown washable paint, then press it firmly onto the front of a folded card with fingers spread upward. Children add a red fingerprint or sticker for the nose, draw eyes with a marker, and write their message inside once the print dries. Keep baby wipes nearby for fast clean hands.
Babies and toddlers can join in with full adult help, while children aged four and up can print, decorate, and write nearly alone. Cards suit family card lists, teacher thank you notes, and parcels posted to relatives far away, because finished cards stay flat and light. One handprint session can produce a whole stack of personal cards in one afternoon.
Imagine grandparents comparing cards across the years and watching the little reindeer grow bigger every December. Too much paint causes the usual problem, because fingers blur into one brown blob and the antlers vanish. Spread paint thinly with a brush, practice one press on scrap paper first, and lift the hand straight up in one clean movement.
Popsicle stick snowflakes
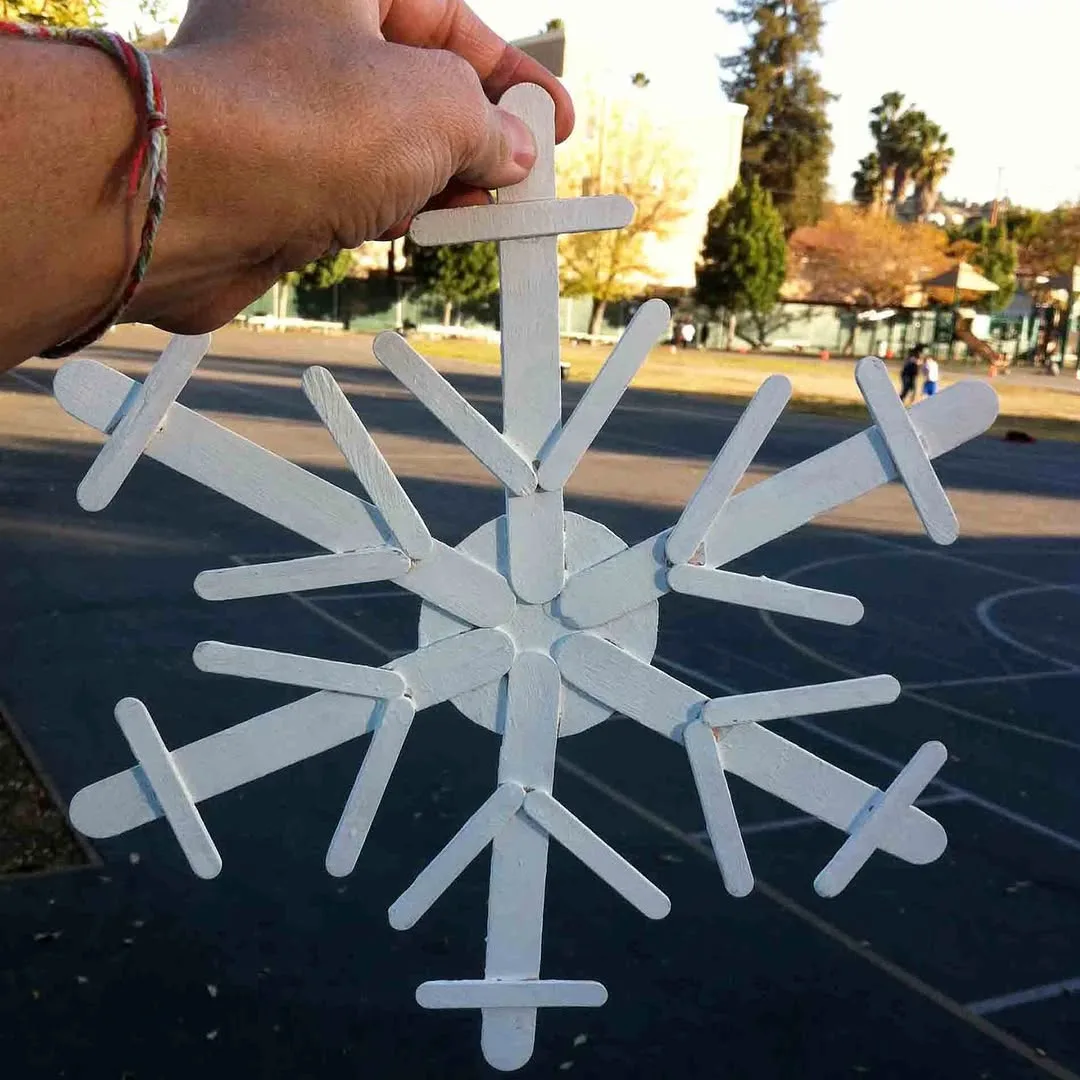
Popsicle stick snowflakes turn plain craft sticks into lacy stars that children paint white, silver, or icy blue and hang in windows. Sticks glue together in simple crosses and stars, so the shapes look impressive while the building stays easy. Glitter, buttons, or gems in the center add sparkle without adding steps, tools, or cost.
Glue four or six sticks across each other on wax paper or a tray, using wood glue for strength or a glue gun handled by an adult. Let the base dry completely, then paint every side and shake glitter over wet paint if you want shine. Tie thread through one point or glue a loop on the back for hanging.
Older children aged six and up enjoy designing their own stick patterns, stacking layers, and adding painted details with fine brushes. Younger children can still join when adults glue plain bases the night before and simply hand over paint and decorations. Windows, doors, and the bare wall above a sofa all gain winter charm from a row of finished flakes.
Picture a plain apartment window in December, suddenly dressed with nine white snowflakes that catch the morning light. Rushing causes the common failure, because paint applied before the glue sets warps the sticks and pulls joints apart. Build every base first, let glue dry during lunch, and treat painting as a separate relaxed stage later.
Paper chain countdown to Christmas
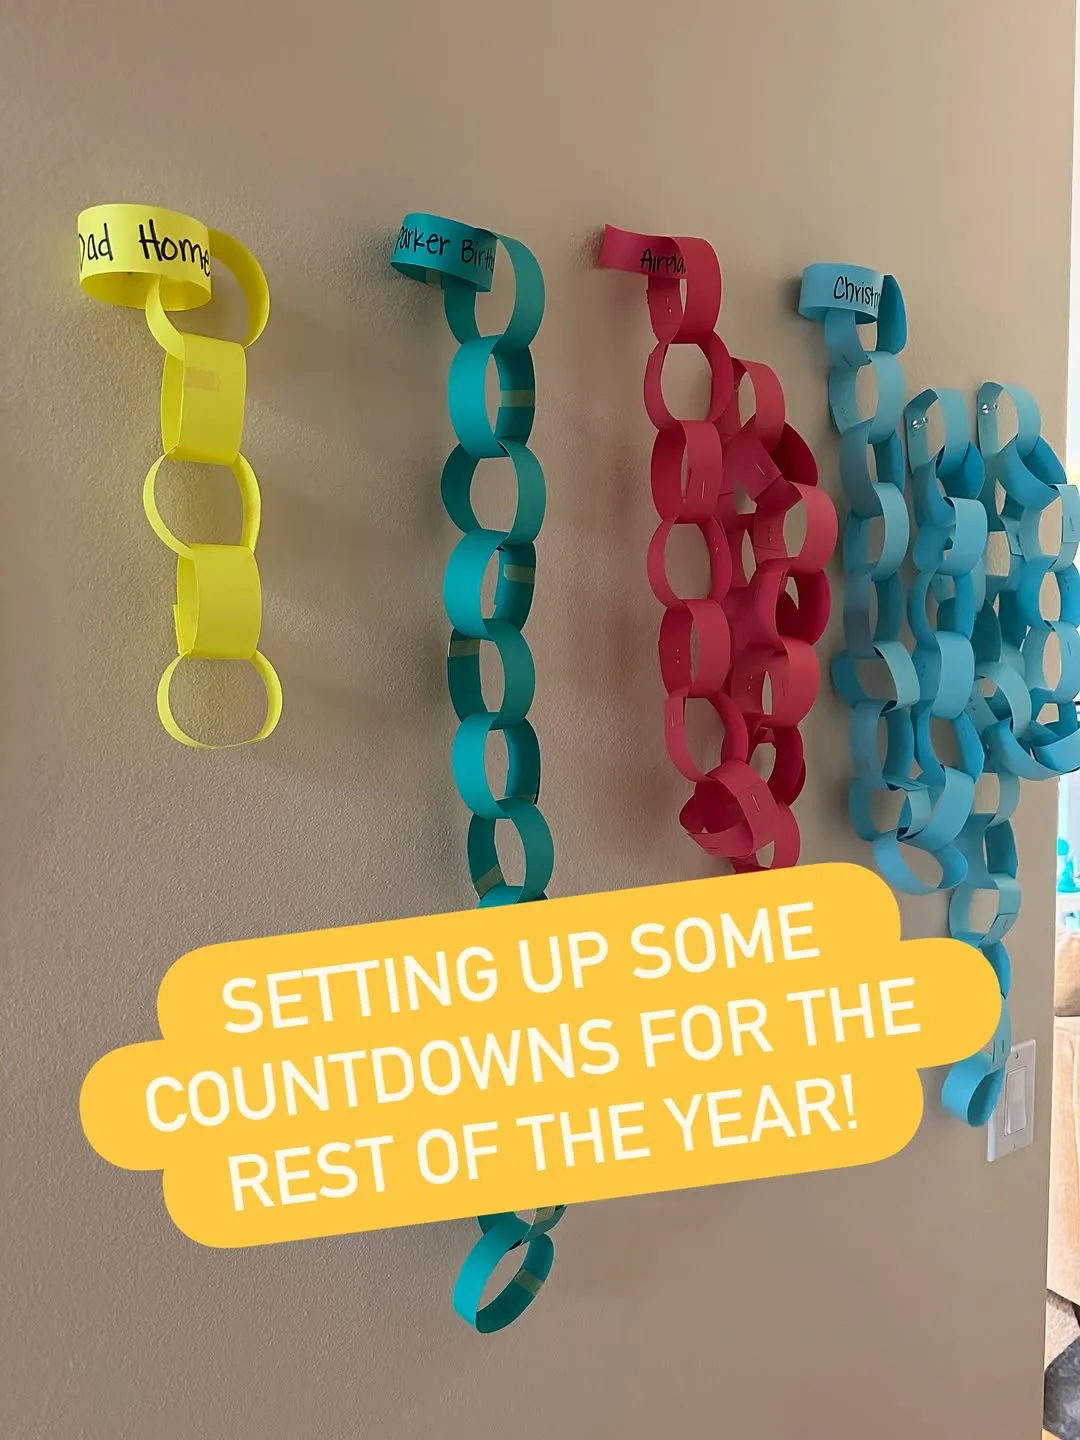
Paper chain countdown turns one simple garland into a daily December ritual, because children remove one link every morning until Christmas arrives. Cutting and gluing strips into rings needs no special skill, and the growing chain decorates the room while it counts. Families can write the date or a tiny kindness task inside each link.
Cut paper into strips about as wide as two fingers, using red, green, gold, or leftover wrapping paper and old cards. Children loop the first strip into a ring, glue or tape the ends, then thread each new strip through the last ring before closing it. Hang the finished chain across a doorway, along a shelf, or around the tree.
Toddlers and children up to about seven enjoy chains most, because the counting teaches days and numbers without feeling like a lesson. Countdown chains rank among the simplest easy christmas crafts for kids because cutting, looping, and gluing are the only skills anyone needs. Classrooms use them to count down to the holiday break with great excitement.
Imagine a child tearing off one link every morning before school, watching Christmas creep closer link by link. Counting errors cause the classic mistake, because a chain made with too many links leaves spare rings hanging sadly after the day arrives. Count the days together first, make exactly that many links, and keep one spare strip for repairs.
Cotton ball snowman pictures
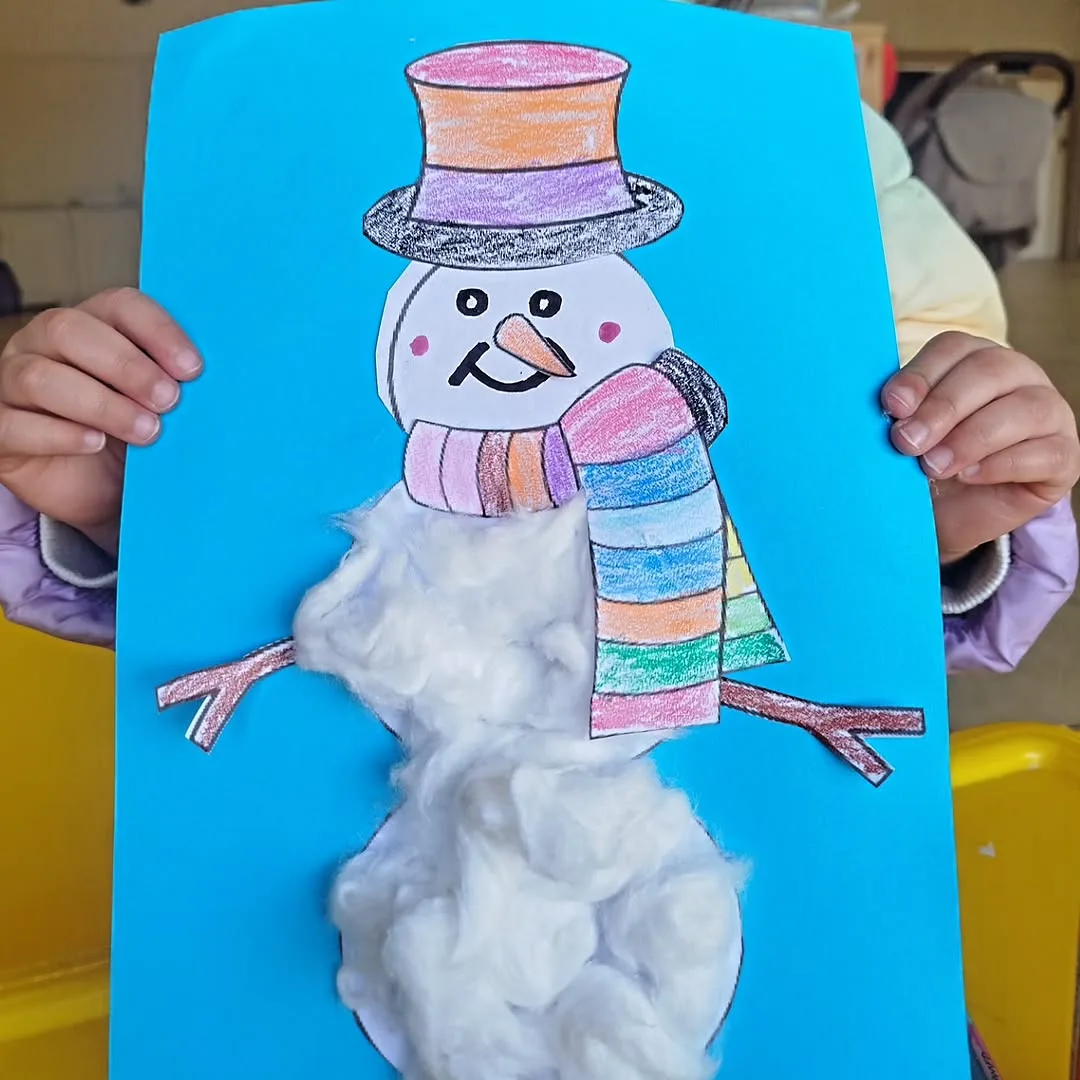
Cotton ball snowman pictures let small children build a round friendly snowman on blue card using nothing more than cotton balls and glue. Soft balls stick easily, need no cutting from the child, and forgive very uneven placing. Orange noses, black paper hats, and drawn scarves turn three white circles into a character with real personality.
Draw three circles in pencil on sturdy blue card as a guide, then let children dab glue inside one circle at a time and press cotton balls into place. Stretch each ball slightly before sticking to cover more ground with fewer balls. Add a triangle of orange paper for the nose, black dots for eyes and buttons, and brown paper strips for arms.
Little children aged two to five gain the most here, because the work feels like play and the pieces stay big and safe. Nurseries and toddler groups finish snowmen inside twenty minutes, even with snack breaks and songs in between. Pictures dry flat, travel home easily in bags, and brighten fridges and bedroom doors for the rest of winter.
Picture a fridge door filled with snowmen, each one wearing a different colored scarf drawn in wobbly marker lines. Floods of glue cause the main problem, because soaked cotton turns grey, flat, and heavy enough to slide. Pour glue into a bottle cap, let children dip one ball at a time, and praise full fluffy coverage over speed.
Pinecone Christmas trees
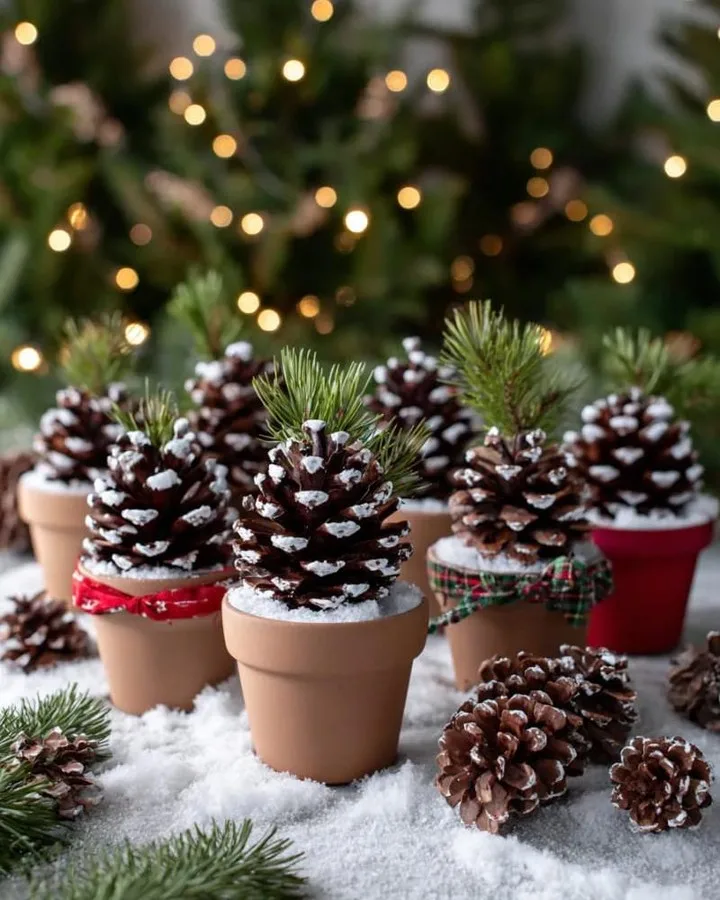
Pinecone Christmas trees turn cones gathered outdoors or bought in a bag into tiny trees that stand on desks, shelves, and dinner tables. Nature supplies the hard part, because every dry cone already grows in perfect tree layers. Pinecone trees belong on any list of easy christmas crafts for kids for exactly that reason: paint and dots do the rest.
Collect dry open cones, brush off dirt and loose seeds, and let them dry indoors for a day if the weather felt damp. Children paint the cone green, dab white on the edges for snow, and glue on tiny pompoms, beads, or dots of paint as ornaments. Stand each tree in a cork, a small pot, or a ring of clay, then add one star on top.
School aged children aged four and up manage painting and gluing happily, while younger ones enjoy choosing colors and placing pompoms with help. Trees suit nature lovers, scout and club groups, and families who want decorations with a walk outdoors built in. Finished trees also work as place markers at Christmas dinner, with one small name card leaning against each pot.
Imagine a dinner table where every guest finds a tiny painted tree holding their name, made by the youngest person at the party. Fresh damp cones cause the common failure, because they close up tight, leak sap, and refuse paint. Dry cones fully before craft day, and let adults handle strong glue when fixing heavier bases.
Fingerprint light cards
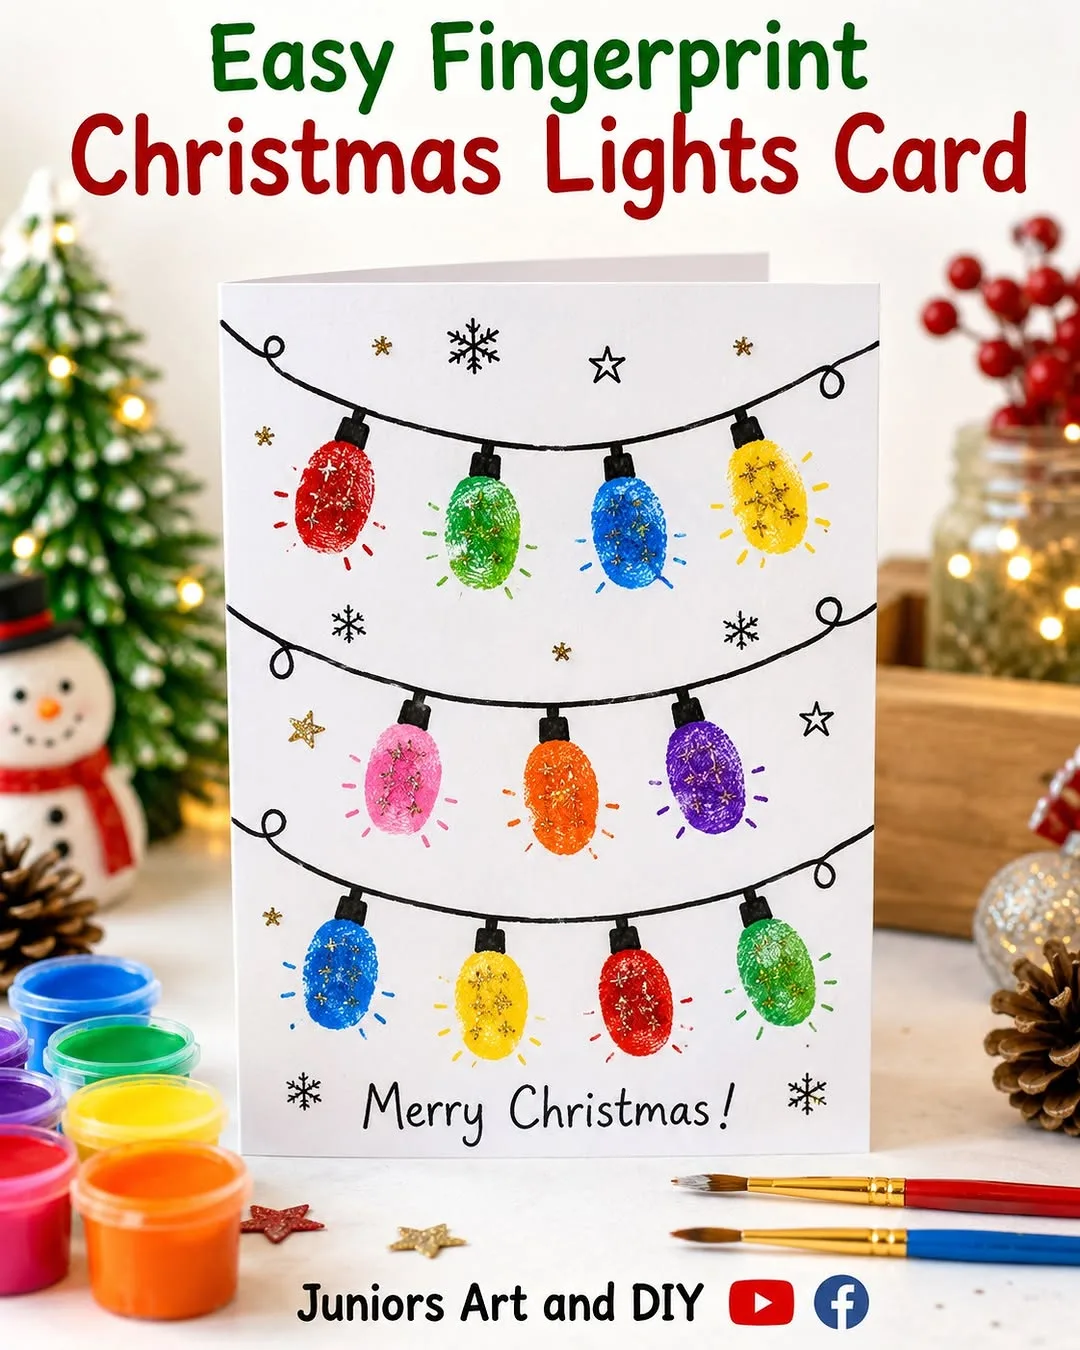
Fingerprint light cards turn painted fingertips into strings of glowing bulbs across the front of a Christmas card. One curvy line becomes the wire, and every fingerprint along it becomes a bulb in whatever color the child chooses. Cards look polished and modern while asking almost nothing from small artists beyond one careful press at a time.
Draw one wavy line across a blank card with a fine black marker, leaving gaps where bulbs will sit. Press fingertips into washable paint pads or shallow dishes of paint, then print one bulb below the line at each gap. Draw a tiny cap where each bulb meets the wire, and write names and dates inside for the memory.
Toddlers can print bulbs with an adult guiding the card, while older children enjoy neat rows, patterns, and rainbow color orders. Cards suit big family lists because one session produces many finished pieces quickly, and every card still feels personal. Teens sometimes join in too, adding tiny painted details and jokes inside for grandparents and cousins.
Picture twenty finished cards drying in a row, each one carrying a different set of fingerprints and color choices. Runny paint causes the classic smudge problem, because wet bulbs blur into the wire and into each other. Dab extra paint off on scrap paper, press once with confidence, and let each card dry flat before stacking.
Cardboard tube reindeer
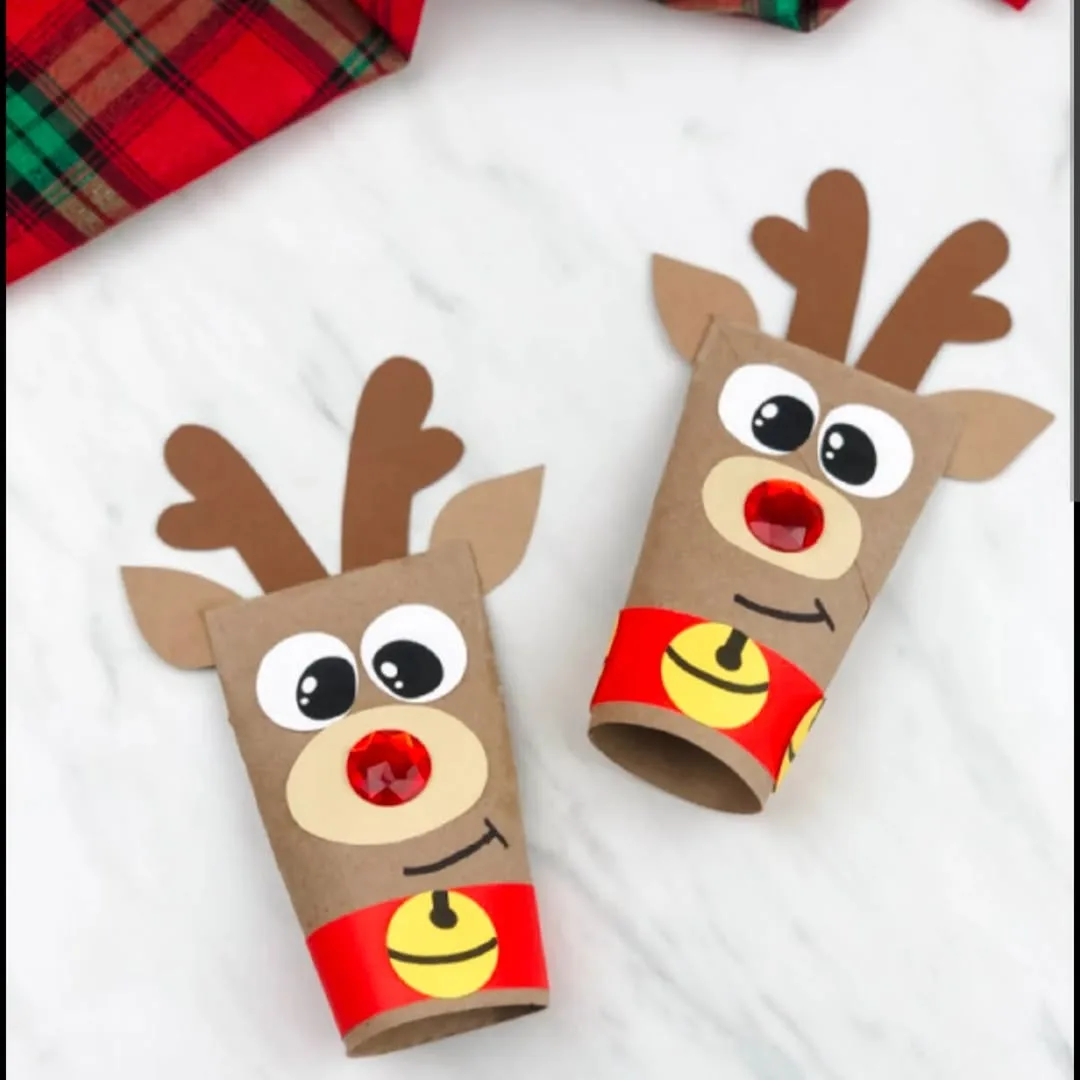
Cardboard tube reindeer turn empty toilet roll tubes into a herd of reindeer with pipe cleaner antlers and bright red noses. Tubes stand up on their own, cost nothing, and give small hands a sturdy body that never tears during decorating. One reindeer takes minutes, so children happily make whole teams to pull an imaginary sleigh.
Save tubes for a week or two before craft day, because one reindeer per child disappears fast once siblings want a herd. Children paint tubes brown or wrap them in brown paper, then stick on paper eyes or googly eyes and one red pompom nose. Twist pipe cleaners or small twigs into antlers and tape or glue them inside the top.
Children aged four to eight hit the sweet spot here, managing paint, sticking, and antler twisting with little help. Reindeer suit party craft stations, classroom afternoons, and rainy weekends when energy runs high indoors. Finished herds line up beautifully along mantels, window sills, and bookshelves, especially with a tiny cardboard sleigh placed at the front.
Imagine nine brown reindeer in a row on the mantel, each nose a different shade of red and each set of antlers proudly uneven. Heavy antlers cause the usual flop, because tall pipe cleaners bend the tube rim and slide out. Push antlers down inside the tube, tape them flat against the inner wall, and keep designs light.
Paper bag gingerbread houses
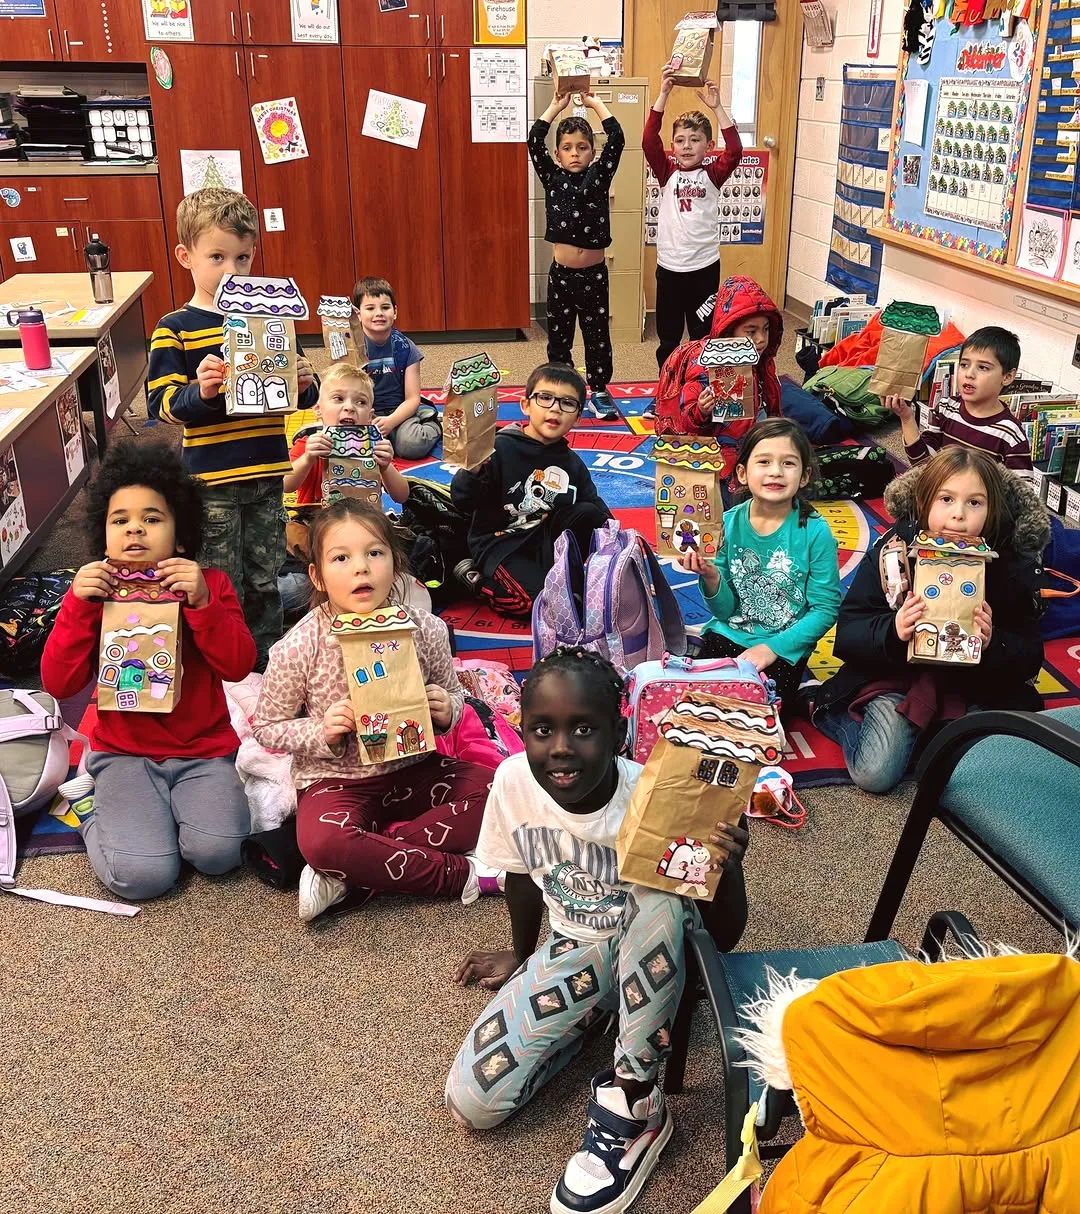
Paper bag gingerbread houses turn plain lunch bags into a whole village of houses that children decorate with paint pens and stickers. Bags stand up once stuffed, need no baking, and never crumble like real cookie walls. Every child decorates at their own pace, and the finished village glows with personality along a shelf or windowsill.
Stuff each bag loosely with crumpled newspaper or scrap paper, fold the top down into a roof shape, and tape or staple it shut. Children draw doors, windows, and icing lines with white paint pens or chalk markers, then glue on paper shapes, sequins, or stickers for candy details. Names on the doors turn the village into family homes.
Groups gain the most from this project, because bags cost almost nothing and one adult can prepare twenty houses quickly. Classrooms, parties, and club sessions all run smoothly when houses arrive stuffed and ready for decorating. Younger children decorate happily with big stickers, while older ones draw careful brick lines, wreaths, and snowy roof tiles.
Picture a classroom windowsill village where every house carries a family name and one crooked smiling door. Overstuffing causes the classic split, because tight bags tear at the seams the moment small hands squeeze them during decorating. Fill bags softly, fold the roof down firmly, and let children press decorations rather than whole houses.
Button tree greeting cards
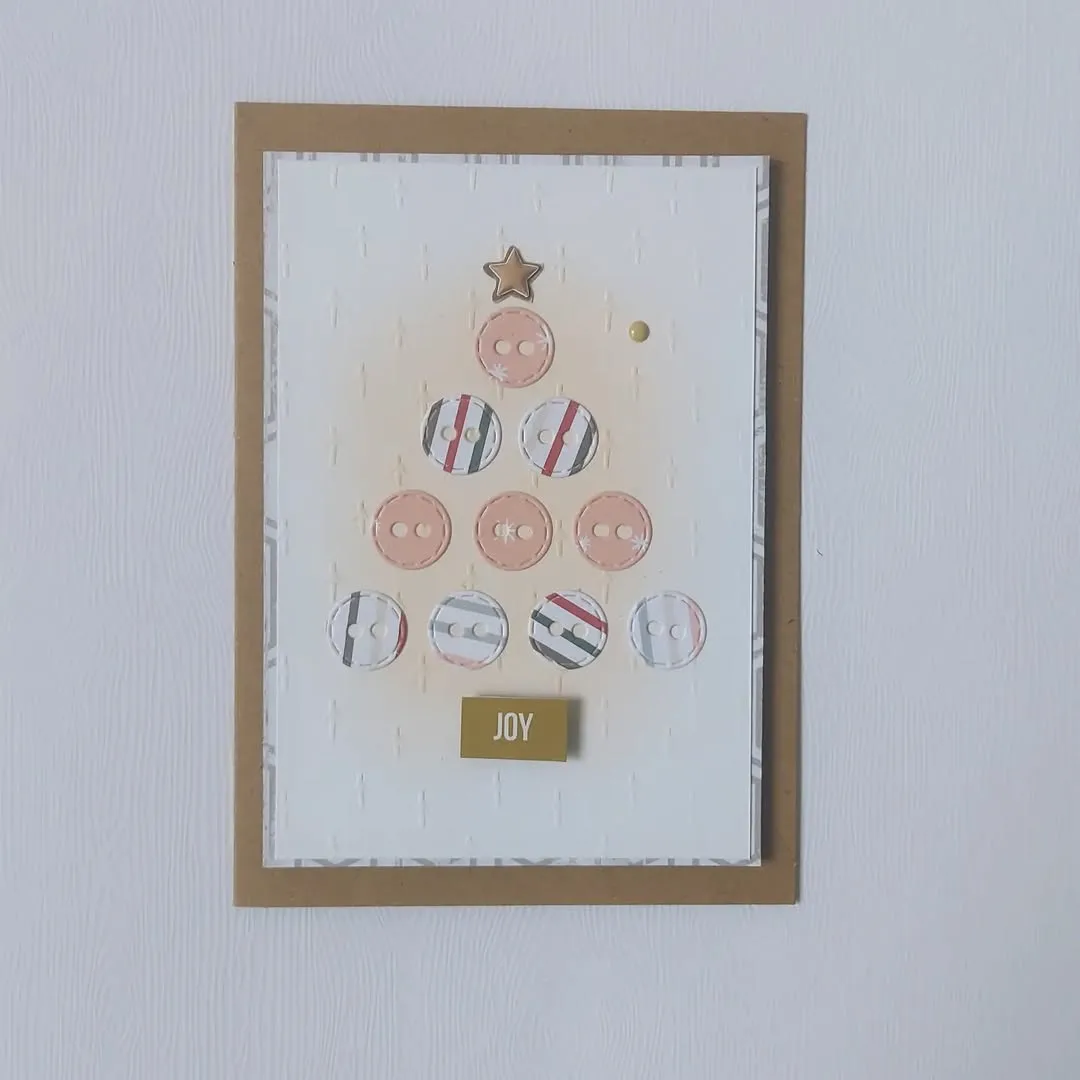
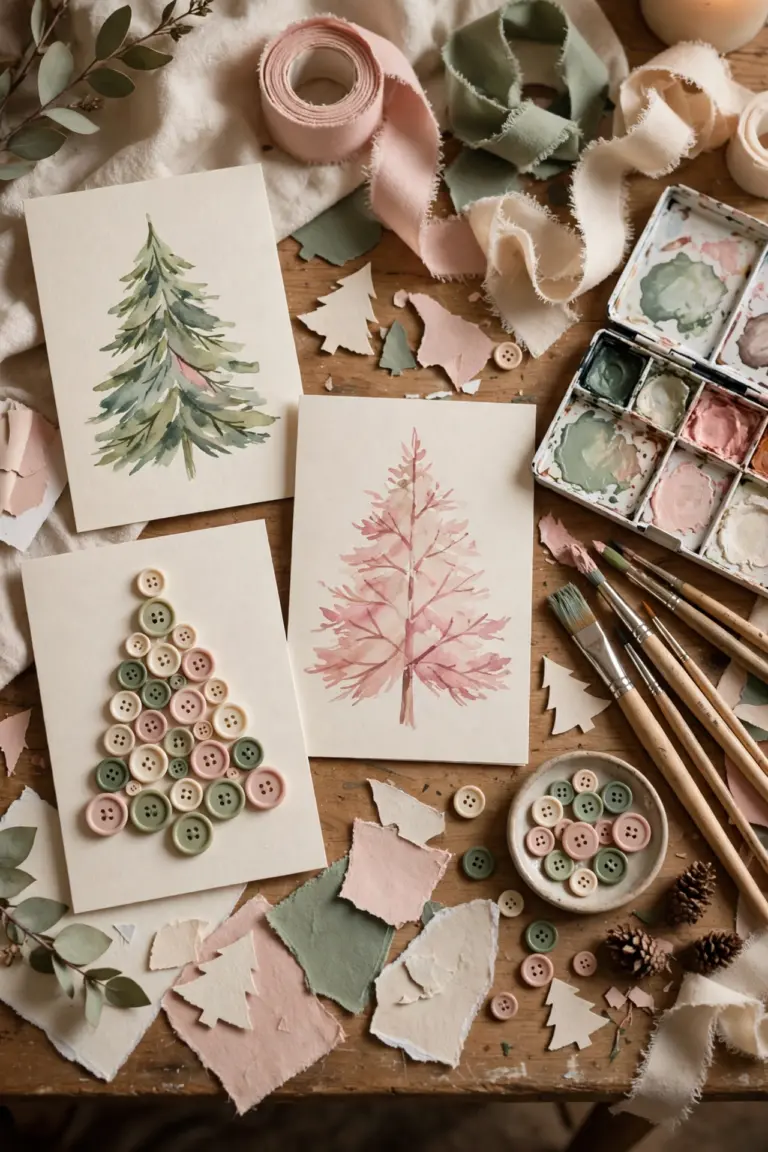
Button tree greeting cards arrange spare buttons into a green triangle tree on the front of a card, finished with a drawn trunk and one star. Sewing boxes everywhere hold odd buttons waiting for a purpose, and this project gives them a proud one. Cards feel textured and special, almost like tiny framed pictures the receiver can keep.
Sort buttons by color first, keeping greens together and saving one red or gold button for the top or the tree base. Children arrange buttons into a triangle without glue first, adjusting until the shape pleases them, then fix each button with glue dots or tacky glue. Draw or glue a small brown trunk below and one star above.
Grandparents and family friends receive these cards with real delight, because the texture invites touch and the card feels handmade in every detail. Older children and adults enjoy the arranging stage as much as young children do. Small buttons suit careful hands only, so give children under three big paper circles instead of real buttons for safety.
Imagine a grandmother recognizing buttons from her own sewing tin, now shining as trees on cards from her grandchildren. Weak glue causes the sad failure here, because buttons slide slowly down the card overnight and land in the envelope. Use glue dots or tacky glue, lay cards flat until fully dry, and press each button down firmly.
Beaded pipe cleaner candy canes
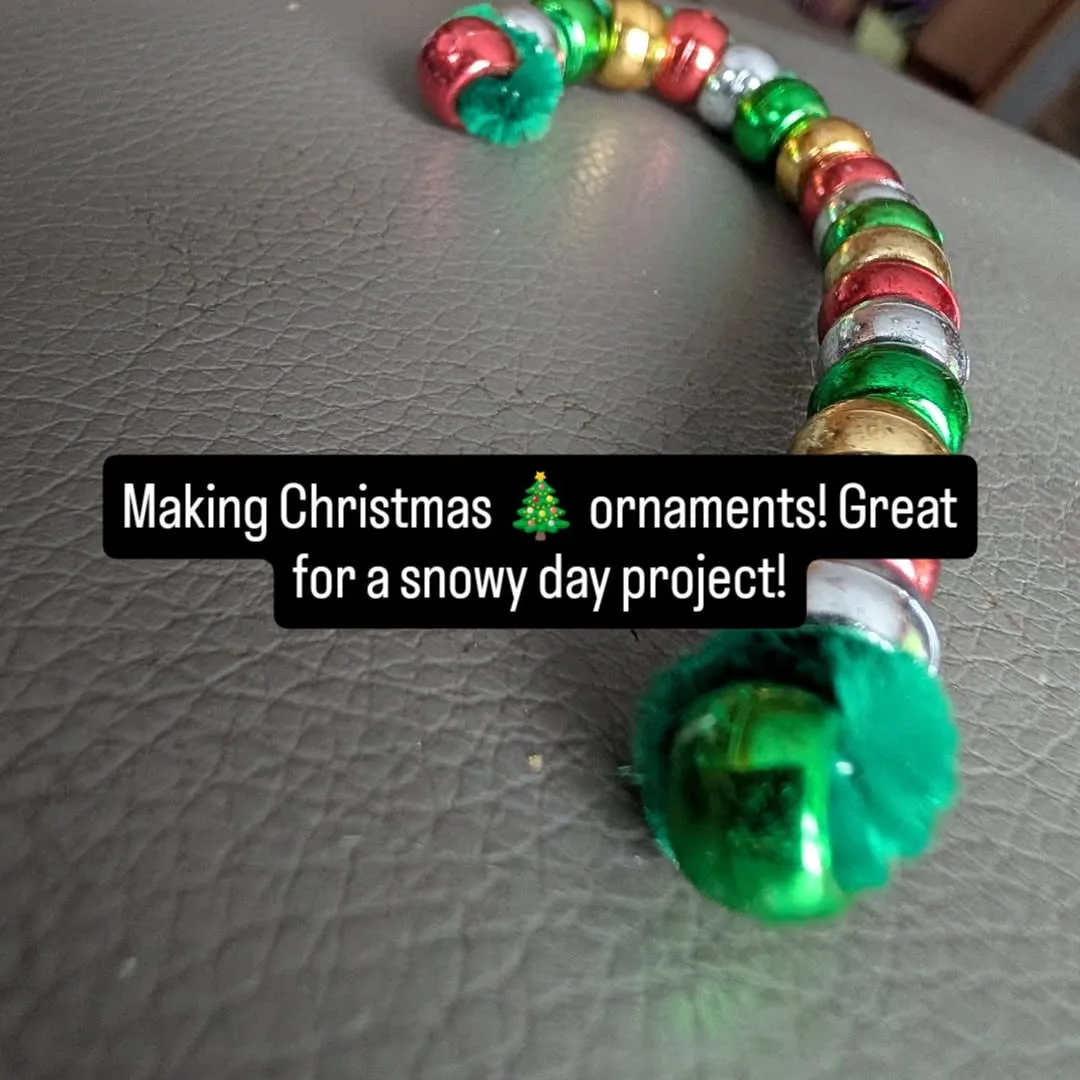
Beaded pipe cleaner candy canes thread red and white beads onto a pipe cleaner, then bend the top into the famous cane hook. No glue, no paint, and almost no mess make this project welcome anywhere, from kitchen tables to car journeys. Finished canes hang on the tree, tie onto gifts, or decorate place settings at dinner.
Thread pony beads in a simple pattern, red then white then red again, until the pipe cleaner looks nearly full. Twist or fold the bottom tip first so beads cannot escape while small fingers work, and bend the top third into a hook at the end. Count roughly twenty beads per cane for a light and tidy result.
Quiet moments suit candy canes best, including waiting rooms, church halls, long drives, and the calm hour before visitors arrive. Children aged four and up manage threading alone, and the repeating pattern builds patience and finger strength without feeling like practice. Hosts also love canes as party favors, because guests hang them at home and remember the day.
Picture every gift parcel under one tree tied with twine and finished with a handmade cane instead of a store bought bow. Loose ends cause the only real failure, because one forgotten open tip lets every bead slide off in a cheerful rattle. Bend both ends before you begin and again at the finish, and store spare beads in a lidded pot.
Tissue paper wreaths on paper plates
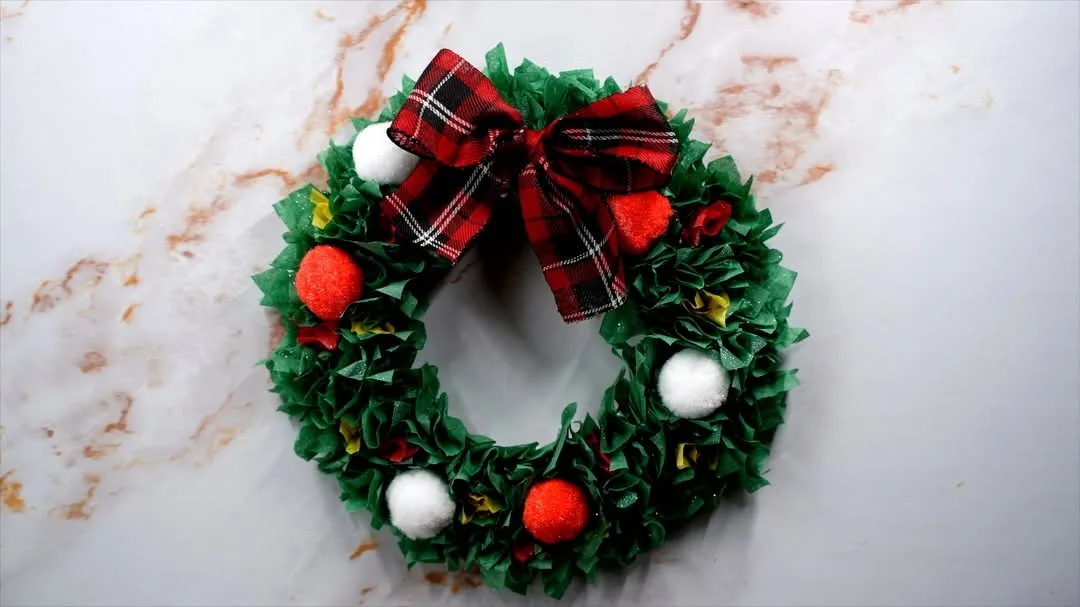
Tissue paper wreaths on paper plates build a full green wreath from a plate ring and dozens of scrunched tissue squares. Plates give every child a perfect circle to follow, so even very young crafters finish with a round and handsome result. Red dots for berries and one ribbon bow at the bottom complete the classic door wreath look.
Cut the center from each plate before children start, leaving a sturdy ring, and cut tissue into small squares about the size of a thumb. Children scrunch one square at a time, dip the base in glue, and press it onto the ring, working around the circle until no plate shows. Glue red pompoms or paper circles in small groups as berries, then tie ribbon at the bottom.
Everyone from age three upward can scrunch and stick, which makes wreaths perfect for mixed age groups at parties and family gatherings. Finished wreaths hang on bedroom doors, classroom doors, and front doors with equal pride. Nursing home residents and teachers receive them happily too, because the wreaths stay light, cheerful, and easy to hang anywhere.
Imagine a corridor of classroom doors, every door wearing a green wreath and every wreath slightly different in berries and bow. Giant tissue pieces cause the lumpy failure, because big scrunches leave gaps and swallow the glue budget fast. Keep squares small, pack them close together, and let children fill gaps with single tiny scrunches at the end.
Decorate your own felt stocking
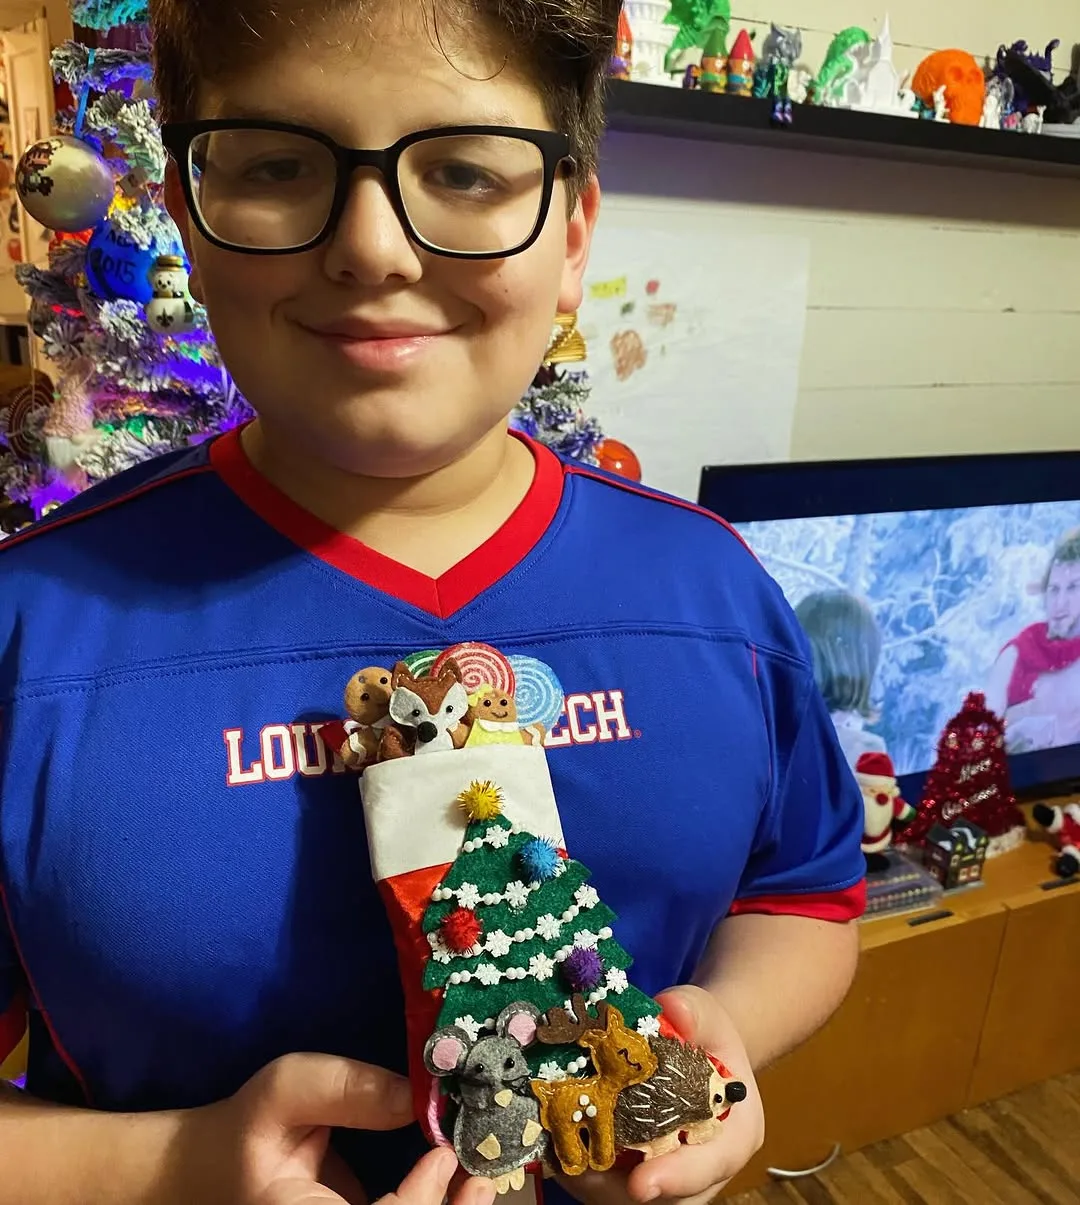
Decorate your own felt stocking gives every child a plain felt stocking to cover with shapes, sequins, paint, and their own name. Plain stockings cost little at craft stores, and felt accepts glue kindly without curling or tearing. Children take real ownership of a stocking they designed, and families hang the same ones proudly year after year.
Buy plain felt stockings in red, green, or cream, or trace a stocking shape onto big felt sheets and let an adult cut and glue two layers together. Set out felt shapes, sequins, fabric paint, ribbon scraps, and paint pens for names. Children sketch a simple plan first, choosing a tree, a star, a snowman, or their initial as the main design.
Families build a tradition here, because each child decorates a personal stocking and hangs it in the same row every December. Parties work well too, since guests decorate stockings and carry them home as both activity and gift in one. Grandparents enjoy decorating alongside grandchildren, often adding careful stitches or vintage buttons from their own boxes.
Picture one mantel holding five stockings, each styled completely differently and each child able to spot their own from across the room. Heavy decorations cause the common drop, because thick gems and layered felt pull away from soft stocking felt overnight. Use fabric glue, keep heavy pieces near the cuff, and lay stockings flat until morning.
Simple snow globes in jam jars
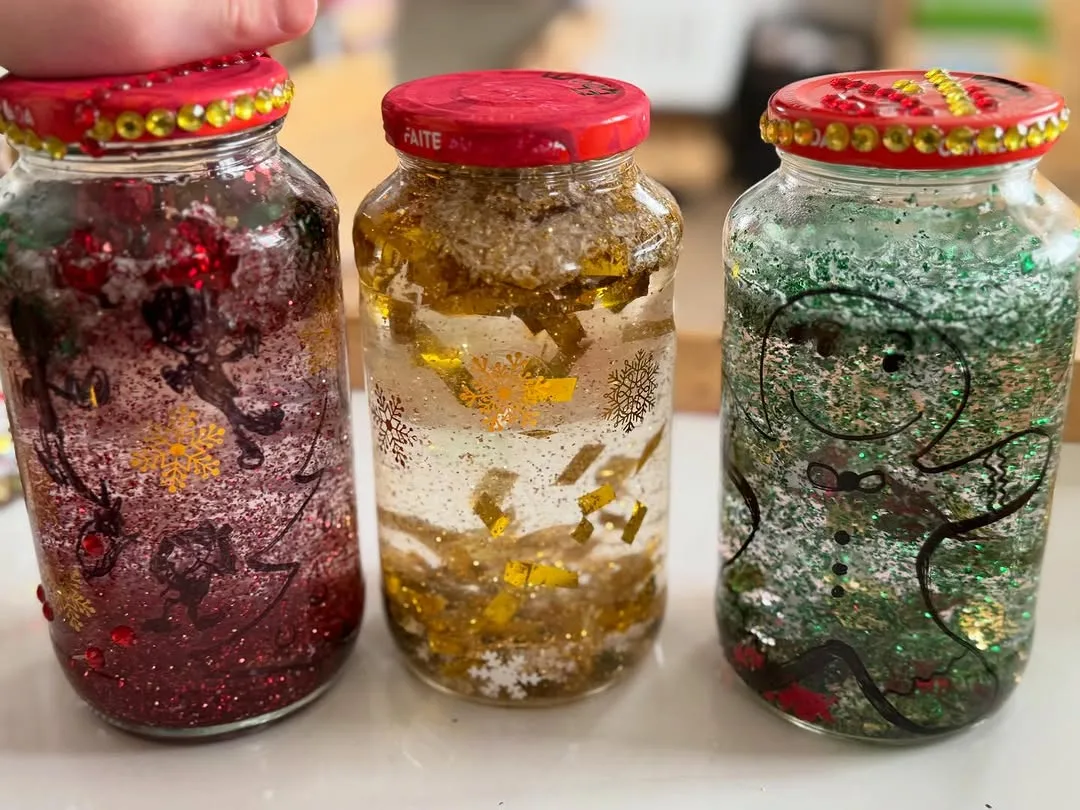
Simple snow globes in jam jars seal a tiny winter scene inside water and glitter, ready to shake into a snowstorm. Snow globes close our list of easy christmas crafts for kids because the result feels like real magic while the work stays short and clear. Children choose the figure, choose the glitter, and claim the finished globe as treasure.
Glue one small plastic figure or bottle brush tree to the inside of the jar lid with strong waterproof glue, handled by an adult, and let it dry fully. Fill the jar almost to the top with water, stir in glitter and one drop of glycerin if you have it, then screw the lid down tightly. Test the seal over the sink before shaking.
Older children aged seven and up can build globes almost alone, needing adults only for the strong glue and final seal check. Younger children still join by choosing figures, colors, and glitter while an adult assembles their globe. Teachers, neighbors, and family friends receive globes as gifts that feel far more expensive than the jar and glitter cost.
Imagine a teacher desk holding one small globe with a tiny tree inside, shaken gently by every child who walks past. Wet glue causes the dreaded leak, because a lid fixed too soon loosens in the water and clouds the whole scene. Dry the figure overnight, seal the rim well, and do the first shakes over a tray.
Common Mistakes to Avoid During Christmas Craft Time
Most easy christmas crafts for kids fail before anyone opens the glue, because adults choose the project for the photograph instead of for the child standing at the table. Long step lists, tiny parts, and hours of drying test patience that young children simply do not own yet. When adults end up finishing every piece, children learn that crafting belongs to grown ups.
Buying every supply brand new and buying too much at once wastes money and storage space in equal measure. Craft shops happily sell glitter glue, special cutters, and themed kits for projects that plain paper handles better. Test one idea with supplies already at home first, because children often prefer the simplest version and your box stays lean.
Rushing sessions into tired moments ruins more craft afternoons than any lack of skill, because hungry children before dinner cannot focus on fiddly steps. Comparing finished pieces around the table causes quiet damage too, since one child always decides their work looks worst. Protect the mood instead: craft after food, praise effort loudly, and display every piece somewhere visible.
Budget Friendly Ways to Stock a Christmas Craft Box
Stock your Christmas craft box from the kitchen, the recycling, and the garden before you spend anything at all. Flour and salt become dough, tubes become reindeer, saved jars become snow globes, and gathered cones become trees. One honest look through drawers and boxes usually fills half the supply list for the crafts in this guide.
Buy only the true basics in shared sizes: card, paper plates, glue, washable paint, tissue paper, cotton balls, and pipe cleaners. Smart buying keeps easy christmas crafts for kids cheap through the whole season, because one pack of plates serves Santas, wreaths, and snowmen alike. January sales then restock your box at half price for next December.
Save scraps all year in one labeled box and the budget almost runs itself by December. Ribbon ends, wrapping paper offcuts, spare buttons, clean jars, and leftover felt all become free supplies with a future. Rotate what you own, share packs between siblings and friends, and let one box be the limit so craft clutter never takes over a cupboard.
Christmas Craft Tips That Keep Mess Under Control
Cover the table before anyone sits down. One old sheet, a plastic cloth, or opened newspaper turns cleanup into a two minute job instead of a long scrubbing session after the fun. Shake the whole cover outside at the end and even the glitter mostly leaves with it.
Dress children in play clothes or aprons. Paint and glue find sleeves with impressive aim, especially when children reach across the table for supplies. Old shirts worn backwards work as instant aprons, and sleeves rolled to the elbow stay out of glue pots. Calmer adults and cleaner party clothes both start with this one small habit.
Put glue in bottle caps or small lids. One shared glue bottle invites squeezing contests, puddles, and dried blocked nozzles at the worst moment. Small amounts in caps let children dip, dot, and control the flow with one finger or a cotton swab. Refill caps as needed and watch the whole table use half the glue.
Set out only what the project needs. Crowded tables overwhelm young children and turn every reach into a spill waiting to happen. Bring supplies in stages, clear finished pieces to a drying tray, and keep spare materials in a box behind you. Children focus better, choose faster, and argue less when the table holds one clear job.
Keep a damp cloth and a tray within reach. Wet fingers spread paint onto chairs, clothes, and every finished piece a child proudly carries. One damp cloth for hands and one tray for carrying work stop most disasters before they start. Wipe little and often, and the final cleanup shrinks to almost nothing at all.
End with a drying and display plan. Wet projects piled in a corner glue themselves together and break small hearts at pickup time. Line a shelf, a tray, or one windowsill as the official gallery before you start, and carry each finished piece there proudly. Children behave better at cleanup when their work goes somewhere honored.
Small habits like these turn craft time from damage control into the cozy December memory everyone hoped for at the start. Pick two habits for your next session, keep them without fuss, and add the rest across the season. Calm tables produce proud children, finished projects, and far better photographs than any expensive kit ever will.
FAQ
How long should a kids craft session last?
Most children craft happily for twenty to forty minutes, and younger toddlers often finish closer to fifteen minutes of real focus. Plan one project per session, keep a second tiny option ready for fast finishers, and stop while energy stays high. Ending on success makes children ask for craft time again tomorrow.
What supplies should a Christmas craft box hold?
Keep card, paper plates, glue sticks and liquid glue, washable paint, cotton balls, tissue paper, pipe cleaners, and plain paper in the box all season. Add flour and salt for dough, saved tubes and jars, and a bag of gathered pinecones, and nearly every project in this guide becomes possible without one extra shopping trip.
How can I craft with toddlers without total mess?
Choose big pieces, washable materials, and one supply on the table at a time when toddlers join in. Trays with raised edges give little hands a clear work border, and aprons protect clothes from the start. Accept wobbly results warmly, because toddlers learn by squeezing, pressing, and peeling far more than by following neat instructions.
Can homemade crafts work as Christmas gifts?
Cards, salt dough ornaments, button trees, and snow globes all make gifts that teachers, grandparents, and neighbors genuinely keep and display. Add the child name and the year on the back, because dates turn sweet gifts into keepsakes families bring out every December. Wrap pieces in tissue, let the maker hand them over personally, and the gift carries double warmth.
How far ahead can we make Christmas crafts?
Dough ornaments, paper chains, cards, and felt stockings can wait happily for weeks in a dry box, so families can craft through November without rushing. Store flat paper work between sheets of card and keep painted pieces away from damp rooms. Snow globes deserve a seal check one week after making, just to catch slow leaks early.
What can children make when we have almost no supplies?
Paper chains, cotton ball snowmen, and paper plate Santas all grow from kitchen basics most homes already own today. Flour, salt, and water become dough ornaments, while a walk outside provides pinecones ready for paint tomorrow. Empty tubes, jars, and bags from the recycling box finish the supply list without spending anything at all.
Conclusion
Good easy christmas crafts for kids do one job well: they let a child start quickly, finish proudly, and carry the result straight to the tree, the fridge, or a waiting grandparent. Simple materials, honest steps, and one sitting per project beat ambitious kits every single December, because finished work is what children remember and request again.
You already own most of what these projects need, from flour and jars to tubes, buttons, and last year wrapping paper scraps. Choose two or three favorites, stock one modest craft box, protect the table, and let children lead the making while you handle glue guns, ovens, and strong seals. December will supply the excitement all by itself.
Choose one craft for this weekend, set the supplies out before you call the children, and enjoy watching small hands turn plain paper and dough into decorations with real pride. Photograph the finished gallery, hang everything where the family passes daily, and let this year’s handmade pieces become next year’s favorite traditions at home.