15 DIY Christmas Ornaments You Can Make at Home
December trees look best when a few ornaments carry a story, and diy christmas ornaments give your tree exactly that personal touch. Shop bought baubles shine brightly, yet handmade pieces remind you of quiet afternoons, children with sticky fingers, and gifts made with love. Even one handmade ornament changes the whole tree, because guests always ask who made it and when.
Crafting ornaments costs little and suits almost every skill level, from children cutting paper shapes to adults painting tiny details by lamplight. Supplies hide in kitchen cupboards, garden paths, and craft drawers, so starting rarely needs a special shopping trip. Working in short sessions keeps the fun alive, and finished ornaments pack away safely for next year.
Inside this guide you will find fifteen diy christmas ornaments matched to real homes, real budgets, and real skill levels. Each idea explains why it works, what you need, who enjoys it most, and one mistake worth avoiding. Gather your supplies early, protect the table with old newspaper, and enjoy making a tree that looks like your family.
What are the easiest diy christmas ornaments for beginners?
Beginners do best with diy christmas ornaments that use three or four supplies and finish in under an hour. Salt dough shapes, paper snowflakes, dried orange slices, and pom pom garlands all forgive small mistakes and still look lovely on the tree. Choose one simple idea first, finish a full batch, and let success build your confidence for trickier projects later.
Pick projects that match the time you actually have, not the time you wish you had. Evening crafters manage one or two ornaments per night, while weekend makers finish a whole set in one afternoon. Keep tools simple, read the whole idea before starting, and stop while the work still feels fun rather than rushed.
Disclosure: As an Amazon Associate I earn from qualifying purchases. Some of the links below are affiliate links, which means Bloomie Living may earn a small commission if you buy through them, at no extra cost to you.
Salt dough star ornaments
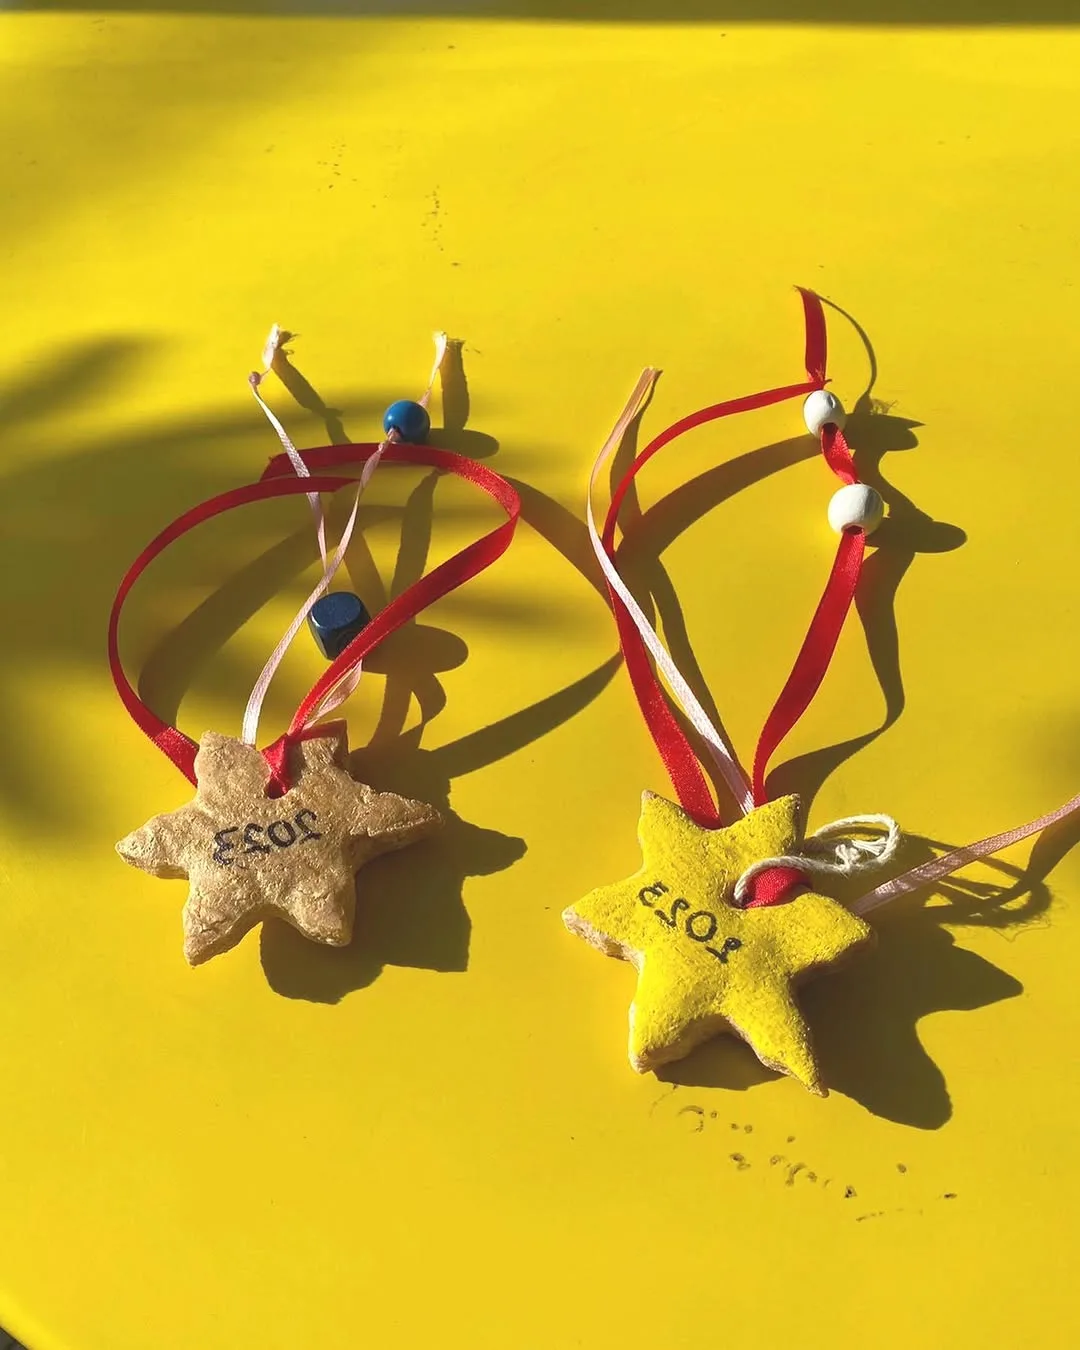
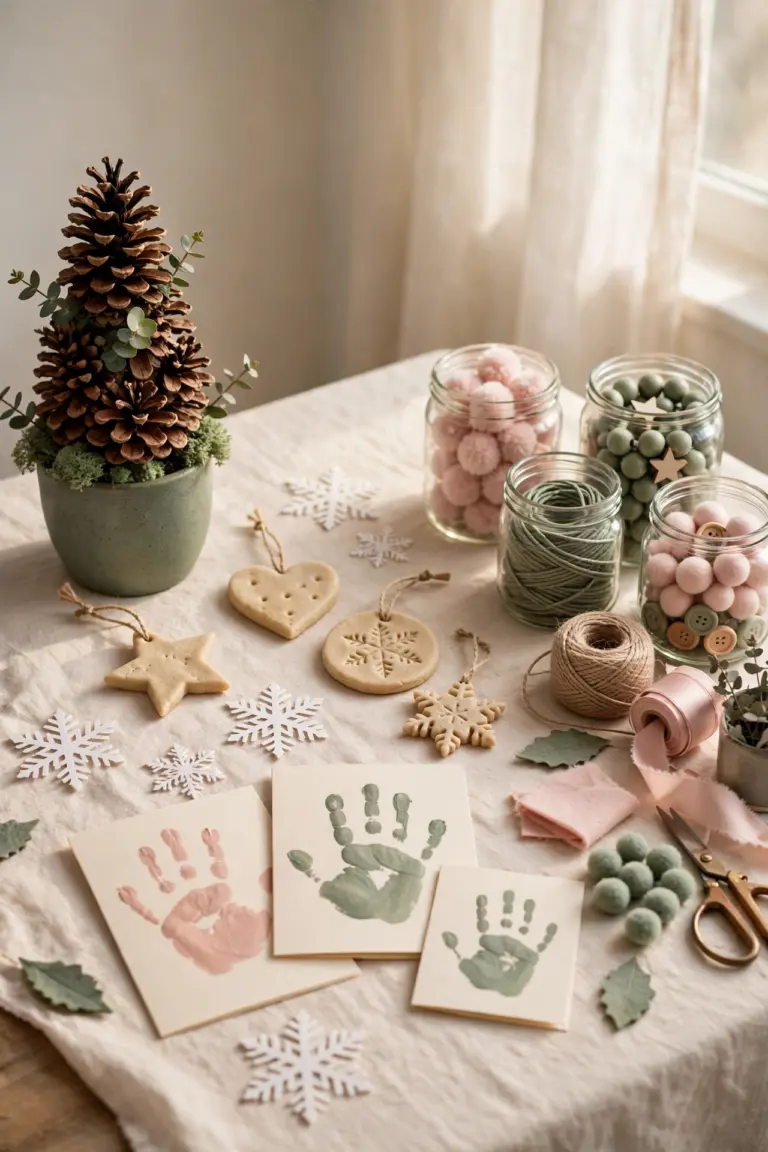
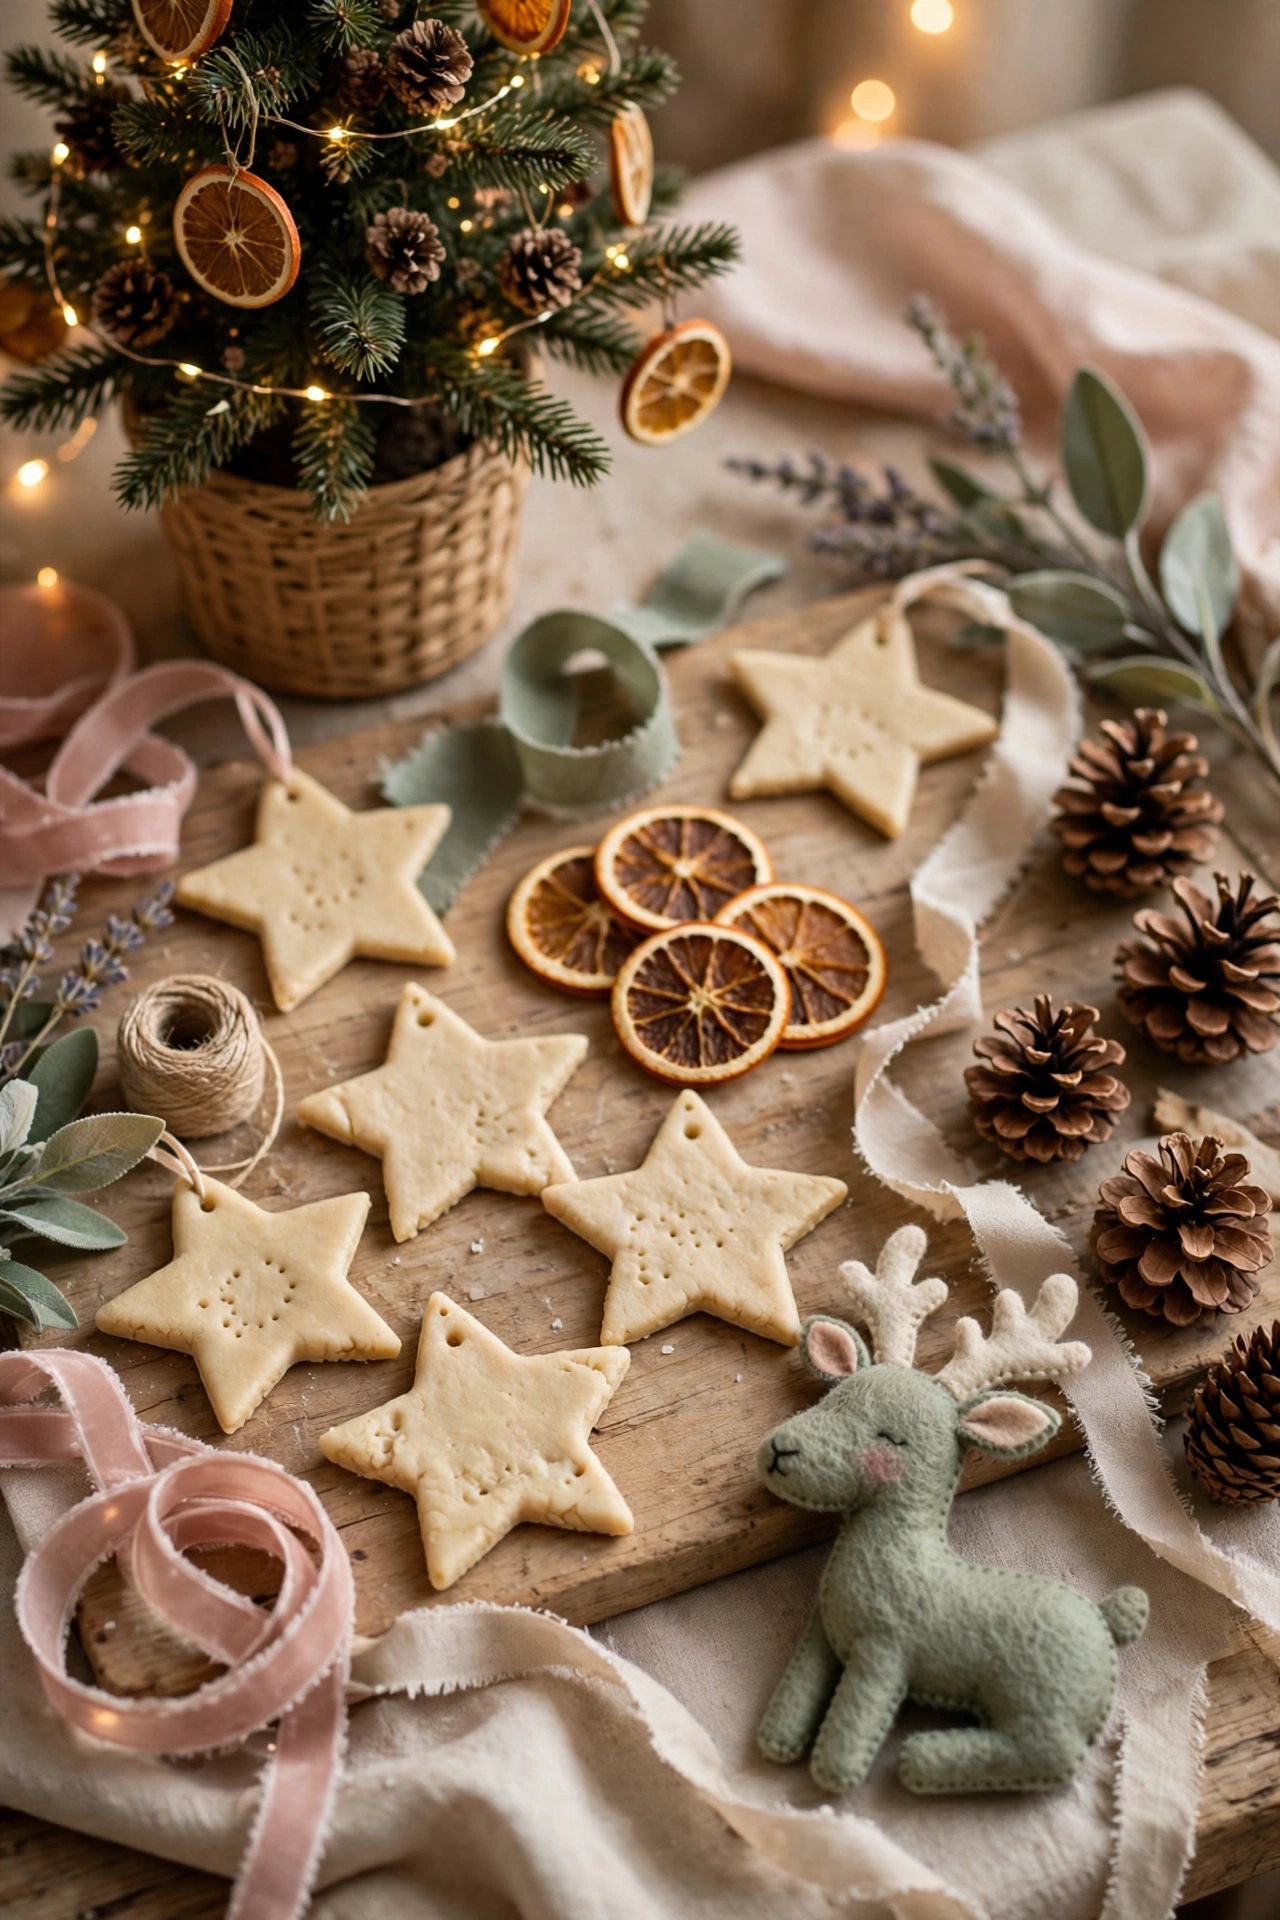
Salt dough stars earn their place on almost every handmade tree because the dough costs pennies and shapes beautifully under small hands. Flour, salt, and water form a smooth dough that holds star shapes well and dries hard enough to hang for years. Children love rolling, cutting, and painting, while adults enjoy the calm rhythm of a simple kitchen craft.
Mix two cups of plain flour with one cup of fine salt and about three quarters of a cup of water until the dough feels smooth and firm. Roll the dough on a floured surface to the thickness of a coin, cut stars with a cutter, and poke a small hanging hole near one point with a straw. Bake the stars slowly in a low oven until fully dry, then cool them completely before painting.
Grandparents treasure salt dough stars because small hands made them, and parents love a craft that keeps children busy on a cold afternoon. Classrooms and playgroups use the same dough for group trees, since one batch stretches across many children. Paint stars in cream, gold, or soft red to match most tree color schemes.
Last year one family painted each star with a child name and the year, then hung them at the front of the tree where visitors noticed them first. Guests asked about the stars more than any shop bought decoration, and the children glowed with pride. Keep a note of the recipe with your decorations so next year starts easily.
Acrylic Paint Set 24 Colors with 12 Brushes: Richly pigmented acrylics in 24 colors come with 12 brushes and work on wood, plastic, ceramic, and fabric surfaces.
Dried orange slice ornaments
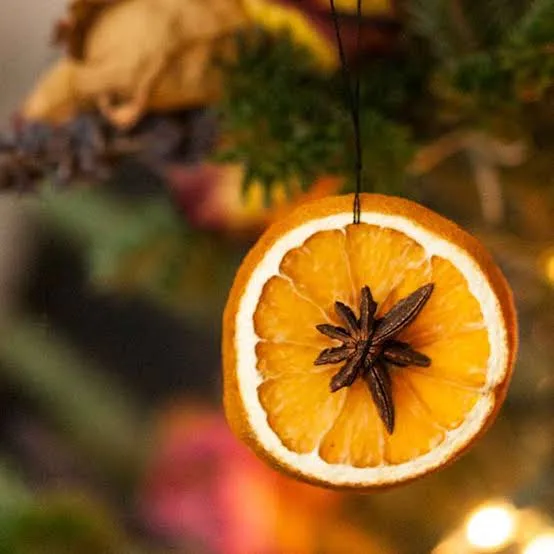
Orange slices bring warm color and gentle scent to a tree without any paint or glitter. Thin slices dry into translucent rounds that glow when tree lights shine through them. Guests notice the natural look at once, and the scent lingers softly in the room for days.
Slice oranges thinly and evenly, aiming for rounds about half a centimeter thick, then pat each slice dry with a clean towel. Lay slices on a lined baking tray and dry them slowly in a low oven, turning once halfway through. Cool slices fully before threading twine through a small hole poked near the edge.
Kitchens with a slow oven suit this idea best, and cooks who already bake enjoy a project that uses the oven during quiet hours. Families who prefer natural decorations love orange slices beside pine cones and cinnamon bundles. Hang slices singly or in small groups of three for a fuller look.
Hang one slice beside a cinnamon bundle and a small pine cone to build a natural cluster that looks gathered rather than arranged. One reader dried slices on a Sunday, strung them Monday evening, and kept the same slices for three Christmases running. Store dried slices in a dry box with tissue between layers.
Dried Orange Slices 3 oz Pack: Evenly dried citrus wheels string onto twine in minutes and bring natural color and a soft orange scent to the tree.
Pine cone ornaments with snowy tips
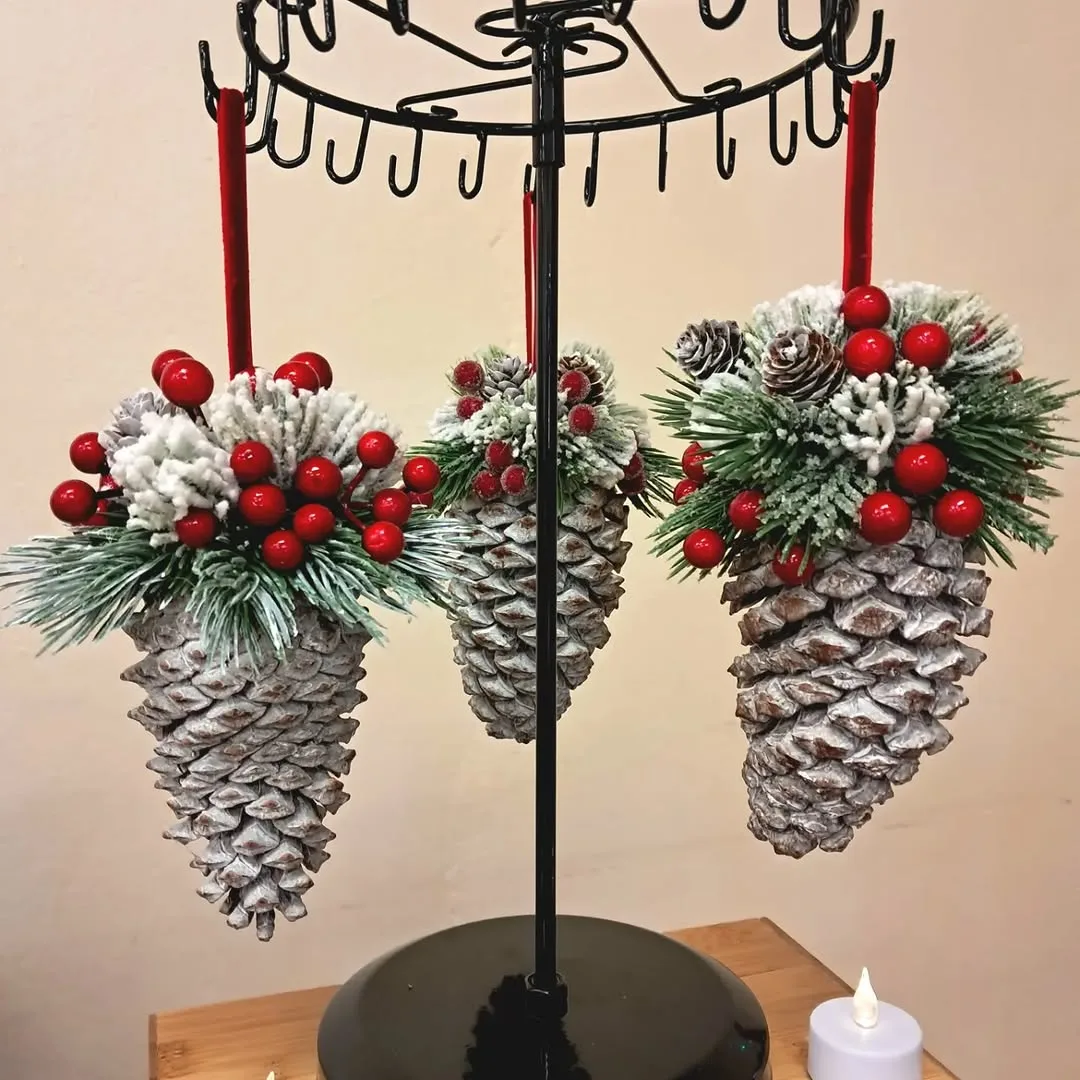
Pine cones cost nothing when you gather them yourself, and snowy tips turn a garden find into a winter decoration. Their natural shape already suits a tree, so little work changes them from forest floor to mantelpiece star. Children enjoy hunting for the best cones on autumn walks.
Brush each cone clean and dry, then dab white paint lightly on the outer edges of the scales to suggest snow resting there. Less paint looks better than a heavy coat, so step back often and check the effect in daylight. Thread a loop of twine around the top scales, add a small bow if you like, and let everything dry before hanging. Simple diy christmas ornaments like these prove that nature supplies the best starting point.
Walkers and gardeners suit this idea best, since gathering cones becomes part of the pleasure. Families with older children enjoy painting sessions at the kitchen table, while apartment dwellers buy clean cones cheaply from craft shops. Pair pine cones with dried oranges for a tree that smells like winter.
Avoid cones that feel damp or sticky, because damp cones close up indoors and drop sap on nearby decorations. Bake gathered cones briefly in a low oven to open the scales and remove tiny visitors before painting. Glitter looks tempting, yet plain snowy tips age far more gracefully year after year.
Christmas Pine Cones Berry and Pine Branch Set 170 Pcs: Snowy pine cones, red berries, and pine branches arrive ready to wire into wreaths, garlands, and rustic hanging decorations.
Cinnamon stick bundle ornaments
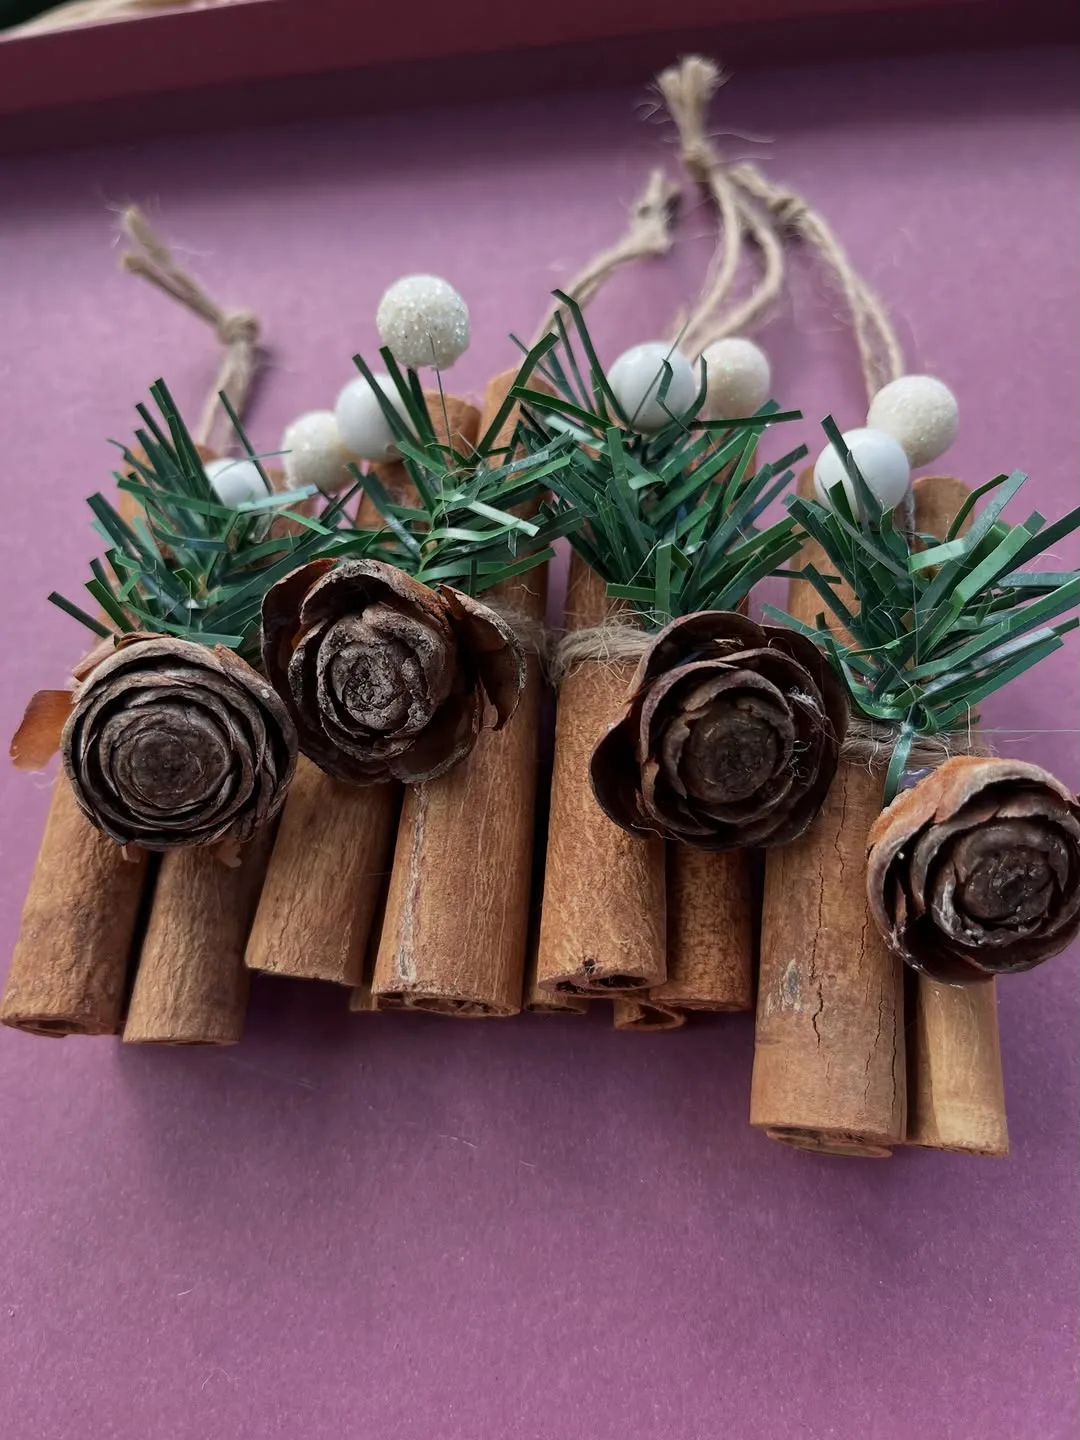
Cinnamon bundles smell like Christmas from the moment you tie them, and guests notice the scent before they notice the tree. Three or four sticks tied with twine form a neat bundle that hangs well among branches. Red berries or a small sprig of greenery finish the look without fuss.
Tie sticks together firmly with twine, leaving a loop at the top for hanging. Wrap the twine twice around the middle for strength, then tuck a small berry cluster or green sprig under the knot. Keep bundles small and light so branches hold them without drooping.
Cooks love cinnamon bundles because the sticks come from the spice cupboard and the project takes minutes. Hosts who welcome guests often hang bundles near the door, where the scent greets visitors warmly. Children tie bundles easily with a little help at the knot stage.
Bundle three sticks with a dried orange slice for a gift topper that doubles as a tree ornament later. One host made twenty bundles in an evening, hung half on the tree, and gave the rest as small gifts with cards. Store unused bundles in a sealed jar to keep the scent strong.
Organic Cinnamon Sticks Whole 16 oz Bulk Pack: Whole organic cinnamon sticks bring warm scent and natural texture to wreaths, garlands, and tied ornament bundles.
Felt reindeer ornaments

Felt reindeer bring soft color and gentle humor to a tree, and felt forgives uneven cutting better than paper or wood. Brown, cream, and red felt combine into a friendly face that children recognize instantly. Sewing stays simple, with straight stitches and a little stuffing doing all the work.
Cut two matching reindeer body shapes from brown felt, then cut smaller pieces for antlers, ears, and a red nose. Sew the edges together with blanket stitch, leaving a small gap to add a pinch of stuffing. Close the gap, sew on the nose and eyes, and add a twine loop at the top for hanging.
Sewers at every level enjoy felt reindeer, because the project teaches basic stitches without demanding perfection. Grandparents stitch reindeer with grandchildren, letting small hands stuff and place the nose. Classrooms use felt reindeer for group trees, since felt costs little and cuts safely with blunt scissors.
Family trees gain charm from a herd of slightly different reindeer, each one showing its maker clearly. One family made a reindeer per person, matching nose colors to favorite colors, and hung them together on one branch. Visitors spent ages matching each reindeer to its maker.
Keep stitches loose and even rather than tight, because tight stitches pucker felt and spoil the soft look. Avoid heavy stuffing, which makes reindeer round and stiff instead of flat and friendly. Flat reindeer hang better and pack flat in tissue for storage.
Felt Fabric Sheets 42 Pack Assorted Colors: Soft felt squares in 42 colors cut cleanly with scissors and glue or stitch easily for small figures and flat decorations.
Painted wooden bead garland ornaments
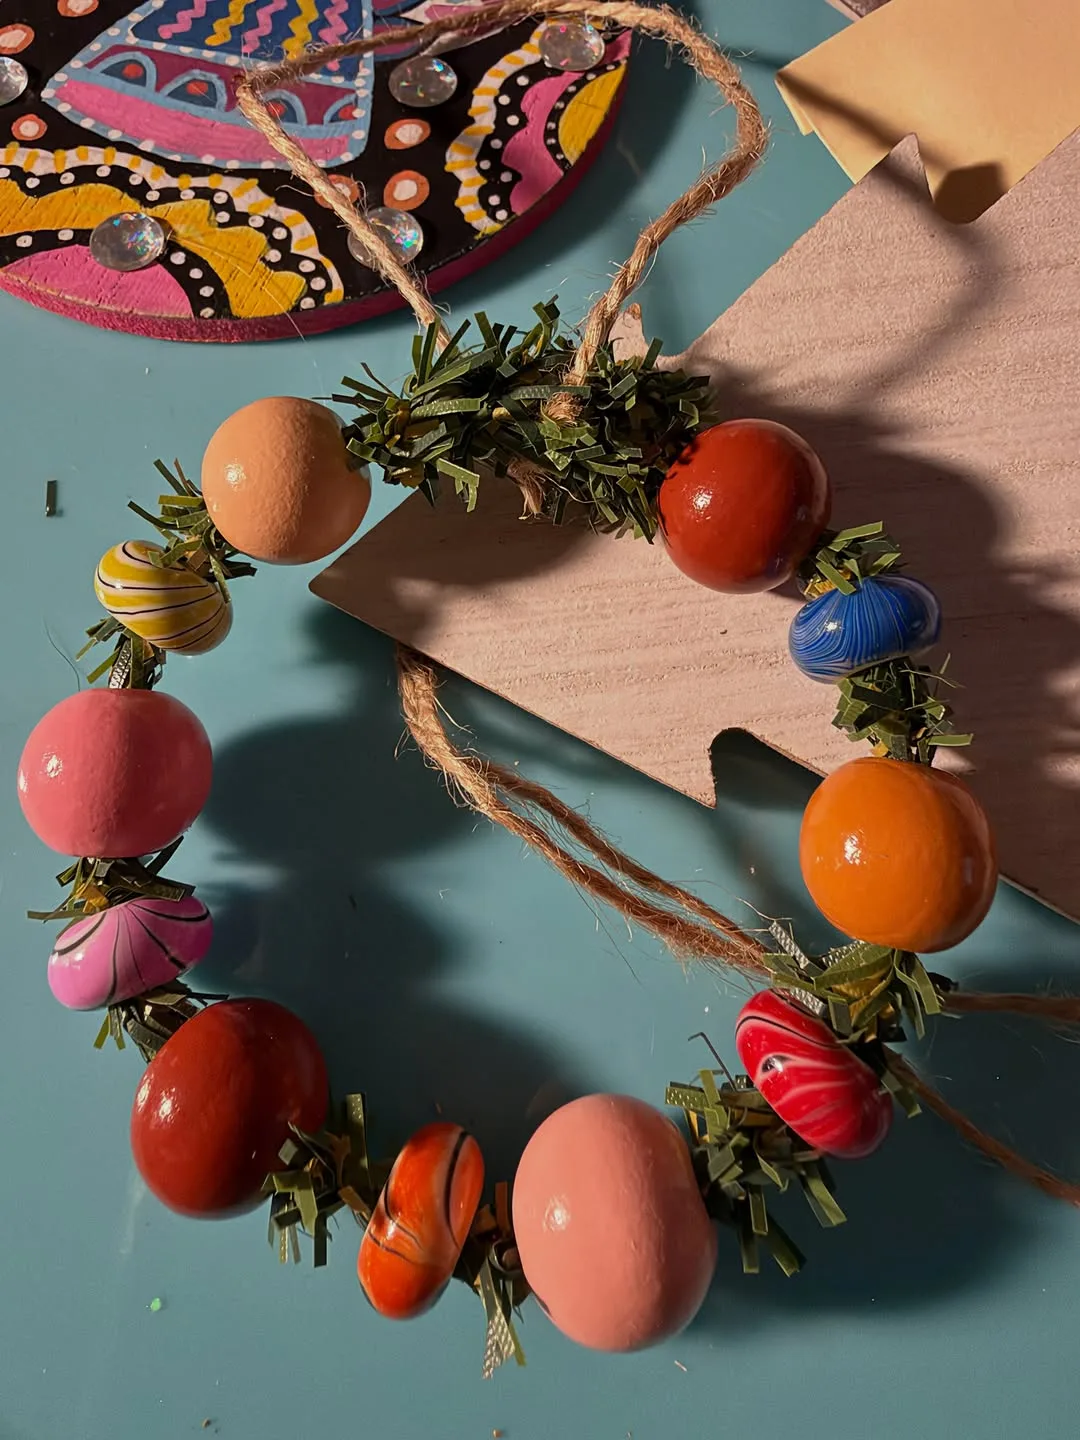
Wooden beads paint beautifully and string into garlands that drape softly across branches. Natural wood suits rustic trees, while painted beads in cream, sage, and red match brighter schemes. Garlands fill gaps between larger ornaments and give the tree a finished look.
Paint beads in small batches on a tray, rolling them gently so color covers evenly, then leave them to dry fully before stringing. Thread beads onto strong twine in a repeating pattern, such as three plain beads followed by one painted bead. Knot the ends firmly and leave a loop for hanging or draping.
Patient crafters enjoy bead painting because the work moves slowly and suits quiet evenings. Children string beads happily once paint dries, practicing patterns and counting without realizing it. Apartment trees benefit most, since garlands add fullness without heavy ornaments pulling branches down.
String beads in soft cream and pale gold for a calm tree, or mix bright red and green for a cheerful family tree. One crafter painted beads to match her wrapping paper, tying tree and gifts together beautifully. Store garlands coiled loosely in tissue to stop tangles.
Wooden Beads 500 Pcs 6 Sizes Unfinished Natural Wood: Smooth unfinished wood beads in six sizes take paint well and thread onto twine for garlands and painted bead ornaments.
Paper snowflake ornaments
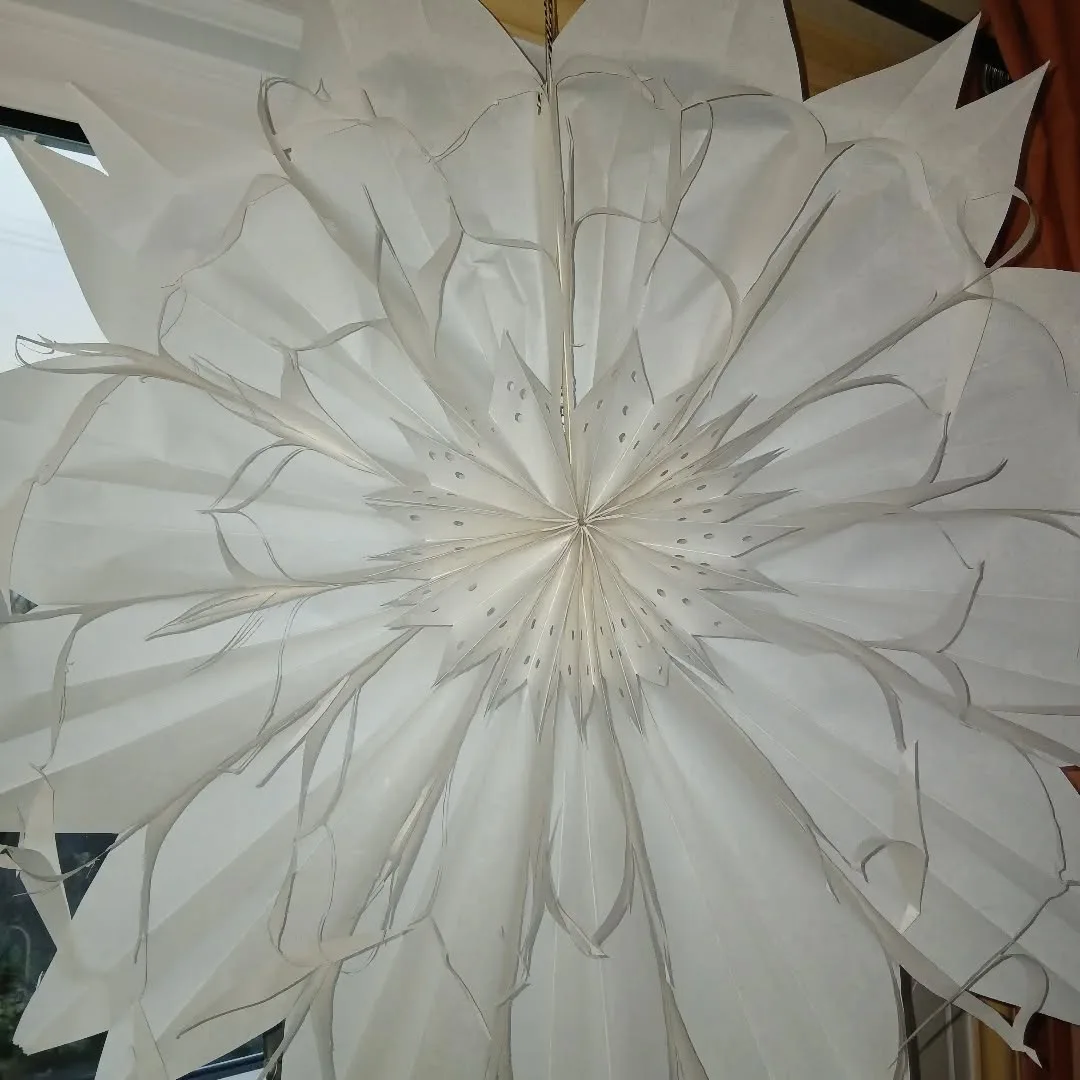
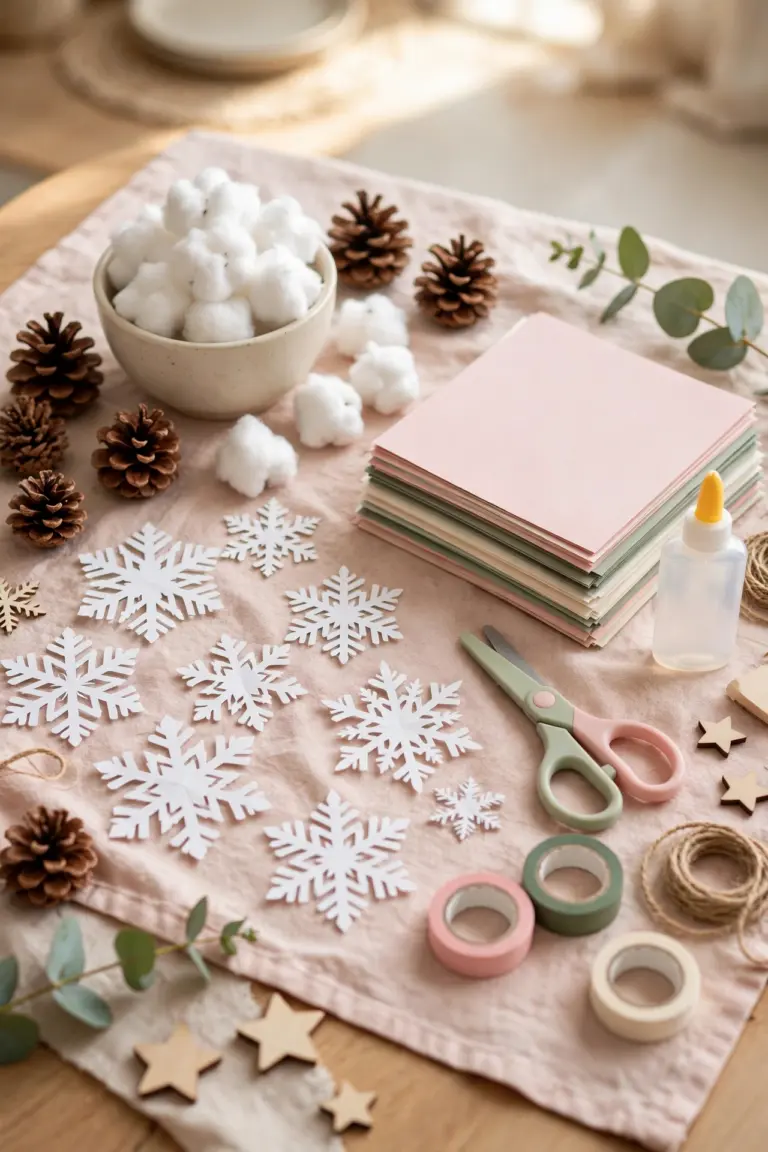
Paper snowflakes remain the cheapest ornament of all, needing only paper and scissors to produce something beautiful. Folded and cut with care, plain paper becomes a lacy shape that catches light on the tree. Children master the folding quickly and delight in opening each flake to reveal the pattern.
Fold a square of paper into a triangle, then fold again into a smaller triangle, keeping edges neat and corners matched. Cut small shapes from the folded edges, avoiding cuts that cross the whole fold, then open the paper slowly. Press flakes flat under a heavy book for an hour before hanging.
Classrooms and family kitchens suit paper snowflakes best, because the craft needs no drying time and no special tools. Rainy afternoons turn productive when a table full of children cuts flakes together. Hang flakes with thread at different heights so they spin gently in warm air.
Use white paper for a classic look, or try pale blue and silver for a frosty tree. One teacher covered a classroom window with student flakes, then sent each child home with a flake for the family tree. Spray finished flakes lightly with stiffener if you want them to last beyond one season.
Bright White Cardstock 75 Sheets: Bright white 65 lb sheets fold crisply and hold their shape, giving snowflakes clean edges and sturdy points.
Mason jar lid wreath ornaments
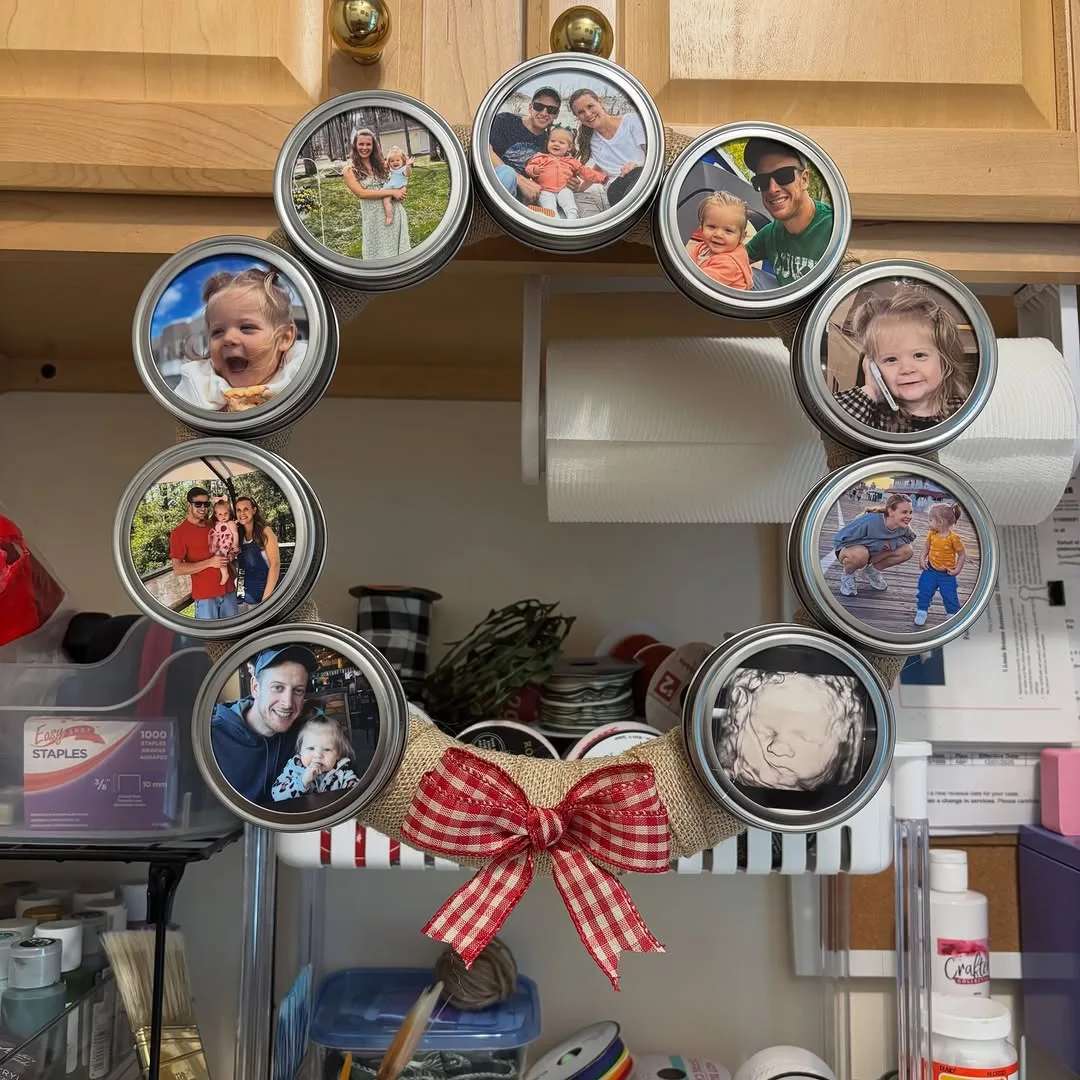
Lids from old jars become tiny wreaths with a little greenery and ribbon, turning kitchen leftovers into tree decorations. Their round shape already suggests a wreath, so the project starts halfway finished. Greenery tucked around the ring looks fresh and festive at once.
Wrap a jar lid ring with green ribbon or twine until no metal shows, securing the end with a dab of glue. Tuck small sprigs of fir, rosemary, or holly around the ring, then tie a small bow at the top. Add three tiny red beads as berries and a loop for hanging.
Savers who keep jars for storage love this idea, since lids often pile up unused in drawers. Among diy christmas ornaments, lid wreaths stand out because they reuse something most homes already own. Gardeners add real sprigs, while others use craft greenery that lasts for years.
Make a set of six lid wreaths in one evening and hang them together on a small tree or along a garland. One cook made lid wreaths from every jar her family emptied during November, giving each wreath a tiny story. Label the back with the year to track which wreaths age best.
Canning Lids and Rings Regular Mouth 48 Pcs: Fresh bands and lids give every mini wreath a neat round frame that glues and ties onto ribbon with ease.
Button tree ornaments
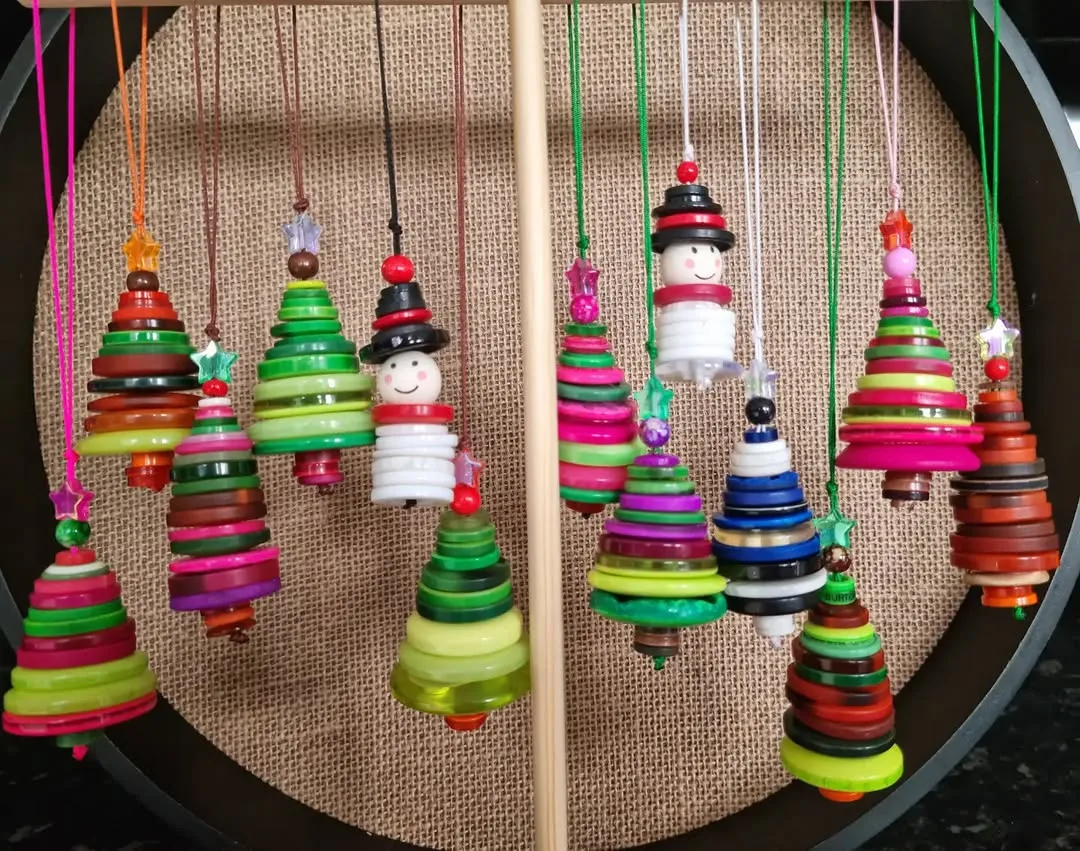
Buttons in mixed colors stack into tiny trees that sparkle quietly among branches. Old button jars hold the whole project, and mismatched buttons look better than matching sets. Green buttons form the tree, while a star button or small bead crowns the top.
Thread buttons onto a wire or strong thread in size order, largest at the bottom and smallest at the top, to build a triangle shape. Bend the wire into a small trunk at the base, or tie thread firmly around a tiny stick. Add a star bead at the peak and a loop for hanging.
Collectors of vintage buttons enjoy this idea most, since every button carries a small memory of a coat or dress. Children sort buttons by color happily, and the sorting itself becomes part of the fun. Button trees suit small trees and tabletop trees especially well.
Sort buttons by shade before starting, grouping greens together and setting aside gold and red for accents. One grandmother used buttons from her own sewing box, and grandchildren now hunt for their favorite button on the tree each year. Glue loose buttons in place for trees handled by small children.
Round Resin Buttons 1500 Pcs Mixed Colors: Generous mix of sizes and colors lets you stack trunks, branches and snowy layers for charming button trees.
Twig star ornaments
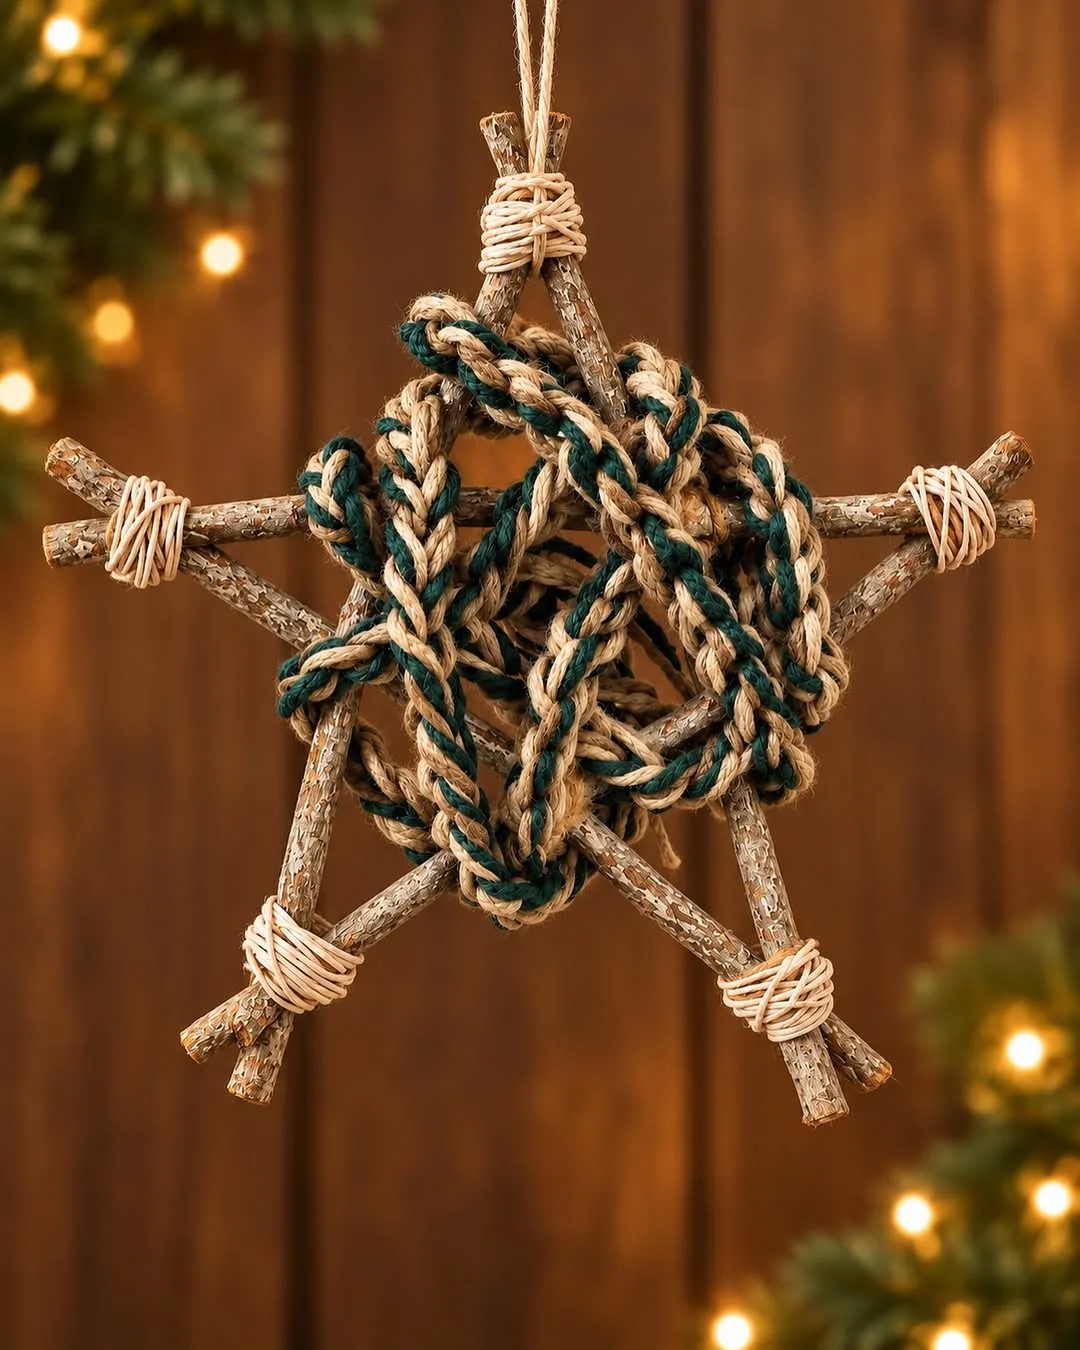
Twigs gathered from the garden become rustic stars with a little twine and patience. Their rough texture suits natural trees, and no two stars ever look quite alike. Walking to gather twigs adds a pleasant outdoor step to an indoor craft.
Gather five straight twigs of similar length and thickness, trimming ends neatly with garden snippers. Lay twigs into a star shape on a flat surface, then bind each crossing point firmly with twine. Trim twine ends short and add a hanging loop at one point.
Nature lovers and families with gardens suit twig stars best, since gathering materials costs nothing and teaches children to look closely at trees. Schools use twig stars for nature tables, pairing the craft with lessons about seasons. Hang stars singly for a calm look or in groups for a bolder display.
Garden stars look lovely beside dried oranges and pine cones, building a woodland corner on the tree. One family gathered twigs on a frosty walk, built stars by the fire that evening, and hung them before bedtime. Years later the same stars return each December, a little darker and more loved.
Choose twigs that bend slightly rather than snap, because brittle twigs break at the binding stage. Avoid green twigs that shrink as they dry, loosening every joint within weeks. Dry gathered twigs indoors for a few days before building for the sturdiest stars.
Natural Willow Twig Sticks 100 Pcs: Natural willow twigs in a uniform 6 inch length bundle neatly into rustic stars with simple twine ties.
Fabric scrap baubles
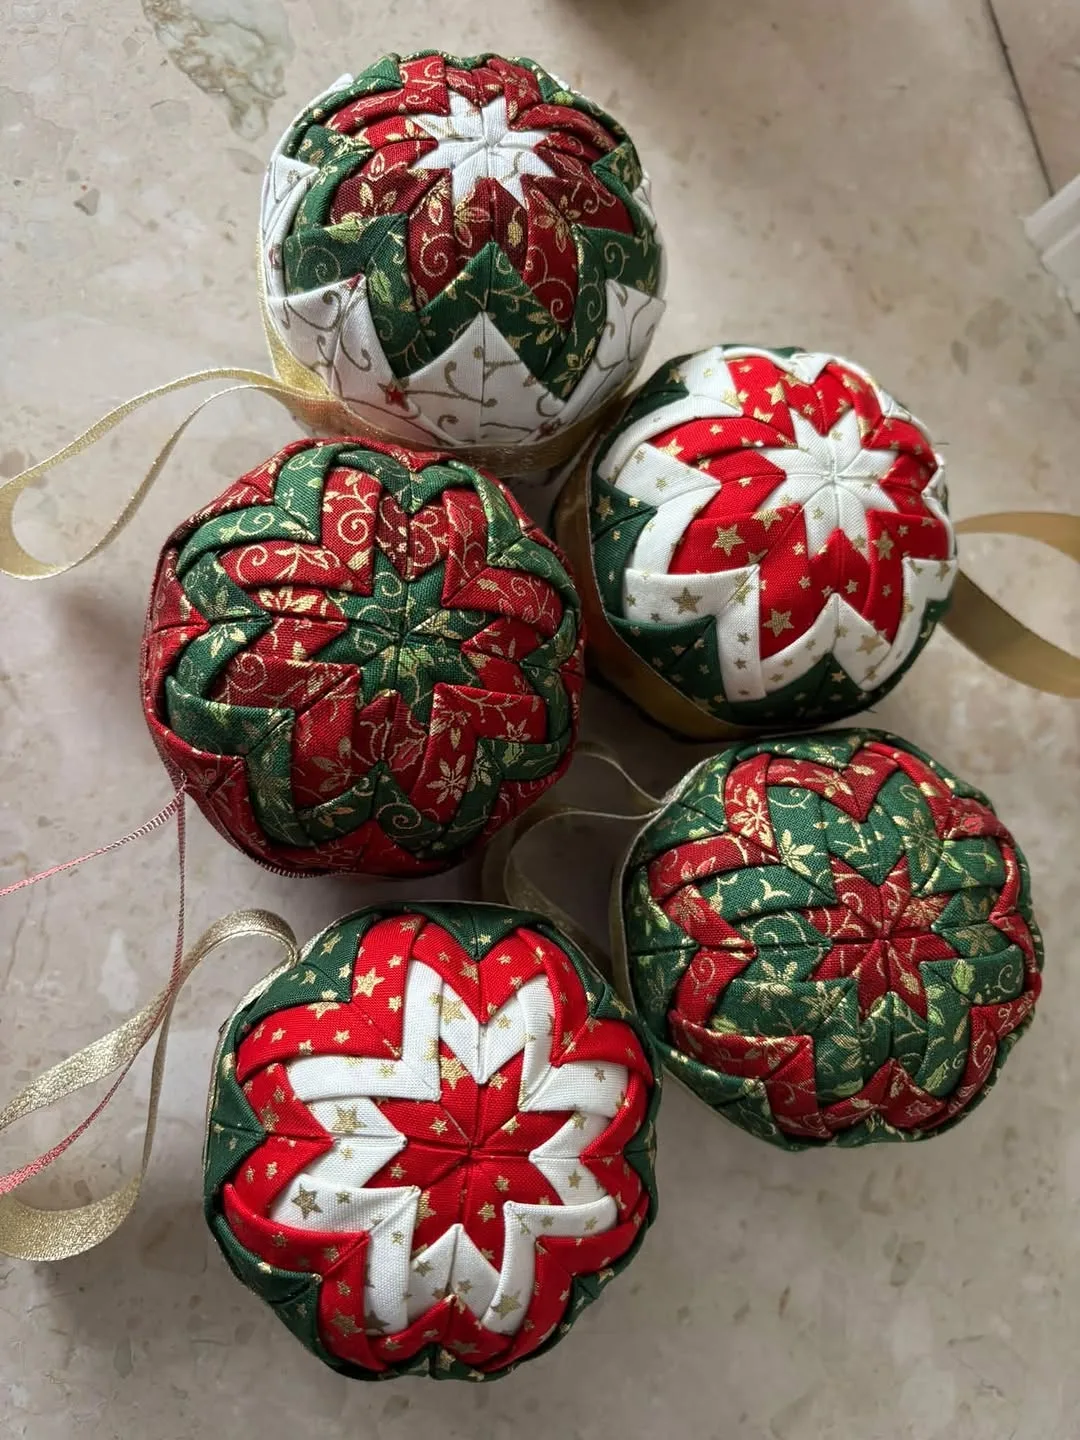
Fabric scraps wrap plain baubles in color and pattern, rescuing tired decorations from the back of the box. Small prints, checks, and festive patterns all work, and no sewing skill is needed. Wrapped baubles feel soft in the hand and look rich on the tree.
Wrap a plain bauble with a square of fabric, gathering the cloth at the top and tying it firmly with ribbon. Trim the gathered fabric neatly, or leave a small ruffle for a softer finish. Glue the fabric edge down where it gapes, and let glue dry fully before hanging.
Sewers with scrap boxes love this idea, since small leftover pieces rarely suit larger projects. Quilters match bauble fabric to table runners or stockings for a coordinated room. Children choose their favorite prints, giving each bauble a personal link to its maker.
Cover old baubles that lost their shine rather than buying new ones, saving money and reducing waste at once. One sewer wrapped twelve mismatched baubles in one evening using scraps from a single quilt project. Guests assumed the baubles came from a shop until she explained the trick.
Cotton Fat Quarters Fabric Bundle 10 Pcs: Soft quilting cotton in coordinated prints wraps foam balls smoothly and adds cheerful pattern to every bauble.
Beaded icicle ornaments
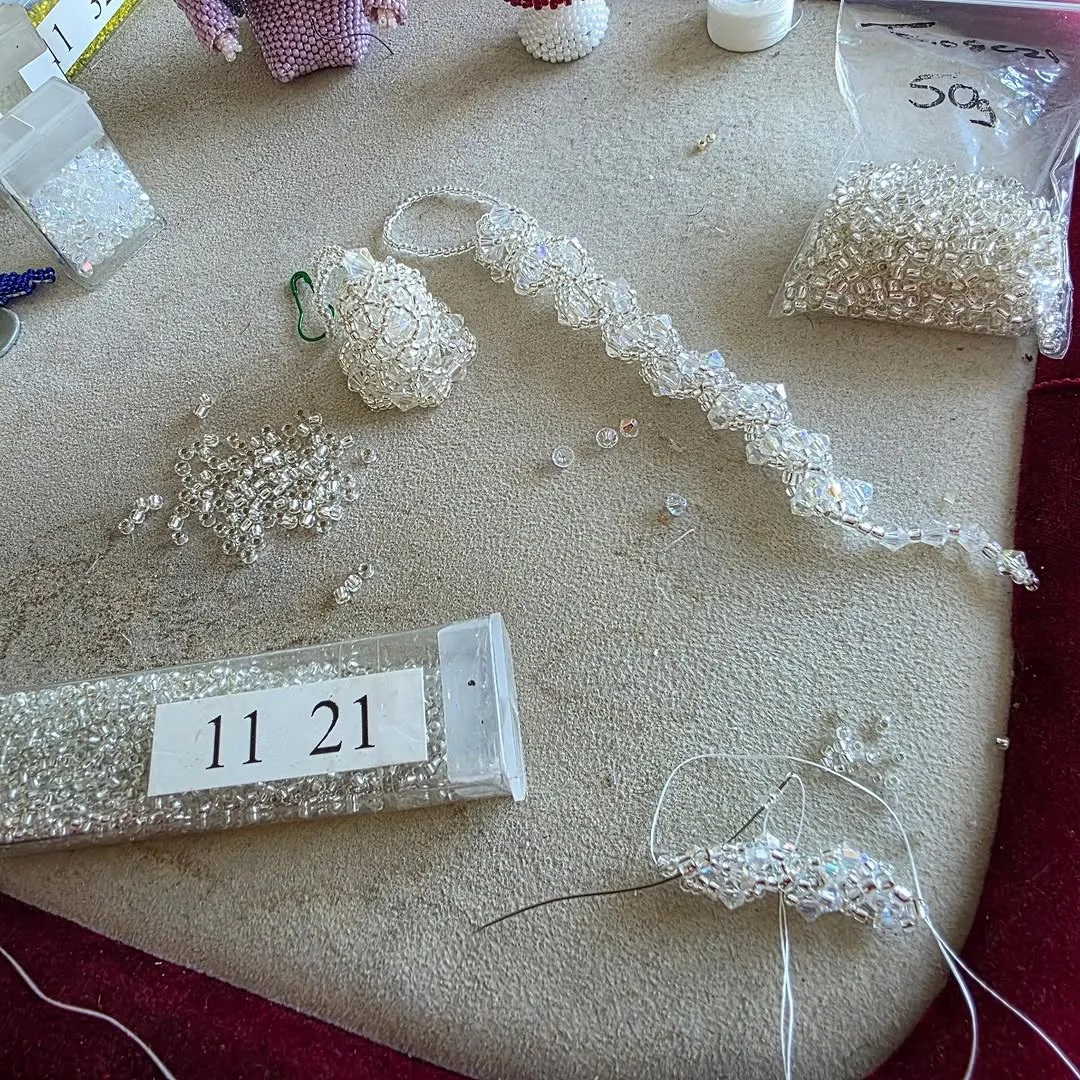
Beads strung into icicles catch tree lights and shimmer with every small movement of air. Clear, silver, and pale blue beads mimic ice best, while a single bright bead at the tip adds a surprise. Icicles hang beautifully at branch ends where light reaches them.
String beads onto wire in a tapering pattern, starting with larger beads at the top and smaller ones toward the tip. Twist the wire firmly at both ends to lock beads in place, then form a small loop at the top. Vary lengths across a set so icicles look natural rather than uniform.
Teenagers and patient adults enjoy beading because the work calms busy minds and suits quiet evenings. Jewelry makers use leftover beads, turning small quantities into a full set of icicles. Hang icicles near the outer branches where they catch light and draw the eye.
Mix clear beads with a few frosted ones for an icy depth that plain clear beads miss. One beader made icicles in three lengths and hung them along one branch like a frozen waterfall. Store beaded icicles in tissue rolls to stop tangling and chipping.
Faceted Rondelle Crystal Beads 1200 Pcs: Faceted rondelle beads in 24 colors catch the light like ice, strung in graduating drops for sparkling icicles.
Photo ornaments in clear baubles
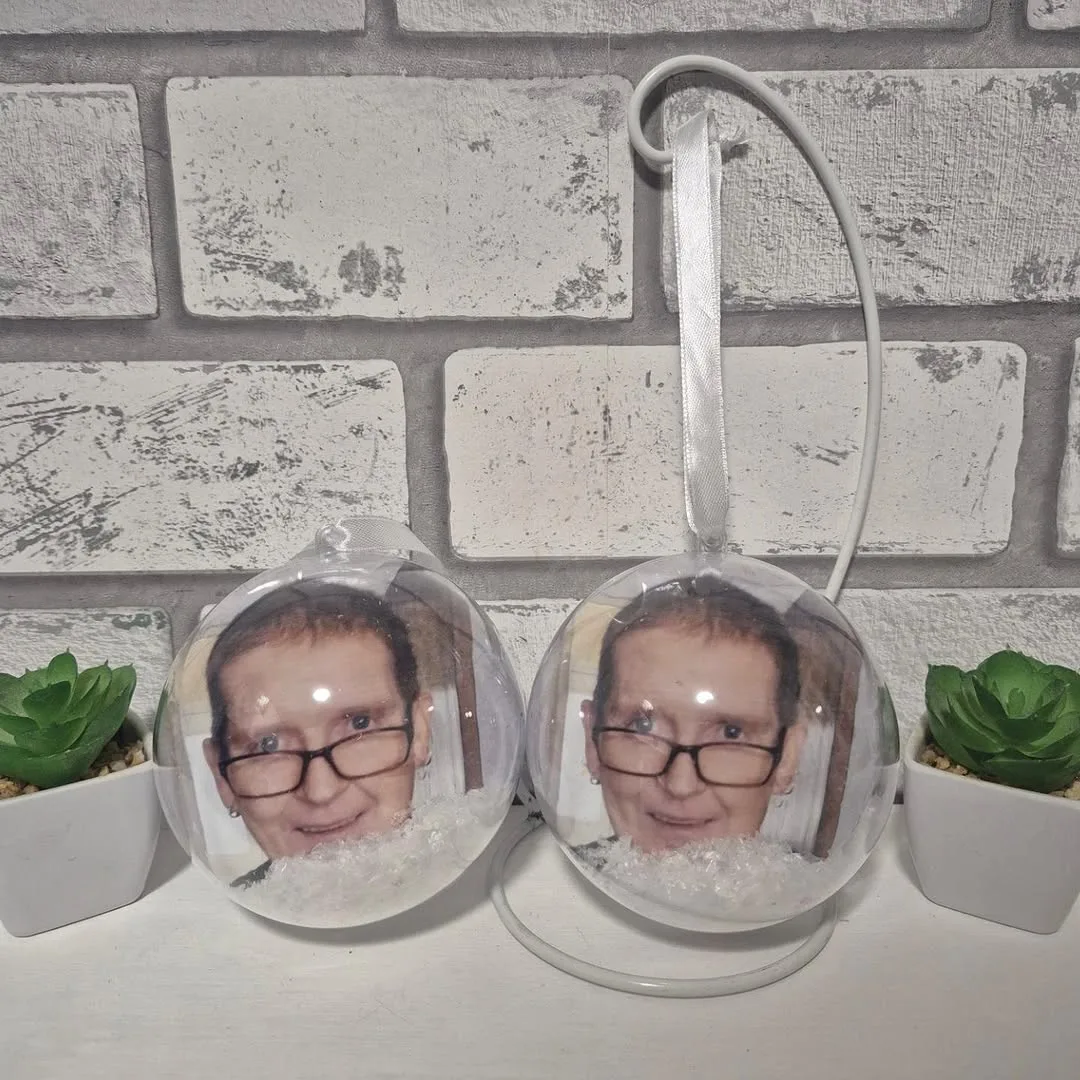
Photos inside clear baubles turn the tree into a family album that guests explore branch by branch. Small prints curled gently inside the bauble show faces, holidays, and milestones through the clear surface. Relatives love spotting themselves and telling the story behind each picture.
Print small photos sized to curl inside the bauble opening without creasing badly, then roll each photo loosely and slide it inside. Add a pinch of fake snow or tiny tinsel for sparkle, replace the cap, and attach a ribbon loop. Write the year on the cap with a fine pen for easy sorting later.
Families with children grown and scattered treasure photo baubles most, since the tree gathers everyone together for December. New parents add a first Christmas photo each year, building a collection that grows with the family. Grandparents receive photo baubles as gifts and hang them proudly.
Choose photos with one or two faces close to the camera, because busy group shots blur behind curved plastic. One family added a new photo bauble every Christmas morning, opening the box together before breakfast. Keep spare caps safe, since clear baubles without caps lose their magic quickly.
Clear Plastic Fillable Ornament Balls 8 Pack 80mm: Clear plastic balls open in two halves so you can fill them with photos, glitter, tiny figures, or keepsake notes before hanging.
Clay gingerbread ornaments
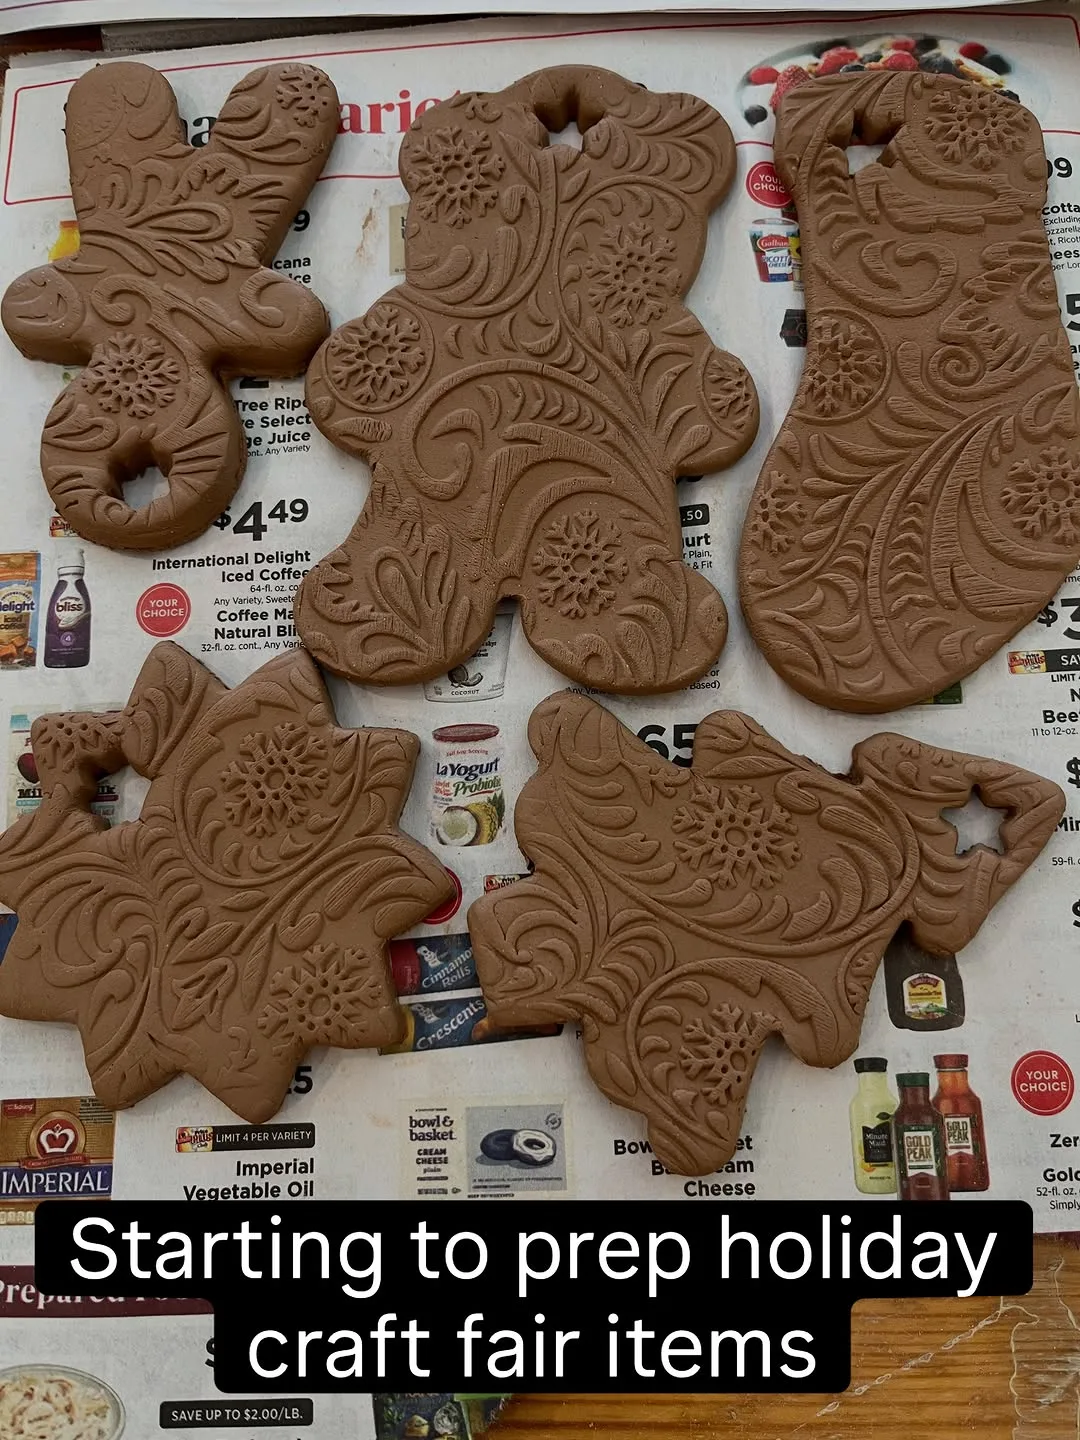
Clay gingerbread figures bring the look of baking to the tree without any worry about crumbs or hungry pets. Air dry clay shapes easily, paints warmly, and hardens into sturdy figures that survive storage. Gingerbread people, houses, and stars all suit the same simple techniques.
Roll clay flat on a clean surface, cut shapes with cutters, and poke hanging holes before the clay dries. Smooth edges gently with a damp finger, then leave shapes to dry fully on both sides. Paint with warm browns, white icing lines, and rosy cheeks, then seal with a clear coat.
Bakers who love gingerbread season enjoy clay versions because the shapes last far beyond December. Children paint clay figures happily, and mistakes wipe away before the clay sets. Hang clay ornaments on lower branches where small hands can admire them safely.
Paint icing lines after the base coat dries fully, using a fine brush or a toothpick for tiny dots. One baker painted clay houses to match her real gingerbread house, placing both on display together. Seal painted clay well, since unsealed paint chips during packing and unpacking.
Air Dry Clay Terracotta: Terracotta colored clay rolls, cuts and stamps like real gingerbread dough, then hardens without any baking.
Pom pom garland ornaments
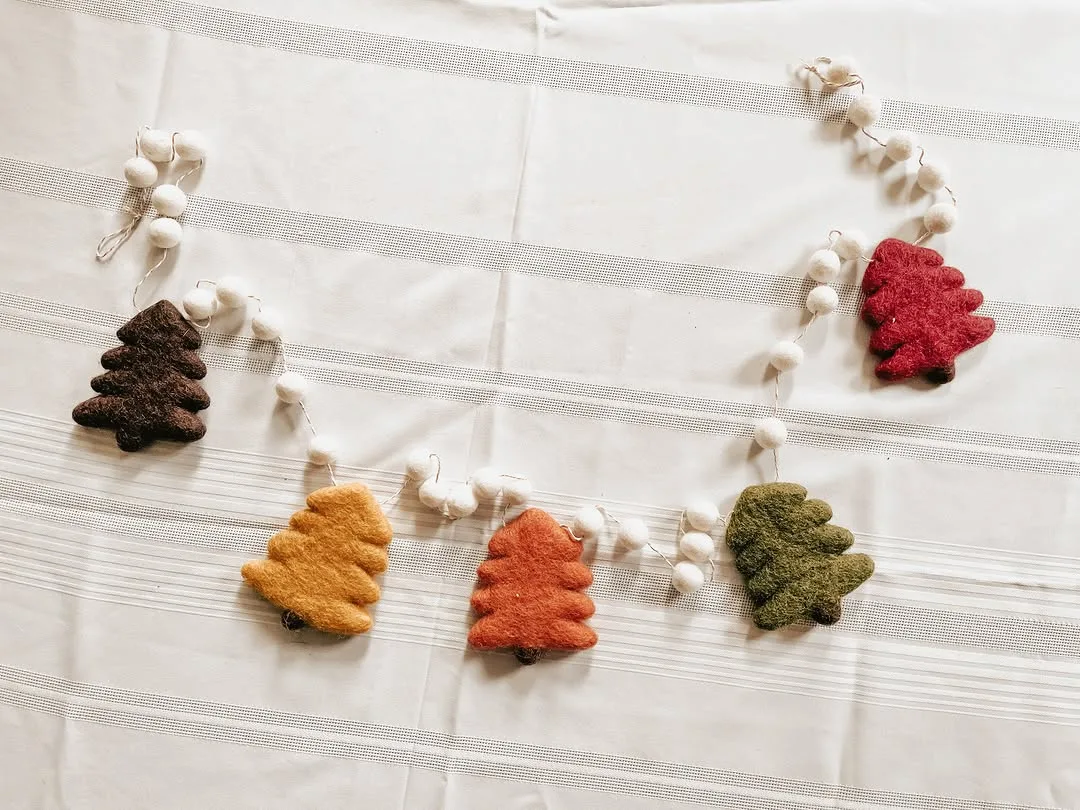
Pom poms in cream, red, and green string into soft garlands that suit family trees perfectly. Wool pom poms feel warm and playful, and children love squeezing them as they help. Garlands made from pom poms survive drops, pets, and toddlers better than glass ever could.
Make pom poms by winding wool around a fork or a cardboard ring, tying the middle firmly, then cutting the loops and fluffing the ball. Trim each pom pom round with sharp scissors, then thread them onto twine with a large needle. Space pom poms evenly or cluster them in color groups.
Children suit pom pom garlands best, since winding and trimming need no sharp tools beyond safety scissors. Families make garlands together on winter evenings, with each person producing pom poms in a chosen color. Hang garlands across the tree front or along a mantel for extra cheer.
Wrap leftover wool from knitting projects into pom poms rather than storing small balls that never suit a full project. One knitter turned a basket of oddments into three garlands, one for each grandchild tree. Label garlands by color scheme to match them to trees quickly next year.
Tie knots firmly on both sides of each pom pom, because loose knots let pom poms slide into clumps. Avoid very large pom poms on small trees, where weight pulls branches down and hides smaller ornaments. Medium pom poms balance softness and lightness best.
Multicolor Pom Poms Assortment 1400 Pieces: Fluffy pom poms in five assorted sizes thread into soft, playful garlands that suit nursery trees and family rooms.
Common Mistakes to Avoid With DIY Ornaments
Rushing the drying stage ruins more ornaments than any other mistake, because paint smears, glue fails, and clay cracks when handled too soon. Read drying times on every product and add extra time in cold or damp rooms. Patience at this stage saves remaking whole batches later.
Overloading branches with heavy ornaments bends branches and hides the tree shape beneath a crowd of decorations. Among diy christmas ornaments, lighter pieces often look best, so balance heavy clay and wood with paper, felt, and pom poms. Step back often and check the tree from across the room.
Skipping a test piece wastes time when a new technique behaves unexpectedly on the real ornament. Paint one spare bead, bake one spare star, and stitch one spare shape before committing to a full set. Tests reveal problems while fixing them still costs little.
Forgetting to label the year and maker on the back of each ornament loses the stories that make handmade trees special. Write names and dates lightly in pencil or fine pen before storing. Future trees gain meaning when every ornament carries its own small history.
Budget Friendly Ways to Make DIY Ornaments
Start with supplies already at home before buying anything new, since kitchens, gardens, and scrap boxes hide most of what handmade trees need. Good diy christmas ornaments rarely need expensive materials, because paper, twigs, pine cones, and fabric scraps cost nothing or next to nothing. One careful look around the house often fills a whole craft basket.
Buy shared supplies in bulk with friends or family when a project needs paint, beads, or felt. Splitting one large pack across three makers cuts costs sharply and stops leftover materials gathering dust. Craft shops run sales in November, so watch for discounts on basics like twine, ribbon, and glue.
Reuse old decorations as bases for new ones, wrapping tired baubles, repainting wooden shapes, and restringing broken garlands. Charity shops sell bags of old ornaments for coins, giving makers plenty of raw material. Saving money this way also keeps old decorations out of landfill for another year.
DIY Ornament Tips That Make Them Last
Seal every ornament. Paint, clay, and paper all last longer with a suitable sealer, varnish, or clear coat applied thinly and evenly. Sealing protects against dust, damp, and handling, especially for ornaments hung on low branches. Test sealer on a spare piece first to check it dries clear.
Store ornaments in layers. Tissue paper between layers stops paint sticking, beads tangling, and felt crushing during the long months in storage. Label each box by type and year, and keep boxes in a dry place away from attics that freeze and thaw. Good storage doubles the life of handmade work.
Hang heavier ornaments low. Strong lower branches hold clay, wood, and beaded pieces safely, while light paper and felt ornaments suit the delicate top branches. Balanced hanging keeps the tree shape pleasing and stops branches drooping by New Year. Check hanging loops yearly and replace worn twine.
Photograph the finished tree. Photos record which ornaments worked well together and which color schemes pleased the family most. Among diy christmas ornaments, the sets you photograph get remade and improved, while forgotten sets gather dust. Keep one photo with the decoration boxes as a guide for next year.
Repair small damage promptly. Loose threads, chipped paint, and frayed loops worsen quickly when ignored for a full year in storage. Keep a small repair kit with glue, thread, and matching paint beside the decoration boxes. Ten minutes of repair each January saves hours of remaking next December.
Involve children in simple tasks. Sorting, painting, and stringing suit small hands and build memories that outlast any single ornament. Children who help make decorations treat the tree gently and proudly point out their work to visitors. Shared crafting turns decoration into a family tradition rather than a chore.
FAQ
How long do salt dough ornaments last?
Stored dry in tissue, salt dough ornaments last for many years, though damp rooms soften them over time. Seal painted stars with clear varnish and keep them away from kitchens and bathrooms. Replace any star that smells musty or feels soft, since damp dough weakens quickly.
Can children make these ornaments safely?
Children make most of these ornaments safely with adult help on ovens, sharp tools, and hot glue. Salt dough, paper snowflakes, felt shapes, and pom poms suit small hands with only blunt scissors and washable paint. Keep beads, small buttons, and wire away from toddlers who still mouth objects.
What supplies should beginners buy first?
Beginners need only plain paper, scissors, glue, twine, paint, and a few brushes to start most ideas in this guide. Add felt, beads, and air dry clay later, once favorite projects emerge. Buying basics first keeps costs low and cupboards free of unused specialty tools.
How do I stop handmade ornaments breaking in storage?
Wrap each ornament in tissue, pack boxes in single layers, and fill gaps with crumpled paper so nothing shifts. Store boxes upright in a dry room and label lids clearly. Heavy ornaments belong at the bottom of the box, with paper and felt pieces layered above them.
Do handmade ornaments suit a themed tree?
Handmade ornaments suit themed trees beautifully when colors and materials follow the theme. Natural themes favor pine cones, twigs, and dried oranges, while bright themes suit painted beads and felt figures. Limit the palette to three colors for a calm and coordinated look.
When should I start making ornaments?
Start simple projects in early November and save slower crafts like knitting or detailed painting for quiet evenings through the month. Beginning early keeps making relaxed and leaves December free for wrapping and visiting. One or two ornaments per week builds a full set without any rush.
Conclusion
Handmade trees tell stories that shop bought trees never can, and diy christmas ornaments carry those stories branch by branch. Each ornament holds a memory of an afternoon, a person, or a small skill learned along the way. Guests notice the difference at once, because handmade trees look loved rather than merely decorated.
Choose two or three ideas from this guide that match your time, your supplies, and your household. Gather materials this week, protect the table, and make the first batch without worrying about perfection. Small flaws prove a person made each piece, and those marks become part of the charm.
Years from now, the salt dough star, the felt reindeer, and the photo bauble will return each December carrying their histories with them. Children grown tall will still hunt for their childhood ornaments first. Begin tonight with one simple idea, and let your tree grow more personal with every passing year.