15 Winter Craft Ideas for Kids to Make at Home
Cold afternoons can feel long when children are stuck indoors and screens start calling louder by the hour. Energy builds up, boredom grows fast, and parents often need a plan that fills time without creating chaos. Simple making projects give small hands real work to do and turn a grey day into something children remember with pride.
You do not need a stocked craft room or a big budget to keep young makers busy all winter. Most projects in this list use paper, card, cotton balls, glue, paint and scraps already waiting in kitchen drawers. Short setup, easy cleanup and clear results matter more than fancy kits when children feel restless and daylight fades early.
Inside this guide you will find winter craft ideas for kids that suit toddlers, preschoolers and older children sharing one table. Each idea explains supplies, timing, best ages, a real example and one common mistake to avoid. Budget notes, practical tips and answers to frequent questions sit at the end so you can plan calmly before you start.
What are the best winter craft ideas for kids to make at home?
Simple winter craft ideas for kids work best when they use few supplies, finish within one sitting and give a clear result children can hold or display. Paper snowflakes, cotton ball snowmen and fingerprint trees suit almost every home because paper, glue and paint cost little. Pick one project, set out only what it needs, and begin.
Start with a five year old who folds and cuts paper snowflakes at the kitchen table while soup warms on the stove. She opens each folded sheet slowly, laughs at the pattern, and tapes her best snowflakes to the window before dinner. One short project filled the whole afternoon and left the room looking brighter for days afterwards.
Disclosure: As an Amazon Associate I earn from qualifying purchases. Some of the links below are affiliate links, which means Bloomie Living may earn a small commission if you buy through them, at no extra cost to you.
Paper Snowflakes
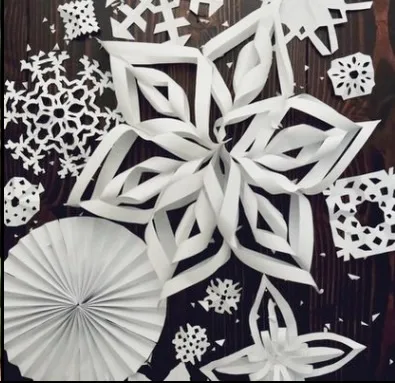
Paper snowflakes remain the most loved of all winter craft ideas for kids because folding and cutting reveal a surprise every single time. Children see plain paper turn into lacy patterns within minutes, and no two results ever match. Finished snowflakes suit windows, walls, cards and gift wrap, so makers feel proud seeing their work displayed around the home.
Fold thin white paper or coffee filters into quarters, then round the corners with safety scissors before cutting small shapes along each edge. Keep a small bowl ready for snipped scraps, and set out tape or thread for hanging finished pieces. One pack of paper and one pair of scissors per child will cover a whole afternoon of making.
Children aged five and older handle folding and cutting with growing confidence, while younger children enjoy tearing, sticking and decorating precut shapes. Patient children love repeating the process to build a whole window display. Children who enjoy patterns and quiet focus often stay with snowflakes longer than with any other paper project on this list.
One family covered their living room window with snowflakes in three sizes during the first snowfall of the year. Neighbours slowed down outside to look, and the children counted passing smiles from the sofa. Their window stayed decorated until spring, and guests always asked who made the largest snowflake in the centre of the glass.
Watch scissor safety closely, because excitement speeds up small hands and folded paper needs firm pressure to cut. Remind children to cut away from fingers and to carry scissors closed and pointing down. Save ironing or pressing for adults only, since hot irons and eager helpers should never share the same small workspace.
Kids Scissors Five Inch Blunt Tip Pack of Two: Blunt tips and handles made for small hands keep paper snowflake cutting safe and easy for young children.
Cotton Ball Snowmen
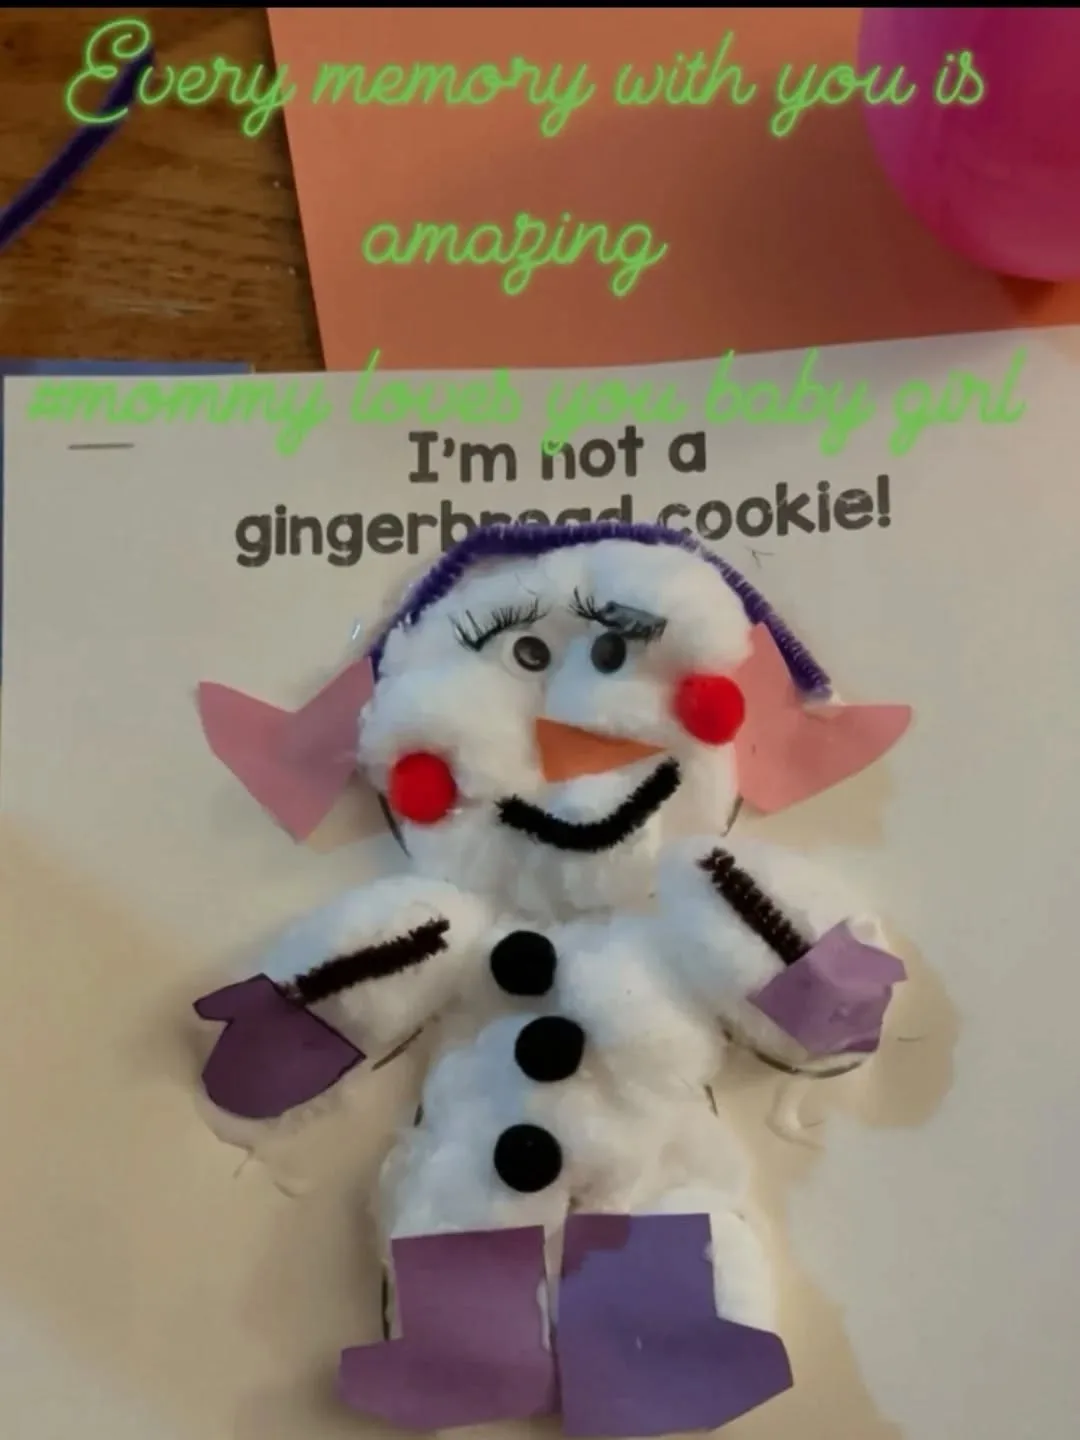
Cotton ball snowmen give children a soft winter figure to build without cold hands or melting snow. Stretching and gluing cotton balls builds round bodies on card, and buttons, twigs and fabric scraps add faces and scarves. Finished snowmen look cheerful on fridges and classroom walls, and each one shows the personality of its maker very clearly.
Gather cotton balls, strong card, child safe glue, small buttons, orange paper for noses and scraps of fabric for scarves. Pull cotton balls apart gently before gluing so bodies look fluffy rather than flat and dense. One bag of cotton balls covers several snowmen, and a glue stick per child keeps waiting time short and tempers calm.
Preschoolers suit this project best because gluing and placing need patience rather than precision or cutting skill. Toddlers can press cotton onto glue shapes drawn by an adult, while older children add hats, arms and detailed faces. Children who love soft textures often return to snowmen whenever craft time feels rushed or noisy at home.
During one rainy weekend, two sisters made a whole snowman family and named each member after a grandparent. They stood the cards along the hallway like a welcoming parade for their father returning from work. He took a photo before dinner, and the snowman family stayed in the hallway for the rest of the month.
Loose buttons pose a risk for very young children, so swap small parts for drawn or paper details whenever toddlers join in. Check that scarves and noses stay firmly glued before hanging finished work on walls. Keep spare cotton nearby, because pressed down cotton loses fluff and children often want to rebuild thin patches.
Cotton Balls 200 Count: Soft fluffy cotton balls glue into round snowman bodies and snowy details with almost no mess.
Pine Cone Bird Feeders
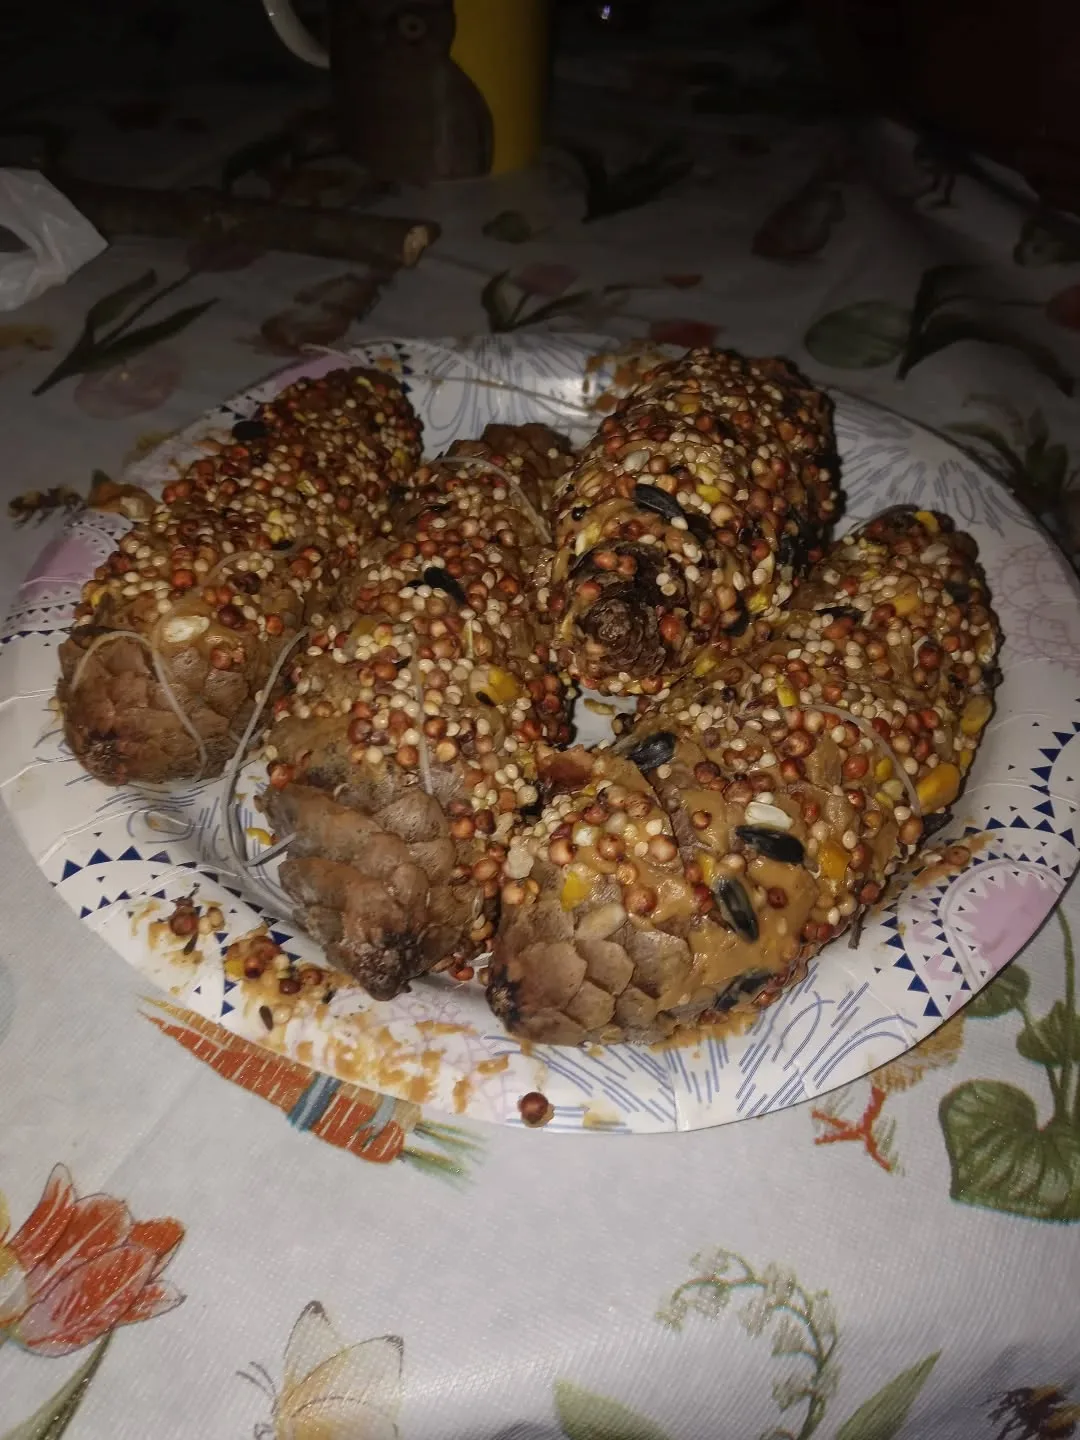
Pine cone feeders connect indoor making with the real winter world waiting just outside the window. Children spread sticky coating over dry cones, roll them in seed, and hang them where birds visit during cold weeks. Watching birds feed on something they made themselves gives children a quiet sense of care and responsibility that lasts all season.
Tie string firmly around the top of each dry cone before any coating begins, because adding string later gets messy. Spread peanut butter or lard mixed with seed onto the cone with a blunt knife or spoon, then roll the cone in a tray of bird seed. Hang feeders outside once coating feels firm and sticky.
School aged children handle spreading and rolling with care, and they enjoy recording which birds visit each day. Younger children can pour seed and hold cones steady while an adult spreads the coating. Children who love animals and nature often rank feeders first, especially when a hungry robin arrives within hours of hanging.
Imagine a quiet morning when a child spots three small birds sharing her feeder before breakfast. She fetches a notebook, draws each visitor, and asks for more seed before the bag runs low. Simple bird watching turned one feeder into a daily winter ritual that the whole family joined without any planning at all.
Check nut allergies in your home and classroom before using peanut butter, and choose plain lard seed mix as a safer option when in doubt. Bring cones indoors for a day first so damp cones dry fully and seed sticks well. Hang feeders away from busy doors where cats wait and birds feel unsafe.
Wild Bird Food 10 Pound Bag: A big bag of mixed bird seed gives children plenty to press onto pine cones for hungry winter birds.
Salt Dough Ornaments
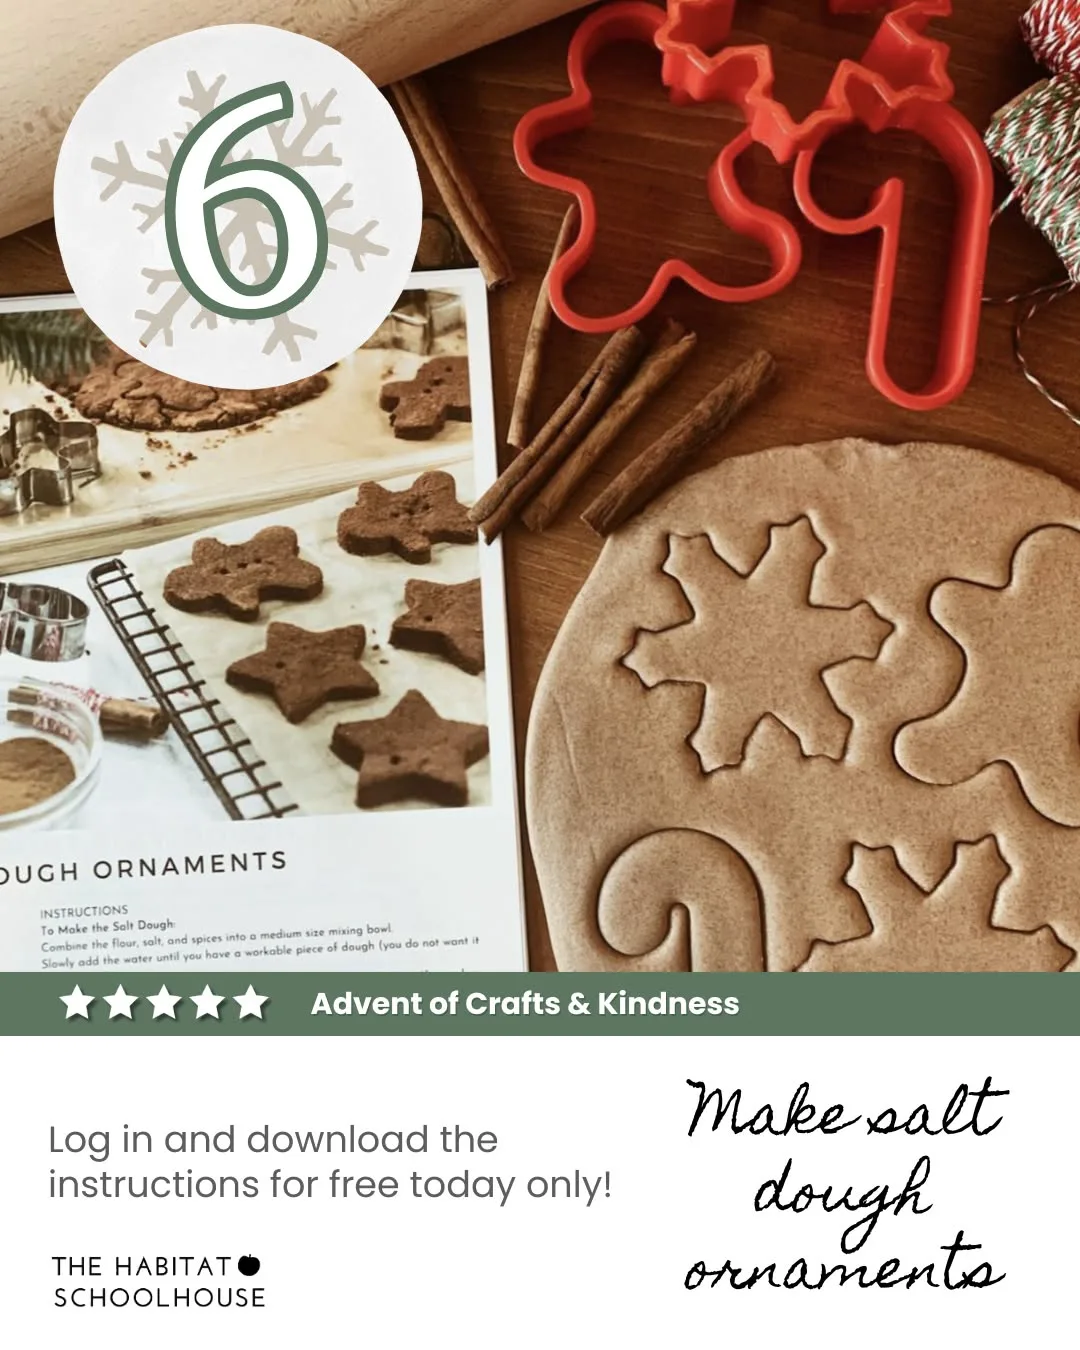
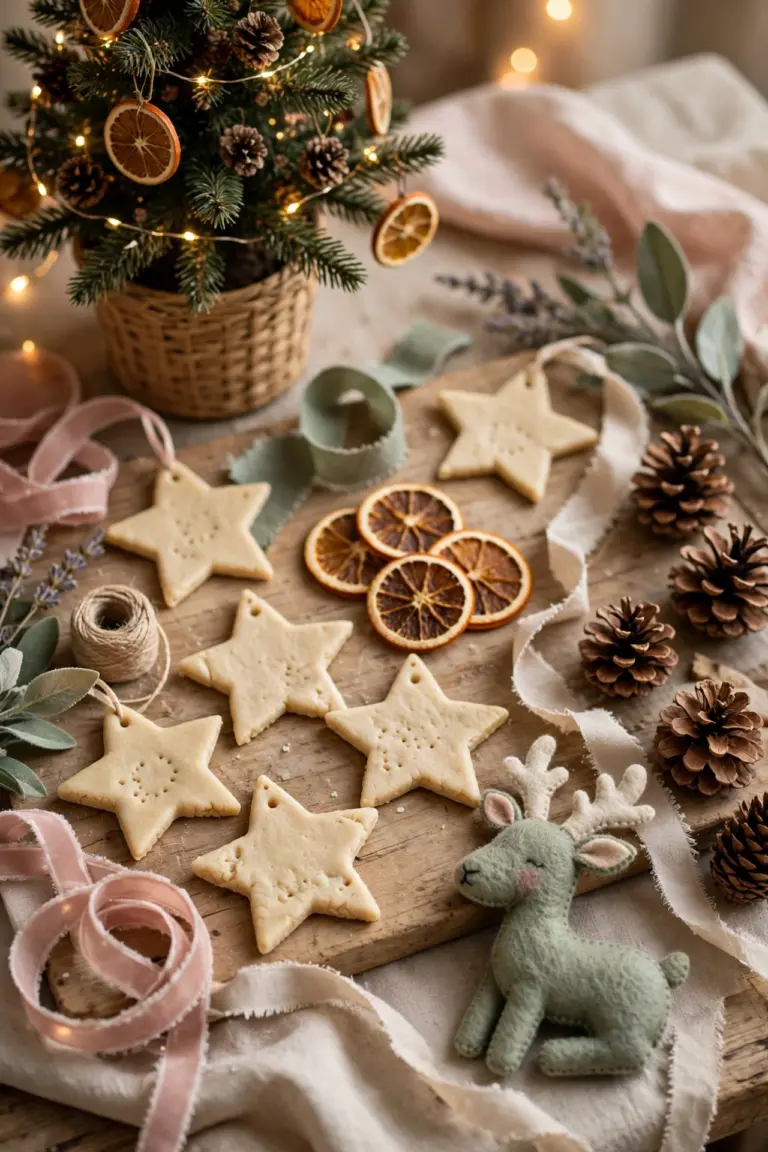
Salt dough ornaments let children roll, cut and paint keepsakes that return to shelves and trees year after year. Dough feels like play dough, costs almost nothing, and hardens into solid shapes after gentle baking or air drying. Painted stars, trees and snowmen make thoughtful gifts for grandparents who treasure handmade pieces from small hands.
Mix flour, salt and warm water in a large bowl until dough feels smooth and soft, using equal parts flour and salt with water added slowly. Roll dough on a floured board, cut shapes with cookie cutters, and press a straw hole near the top of each piece. Adult hands should manage ovens and hot trays.
Patient children aged four and older enjoy rolling and cutting, while older children paint fine details once pieces cool. Toddlers can press hand shapes into flattened dough with adult help and enjoy the squishy texture. Families who bake together often love dough days, because the kitchen already smells warm and everyone knows the routine.
Last December, a boy made dough stars for every teacher at his school and painted each star a different colour. Teachers hung them in classroom windows, and he pointed them out proudly during the school concert. Making gifts himself taught him more about giving than any shop bought present had managed in earlier years.
Thin dough cracks during drying, so roll pieces evenly and keep shapes at least as thick as a pencil. Dry pieces fully before painting, because trapped moisture softens paint and clouds bright colours. Store finished ornaments in dry boxes with tissue between layers, never in damp cupboards where salt dough slowly absorbs moisture.
Stainless Steel Cookie Cutters Set: Sturdy metal cutters press clean shapes from salt dough so ornaments look neat after baking and painting.
Paper Plate Penguins
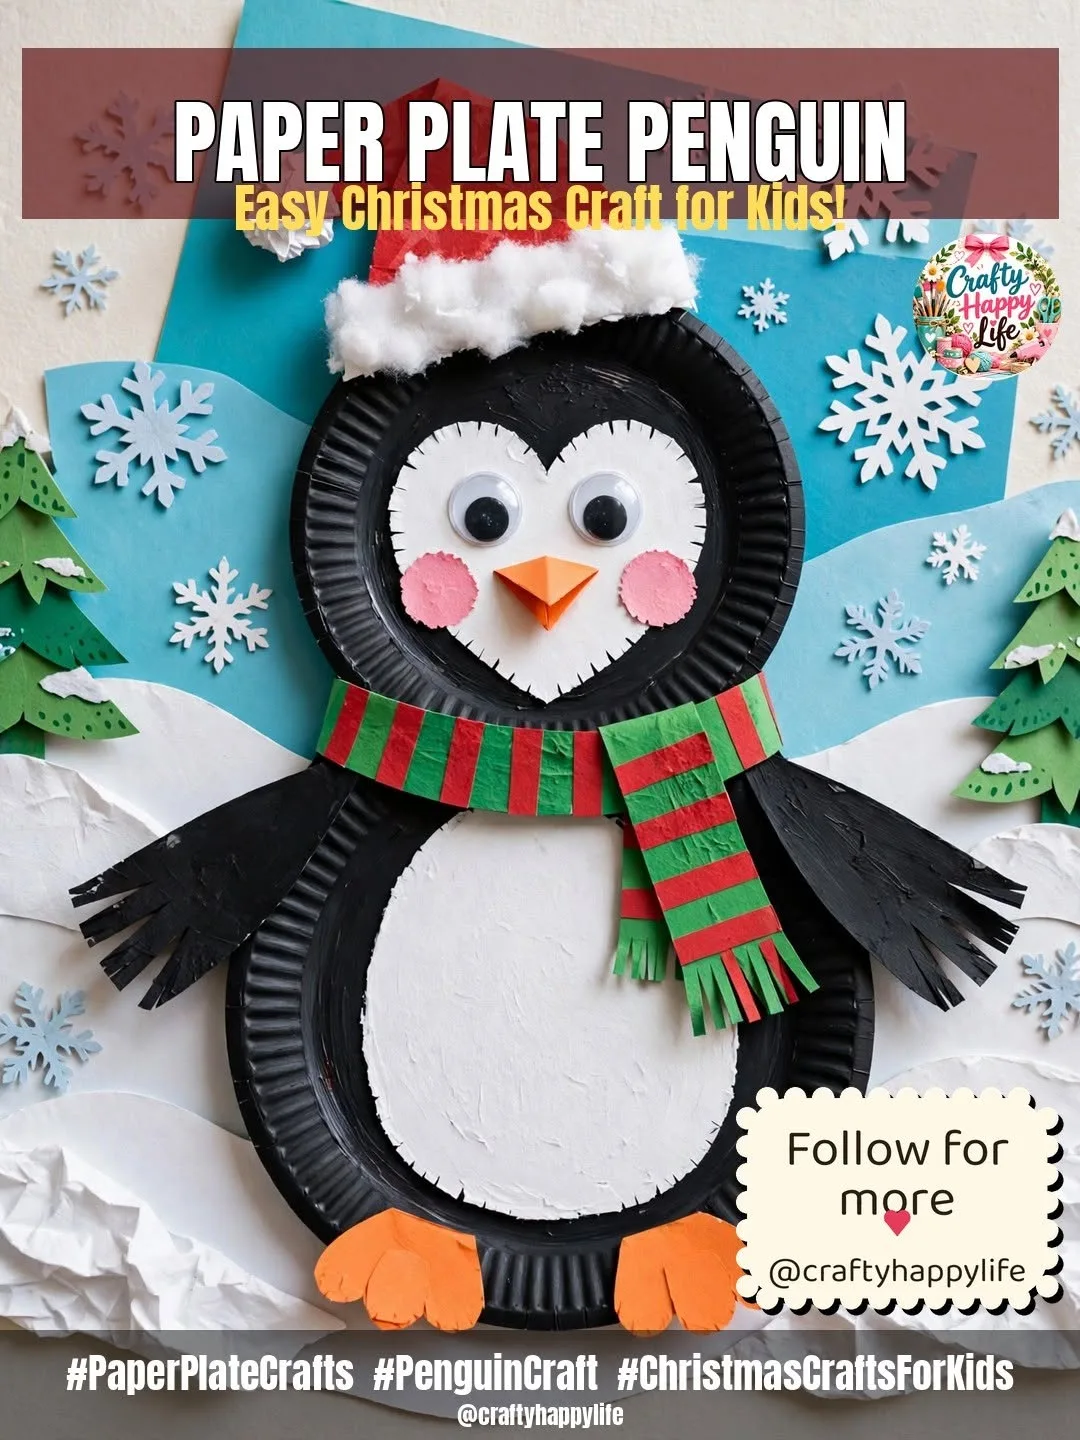
Paper plate penguins top many lists of winter craft ideas for kids because round plates already hold the perfect penguin body shape. Black paint or paper forms the back, a white oval forms the belly, and orange feet finish the character. Children love giving each penguin a name, a scarf and a very serious face.
Paint the rim of a strong paper plate black or cover it with black paper, then glue a white paper oval in the centre for the belly. Add paper eyes, an orange triangle beak and two orange feet at the base. One plate, two paper sheets and glue give each child a complete penguin in under an hour.
Younger children suit penguins well because big shapes forgive wobbly cutting and generous glue. Older children enjoy adding earmuffs, scarves and snowy backgrounds around their birds. Children who love animals often start inventing penguin stories while they work, which keeps conversation lively and helps shy children join group craft sessions with confidence.
At one library craft morning, twenty penguins lined the windowsill and every child insisted the group needed a photograph together. Staff printed the photo for the notice board, and children brought parents back later just to find their own penguin. Small paper birds had turned a routine morning into a small community event.
Weak plates bend under heavy paint and glue, so choose thick plates or back each plate with card before starting. Let black paint dry before adding the belly, because wet edges smudge white paper grey. Keep finished penguins flat overnight under a light book so curled edges settle before display or gifting.
Everyday Disposable Paper Plates 100 Count: Plain white plates make a sturdy round base for penguin bodies, wings and bright orange feet.
Handprint Mittens
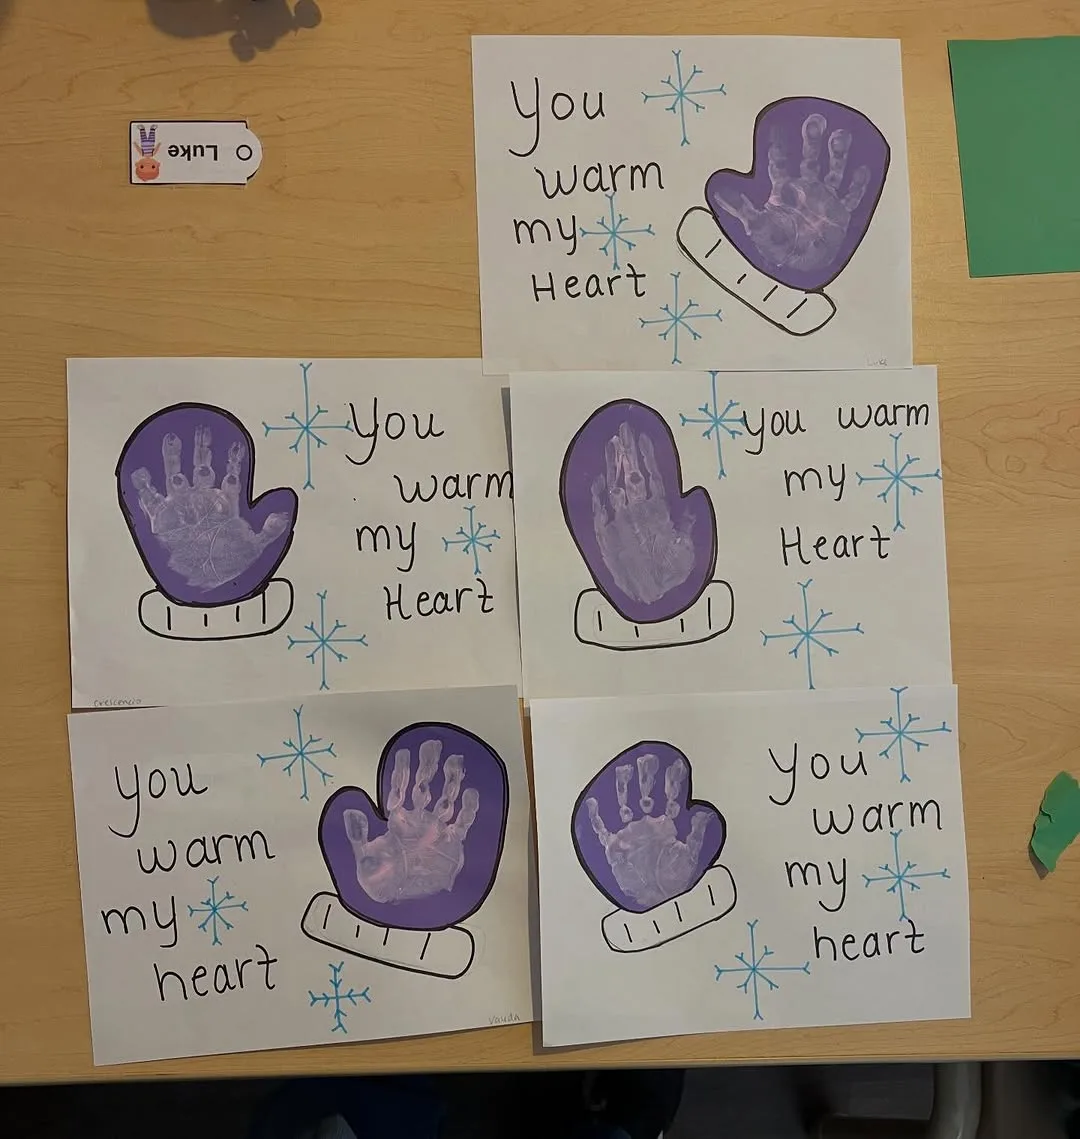
Handprint mittens capture the real size of a child hand inside a cosy winter shape that families keep for years. Children draw around their hands on coloured card, cut out mitten pairs, and decorate cuffs with cotton wool or white paint dots. Pairs joined with yarn look sweet strung across a mantel or classroom wall.
Draw around each hand with fingers together on folded card so two matching mittens appear at once, then cut slowly along the line. Glue cotton wool along the wrist edge for a fluffy cuff, and decorate with stickers, stamps or drawn patterns. Keep one set undecorated as a size record and date the back in pencil.
Toddlers enjoy the drawing around hands stage and the sticking, while children aged five and older cut their own shapes neatly. Grandparents treasure mitten pairs as gifts because hand size tells its own story each year. Children who dislike messy paint often prefer mittens, since pencils and glue keep hands and sleeves fairly clean.
Picture a grandmother opening an envelope to find red mittens traced from her grandson hands, joined with gold yarn. She hung them beside mittens from the year before and compared sizes with tears in her eyes. Two pieces of card had carried more feeling than an expensive card from any shop shelf nearby.
Sharp scissors near wiggly fingers cause most accidents during tracing and cutting, so adults should cut shapes for children under five. Check pencil lines before cutting, because mitten thumbs vanish when children spread fingers too wide. Remind makers to keep both mittens the same way up before decorating cuffs on the wrong edges.
Washable Kids Paint Set 10 Count: Washable paints in ten bright colors let little hands print colorful mittens without staining skin or clothes.
Snow Globes in Jars
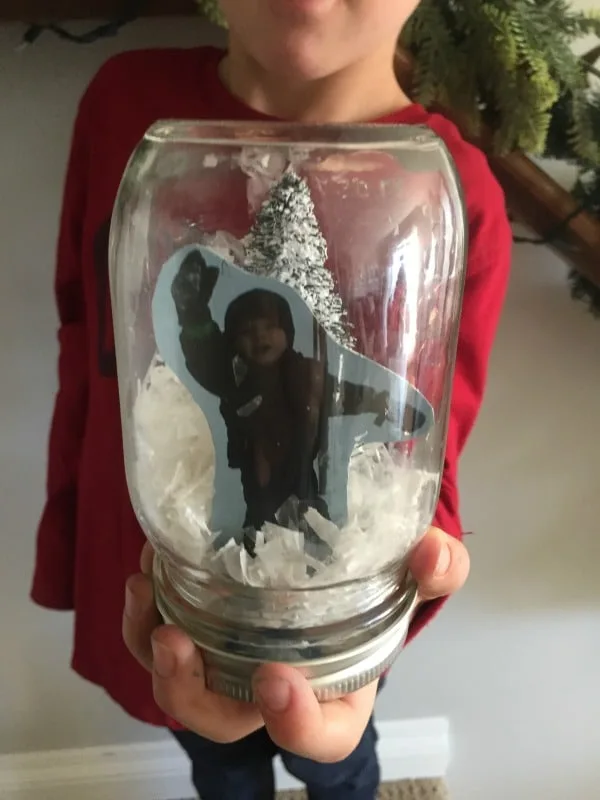
Snow globes in jars turn small figures and glitter into a tiny winter scene children can shake all season long. Clear jars, water and a waterproof figure fixed inside the lid create the classic swirling effect. Children treasure globes they designed themselves far more than shop versions, and globes make calm gifts for desks and bedside tables.
Fix a small plastic figure or clay tree firmly to the inside of a clean jar lid using waterproof glue, and let glue cure fully before adding water. Fill the jar almost to the top, add a pinch of glitter, and screw the lid down tightly. Adults should seal edges and handle all leak checks at the sink.
Confident children aged seven and older manage measuring, filling and sealing with close adult help, while younger children choose figures and glitter colours. Careful children who enjoy slow, precise work shine at globes. Children who love collecting treasures often build whole villages of globes across a winter, one jar at a time.
Try one small globe first, like a boy who filled his jar with a tiny deer for his younger sister last winter. She kept the globe beside her bed and shook it whenever evenings felt long and quiet. He later made matching globes for cousins, and each one carried a different tiny scene inside.
Leaks ruin shelves and disappoint makers, so test every finished globe upside down over the sink for a full minute. Cloudy water spoils the scene quickly, which means clean jars and clean hands matter before filling. Keep glitter modest, because heavy glitter clumps together and hides the figure children worked so hard to place.
Wide Mouth Mason Jars with Lids and Bands 12 Count: Clear glass jars with tight lids turn into pretty snow globes that keep water and glitter safely inside.
Popsicle Stick Sleds
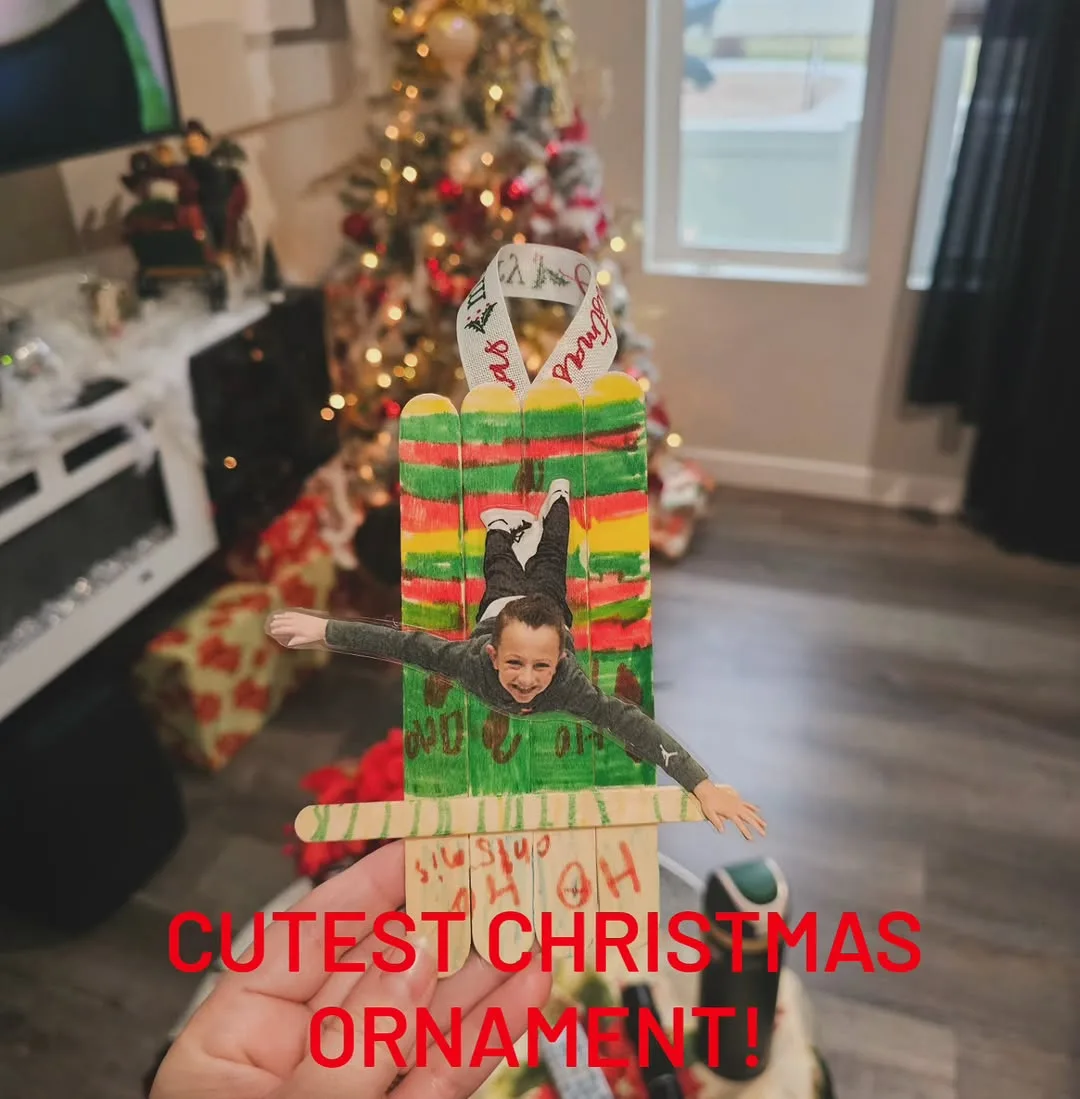
Popsicle stick sleds turn saved craft sticks into tiny winter rides for small toys and figures. Gluing sticks into flat beds with raised runners teaches children simple building skills and patience while glue dries. Painted sleds race down cardboard hills, carry pine cones, and star in small world play long after craft time ends.
Lay five sticks side by side for the sled bed, glue two sticks across the back to hold them, then glue two upright sticks beneath as runners. Add a short string loop at the front for pulling, and paint once glue feels fully dry. Save sticks from summer treats or buy clean craft sticks in bulk packs.
Children aged six and older who enjoy building and puzzles handle sleds with real satisfaction, since parts must line up neatly. Younger children can paint and decorate sleds built by adults or older siblings. Energetic children often calm down during sled building, because careful gluing rewards patience more than speed at every stage.
One class built sleds, loaded them with dried beans, and raced them down a gentle cardboard ramp during indoor play. Sleds that wobbled sparked quick repairs and cheerful problem solving among teams. Teachers kept the ramp for weeks, and sled races became the reward children requested after finishing their regular school work.
Rushing paint onto wet glue weakens joints and smears colour across clean wood, so build sleds in two short sessions instead of one. Press each joint firmly and count slowly before letting go. Test finished sleds with light loads first, because a sled that breaks under a toy breaks a maker heart too.
Wood Craft Jumbo Sticks 1200 Pieces: Wide smooth wooden sticks glue together into strong sled runners and seats for small winter figures.
Tissue Paper Stained Glass Snowflakes
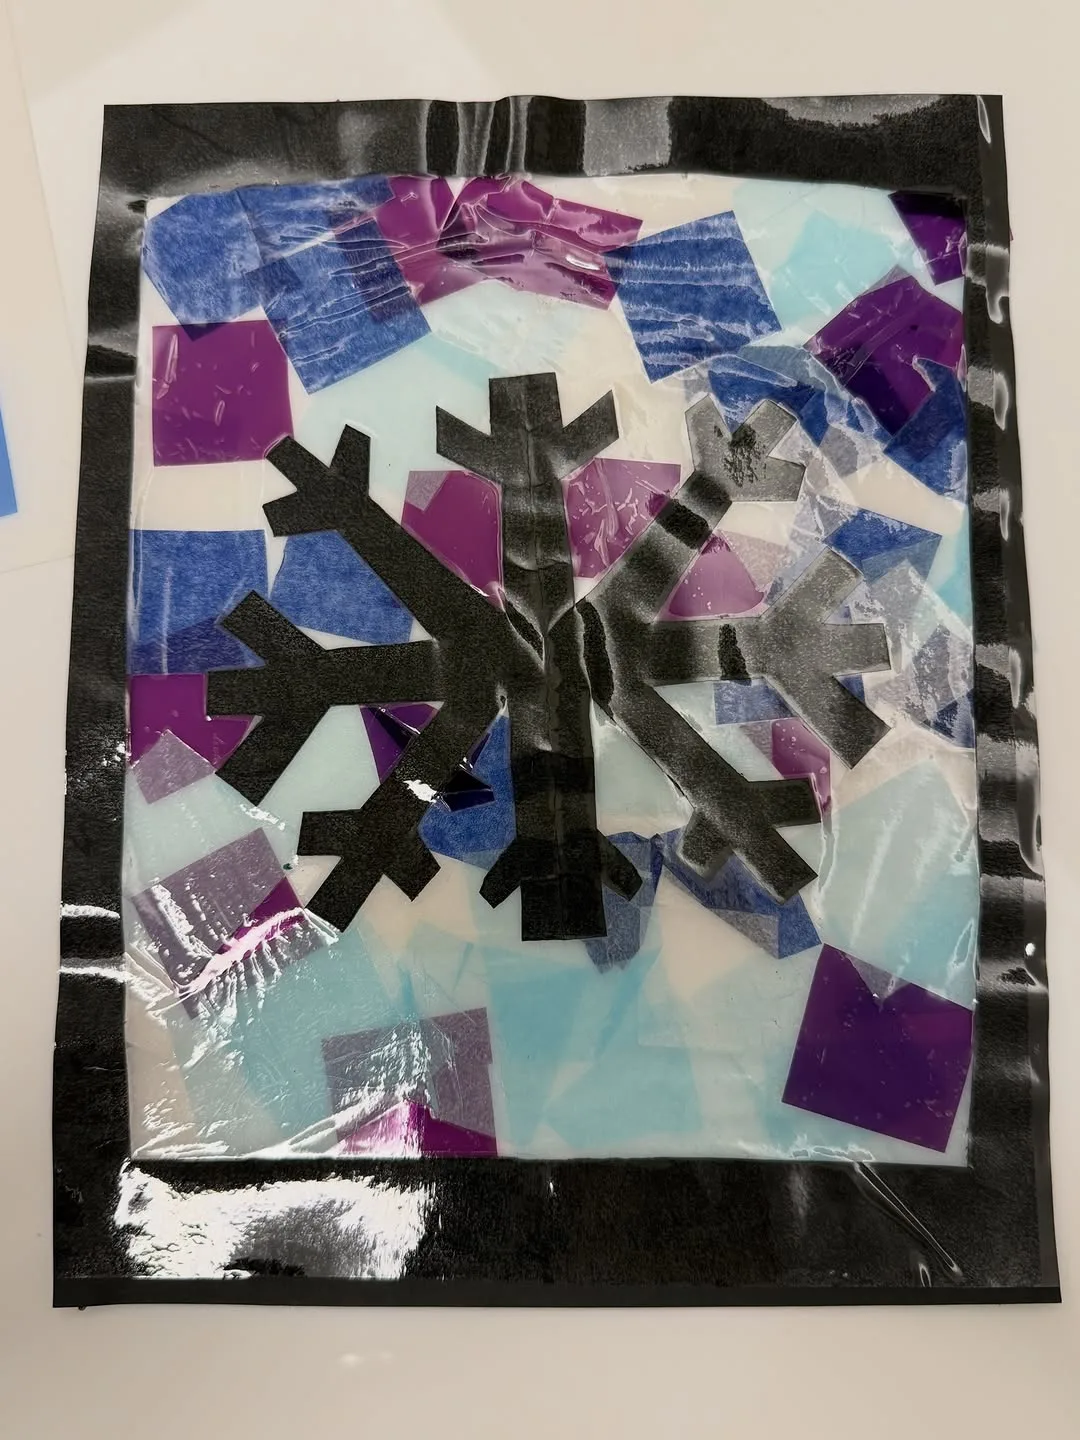
Tissue paper stained glass snowflakes bring colour back into pale winter windows, and they glow when weak sunlight shines through them. Layered tissue on clear contact paper or waxed paper forms bright patterns without paint or mess. Many families rank tissue snowflakes among their favourite winter craft ideas for kids for calm afternoons indoors.
Cut a snowflake frame from black card or fold clear contact paper with the sticky side facing up inside a simple card frame. Press small tissue squares inside the frame, overlapping colours slightly so light blends them. Trim edges once the frame fills, then tape finished pieces directly onto clean window glass for best glow.
Little hands manage pressing tissue squares easily, making this project kind to toddlers with adult framing help. Older children design detailed patterns, mix colour families and cut finer frames independently. Children who feel frustrated by drawing often relax with tissue work, because colour placement alone creates beauty without any need for realistic shapes.
When afternoon sun hit a row of tissue snowflakes in one classroom, colours spilled across desks and children gasped out loud. Their teacher left the display up for a month because behaviour improved during the golden hour before home time. Bright windows had quietly changed the mood of the whole room each day.
Too much tissue in thick layers blocks light and dulls the stained glass effect everyone hopes for. Keep layers thin, press bubbles out gently, and hold work up to the window before adding more colour. Dark frames show best against pale winter skies, so save black and deep blue card for this project.
White Tissue Paper Sheets Pack of 100: Thin white tissue layers fold and glue into soft stained glass snowflakes that glow in a sunny window.
Sock Snowmen
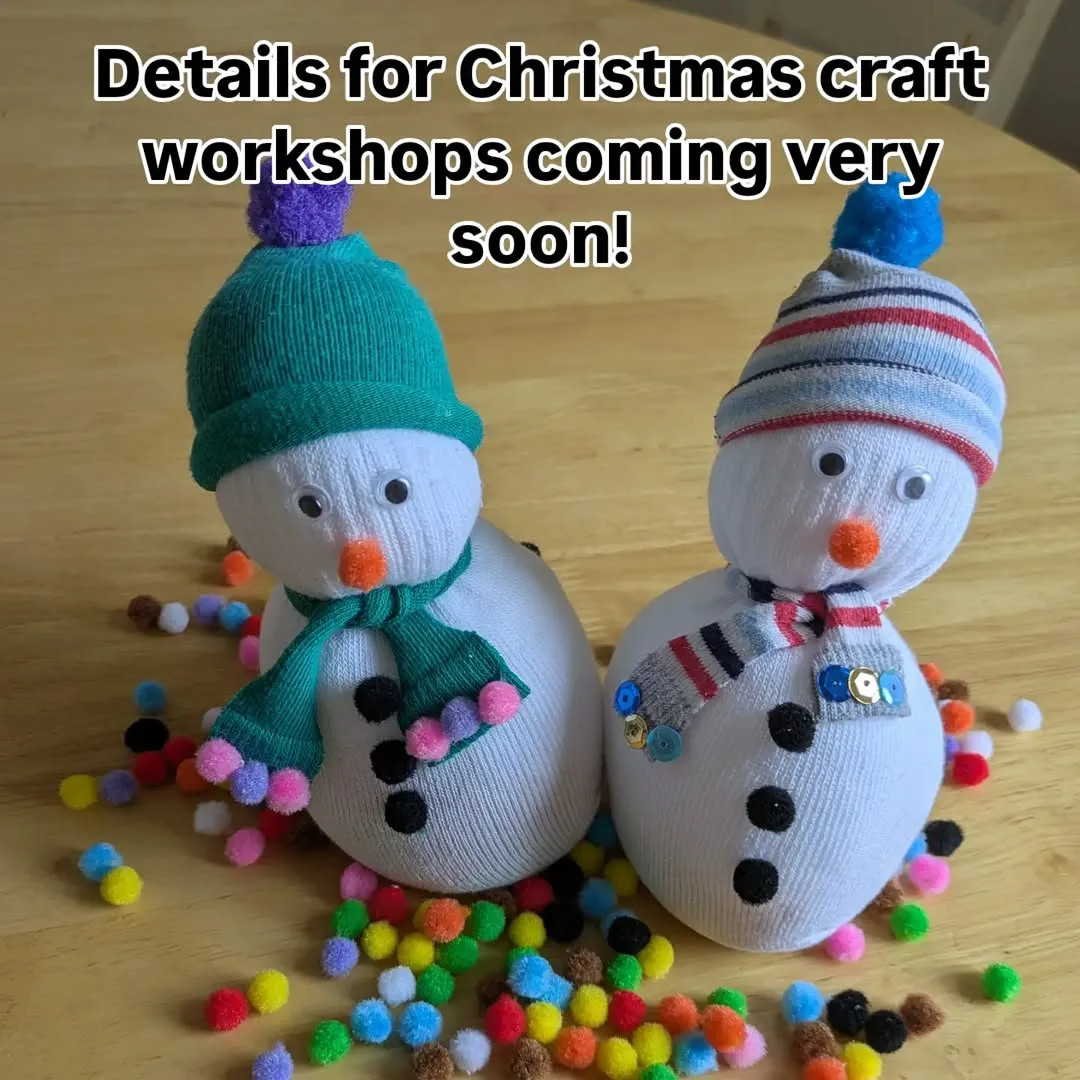
Sock snowmen need no sewing and no snow, yet they stand plump and proud on any shelf. Rice or lentil filling inside a clean white sock forms the body, and elastic bands shape the head without a single stitch. Scarves from fabric scraps and drawn faces give every snowman a mood, from sleepy to surprised.
Fill a clean white sock with rice or dry lentils until the body feels firm, tie the top closed, and pinch a smaller head section with an elastic band. Roll the sock cuff down as a hat, glue or draw the face, and wrap a fabric strip around the neck as a scarf. Work over a tray to catch spills.
Families with several children love sock snowmen because odd socks finally gain a purpose and each child builds at their own pace. Children aged five and older pour, tie and decorate with little help. Younger children choose scarves and faces while adults manage filling and tight knots at the end of each body.
During a power cut one evening, three cousins built sock snowmen by torchlight and lined them along the stairs. Giggles replaced complaints about dark rooms, and the snowmen stayed on the stairs for a week. Their mother later said the simplest project of the season had saved the hardest night of the winter.
Spilled rice spreads fast across floors and turns cleanup into the longest part of the project, so fill socks slowly over deep trays. Check knots twice, because loose ties leak filling during play and display. Keep finished snowmen dry, since damp filling smells stale and can stain fabric within days of making.
Kids Cushioned Crew Socks 3 Pairs: Plain white crew socks fill with rice or stuffing to build round snowmen that stand up on their own.
Winter Painting with Forks
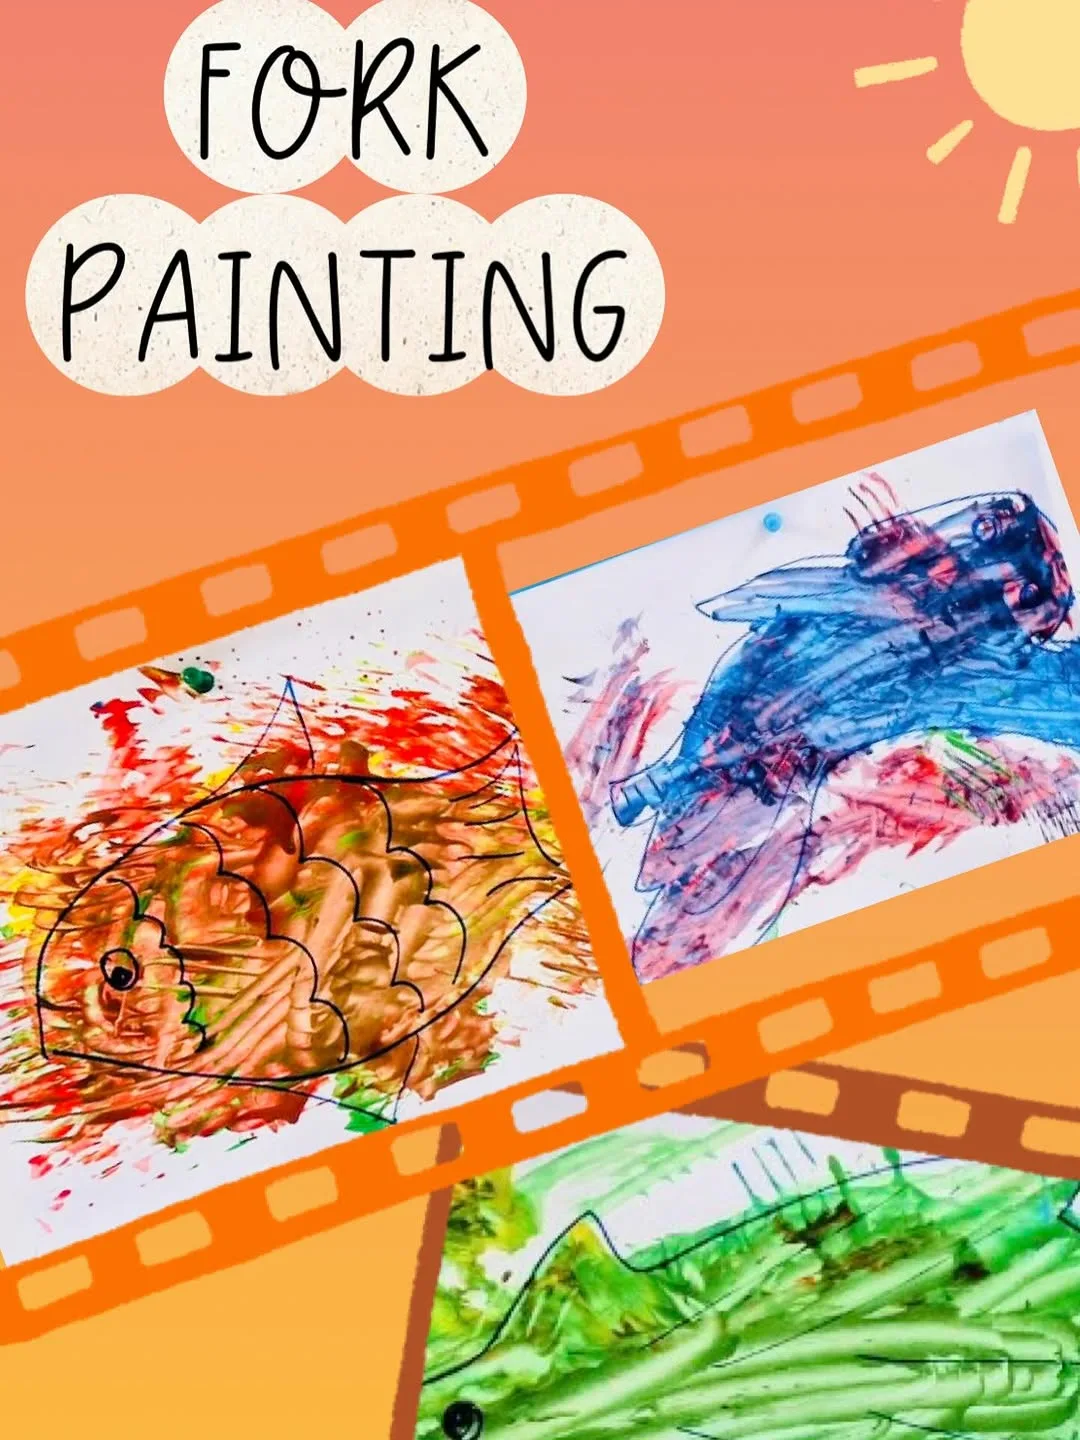
Winter painting with forks lets children print spiky pine trees, fireworks of frost and textured snow scenes using a kitchen tool. Fork prongs dragged or stamped through paint leave fine lines that brushes rarely match. Children who think they cannot paint gain confidence quickly, because printed marks look deliberate and wintry almost every time.
Set out thick paper, washable paint in greens, whites and blues, and one plastic fork for each colour on the table. Show children how stamping builds triangle trees and how dragging makes grass like frost strokes along the ground. Aprons and a covered table keep paint on paper rather than on sleeves and floors.
Energetic toddlers and preschoolers thrive with stamping because big movements produce satisfying marks without fine control. Older children layer prints into forests, add printed stars and build detailed night scenes with patience. Reluctant artists often join fork painting first, since a tool sits between their hand and the page and lowers pressure to perform.
Imagine a child who refuses brushes yet stamps a whole forest of green trees in ten happy minutes. She adds white fork dots as falling snow, signs her name in blue, and asks for wall space immediately. Her forest hung beside the front door all winter, greeting every visitor with cheerful confidence each day.
Watery paint blurs prong marks into plain blobs, so keep paint thick and replace water pots before they turn muddy. Test forks on scrap paper first, because bent prongs print uneven lines that frustrate perfectionists. Wash forks promptly after painting, and never return craft forks to kitchen drawers once paint touches them.
Washable Project Paint 6 Count: Six washable colors spread with a fork make spiky pine trees and falling snow in winter paintings.
Ice Sun Catchers
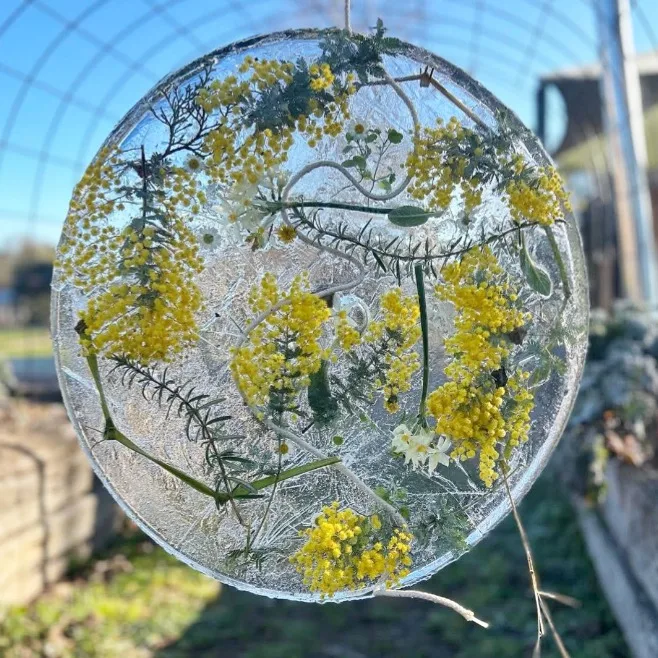
Ice sun catchers freeze leaves, berries, orange slices and small treasures into clear discs that sparkle outside on cold mornings. Children arrange natural finds in shallow containers, cover them with water, and wait for frost or a freezer to finish the work. Hung from branches, finished discs catch low winter light beautifully before slowly melting away.
Arrange leaves, petals, citrus slices or small flat treasures in a shallow dish or silicone mould, then pour water slowly until pieces sit just covered. Add a loop of string with both ends dipped in water so the loop freezes in place for hanging. Freeze overnight outdoors when nights stay cold, or use the freezer.
Curious children aged four and older enjoy hunting for treasures to freeze, and they check progress with real excitement. Younger children help arrange pieces and pour water with a small jug and steady adult hands. Patient families enjoy catchers most, because waiting overnight builds anticipation that quick crafts rarely create in quite the same way.
Early one frosty morning, a girl hung six catchers along a bare hedge and watched sunrise light them like small windows. Passers by stopped during dog walks to admire colours glowing through the ice. By lunch the discs had melted, yet photographs kept the display alive on the family fridge for months.
Overfilling containers makes thick discs that freeze slowly and crack when handled, so keep water shallow and pieces flat. Glass dishes can crack in hard frost, which makes plastic or silicone containers the safer choice outdoors. Bring treasure pieces inside if you plan to reuse them, because melt water scatters small items across paths.
Silicone Round Cake Molds 4 Inch Set of 3: Round silicone molds hold water and small treasures while they freeze into clear ice sun catchers.
Cardboard Igloos
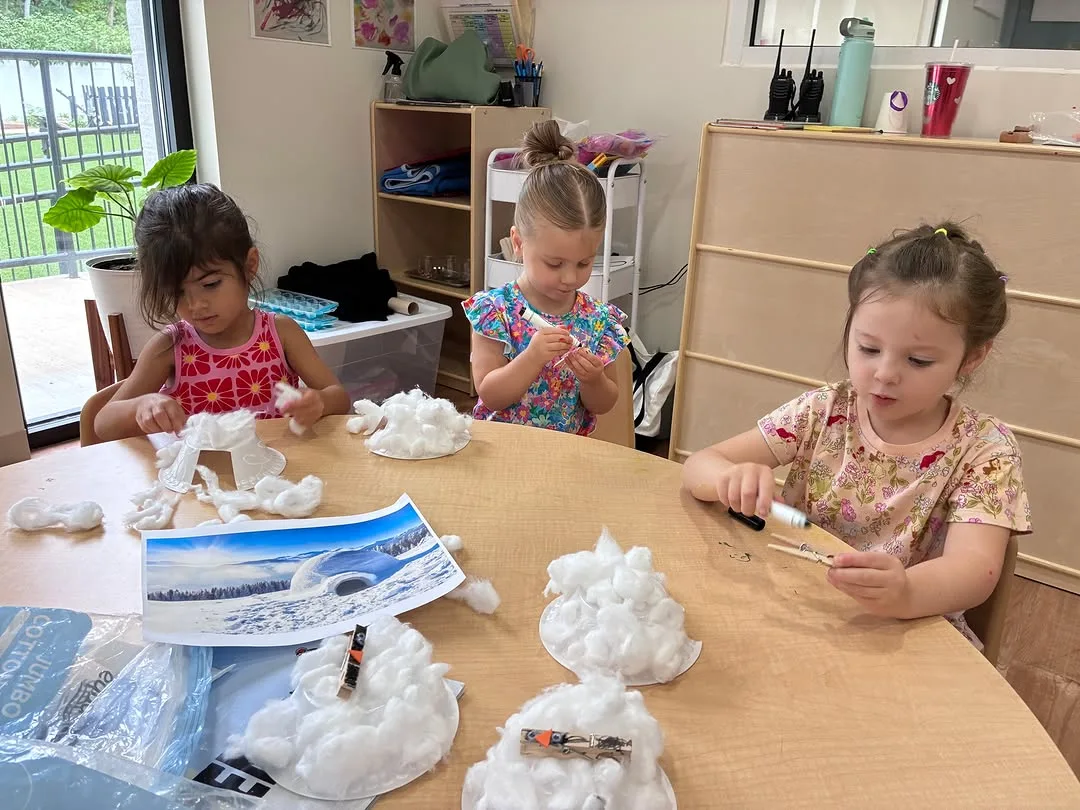
Cardboard igloos turn big boxes into cosy winter dens, and they anchor many collections of winter craft ideas for kids at home. Children stack drawn or glued paper blocks around a box base, cut a low doorway with adult help, and crawl inside with blankets and books. Few projects match the joy of playing inside something you built.
Start with the largest clean box you can find, cut a rounded doorway, and strengthen corners inside with extra card and strong tape. Cover outside walls with white paper or paint, then draw block lines or glue cotton wool along seams as snow. Add a small roof flap only if walls feel sturdy enough to hold it safely.
Groups of siblings suit igloo building best, because many hands make covering a big box feel quick and fun. Children aged six and older measure, tape and decorate with growing independence and pride. Younger children crawl, test and decorate inside walls, which keeps them involved without placing them near cutting tools or heavy boxes.
One rainy Saturday, two brothers built an igloo in the corner of their bedroom and read inside it by torchlight all afternoon. Their parents served hot drinks through the doorway like a tiny cafe, and nobody missed the cancelled park trip. The igloo survived three weeks before recycling day finally claimed it for good.
Collapsing walls spoil igloo fun fast, so reinforce corners before decorating and keep jumping or leaning off the structure entirely. Damp cardboard weakens quickly, which means igloos belong indoors away from wet boots and radiators. Adults must cut doorways, because thick card resists child scissors and blades slip when children push too hard.
Corrugated Cardboard Paper Sheets 10 Pieces: Thick cardboard sheets cut and stack into igloo walls and arched doorways for pretend polar play.
Fingerprint Winter Trees
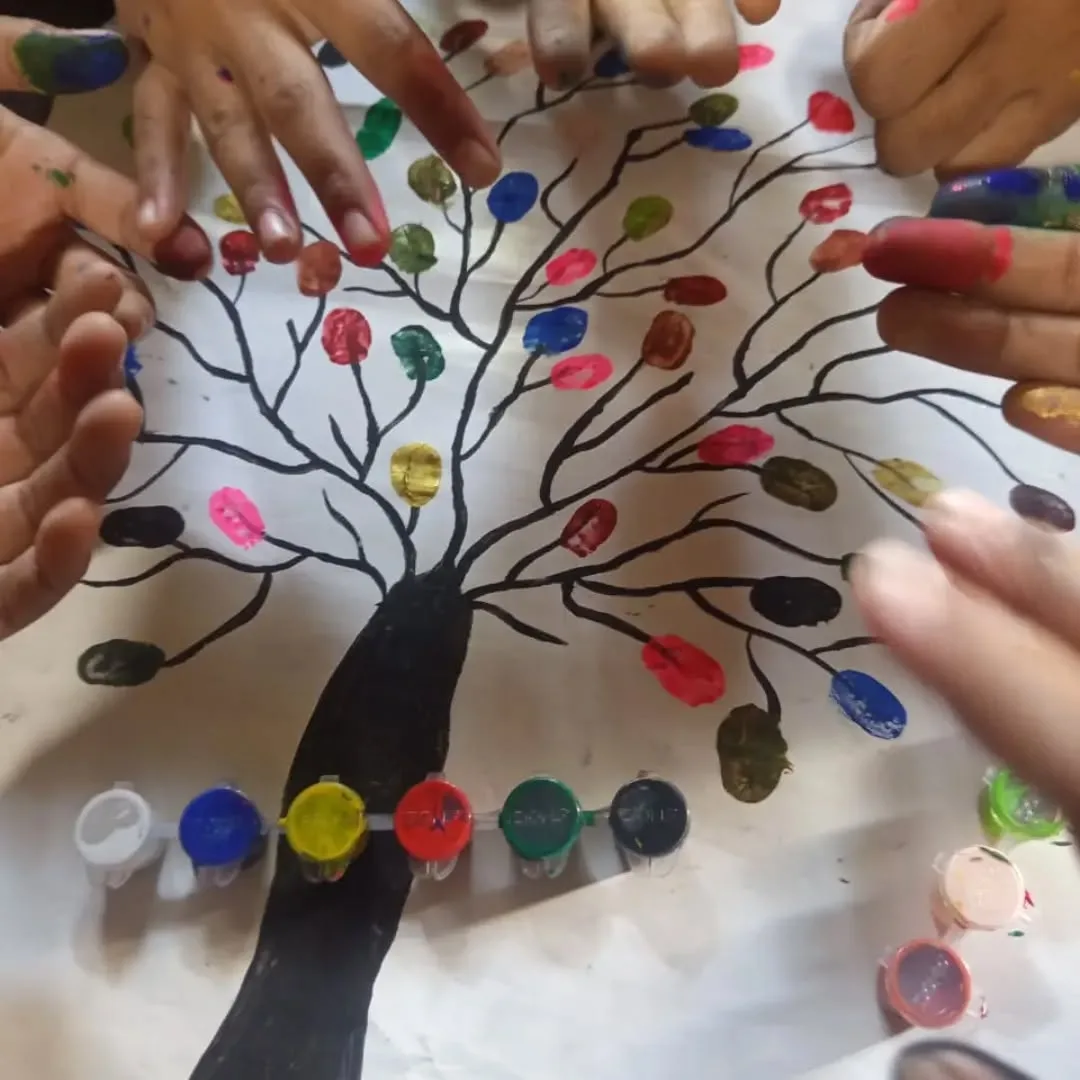
Fingerprint winter trees use painted fingertips as leaves, snow and decoration on bare drawn branches. Children press white, silver or pale blue prints around brown branches to suggest frost, berries or falling snow. Small hands literally sign the artwork, and finished trees make sweet cards and gifts that relatives keep long after winter ends.
Draw a simple tree trunk and branches on thick card with brown pen or paint, and let the outline dry before printing begins. Pour small puddles of washable paint onto a plate, press fingertips lightly, and test each print on scrap paper first. Keep wipes and a water bowl ready, because quick cleaning keeps colours pure.
Even very young children join fingerprint trees, since pressing a fingertip needs no drawing skill at all. Older children plan patterns, add tiny birds and turn prints into robins with pen details after drying. Grandparents adore fingerprint gifts, because each print records a small moment in childhood that never comes back again.
For her grandfather birthday, a girl printed a tree covered in white snow prints and one single red robin. He framed the card and hung it beside his chair, telling visitors his granddaughter had painted winter for him. She now sends him a new fingerprint tree every year as their shared tradition grows.
Pressing too hard turns delicate prints into round blobs that hide branch lines and look muddy. Practise light touches, and reload paint often so prints stay even and pale rather than thick. Wash hands between colours, because one muddy fingertip can grey a whole sky of clean white snow prints within seconds.
Rainbow Stamp Pad 6 Washable Inks: Six washable ink colors let fingertips stamp bare winter trees with snowy dots and bright birds.
Pom Pom Snowballs
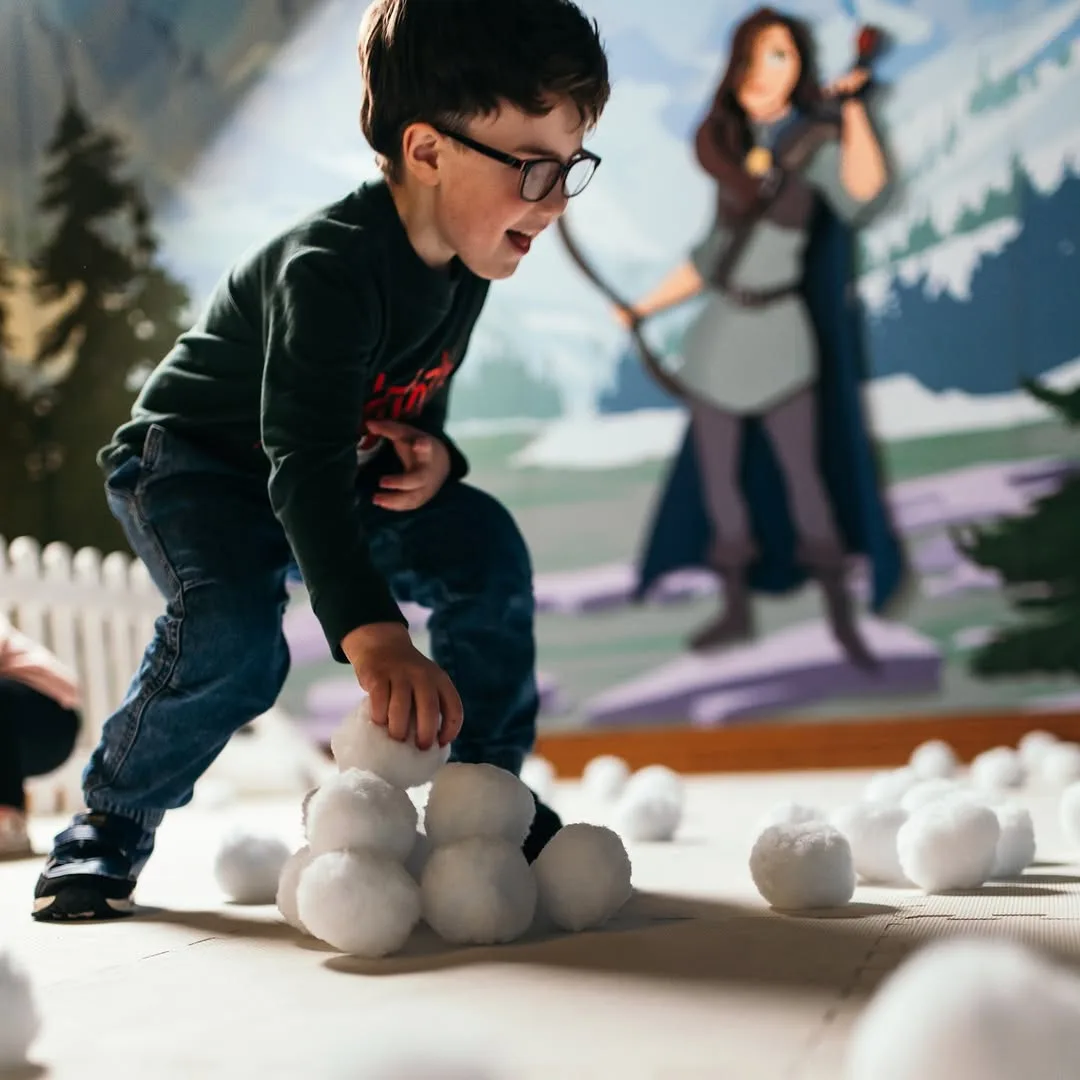
Pom pom snowballs give children indoor snow play without cold, wet gloves or melting puddles on the floor. Soft white pom poms become snowballs for throwing games, counting activities, decorations and gentle target practice into buckets. Children also glue pom poms onto card to build snowmen, snow scenes and fluffy winter animals during quieter sessions.
Buy large white pom poms in bulk bags, or make your own by winding white yarn around card circles and tying centres tightly. Set out buckets, hoops or taped floor targets for throwing games, and bowls for sorting and counting activities. One large bag supplies several sessions, and soft balls suit shared indoor spaces well.
Playful toddlers throw safely with the largest pom poms, while older children invent scoring games and timed challenges for friends. Children aged three and older glue pom poms into snow scenes with thick glue and tweezers or fingers. Gentle indoor snow play suits children who dislike cold weather yet still want winter games.
Think of a living room snowball toss where cousins aim pom poms into laundry baskets while grandparents keep score on paper. Nobody got cold, nobody got hurt, and the game lasted through two hot chocolate breaks. Soft snowballs had rescued a housebound afternoon that screens would otherwise have filled without any real laughter.
Small pom poms suit gluing but pose a risk for babies and toddlers who mouth craft materials during play. Choose the largest sizes for throwing games, and count pom poms back into the bag after each session. Store bags out of reach between activities, because scattered pom poms underfoot make floors surprisingly slippery.
White Pom Poms 2000 Pieces: A huge bag of small white pom poms gives children endless soft snowballs for counting games and crafts.
Common Mistakes to Avoid With Winter Crafts
Choosing projects that are too hard causes most tears during winter craft ideas for kids sessions at home. Children lose heart when cutting, folding or gluing sits far beyond their current skill, and adults end up finishing every piece alone. Match projects to the youngest maker at the table, then add harder decorations for older children who want more challenge.
Setting out every supply you own invites mess, waste and arguments over the same shiny materials. Place only what the chosen project needs on the table, and bring extras out one at a time when children ask. Limited choices calm young makers, speed decisions and make the final cleanup far less painful for everyone involved.
Skipping preparation wastes the happiest minutes of craft time, because children wait while adults hunt for glue, scissors or clean water. Read each idea fully before calling children to the table, and lay out tools in the order they will be used. Five quiet minutes of preparation protect the whole session from early frustration.
Expecting perfect results steals joy from projects meant to build confidence and family memories during long winter weeks. Wobbly penguins and lopsided snowmen still deserve wall space, because effort matters more than polish at this age. Praise choices, patience and finishing, and let children decide which pieces they display, gift or keep privately.
Budget Friendly Craft Planning for Winter
Planning winter craft ideas for kids around supplies you already own keeps winter making almost free for most families. Paper, card, clean socks, jars, boxes and kitchen salt already wait in most homes, ready for new purpose. Shop only for true gaps like glue or paint, and write a short list before entering any craft store with children.
Buying basics in plain bulk packs beats themed kits almost every time on price and flexibility. Plain paper, white glue, washable paint and craft sticks serve ten projects, while a single kit serves one afternoon only. Store leftovers in one clear box so you can see stock clearly before buying duplicates next month.
Nature and recycling supply excellent free materials when you look with craft eyes during winter walks and weekly sorting. Pine cones, sturdy sticks, clean boxes, jar lids and fabric scraps become feeders, sleds and igloos without costing anything. Wash and dry natural finds before use, and keep a small collection box ready near the door.
Winter Craft Tips for Calm and Happy Sessions
Cover the table first. Old newspapers, a washable cloth or a large tray under each child catches glue, paint and tiny scraps before they spread. Protection laid down early saves floors, clothes and tempers when excitement rises. Cleanup then takes minutes instead of becoming the longest job of the afternoon.
Work in short sessions. Young attention lasts twenty to forty minutes for most making projects, and tired hands make messy mistakes quickly. Plan one project per session, pause for drinks, and return later if children still feel eager. Short happy sessions build a love of crafting far better than long forced ones.
Keep a craft box ready. One box holding paper, glue, scissors, paint and wipes means winter projects can start whenever boredom strikes at home. Restock the box after each session while children help tidy their finished work. Ready supplies turn sudden snow days into calm making days without any frantic searching.
Display finished work proudly. Windows, fridges, string lines across a room and bedroom doors all become galleries when you hang work at child height. Children who see their making displayed feel valued and want to create again soon. Rotate displays weekly so new pieces gain space and older favourites move to memory boxes.
Photograph projects before gifting. Many winter crafts leave home as gifts, melt outdoors or fade after weeks on a sunny window. Quick photos preserve the memory for children and grandparents alike without keeping every object forever. Albums of past projects also inspire ideas when children cannot decide what to make next.
End with a tidy ritual. Songs, timers and small jobs like washing brushes turn cleanup into part of the session rather than a punishment after fun. Children who tidy their own space learn care for tools and shared rooms. Finishing calmly also protects finished work from wet paint, stray glue and careless stacking.
FAQ
What age can children start winter crafts?
Most children can join simple making from around age two, pressing, sticking and stamping with close adult help at the table. Start with big materials, washable paint and projects that finish quickly before attention fades. Complexity can grow each winter as hands strengthen and patience slowly builds through regular short sessions at home.
How long should a winter craft session last?
Sessions of twenty to forty minutes suit most young children, with drying breaks built into painting and gluing projects. Watch energy rather than the clock, and stop while children still feel happy and proud. Leaving one small step for tomorrow often creates welcome anticipation instead of tired arguments at the table.
What supplies should I buy first?
Paper, strong card, child safe glue, washable paint, safety scissors and cotton balls cover most projects in this guide for very little money. Add craft sticks, pom poms and tissue paper when budget allows during later shopping trips. Borrow cookie cutters, jars and boxes from kitchen cupboards before buying anything new at all.
How do I keep craft time calm and tidy?
When you set out only the supplies one project needs, mess stays small and choices stay simple for young makers. Covered tables, aprons, water bowls and a bin within reach prevent most spills from spreading across the room. Calm music, clear turns and tidy rituals at the end help everyone relax.
Can siblings of different ages craft together?
Sharing one project works well when older children take harder jobs like cutting and younger children handle sticking, pressing and decorating. Penguins, mittens and tissue snowflakes all offer simple and detailed roles at the same table. Separate small bowls of materials prevent arguments and let each child work at a comfortable pace.
What can children make as winter gifts?
Projects like salt dough ornaments, fingerprint trees, handprint mittens and snow globes make gifts that relatives genuinely keep and display. Choose projects with drying time built in, and finish them at least a few days before giving. Handmade gifts teach children thoughtfulness far better than rushed shopping ever manages for young givers.
Conclusion
Winter days feel shorter and kinder when winter craft ideas for kids fill the table with colour, texture and shared laughter. Snowflakes on windows, penguins on shelves and catchers glowing outside remind families that cold months hold their own kind of fun. Making together turns waiting for spring into a season worth enjoying on its own.
Choose one project that matches your youngest child, gather only what it needs, and enjoy the process more than the result. Confidence grows with every finished piece, and children remember the calm time beside you far longer than any small mistake. Keep supplies ready, keep expectations gentle, and let each maker lead where curiosity points next.
Call children to the table this week, put on warm drinks, and start with paper, glue and one cheerful idea from this list. Snow will melt, mittens will be outgrown, and displays will change with the seasons ahead. Memories of making winter crafts side by side will stay with your family for many years.