15 Handmade Christmas Card Ideas to Make and Send
Sending a card you made yourself feels different from posting a card bought in a shop, because every brush stroke and glued button shows time spent thinking about one person. Receivers notice that effort at once, and many keep handmade cards on mantels long after shop bought cards go into recycling. December brings a perfect excuse to sit down with paper, paint, and a cup of tea, and make something personal for the people you love most.
Card making suits beginners well, since most designs need only plain card, glue, and a few craft supplies from a drawer at home. Simple shapes carry the whole design, so shaky drawing skills never spoil the result. Children can join in too, and grandparents treasure cards made by small hands more than any expensive gift from a store shelf.
Below you will find fifteen handmade christmas card ideas for every person on your list, from painted trees and button designs to embroidered stars and photo fronts. Each idea explains why the design works, what supplies you need, who it suits best, and one mistake worth avoiding. Read through, pick the designs that match your skills and your list, and enjoy a few calm evenings making cards by hand.
What makes a handmade christmas card special?
Handmade christmas card ideas stand out because they carry a personal message in both words and design, and the receiver can see exactly who made the card and why. A painted tree in a favorite color, a button chosen to match a coat, or a fingerprint reindeer made by a grandchild all tell a small story. Shop cards can look polished, yet they rarely carry that kind of personal detail.
Receivers also keep handmade christmas card ideas longer than shop cards, because the card itself becomes a keepsake rather than a simple greeting. Many families display handmade cards through January, and some save favorites in a box with letters and photos. Making cards also slows December down, giving you a quiet creative hour away from shopping lists and busy schedules.
Disclosure: As an Amazon Associate I earn from qualifying purchases. Some of the links below are affiliate links, which means Bloomie Living may earn a small commission if you buy through them, at no extra cost to you.
Watercolour Christmas tree card
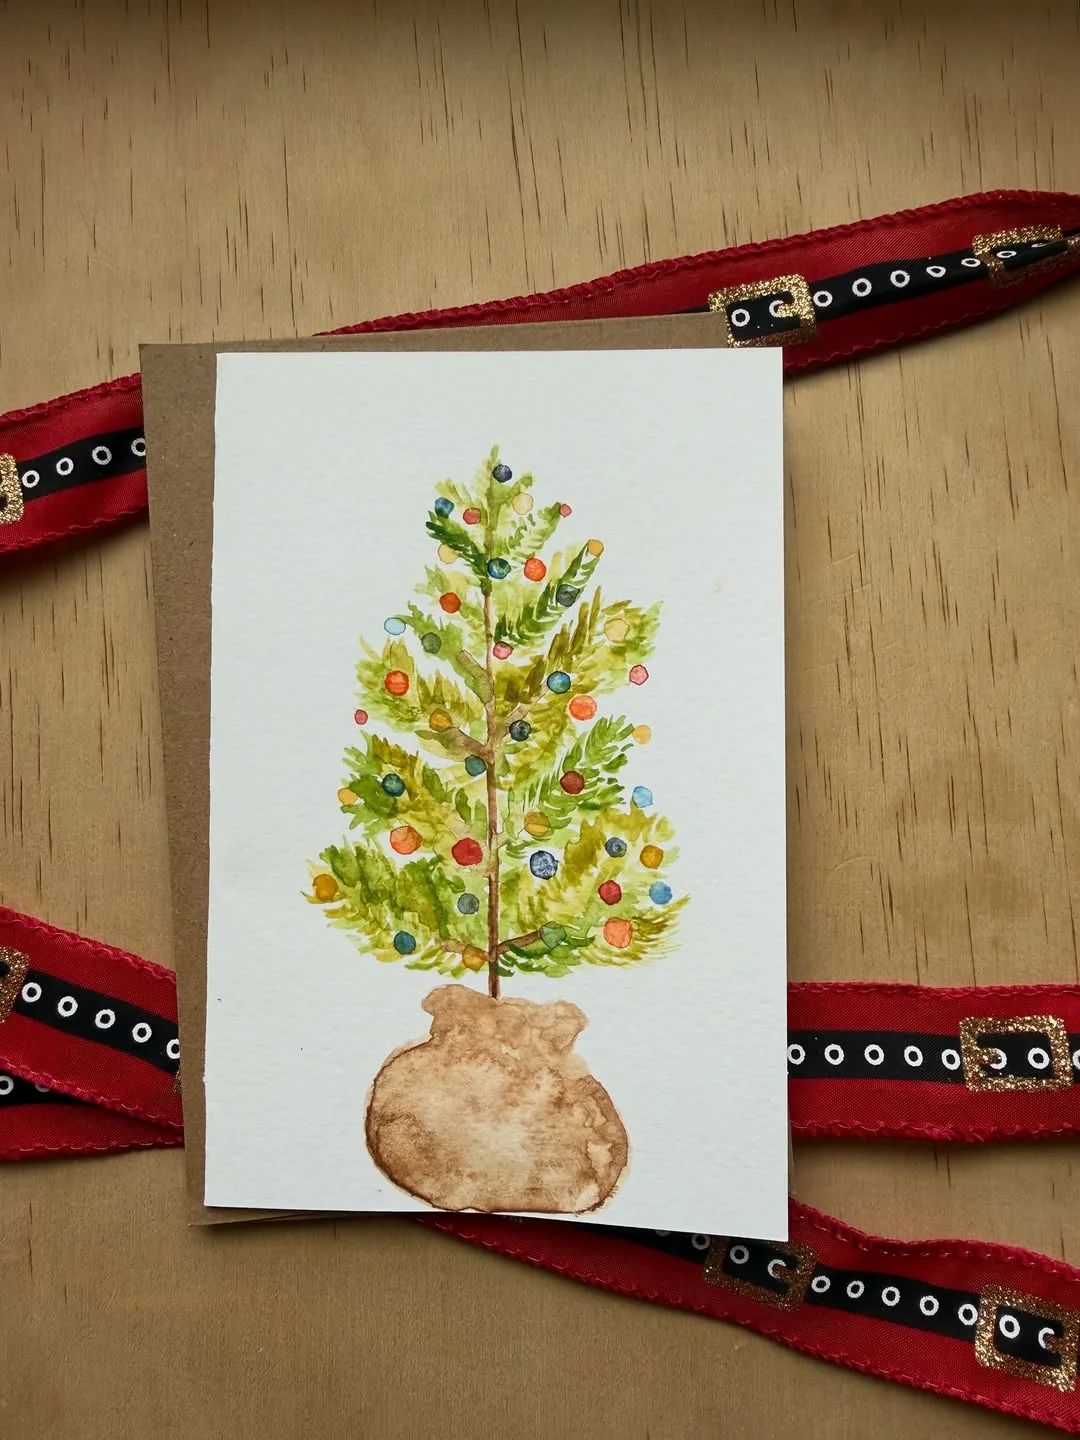
Painted trees suit complete beginners, because one triangle shape in green paint reads as a Christmas tree at once. Watercolour paint blends softly on thick card, and small mistakes look like snowy texture rather than errors. Gold or silver paint dots for baubles finish the design with very little effort.
Use thick white card folded in half, plus a small set of watercolour paints, one medium brush, and a fine brush for details. Paint the tree in two or three green shades, starting with the lightest shade at the top and deepening toward the bottom. Let each layer dry before adding dots, stars, and a short trunk in brown paint.
Friends who enjoy simple elegant designs love painted tree cards, and older relatives often frame them after Christmas. Children can paint trees too, with bigger brushes and fewer details. Teachers and neighbors also appreciate a painted card, since it looks thoughtful without feeling overdone.
Imagine your grandmother opening a card with a soft green tree, gold dots, and a hand painted star, then propping it on her mantel beside family photos. She mentions the card in every phone call through January. Small painted details carry that kind of lasting warmth.
48 Colors Watercolor Paint Set with 3 Brushes: Forty eight washable colours plus three brushes cover watercolour trees, snowy scenes and soft blended backgrounds on card fronts.
Button Christmas tree card
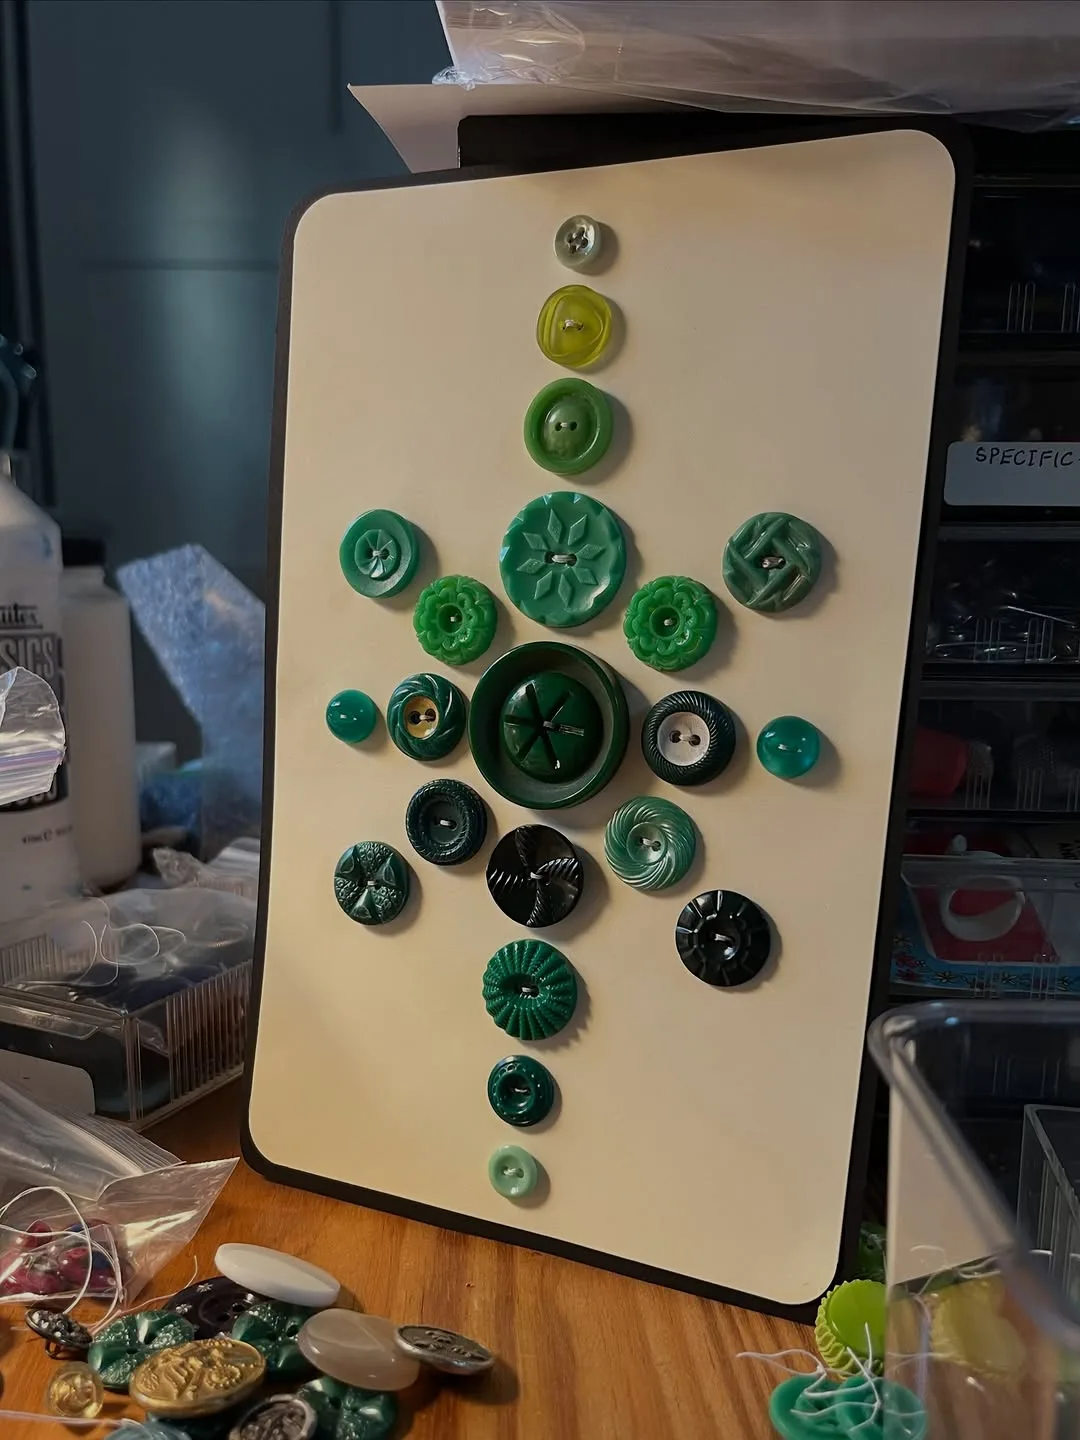
Buttons give a card texture and charm, and a tree built from buttons looks clever without demanding drawing skill. Mixed green buttons in different sizes form the tree shape, while one red button on top plays the star. Craft drawers and old sewing boxes usually hold enough buttons to make several cards.
Glue buttons onto folded card in rows, starting with one button at the top and widening each row toward the bottom. Strong craft glue holds buttons firmly, and a small brown rectangle of card makes the trunk. Add a short handwritten greeting beneath the tree, keeping words simple so the button design stays the focus.
Sewing friends and crafty relatives enjoy button cards most, since they recognize the supplies and the clever reuse. Grandparents also love them, especially when buttons come from a family sewing box with its own history. Children enjoy sorting buttons by color and size before gluing.
Picture a friend who sews opening a card covered in green buttons from your own button tin, with a tiny star button on top. She laughs at the familiar buttons, then keeps the card pinned above her sewing machine all year. Reused materials give the card a story no shop card can match.
1500 Pcs Round Resin Buttons Mixed Colors: Greentime resin buttons in mixed colors and sizes give card makers plenty of shades for stacking into a cheerful button tree.
Fingerprint reindeer card
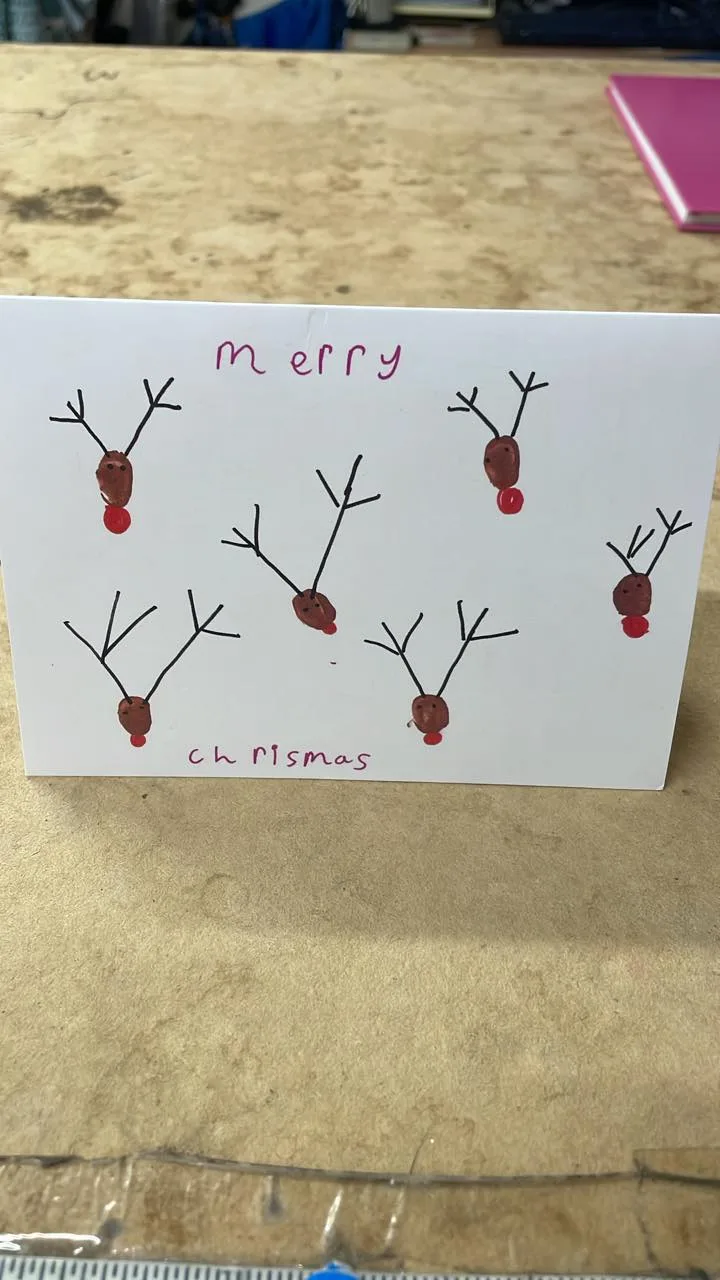
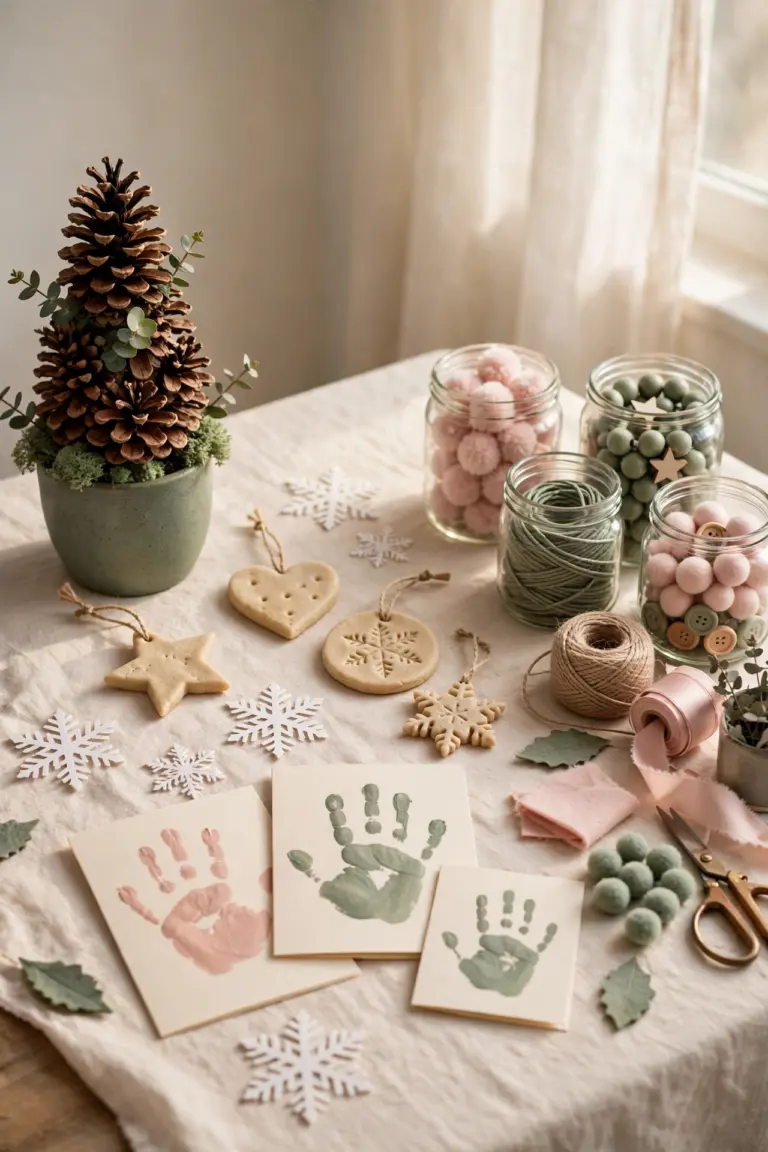
Fingerprint reindeer cards turn tiny fingers into festive art, and parents and grandparents treasure them above almost every other card. Brown paint fingerprints form the reindeer face, while a red fingerprint becomes the nose. Wobbly antlers drawn in pen add character rather than spoiling the design.
Press one fingertip into brown washable paint, then press it gently onto folded card to make the face shape. Add antlers, eyes, and ears with a fine pen once the paint dries fully. Keep a damp cloth nearby for quick hand cleaning, and test the paint on scrap paper first so prints stay clear.
Babies and toddlers can make reindeer cards with adult help, and the prints capture hand size at one precious age. Grandparents, godparents, and aunts love receiving them, especially from children who live far away. Older children enjoy making a whole herd of reindeer across several cards.
Imagine a grandfather opening a card with three small brown fingerprints, each turned into a reindeer with a red nose, and a note giving the ages of the children who made them. He frames the card and shows every visitor through December. Fingerprint cards become keepsakes within a single year.
Craft Ink Pads 20 Colors Rainbow Finger Ink Pads: Lsushine ink pads in 20 rainbow colors press clean fingerprint shapes and wash off little hands with soap and water.
Washi tape tree card
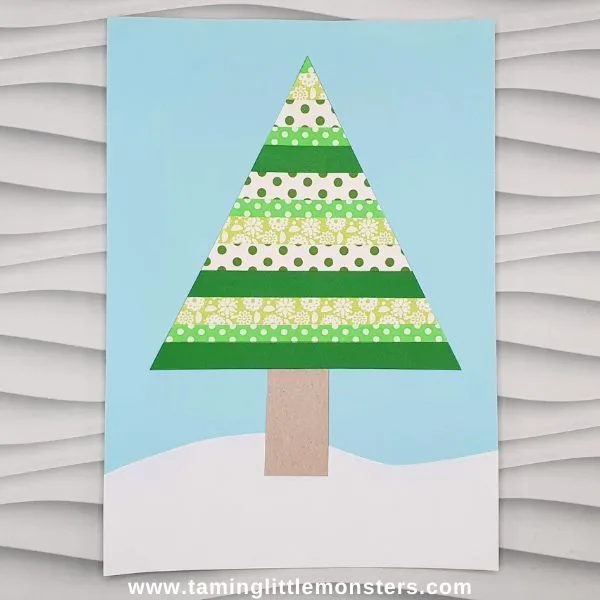
Washi tape makes crisp clean stripes of color with no drying time and no mess, which suits busy card makers perfectly. Torn or cut strips in green and gold patterns stack into a tree shape on plain card. Patterned tape adds instant festive detail, so even a simple design looks polished.
Fold thick card in half, then stick strips of washi tape across the front in rows, longest at the bottom and shortest at the top. Trim tape ends with small scissors for a neat triangle edge. Add a star sticker or a small paper star on top, plus a short greeting written beneath the tree.
Teenagers and busy adults love washi tape cards, since one roll of tape and ten minutes produce a finished card. Friends who enjoy modern clean designs also prefer tape trees over painted ones. Children enjoy choosing patterns and tearing tape, though adults should handle trimming for younger makers.
Picture a coworker receiving a card with neat gold and green tape stripes forming a tree, made during a lunch break with supplies from a desk drawer. She pins it above her desk, and colleagues ask where it came from. Quick cards can still look genuinely impressive.
24 Rolls Washi Tape Set Fall Halloween Christmas: Twenty four rolls of patterned tape in fall, Halloween and Christmas designs build quick washi trees, borders and envelope seals in minutes.
Stamped snowflake card
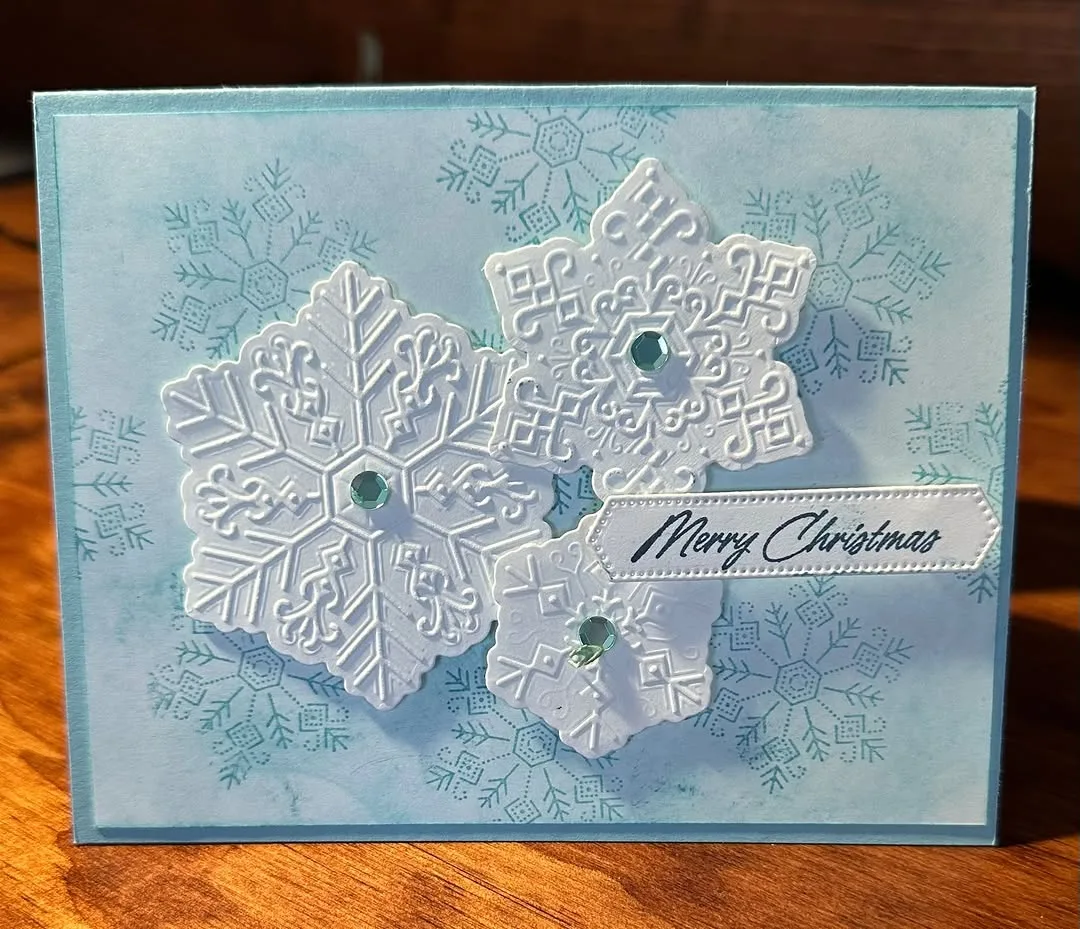
Stamped snowflakes give a card a classic winter look with very little skill needed, since the stamp does the detailed work. Blue or silver ink on white or cream card reads as frosty and elegant at once. One large snowflake in the center, or a scatter of small flakes, both make a beautiful front.
Choose a snowflake stamp and an ink pad in blue, silver, or deep red, plus plain folded card in white or cream. Press the stamp firmly and evenly, then lift it straight up so lines stay sharp. Practice on scrap paper first, and stamp extra flakes on the envelope flap for a matching touch.
Elegant friends, older relatives, and anyone who prefers quiet designs enjoy stamped snowflake cards most. Office colleagues also suit them, since the design feels festive without being personal. Beginners gain confidence quickly, because stamping rewards a steady hand rather than drawing talent.
Imagine sending a stamped snowflake card to a neighbor who hosted you during the year, with a short warm note inside. She props it on a windowsill, where winter light catches the silver ink. Simple stamped designs earn their place on display through January.
Christmas Wooden Rubber Stamps Set with Ink Pads: Eight small wooden stamps with ink pads print festive words and motifs for fast stamped snowflake and greeting designs.
Ribbon Christmas tree card
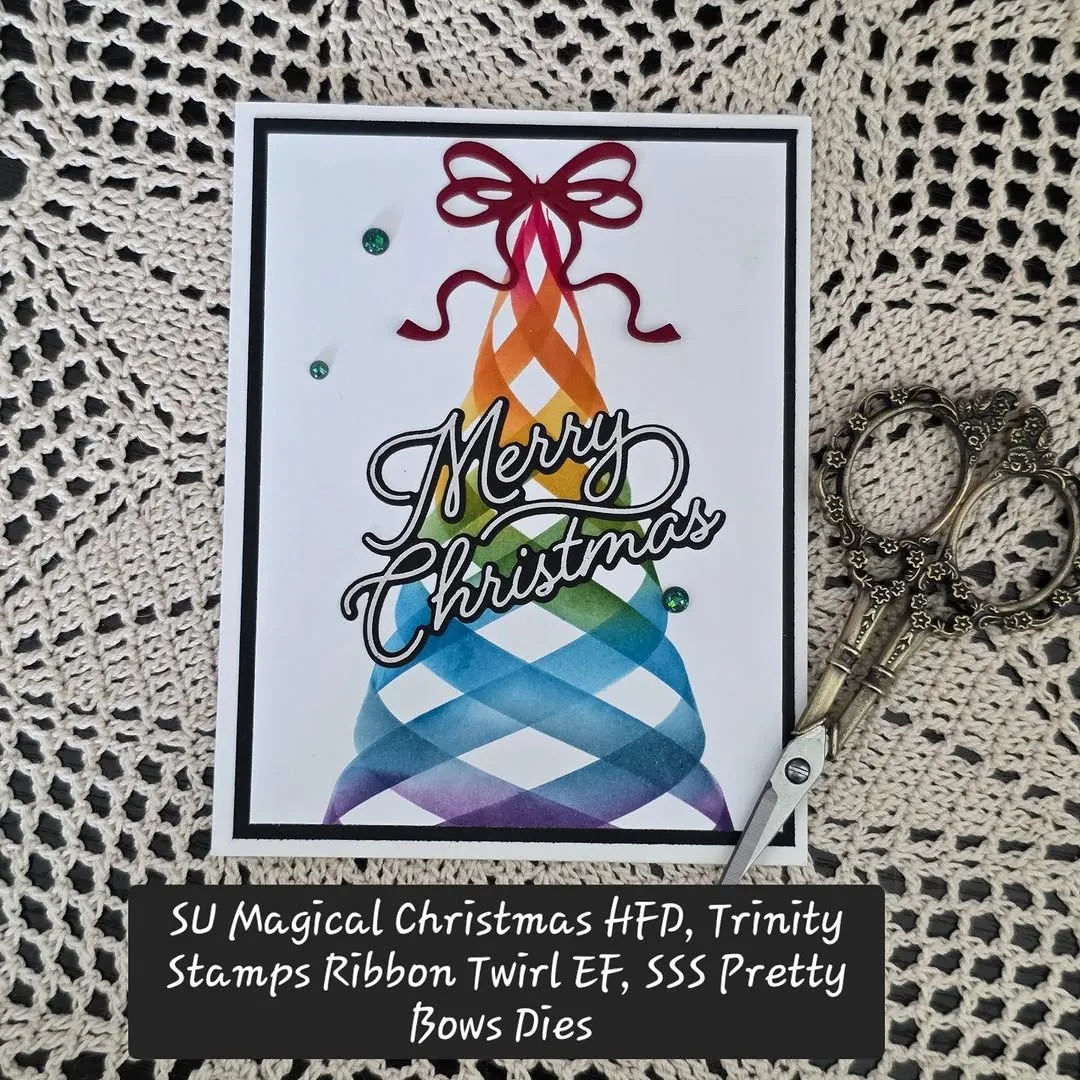
Ribbon trees look soft and festive, and loops of green ribbon give a card a pleasing texture that flat designs lack. Small bows, ric rac, or velvet ribbon all work, and the tree shape forms easily from folded ribbon lengths. Gold ribbon stars and tiny beads finish the design beautifully.
Cut green ribbon into lengths from short to long, fold each piece into a loop, and glue the loops onto folded card in rows. Start with the longest loop at the bottom and finish with the shortest at the top. Glue a small star or bead on top, and write a greeting beneath the tree in neat pen.
Friends who love sewing and fabric crafts enjoy ribbon cards, since the materials feel familiar and luxurious. Mothers and grandmothers also appreciate ribbon trees, especially in deep green velvet. Older children can fold and glue ribbon loops with a little guidance on spacing.
Picture your aunt opening a card with soft green ribbon loops and a gold star, then running a finger over the texture before reading your note. She keeps the card on her dresser long after Christmas ends. Texture makes a card feel special in the hand as well as to the eye.
Rainbow Satin Ribbon 12 Rolls 60 Yards: Ribbli satin ribbon rolls in 12 colors cut and glue into neat tree layers with a soft shiny finish.
Handprint Santa card
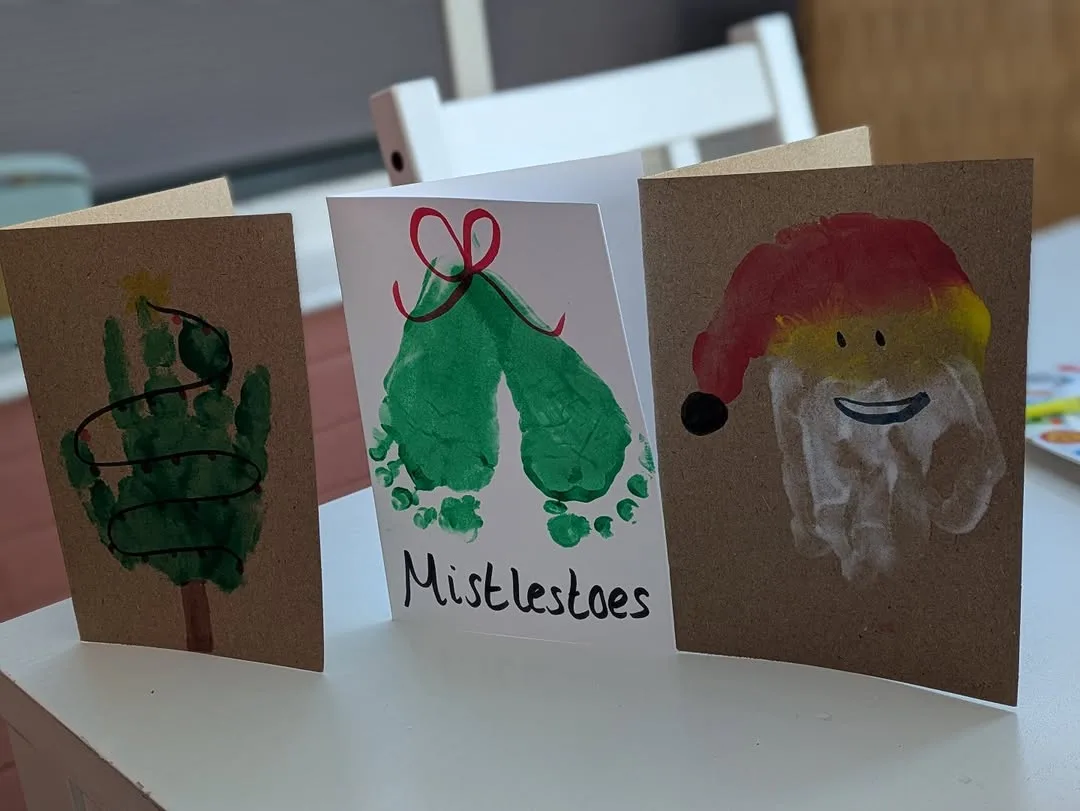
Handprint Santa cards capture a child hand at Christmas, with the palm forming Santa face and fingers becoming his hat and beard in paint. Parents love sending them to grandparents, and the hand size records growth year by year. Red and white paint keep the design bright and instantly recognizable.
Paint a small palm with skin tone paint or light pink paint, press it onto folded card, and let the print dry fully. Add a red hat shape above the print, white paint for the beard and hat trim, plus eyes and a nose with a fine pen. Wash hands right after printing so paint never reaches furniture or clothes.
Grandparents and great grandparents treasure handprint Santa cards most, especially when children live far away. Preschool teachers also enjoy them as class gifts, since every child handprint looks different. Families who make one each year build a collection showing hands growing over time.
Imagine a grandmother opening a card with a tiny handprint from her grandson turned into Santa, dated on the back in small writing. She compares it with last year card and smiles at how much he grew. Handprint cards carry family history in a single press of paint.
Washable Paint Set 12 Count: Crayola washable paint in 12 colors spreads smoothly for handprint art and rinses off skin without scrubbing.
Embroidered star card
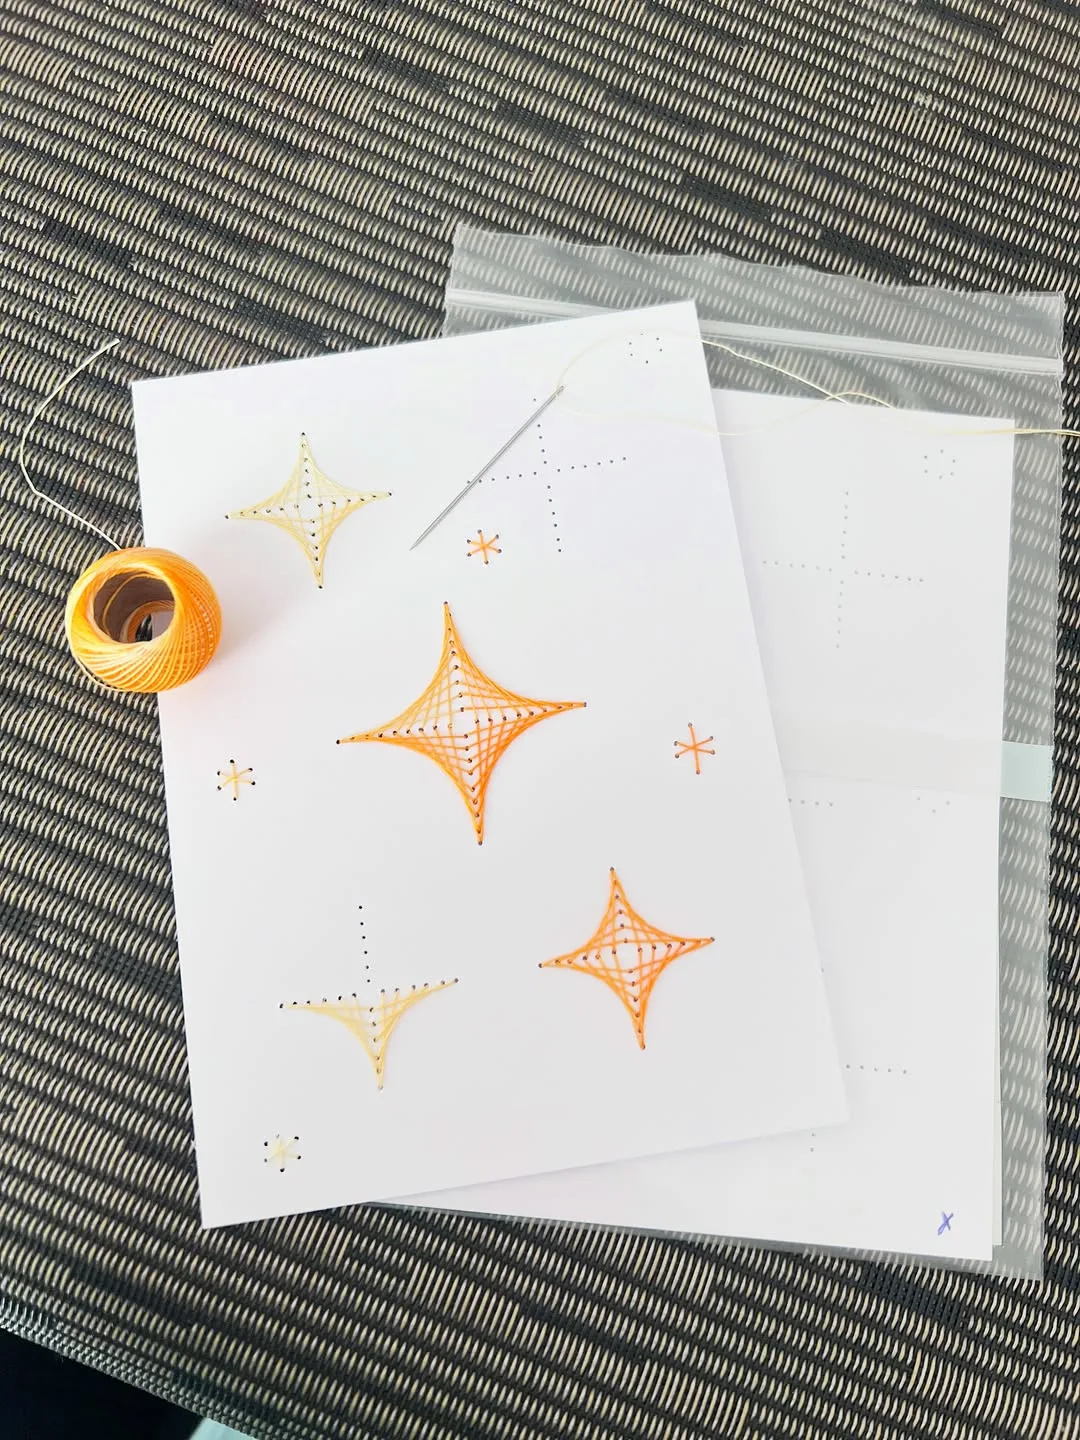
Embroidered stars give a card a handmade luxury that flat designs rarely match, since thread adds shine and texture. One simple star stitched in gold or red thread on cream card looks elegant and festive. Beginners manage star shapes easily, because straight stitches between punched holes need no advanced skill.
Punch small holes in a star shape through the card front with a needle, then stitch through the holes with embroidery thread. Keep stitches even and gentle so the card never tears. Knot thread ends on the inside of the card, and glue a plain paper panel over the back to hide knots neatly.
Crafty friends, mothers, and anyone who sews enjoy embroidered star cards, since they recognize the time and patience involved. Special friends and close family suit them best, because stitching takes longer than other designs. Teenagers learning embroidery also enjoy star cards as a first finished project.
Picture a close friend opening a card with a gold thread star catching the light, and realizing you stitched every line by hand. She keeps the card standing on a shelf through winter. Slow crafts speak loudly about care, even in a small card.
150 Skeins Embroidery Floss Assorted Colors: ElloLife embroidery floss skeins in 150 colors give card stitchers soft cotton thread for stars and simple stitched designs.
Paper cut snowflake card
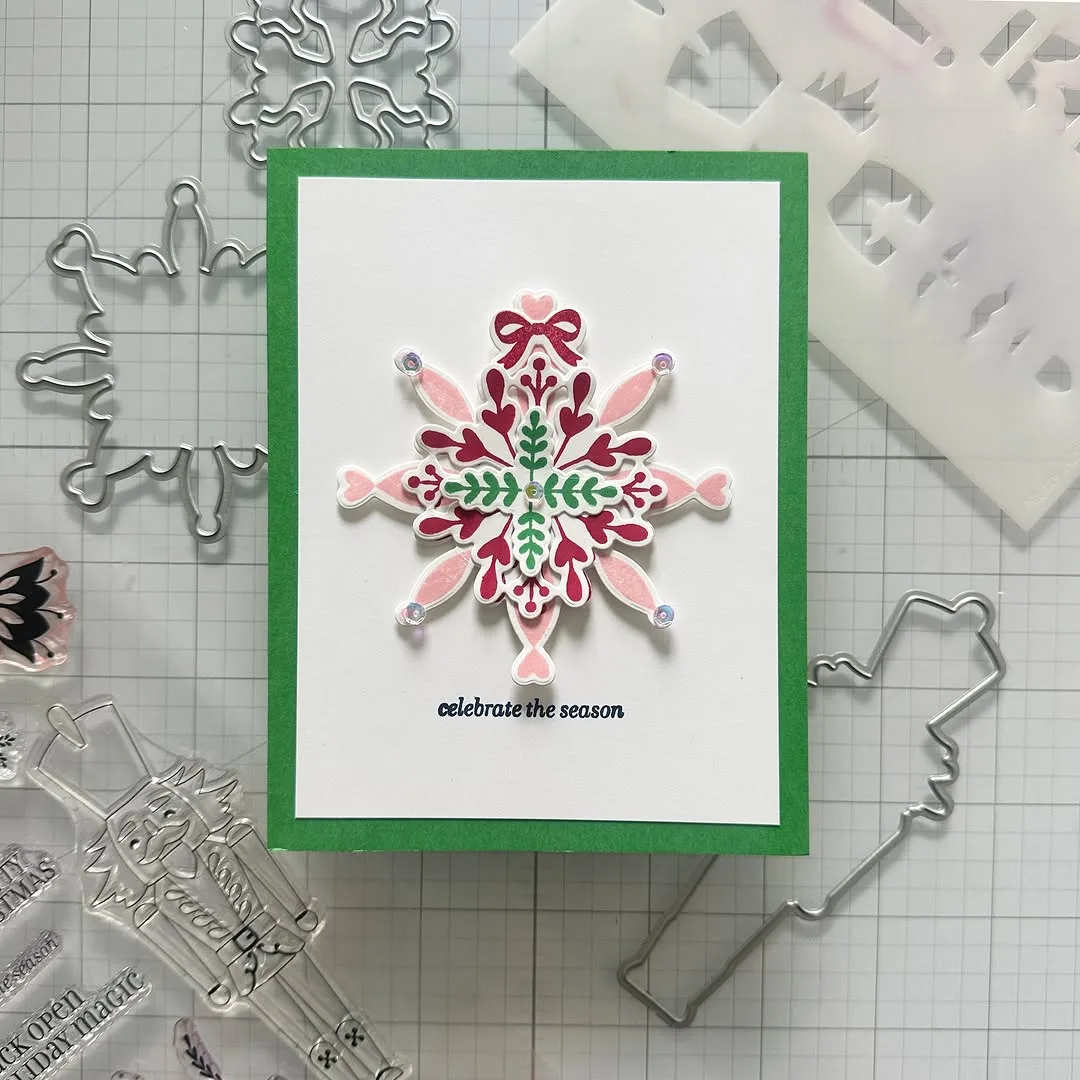
Paper cut snowflakes bring a crisp winter magic to cards, and folding and cutting paper costs almost nothing. White snowflakes on blue or deep red card look striking, while silver paper adds sparkle. No two snowflakes turn out alike, so every card feels unique.
Fold thin white paper into a small triangle, cut small shapes from the edges with sharp scissors, then open the paper gently to reveal the snowflake. Glue the snowflake onto folded card in a contrasting color, pressing flat so edges stick fully. Trim any long points so the card still fits its envelope.
School age children love cutting snowflakes, and families enjoy making a batch together on a winter afternoon. Friends who enjoy traditional crafts also appreciate paper cut designs. Adults should supervise scissors for younger children, and older makers can try more detailed cutting patterns.
Imagine a whole family spending an afternoon cutting snowflakes, then gluing the best ones onto cards for neighbors and teachers. Each card carries a different snowflake, and receivers compare designs at the door. Shared making afternoons become part of the Christmas memory itself.
White Cardstock 250 Sheets: Neenah Exact Index cardstock in a sturdy 90 lb weight folds into crisp snowflake cards that hold fine cut details well.
Photo front Christmas card
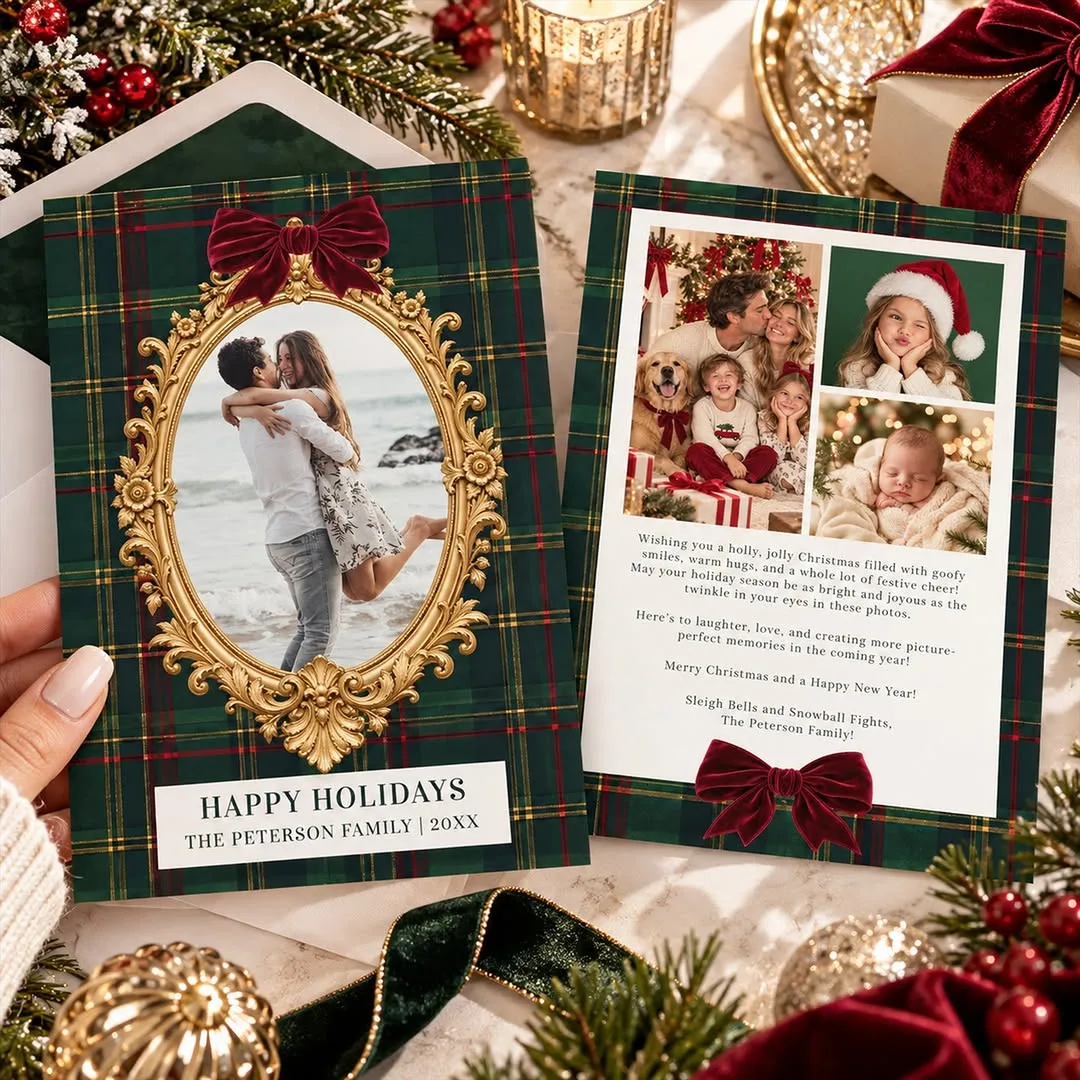
Photo front cards turn a favorite family picture into the card itself, which makes the greeting deeply personal. A photo from a summer holiday, a family gathering, or a child first steps gives receivers a happy memory with their Christmas greeting. Printed photos glue neatly onto folded card in minutes.
Print a favorite photo at home or at a copy shop, trimming it to fit the card front with a small border. Glue the photo flat onto folded card, pressing from the center outward so no air bubbles form. Add a short handwritten greeting beneath the photo, keeping words warm and simple.
Far away family and old friends love photo cards most, since the picture closes distance across the holidays. Grandparents especially treasure new photos of grandchildren they rarely see. Couples and new parents also enjoy photo cards as a way to share the year highlights with everyone at once.
Picture an aunt living overseas opening a card with a photo of the whole family at a summer picnic, plus a note about Christmas plans. She props the card beside her own family photos and feels close despite the miles. Photos turn a greeting into a gift.
Blank White Cards and Envelopes 50 Pack: Fifty heavyweight folded blank cards with matching envelopes give you a ready base for painted, stamped and collage designs all season long.
Pop up Christmas tree card
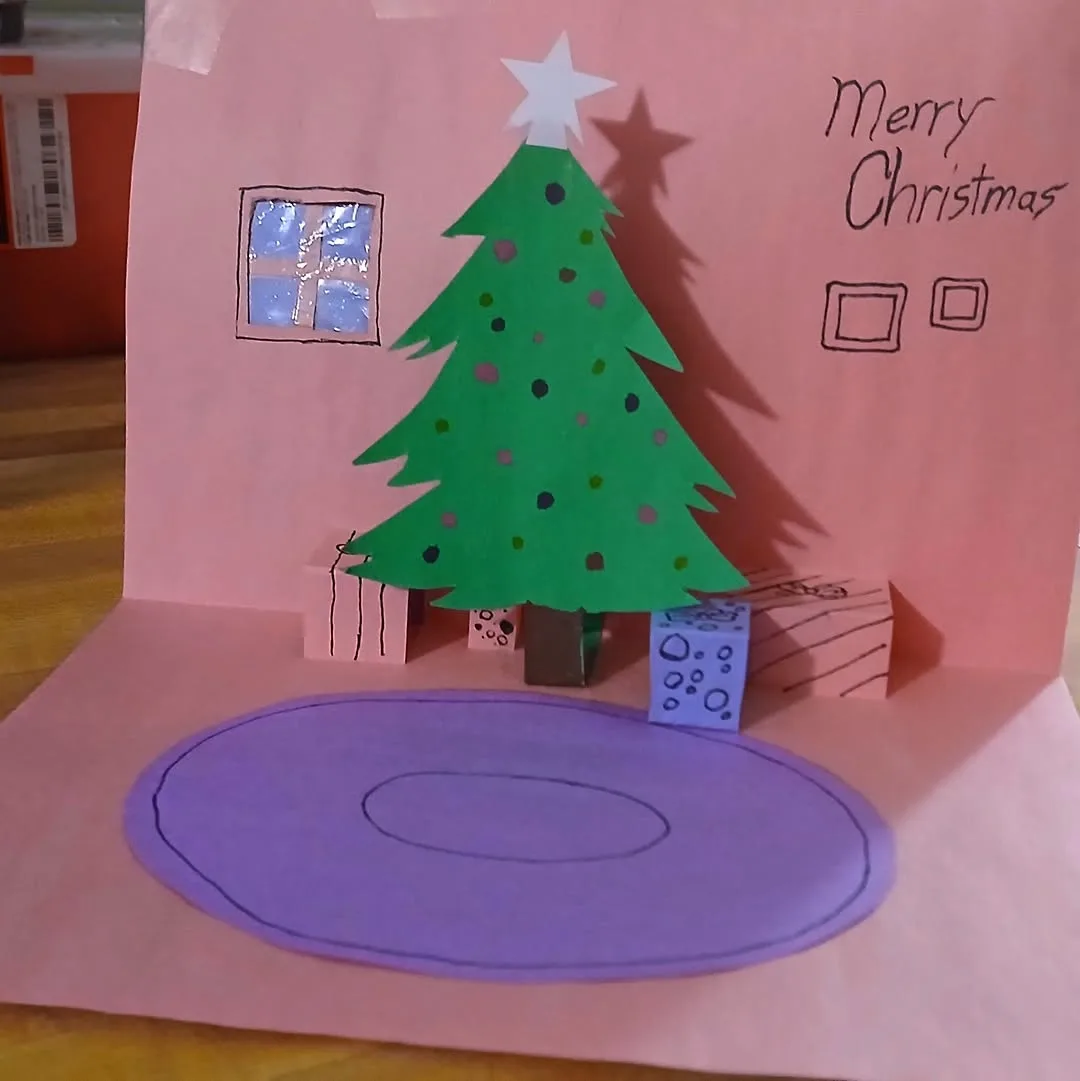
Pop up trees surprise receivers the moment they open the card, since a flat card suddenly becomes a small tree standing upright. Children gasp with delight, and adults admire the clever folding. Green card trees with tiny paper baubles look festive and joyful.
Cut a tree shape from green card with two slits near the base, fold the card front carefully, and glue the tree so it rises when the card opens. Test the fold several times on scrap card before gluing the final version. Add small paper circles as baubles and a star on top, keeping decorations flat so the card still closes.
Children and playful adults enjoy pop up cards most, since the surprise element adds fun to the greeting. Godchildren, nieces, and nephews love receiving them, and teachers enjoy them as class cards. Patient makers suit pop up designs, since careful folding matters more than speed.
Imagine a niece opening a card and watching a green tree spring up inside, then standing the card on her bedroom shelf for the whole holiday. She opens and closes it ten times before dinner. Interactive cards earn repeat attention long after other cards go into a drawer.
Precision Craft Glue 2 fl oz with Tip Kit: Precision tip glue bottle applies tiny controlled dots that hold buttons, felt shapes, ribbon and glitter neatly in place without mess.
Glitter bauble card
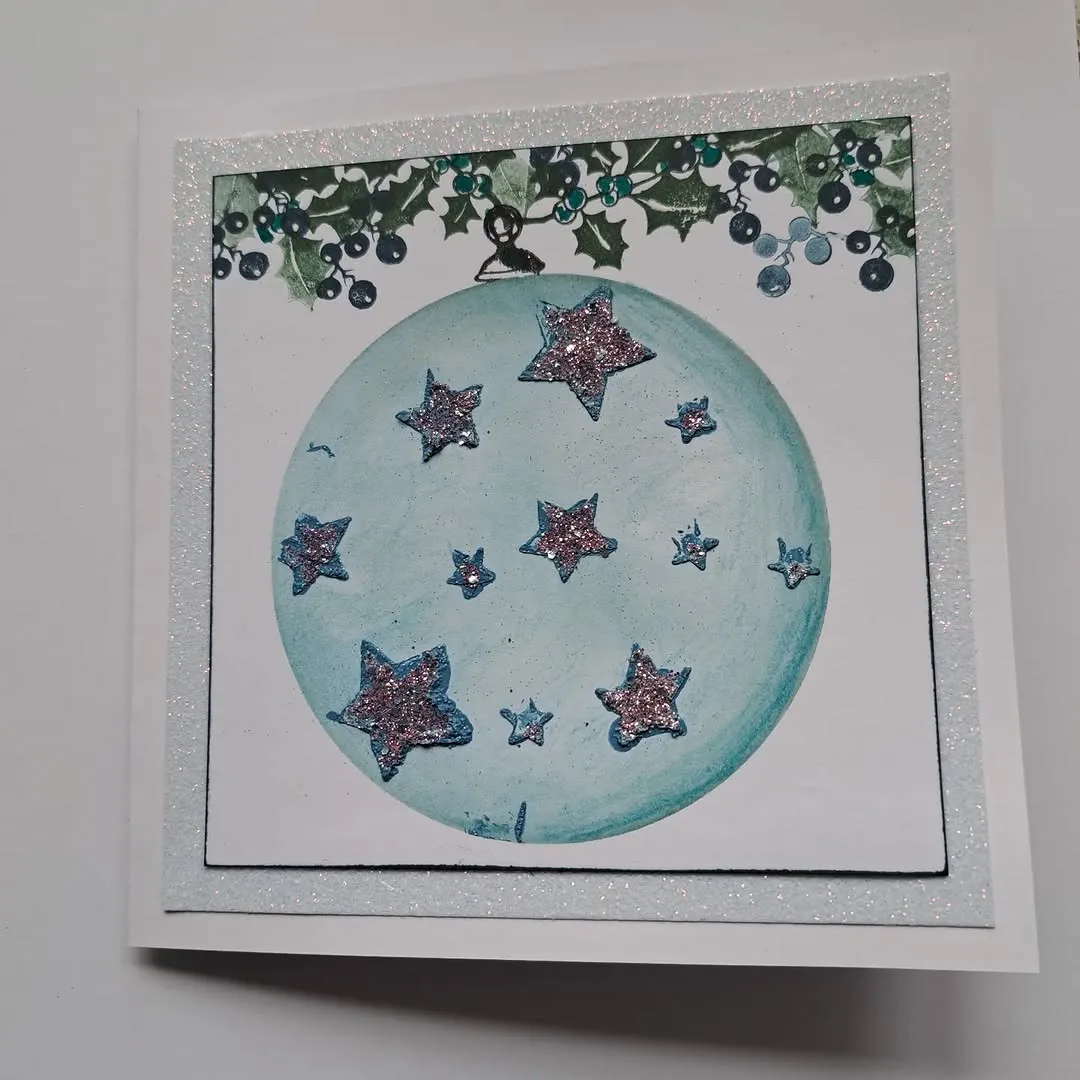
Glitter baubles bring sparkle to card fronts, and round bauble shapes suit glitter perfectly. Gold, red, and green glitter on dark card catches light beautifully. Sealed glitter stays put, so cards arrive clean and receivers enjoy sparkle without mess.
Draw bauble circles on folded card with glue, sprinkle glitter over the glue, and shake off the excess onto scrap paper. Let the glue dry fully, then brush a thin layer of clear glue or sealant over the glitter to lock it in place. Add a small loop shape on top of each bauble with pen, plus a short greeting beneath.
Friends who love glamour and sparkle enjoy glitter bauble cards, and teenagers often choose them for friends. Party hosts also like glitter cards, since they match festive decorations. Young children enjoy sprinkling glitter, though adults should handle sealing and keep glitter away from small faces.
Picture a friend opening a card covered in gold glitter baubles that catch lamplight, then standing it on a mantel where it glitters all evening. She mentions the card when guests arrive. Sparkle suits Christmas cards, provided sealing keeps glitter where it belongs.
Rainbow Glitter Glue Pens Set 31 Count: Elmer’s glitter glue pens in 31 rainbow colors add raised sparkle to bauble shapes with no loose glitter mess.
Felt reindeer card
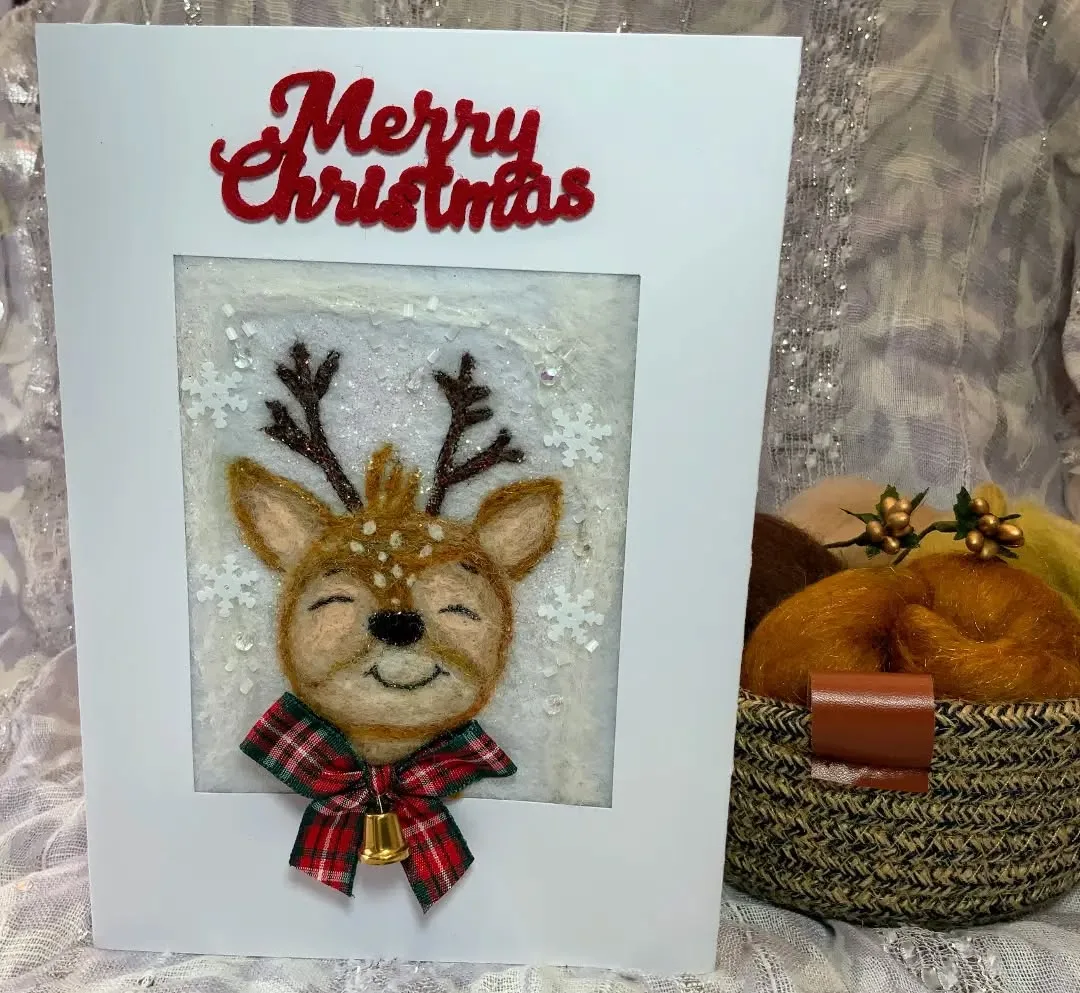
Felt reindeer cards feel soft and charming, and brown felt shapes give a card a cozy handmade look. Felt cuts easily, never frays, and glues flat onto card without curling. A red felt nose and small googly eyes finish the reindeer with humor.
Cut a reindeer face shape from brown felt, plus two antler shapes from darker felt, and glue the pieces onto folded card. Add a red felt circle for the nose and two small googly eyes, pressing each piece firmly. Write a greeting beneath the reindeer, keeping letters clear so the felt design stays the star.
Children love felt reindeer cards, both making and receiving them, since felt feels like a toy material. Grandparents also enjoy them, especially when a grandchild cut the shapes. Craft groups and school classes suit felt cards, because felt needs no drying time and little supervision.
Imagine a class of children cutting felt reindeer faces and gluing them onto cards for parents, each reindeer slightly different. Parents receive cards with wonky antlers and huge smiles, and keep them for years. Felt cards carry childhood charm in every uneven edge.
42 Pcs Felt Fabric Sheets Assorted Colors: Flic Flac felt sheets in 42 assorted colors cut into soft reindeer faces, ears and antlers that glue flat on card fronts.
Torn paper collage card
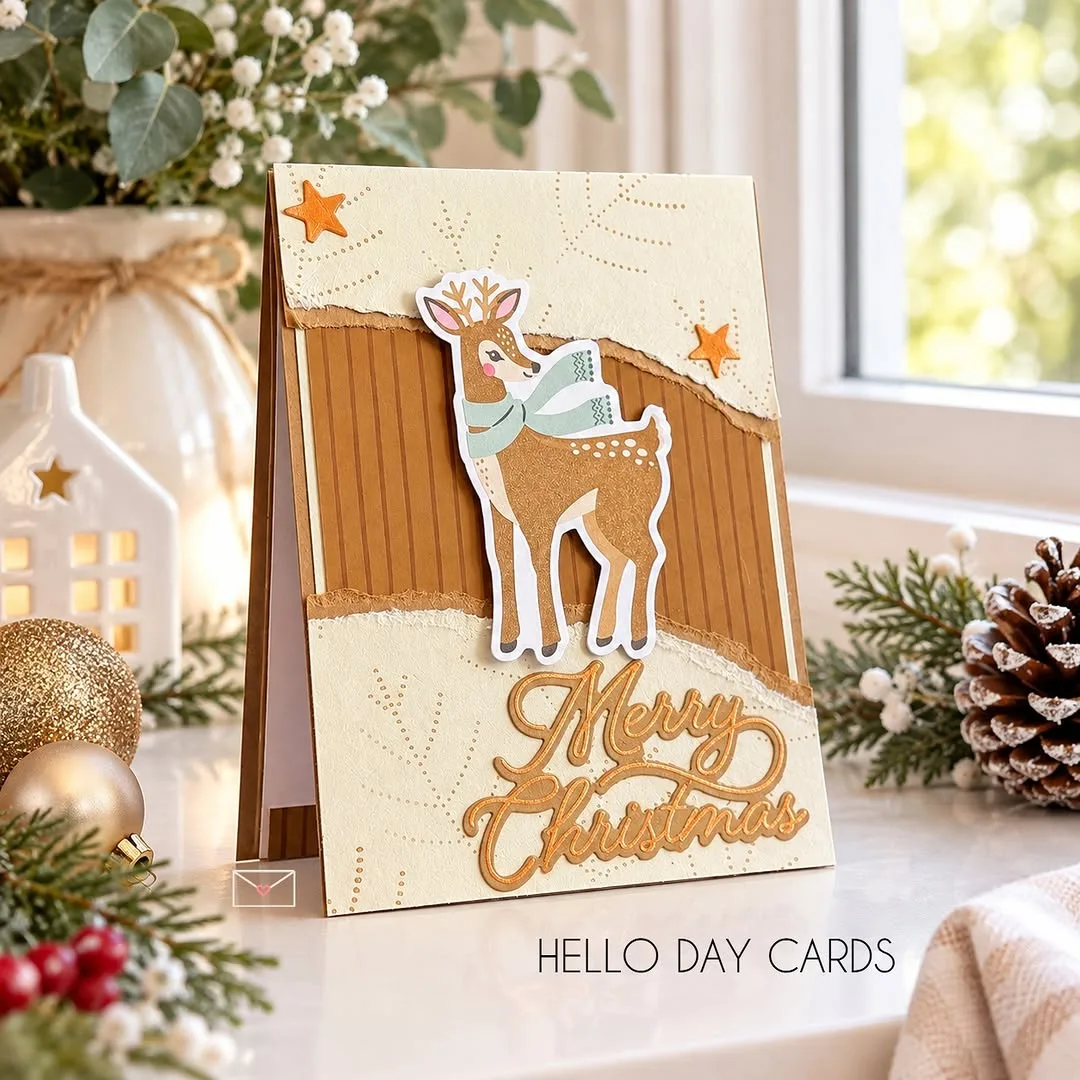
Torn paper collage cards suit makers who prefer texture over drawing, since torn edges create soft shapes that scissors never manage. Torn green paper forms trees, torn blue paper forms skies, and torn gold paper adds stars. Collage designs look artistic with very little skill required.
Tear colored paper into small pieces, arrange the pieces on folded card to form a simple scene, then glue each piece flat. Start with the background pieces and finish with the smallest details on top. Let the glue dry fully before writing inside, so pages never stick together.
Artistic friends and older children enjoy torn paper collage cards, since the technique rewards imagination over precision. Adults who feel nervous about drawing gain confidence from collage, because torn shapes forgive every wobble. Nature lovers also enjoy collage scenes with trees, hills, and stars.
Picture a friend who paints receiving a collage card with a torn paper winter scene, layered greens and golds forming a small forest. She studies the layers and asks how you made it. Collage turns scrap paper into art worth displaying.
Construction Paper Bulk Pack 480 Sheets: Crayola construction paper in 480 sheets and 10 bright colors tears into layered collage pieces with lovely rough edges.
Calligraphy greeting card
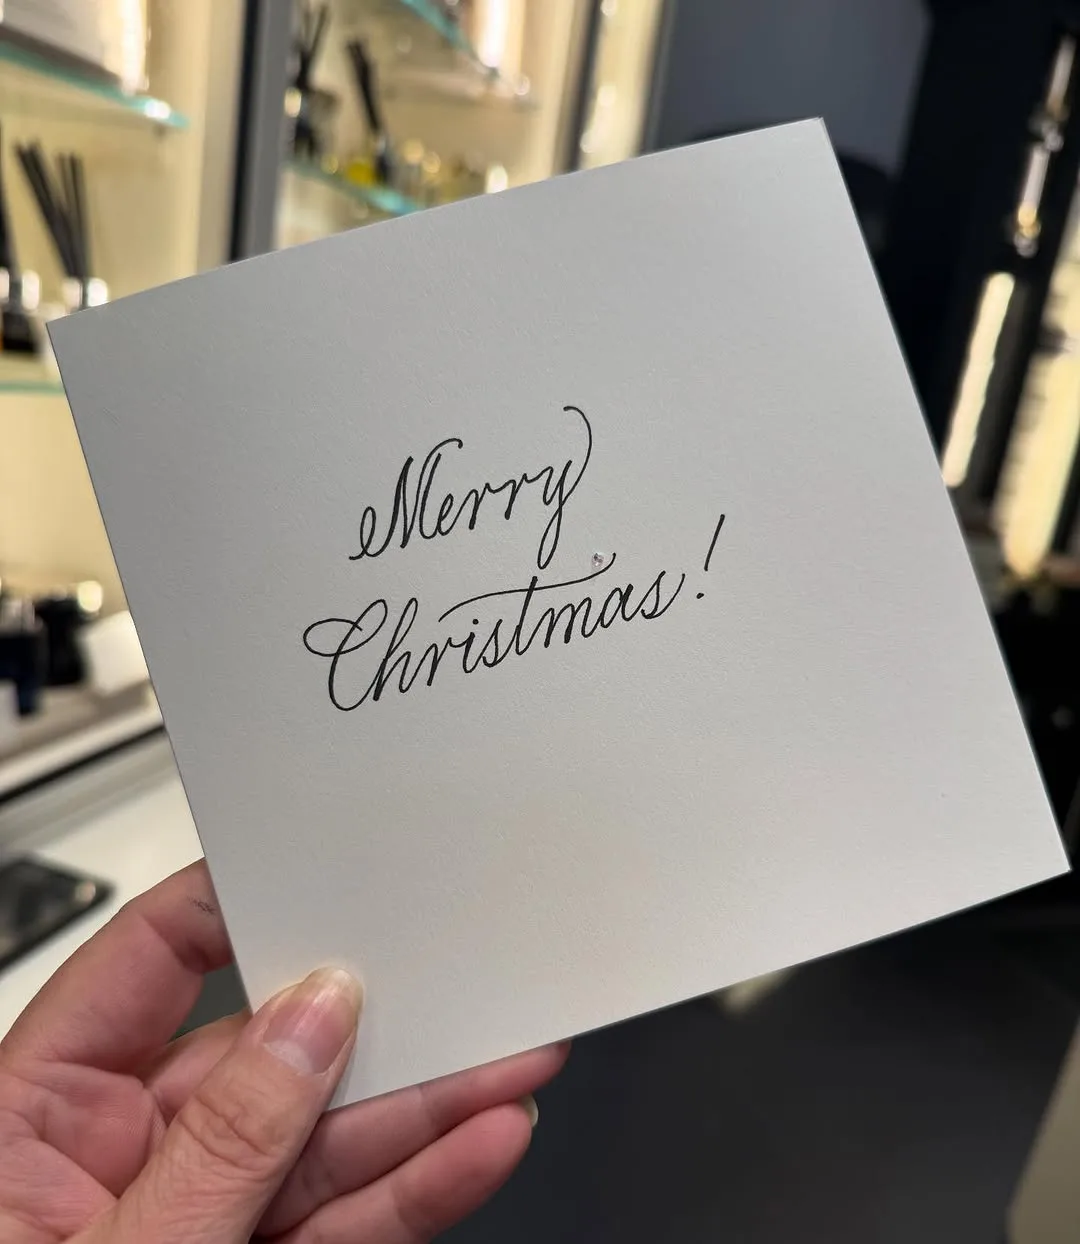
Calligraphy greeting cards put beautiful writing at the center of the design, and one elegant greeting carries the whole card. Gold or deep red ink on cream card looks timeless and refined. Simple calligraphy styles suit beginners, since slow careful letters matter more than fancy flourishes.
Use a calligraphy pen or a brush pen, plus smooth cream card that lets ink flow without bleeding. Practice the greeting on scrap paper several times, keeping letters even and spacing steady. Write the final greeting on the card front, let ink dry fully, and add one small painted star or sprig beside the words.
Elegant friends, older relatives, and wedding guests from the year enjoy calligraphy cards, since beautiful writing feels like a gift itself. Anyone who values traditional crafts appreciates the patience behind each letter. Adults learning calligraphy also enjoy cards as a practical way to practice.
Imagine a former teacher opening a card with her name written in flowing gold letters, plus a short note of thanks inside. She keeps the card on her desk through winter, showing visitors the beautiful writing. Words written with care become the decoration.
Brush Pens 10 Pack: Ten hard tip brush pens in bright colours make hand lettered greetings, swirls and fine details easy for beginners and confident writers alike.
Common Mistakes to Avoid With Handmade Cards
Rushing the final card before glue or paint dries causes the most common disappointment, and many handmade christmas card ideas fail at this last step. Wet cards stick to envelopes, smudge greetings, and lose glitter across the table. Finish cards at least one day before posting, and store them flat in a dry place until envelopes are ready.
Overloading the front with every supply in the drawer also spoils good designs, since too many buttons, ribbons, and glitter pieces compete for attention. Choose one main feature per card, such as a painted tree or a felt reindeer, and let empty space frame it. Simple cards photograph better and feel more polished in the hand.
Guessing envelope sizes causes another frequent problem, because some handmade christmas card ideas grow too thick or too wide for standard envelopes. Measure the finished card before buying envelopes, and test one card in its envelope before making a full batch. Thick cards may need larger envelopes or extra postage, so check early rather than on posting day.
Writing greetings in pen that bleeds through thin card disappoints makers who spent hours on the front design. Test pens on scrap card first, and choose thicker card for cards with long handwritten notes. Pencil guidelines help keep writing straight, and erasing them gently after ink dries leaves a clean finish.
Budget Friendly Ways to Make Handmade Cards
Supplies already at home should always be your first shop, since drawers hold buttons, ribbon scraps, old wrapping paper, and spare paint from earlier projects. Raiding your own stash can cut the cost of a batch of cards to almost nothing. Borrow stamps, punches, and special pens from friends instead of buying tools for one afternoon of making.
Buying card in bulk packs keeps prices low, and many handmade christmas card ideas use the same plain folded card as a base. One pack of white or cream card, one set of paints, and one glue stick cover most designs in this guide. Share bulk supplies with a friend who also makes cards, splitting packs of envelopes and paper between two households.
Presentation costs pennies yet changes how a card feels, so spend effort there before spending money elsewhere. Clean envelopes, neat handwriting, and a simple paper band around a set of cards make simple designs look considered and generous. Skipping expensive wrapping in favor of brown paper and twine suits handmade cards beautifully.
Handmade Card Tips for a Polished Finish
Test every technique on scrap card first. Paints, stamps, and glitter behave differently on each card type, and a quick test prevents ruined fronts. Keep a pile of offcuts beside your workspace for trials, and test pens for bleeding before writing inside a finished card.
Keep one feature per card. A painted tree, a button design, or a stitched star each deserve the full front to themselves. Extra decorations dilute the main idea and make cards look busy. Step back after finishing each card and remove anything that distracts from the main feature.
Make cards in batches by stage. Cut all card bases first, then paint or glue all fronts, then write all greetings, because batch working keeps quality steady and saves setup time. Many handmade christmas card ideas work faster this way, and makers finish a full set in one relaxed weekend.
Sign and date the back lightly in pencil. Receivers love knowing who made the card and when, especially for handprint and fingerprint designs. Pencil marks stay discreet, and dates help families track children growth across years of cards.
Photograph finished cards before posting. Photos give you a record of designs that worked, and help you remember favorite combinations next Christmas. Share photos with making friends for inspiration, and keep a small album of card designs across the years.
Store finished cards flat under a book overnight. Gentle weight flattens curled edges from paint and glue, so cards slide into envelopes cleanly. Avoid heavy stacks that crush felt or ribbon details, and store glitter cards face up so sparkle stays on the front.
FAQ
How many cards can a beginner make in one afternoon?
Beginners usually finish six to eight simple cards in one relaxed afternoon, including drying time between stages. Stamped, washi tape, and paper cut designs run fastest, while embroidered and pop up cards take longer. Start with one design in a batch, and add a second design only after the first batch dries.
What card thickness works best for handmade cards?
Medium to heavy card around 250 to 300 grams per square meter suits most handmade christmas card ideas, since it holds paint, glue, and stitching without bending. Thinner card curls under wet paint and tears under buttons. Craft shops label card weight clearly, so check the pack before buying.
How early should cards be posted for Christmas?
Post handmade cards at least two weeks before Christmas for local delivery, and earlier for overseas family. Handmade cards sometimes need extra handling at the post office, especially thick or glittery designs. Finish making by early December, and keep a small list of addresses ready before writing begins.
Can children make handmade cards safely?
Children make cards safely with washable paints, blunt scissors, and adult supervision for glue and glitter. Fingerprint, handprint, felt, and paper cut designs suit young makers best. Keep small buttons and beads away from toddlers, and let older children handle stamps and washi tape independently.
How do I keep glitter from falling off cards?
Seal glitter with a thin layer of clear drying glue or a light spray sealant made for crafts, and let cards dry flat overnight. Many handmade christmas card ideas use glitter, yet unsealed glitter sheds inside envelopes and annoys receivers. Test sealant on one card first, since heavy sprays can dull sparkle.
What should I write inside a handmade card?
Write a short personal note mentioning a shared memory or a wish for the coming year, since personal words matter more than long poems. Mention the design when it links to the receiver, such as a favorite color or a shared joke. Sign your name clearly, and add the year lightly in pencil on the back.
Conclusion
Handmade cards ask for time instead of money, and receivers understand that exchange better than anyone. The handmade christmas card ideas in this guide share one simple strength: each design carries a piece of your attention, your creativity, or your family story. Skill matters far less than honesty, simplicity, and one personal detail chosen with the receiver in mind.
Choose the idea that made you think of one person most strongly, gather supplies early, and work in calm short sessions. Beginners succeed with these designs every year, and your effort will show in all the right ways. Make cards in batches, test techniques on scrap paper, and enjoy the quiet pleasure of creating something by hand.
Years from now, shop bought cards blur together in memory, while the painted tree, the fingerprint reindeer, and the handprint Santa remain in daily use or in keepsake boxes. Making one of those lasting cards this Christmas starts a tradition worth repeating. Pick your design tonight, fold your first card, and begin with a smile.