15 Kitchen Organization Ideas That Make Cooking Feel Easier
Cooking feels harder when every task starts with a search. You open a drawer for a spoon and find tangled tools, then you move jars around in the pantry just to reach the rice. Small delays like these add stress to busy mornings and family dinners, even in a kitchen you love.
Small changes can calm that daily scramble without a full remodel or a huge shopping list. Clear homes for everyday items help you cook faster, clean faster, and put groceries away without guessing. You also waste less food because you can see what you already own before you buy more.
Inside this guide you will find practical storage for pantries, drawers, cabinets, counters, and the fridge. Each idea explains why it works, how to set it up, where it helps most, and one mistake to skip. You will also find budget advice and simple kitchen organization ideas you can start today.
How can I organize a kitchen without buying everything at once?
Start with the spot that slows you down most, and finish that one spot fully before you move on. Empty the drawer or shelf, wipe it clean, toss expired food, and return only items you use often. Good kitchen organization ideas grow zone by zone, so one calm drawer still helps on day one.
For example, you could reset only the cooking drawer beside the stove this weekend. Keep the spatulas, spoons, tongs, and ladles you reach for daily, and move extras to a box for one month. You will quickly learn what you truly need, and you will spend money only on storage that solves a real problem.
Matching glass jars for pantry staples
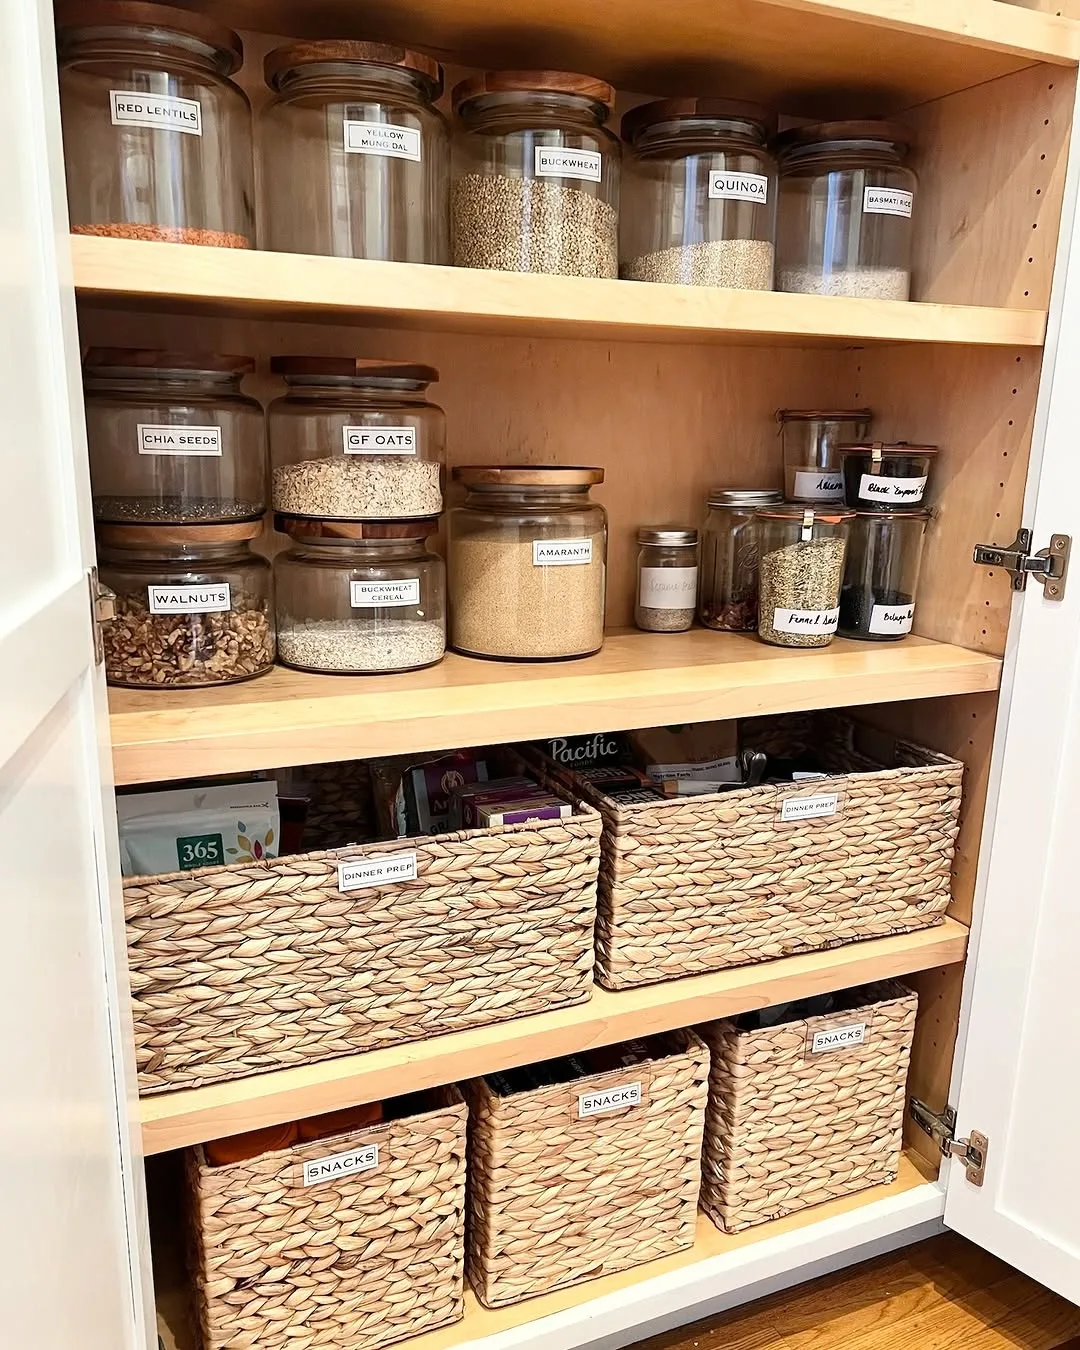
Matching glass jars turn scattered bags of flour, rice, pasta, and oats into one clear and calm pantry row. You can see levels at a glance, so shopping lists get easier and half empty bags stop hiding at the back. Simple kitchen organization ideas like this work because they remove visual clutter and guesswork at the same time.
Choose jars with wide mouths and lids that seal well, then pick two or three sizes that fit your shelves. Pour dry goods in slowly, tap the jar gently to settle the contents, and leave a little space at the top. Add a plain label with the name and the date you filled the jar.
Busy home cooks benefit most because breakfast and dinner staples stay visible and easy to grab. Oats, rice, lentils, and pasta suit jars best, while sticky items like brown sugar need a tight seal. Keep one small scoop inside the jars you use daily, and store backup bags in one bin nearby.
Imagine opening the pantry on a rushed morning and spotting the oats, raisins, and nuts in seconds, with no rustling bags. One common mistake spoils the calm though. People buy pretty jars before measuring shelf height, then tall jars fail to fit. Measure first, buy second, and test one jar before you order a full set.
Pantry shelves with labeled bins
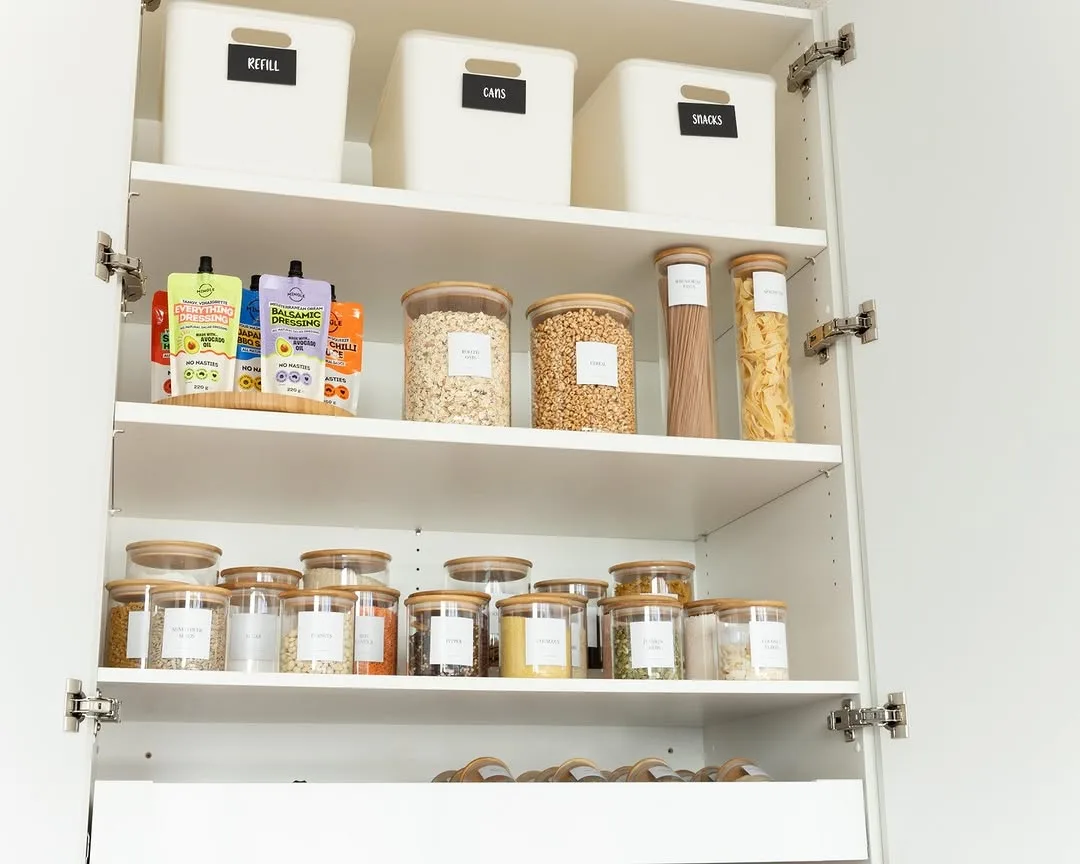
Labeled bins give every pantry category a clear home, from snacks and baking goods to cans and lunch supplies. You stop stacking unlike items in messy piles, and family members can help put groceries away correctly. Bins also pull out like drawers, so nothing gets lost behind the front row for months.
Measure shelf depth and width before you shop, then choose bins with straight sides so they sit close together without wasted gaps. Use short labels with big clear words, and keep each bin focused on one job. Leave a little empty space in each bin so hands can reach in without a struggle.
Homes with children gain a lot because kids can find their own snacks in one low bin without climbing or digging. School lunch items, granola bars, and fruit pouches work well grouped together. Place heavy cans in sturdy bins on lower shelves, and keep light packets in bins higher up.
Picture grocery day with a bin for baking, a bin for snacks, and a bin for cans, each sliding back into place in minutes. Skipping labels causes the main problem here. Unlabeled bins slowly turn into junk bins where random items land. Label every bin on day one and review the contents each month.
Wire baskets inside a pantry cabinet
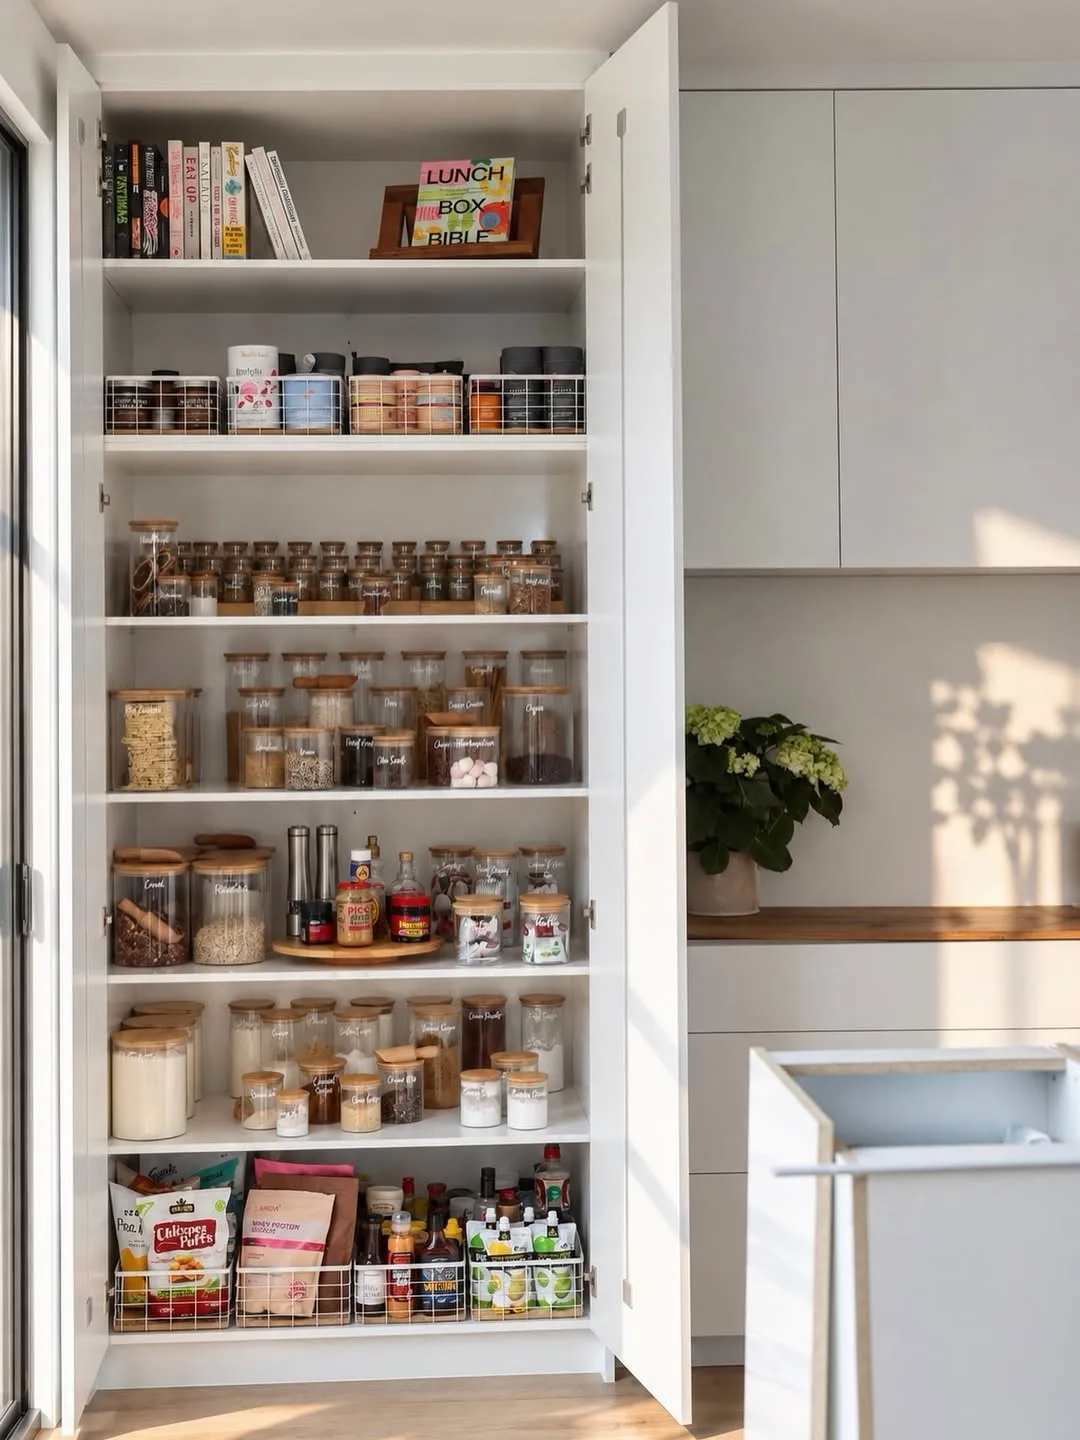
Wire baskets let air flow around onions, potatoes, apples, and bread while the open design keeps everything visible. You can lift a whole basket out, sort it at the counter, and slide it back in one move. Baskets also corral round items that roll around loose shelves and bruise each other.
Slide baskets onto a pantry cabinet shelf, or stack two sturdy baskets with a small gap between them for easy reaching. Line the bottom with a clean cloth if small items slip through the wires. Keep potatoes and onions in separate baskets because they age faster when stored together in close quarters.
Loose produce causes the biggest mess in many kitchens, so baskets suit anyone who buys fresh food weekly. Root vegetables, citrus fruit, and garlic bulbs all sit happily in wire baskets. Keep baskets away from direct heat and bright sun, since warmth speeds up sprouting and softening in stored produce.
During a weekly shop, you can carry the empty basket to your bags, fill it, and set it straight back on the shelf. One mistake ruins the system though. People overload baskets until handles bend and items crush at the bottom. Fill baskets only to the rim, and add a second basket instead.
Open pantry shelves with glass jars
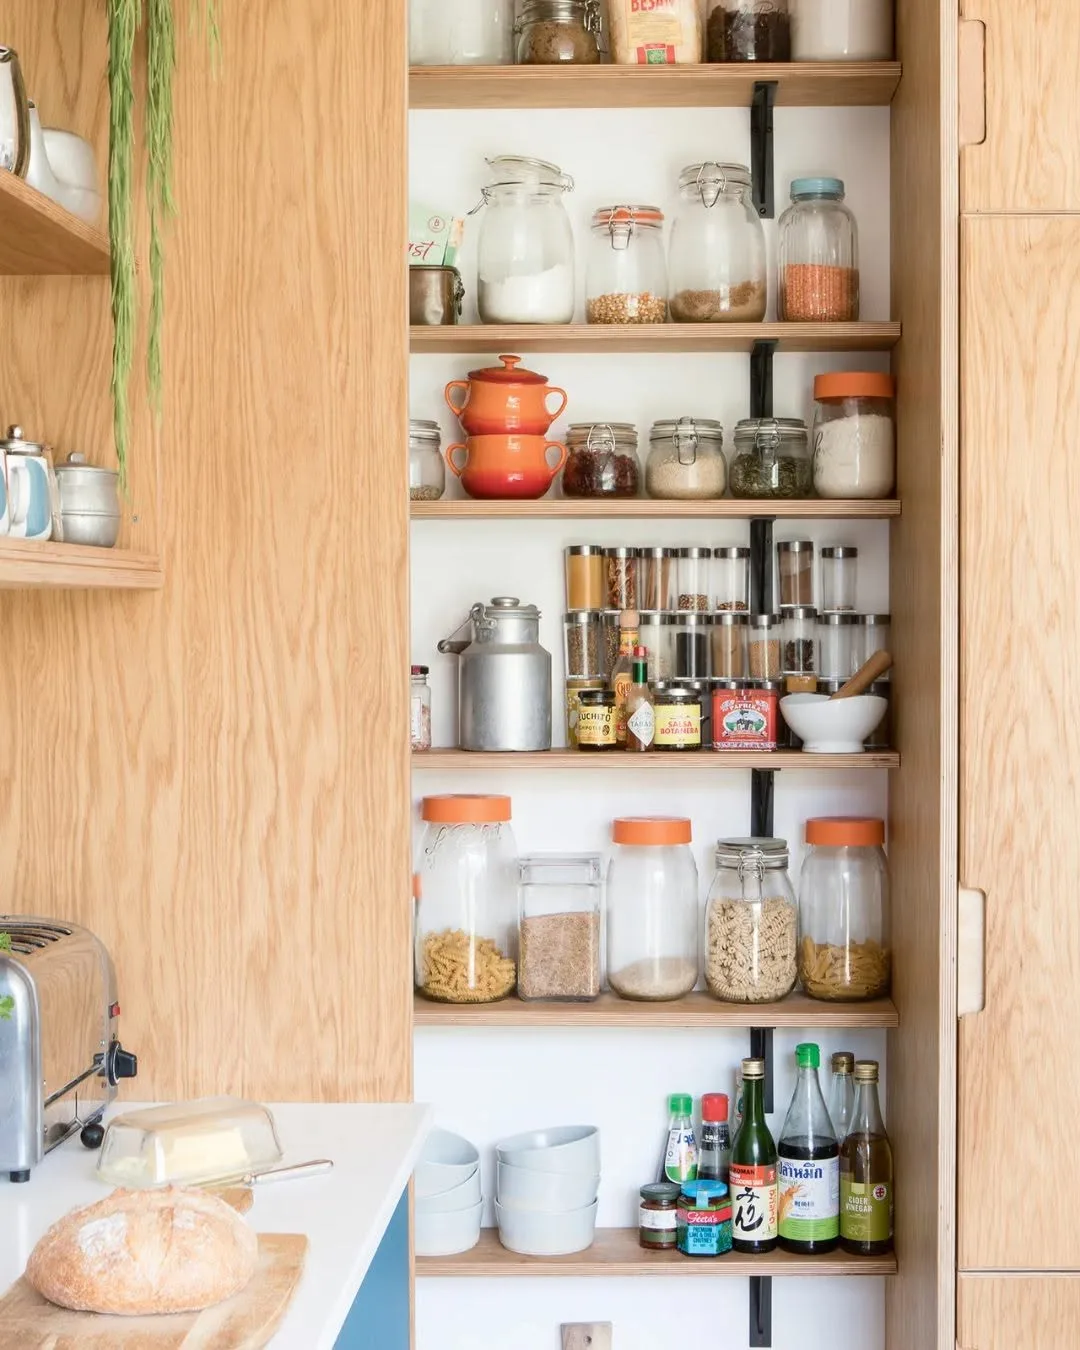
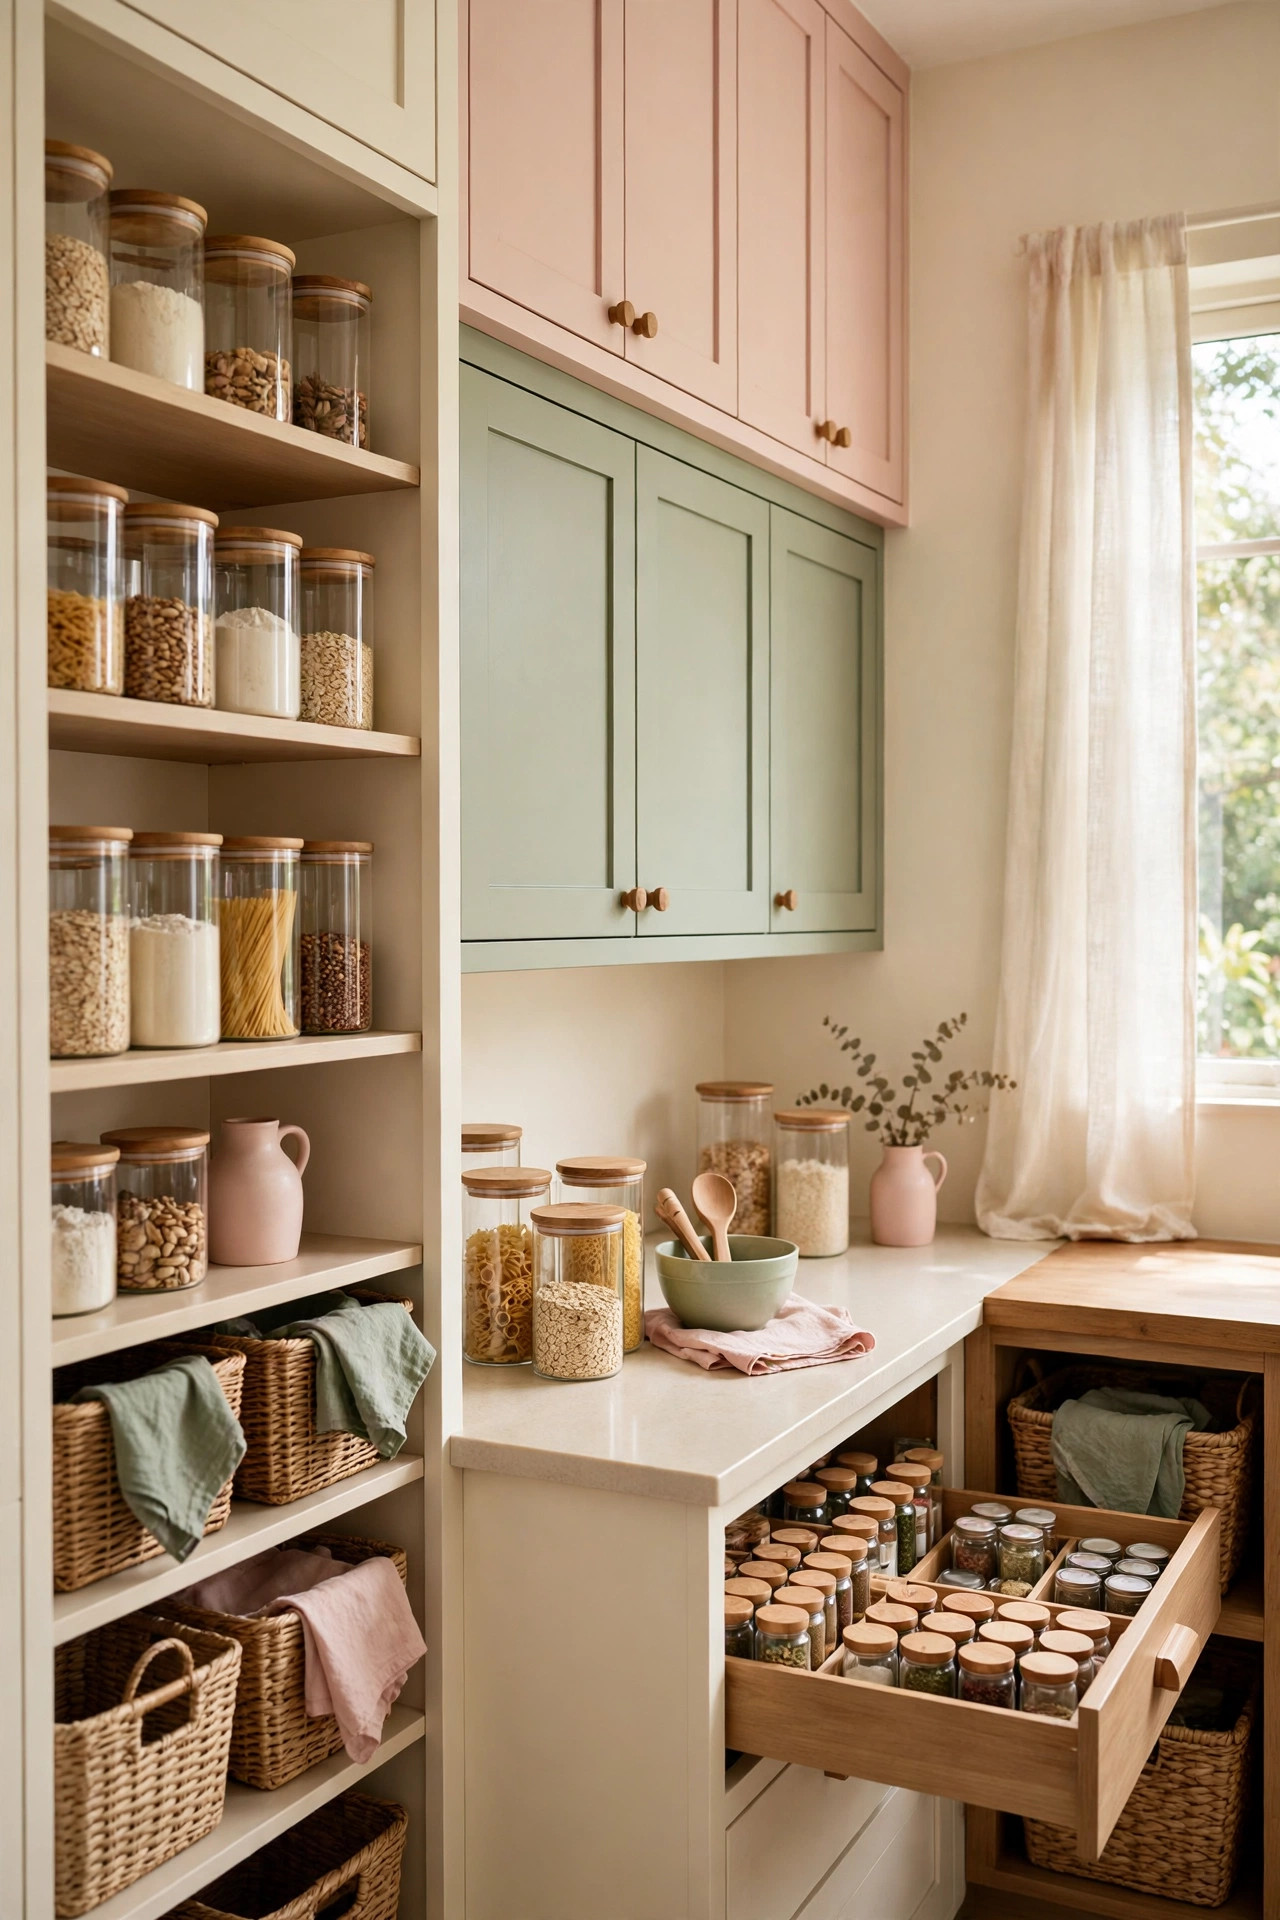
Open pantry shelves put daily staples in plain sight and within easy reach, which speeds up cooking on busy nights. Glass jars on open shelves look tidy when you keep colors and sizes grouped with care. Among kitchen organization ideas, open shelving rewards people who enjoy a quick visual check before they cook.
Keep only items you use every week on open shelves, such as grains, beans, coffee, and favorite spices. Place jars in one or two neat rows so you never hide a second row behind the first. Wipe shelves weekly, because open storage collects dust and cooking steam faster than closed cabinets do.
Daily cooks love open shelves because grabbing rice or lentils takes seconds and restocking feels simple. Small kitchens also gain because removing cabinet doors can make a tight pantry corner feel lighter. Store rarely used items elsewhere though, since open shelves punish clutter faster than any closed cupboard can hide it.
One shelf above your prep area could hold six jars, a small plant, and a stack of everyday bowls with breathing room to spare. Crowding causes the classic mistake here. People treat open shelves like normal cupboards and fill every inch. Leave clear gaps between groups so the shelf stays calm and useful.
Spice drawer with matching jars
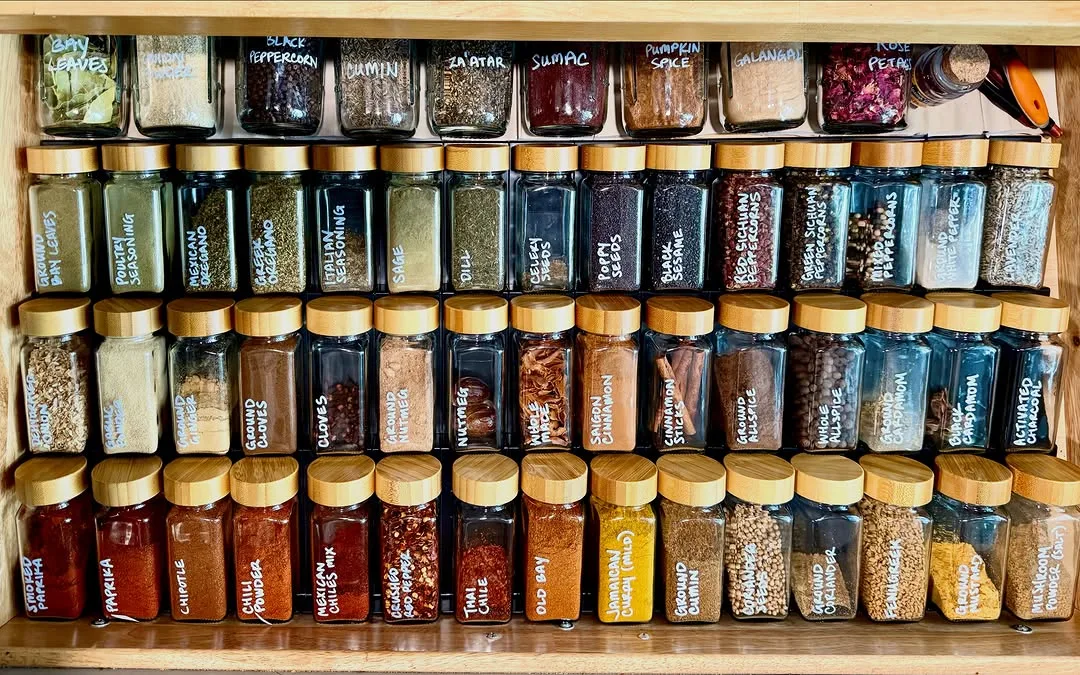
Flat spice storage inside a drawer ends the hunt through a dark crowded cabinet where small bottles hide behind tall ones. Matching jars lying in neat rows let you read every label from above in one glance. Cooking feels smoother because one hand can grab cumin or paprika while the other hand stirs.
Small glass jars with plain lids work best, filled only about three quarters full so powder shakes out easily. Arrange jars in the order you cook, with daily spices near the front and baking spices at the back. Add a simple label on each lid, since you will view the jars from above.
Cooks who use spices daily gain the most, especially in small kitchens where cabinet space feels tight. Ground spices, dried herbs, and blends suit drawer storage, while bulky refill bags belong in a pantry bin. Keep the drawer near the stove but away from direct heat, which fades flavor over time.
Picture a drawer opening before dinner to reveal chili, turmeric, oregano, and cinnamon in tidy rows, each lid labeled clearly. Buying jars in many random sizes creates the usual mistake. Rows wobble, labels face odd directions, and space gets wasted. Choose one jar size, buy a few spare jars, and refill from one backup bag.
Cutlery and utensil tray
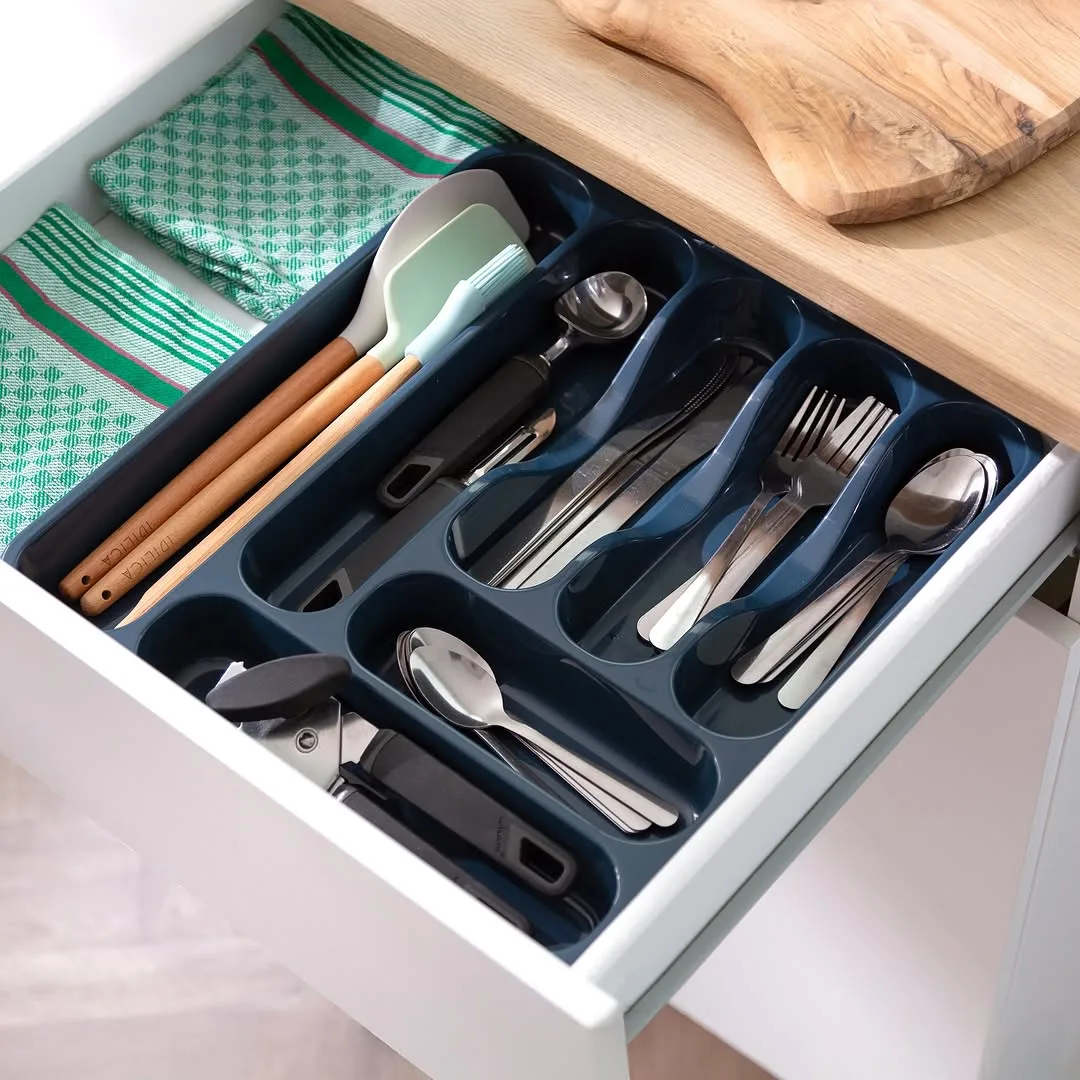
Cutlery trays give forks, knives, spoons, and serving tools fixed slots, so setting the table takes seconds instead of minutes. Loose cutlery rattles around, scratches drawer bottoms, and slows everyone down during busy meals. One neat tray also makes unloading the dishwasher simple enough for kids to help without sorting confusion.
Wash and dry the drawer first, then choose a tray that leaves a small gap at the back for long serving spoons. Place everyday cutlery in the front slots and special pieces behind them. Line the drawer with a thin mat if the tray slides around when you open and close it.
Families with children benefit because everyone learns where each piece belongs after meals. Guests can also find a spoon for coffee without asking or opening three drawers. Keep sharp knives in a separate block or holder though, since loose blades inside a cutlery tray can dull edges and cut fingers.
Before a family dinner, one person can grab eight forks from one slot and finish the table in a single trip. Skipping the measuring step causes trouble here. Trays bought by guesswork often block the drawer or waste side space. Measure the drawer inside edges, then pick a tray with room to spare.
Bamboo dividers for kitchen tools
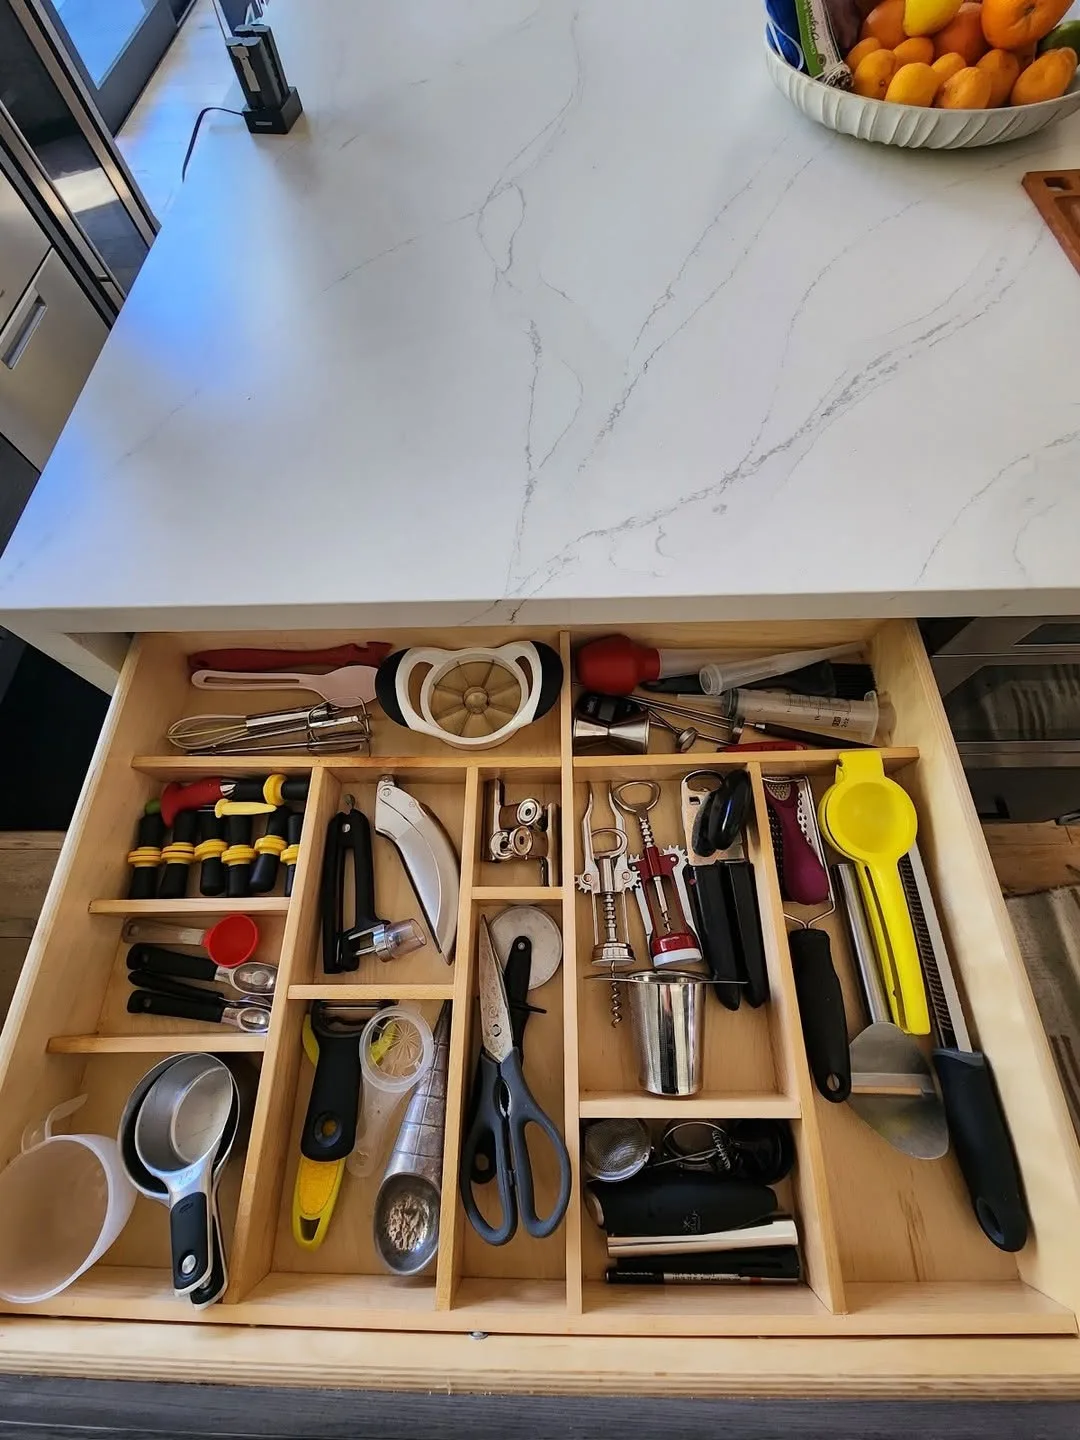
Bamboo dividers split one wide messy drawer into calm sections for spatulas, whisks, ladles, and peelers. Natural bamboo feels warm, wipes clean easily, and adjusts to fit many drawer sizes with spring loaded ends. Flexible kitchen organization ideas like this suit drawers that change as your tool collection grows over time.
Adjust the dividers by pressing the ends, setting them in place, and testing the drawer with your longest tools first. Give wide tools like mashers their own section, and group slim tools together by job. Cooking tools belong near the stove, while baking tools can live in a drawer near the mixing bowls.
Drawers that hold mixed tools suit dividers better than fixed trays, because you can move sections as needs change. Most households enjoy the simple setup since dividers need no screws or glue. Keep dividers dry though, and lift them out monthly to shake crumbs from the drawer corners.
Imagine a drawer where tongs, spatulas, and whisks each rest in a clear lane, visible the moment you pull it open. One mistake shows up often. People pack every lane tightly until tools jam and handles overlap again. Leave a little slack in each section, and move rarely used tools to a storage box.
Corner cabinet lazy Susan
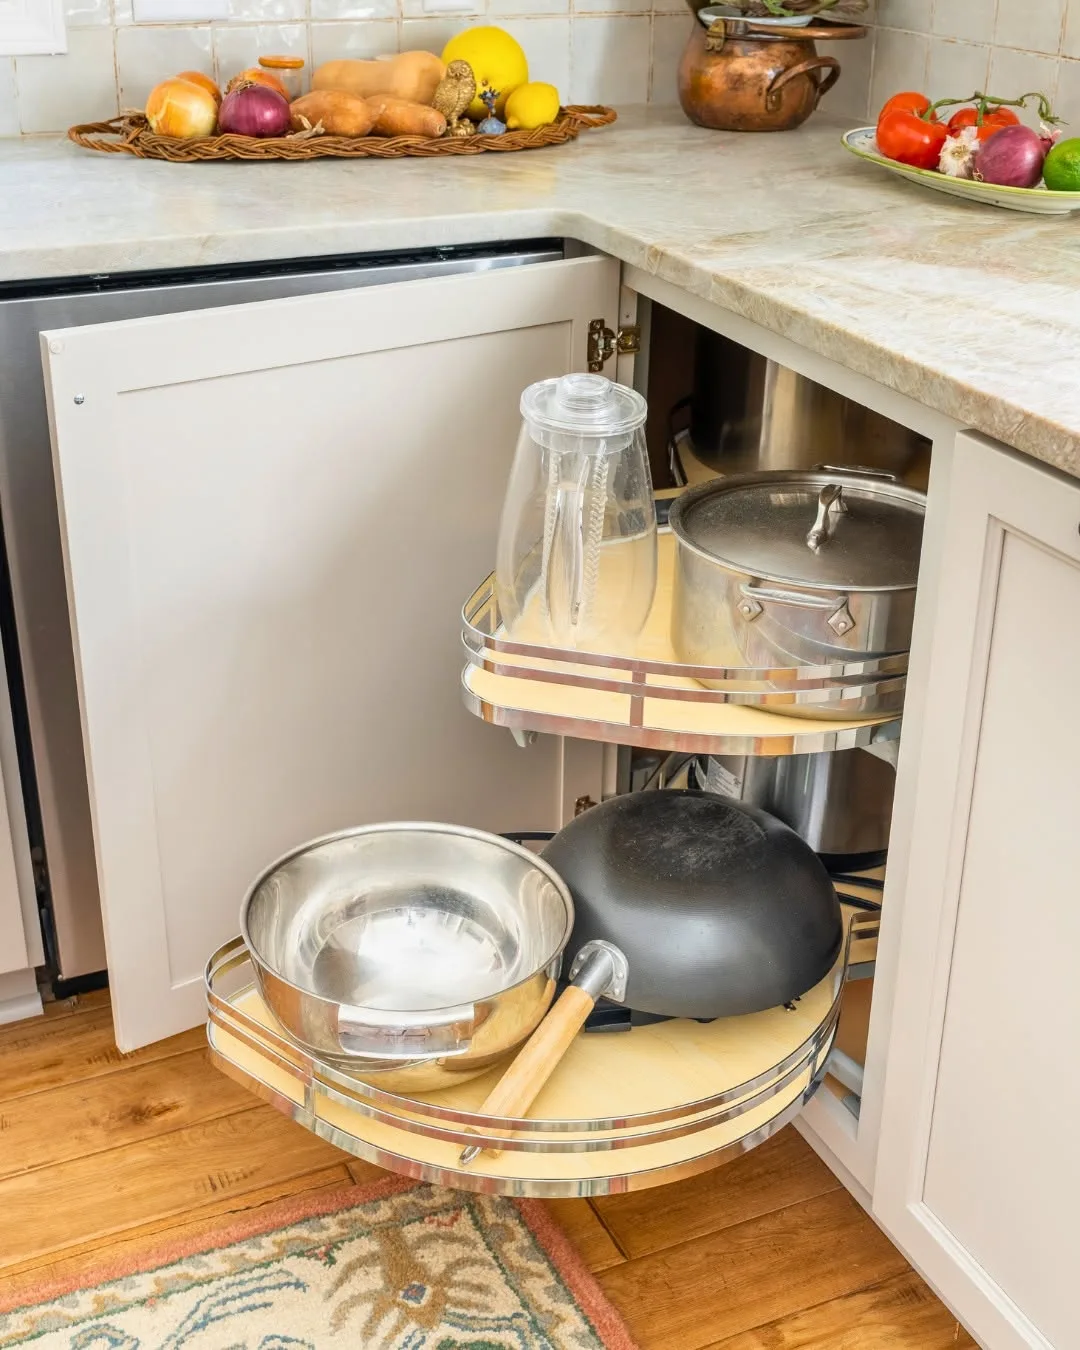
Corner cabinets swallow pots and jars into a dark deep space where items vanish for months at a time. Round turntables solve that problem by bringing the back row to you with one gentle spin. Nothing hides for long, because every item passes the front each time you turn the tray.
Choose a sturdy turntable slightly smaller than the cabinet door opening so it spins without catching the frame. Place tall bottles in the middle and shorter jars around the edge for a clear view. Heavy items belong on the bottom shelf turntable, while light packets and lids suit the upper level.
Heavy pots, sauce bottles, and bulk jars suit corner turntables in busy family kitchens. Small appliances you use weekly also fit well, such as a blender base or a food processor bowl. Keep cleaning sprays in a separate spot though, since food and chemicals should never share one crowded shelf.
During a big cooking day, one spin brings the vinegar, oils, and sauces to your hand without kneeling or reaching blindly. Overloading causes the common failure here. Turntables stacked too high drop items behind the tray where they jam the spin. Load one calm layer, spin slowly, and keep tall bottles centered.
Vertical storage for boards and trays
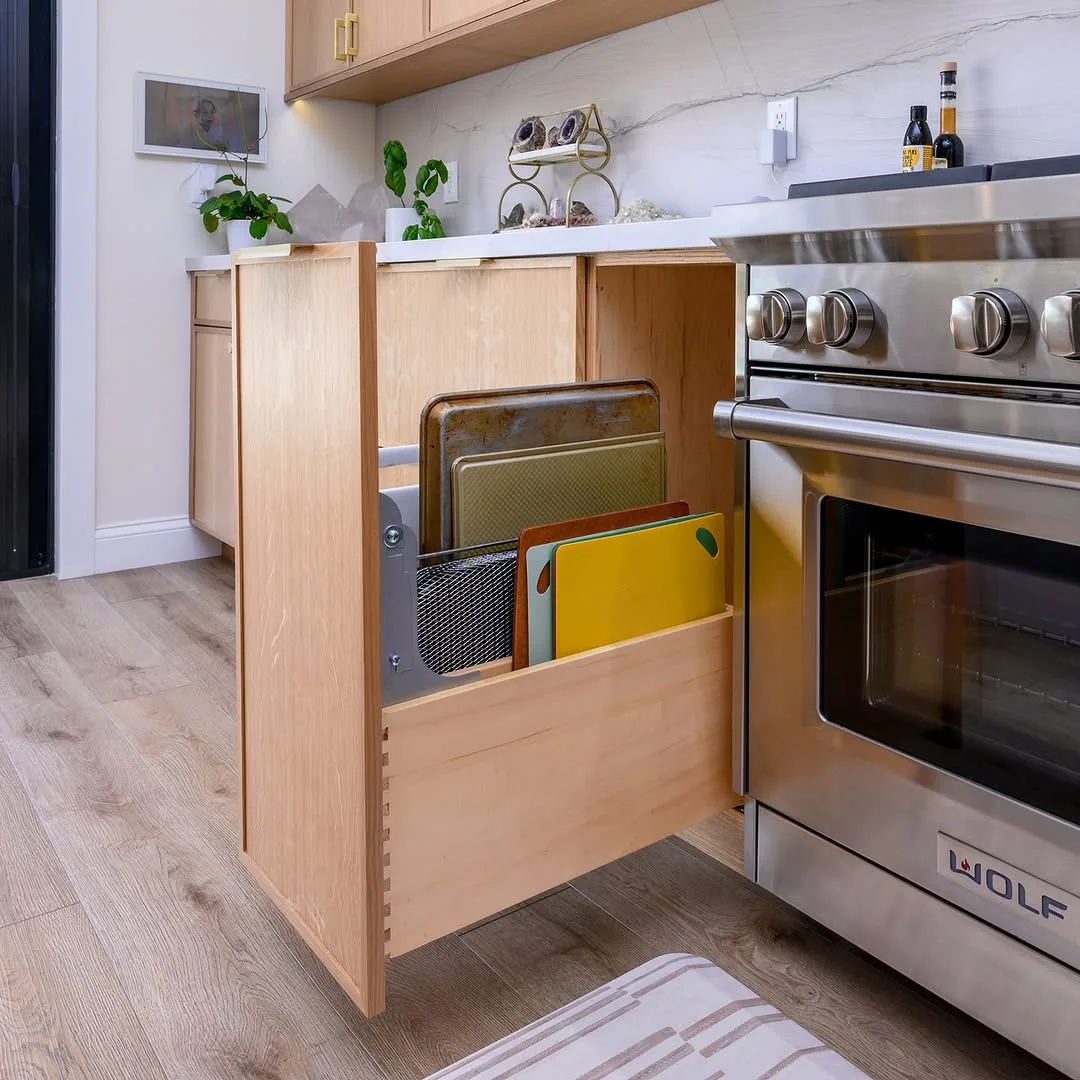
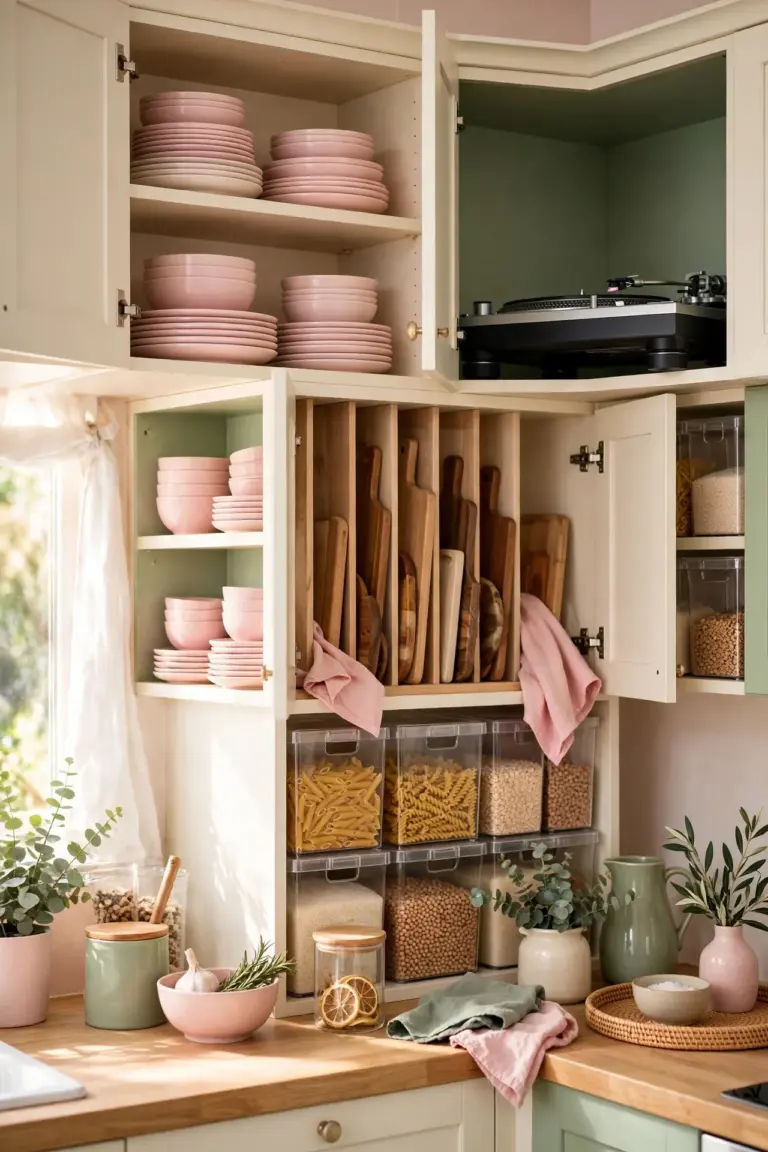
Vertical storage keeps cutting boards, baking trays, and cooling racks upright in slim slots instead of one heavy flat stack. Lifting the top board off a pile wastes time and chips edges, while upright files let you slide out exactly what you need. Counters also stay clearer because boards gain a home off the work surface.
Place a simple rack or tension rods inside a deep cabinet near your main prep area. Sort boards by size, with the largest at the back and everyday boards at the front. Leave finger space between each piece so you can grip edges easily without scraping the board beside it.
Boards and trays cause daily frustration in small kitchens, so vertical files help bakers and meal preppers most. Wooden boards, plastic boards, sheet pans, and muffin trays all store well upright. Keep boards fully dry before filing them though, because trapped moisture can warp wood and cause musty smells over time.
One narrow cabinet beside the oven could hold two boards, three trays, and one rack in the space a messy stack once wasted. Forcing too many pieces into the rack creates the usual mistake. Slots packed tight make boards stick and handles catch. File fewer pieces, and store seasonal trays in a less busy cabinet.
Under cabinet board rack
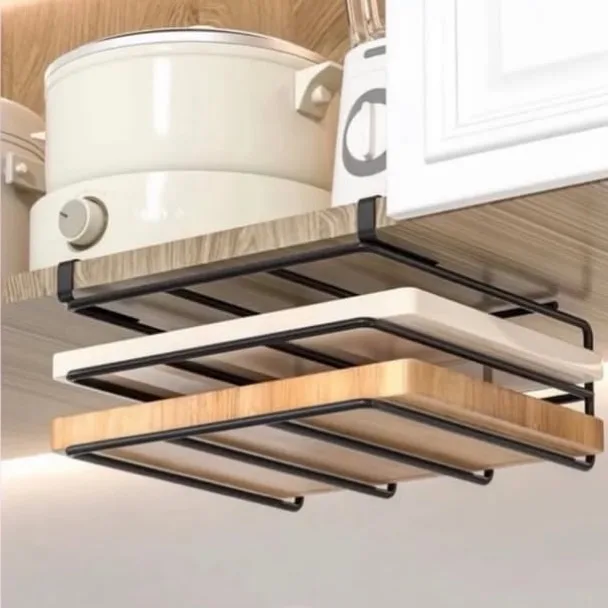
Under cabinet racks use the empty space beneath upper cabinets to hold cutting boards right above your prep counter. Boards stay off the counter, dry faster with air around them, and drop into your hand when you start chopping. Smart kitchen organization ideas often win by using space you already have but rarely notice.
Mount the rack under a cabinet near the sink or stove, following the maker guide for screws and weight limits. Slide boards in gently and keep the heaviest board in the middle slot for balance. Check that cabinet doors and lights still clear the rack, and wipe the rack monthly to remove dust and steam residue.
Kitchens with tiny counters gain the most, because every clear inch of work surface matters during busy cooking. One or two everyday boards suit the rack best, while party sized boards can live in a cabinet. People who chop vegetables daily will feel the benefit every single evening at dinner time.
Before dinner, you can pull a board down, chop onions on the clear counter below, wash the board, and slide it back up. Installing the rack above a heat source causes a real problem though. Steam and heat can warp boards and loosen fittings over time. Pick a cool dry cabinet away from the stove top.
Countertop turntable for daily items
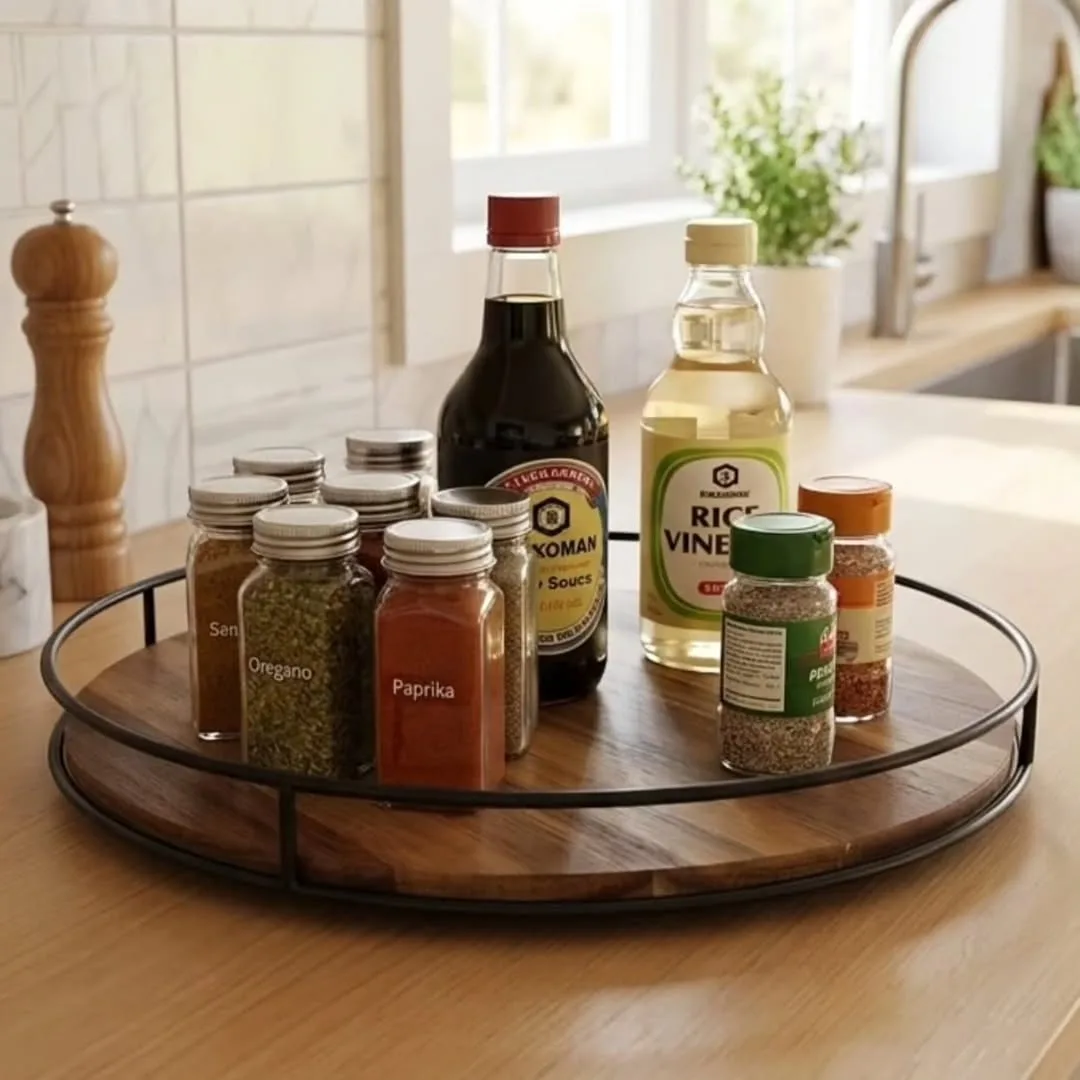
Countertop turntables group oils, salt, honey, and sauces into one neat spinning station beside the stove. Loose bottles spread across counters, leave sticky rings, and crowd your prep space during cooking. One tray keeps daily flavor basics together and wipes clean in seconds after a messy meal.
Keep the turntable small enough that counters still feel open, and choose a raised edge so bottles stay put while spinning. Place the items you use daily on the tray and move special sauces back into a cabinet. Wipe the tray weekly, because drips collect quietly under bottles and attract dust and ants.
Small kitchens benefit because one tray replaces a scattered line of bottles along the backsplash. Coffee corners also work well, holding sugar, mugs, and a small jar of spoons in one tidy circle. Avoid glass bottles near the tray edge though, since a fast spin can tip tall bottles onto hard counters.
Morning cooking gets easier when oil, salt, and pepper spin into reach while eggs cook in the pan beside them. Filling the tray with every bottle you own causes the classic mistake. Turntables work only when they hold daily items. Edit the tray monthly, and return stray bottles to the pantry the same day.
Glass front cabinets for everyday dishes
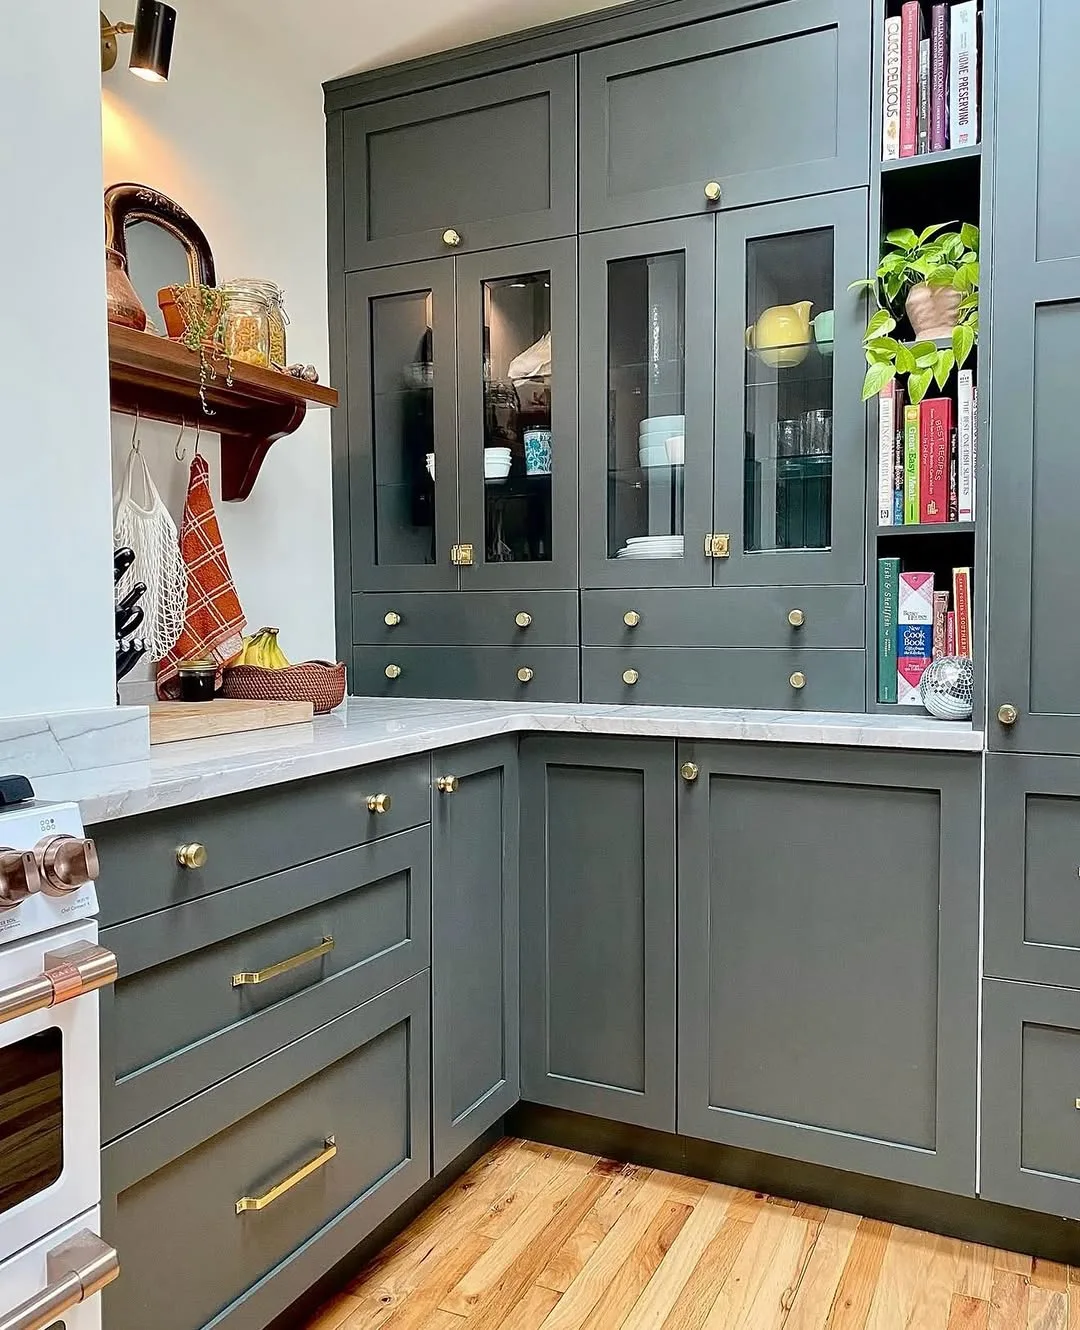
Glass fronts on cabinets let you see everyday plates, bowls, and glasses before you even open the door. Visual order encourages everyone to return dishes to the right shelf, and guests can find a mug without guidance. Displayed dishes also remind you to use and enjoy pieces that hidden cabinets make you forget.
Group dishes by type and color on each shelf, leaving small gaps so stacks look calm rather than packed. Keep daily plates on the lowest shelf and special glasses higher up where hands reach less often. Clean the glass monthly with a soft cloth, since steam and fingerprints show quickly on clear fronts.
Everyday dishes suit glass cabinets because regular use keeps them dust free and easy to justify displaying. Matching sets look best, while mixed collections gain order from grouping by size and shape. Store plastic tubs and worn pans behind solid doors though, because visual clutter behind glass defeats the whole purpose.
Guests helping after dinner can spot the bowl shelf through the glass and put things away without opening every door. Cramming causes the mistake people regret most. Shelves stuffed edge to edge look messy and make plates chip when you pull them out. Keep stacks short, and donate pieces your family never uses.
Square containers that stack neatly
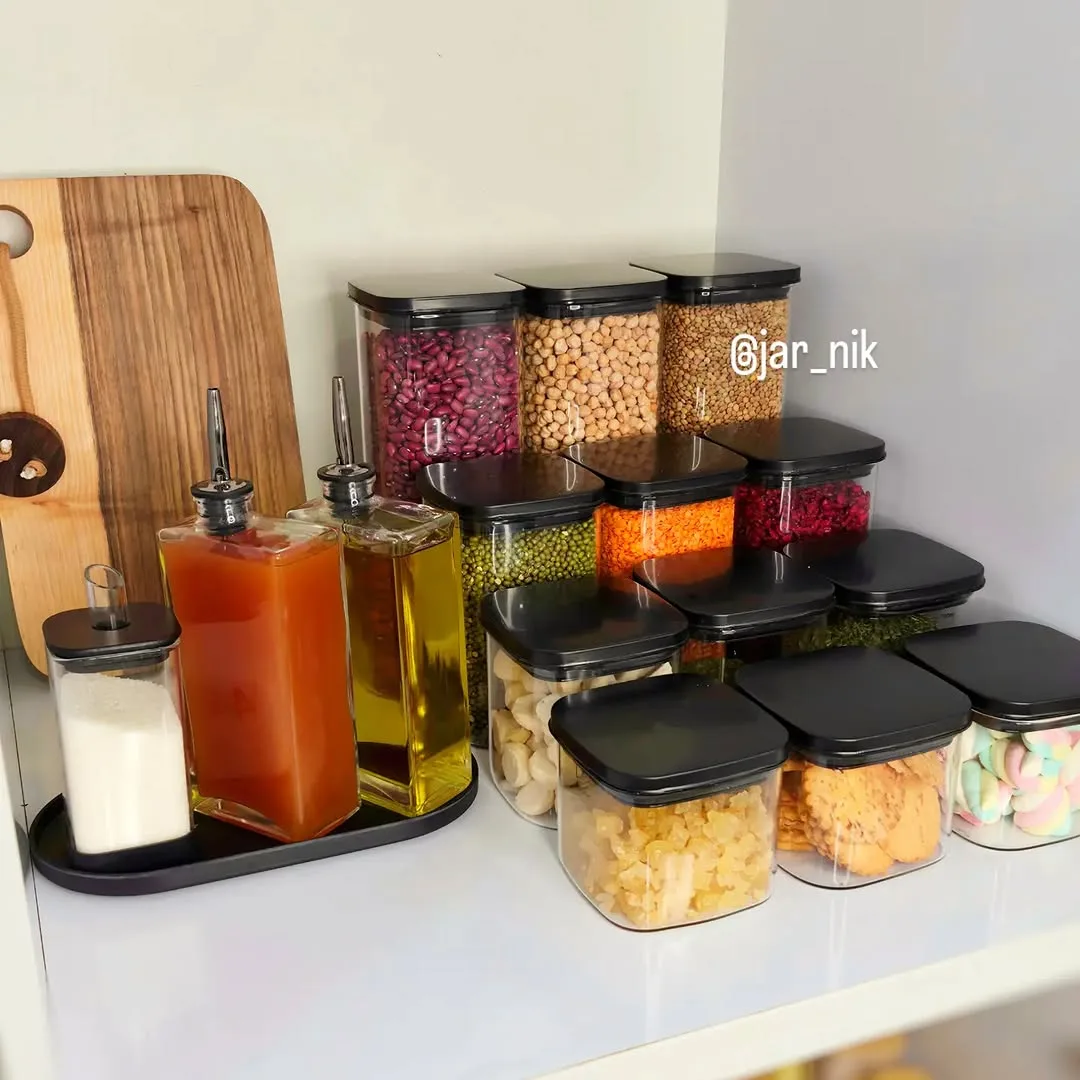
Square containers use shelf and fridge space far better than round tubs, which leave wasted gaps between them. Flat sides sit flush together, lids stack in one pile, and labels face forward in tidy rows. Practical kitchen organization ideas like this calm both the pantry and the fridge with one simple shape change.
Stack containers two or three high at most, and keep the sizes in one family so lids swap easily between tubs. Use larger squares for flour, rice, and cereal, and smaller squares for snacks, seeds, and leftovers. Write contents and dates on the front face, where eyes land first when you open the door.
Dry goods, chopped vegetables, and packed lunches all suit square containers in busy homes. Meal preppers love the tidy fridge rows, and lunch packers can grab one tub without moving five others. Leave a little head space in each tub though, because food expands slightly and tight lids pop off in bags.
Picture a fridge shelf holding four neat squares of soup, salad, fruit, and rice, each labeled and ready for the week. Mixing many brands creates the main headache. Lids stop matching, stacks lean, and sorting takes longer than cooking. Buy one container family in a few sizes, and replace lost pieces from the same range.
Clear bins inside the fridge
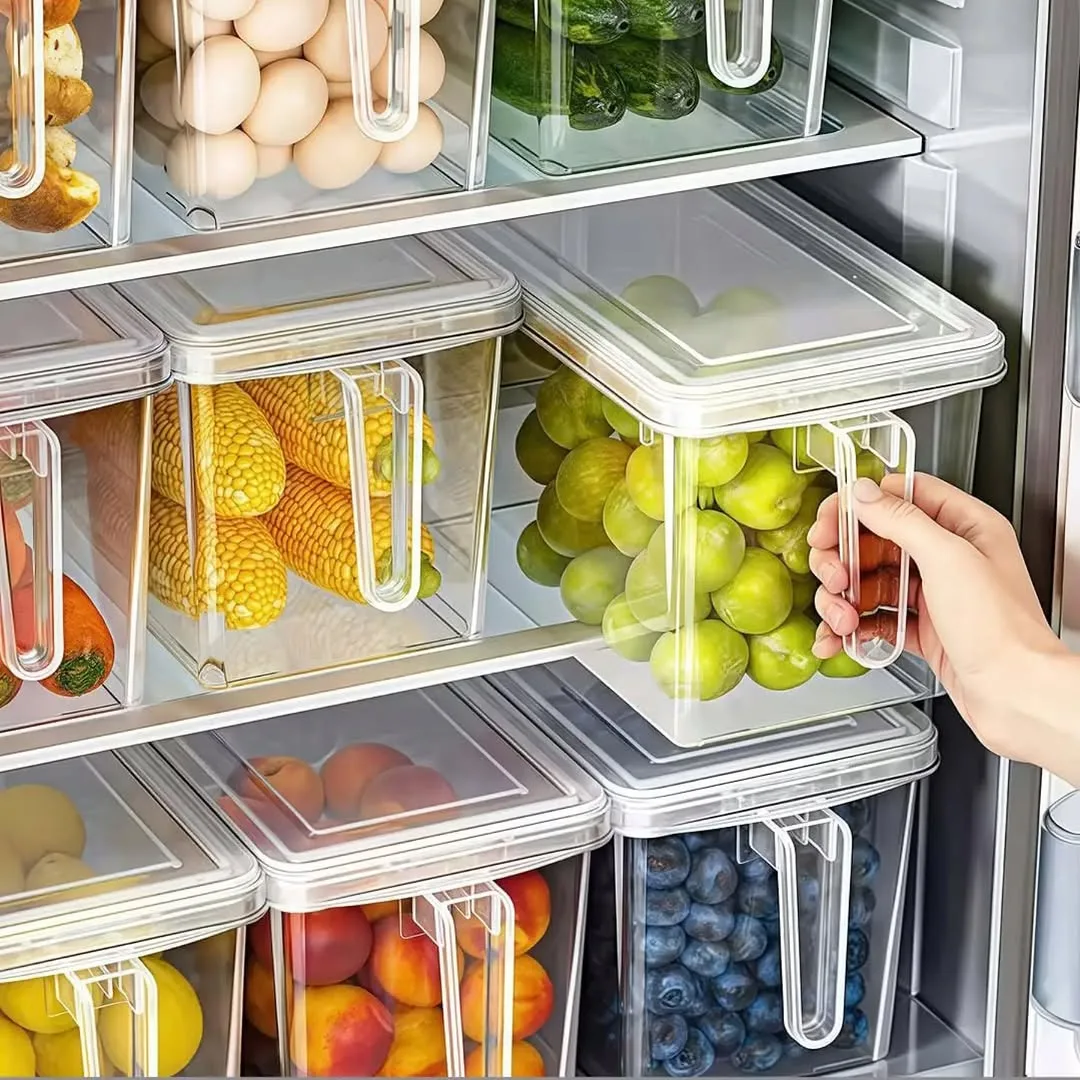
Clear fridge bins group yogurts, cheese, fruit, and leftovers into zones you can pull out and check in seconds. Loose items roll to the back, expire quietly, and turn weekly cleaning into a chore you avoid. Bins catch small spills too, so one leaking tub no longer coats the whole shelf below it.
Wash bins before the first use, then assign each bin one job, such as snacks, dairy, or tonight dinner items. Place bins with handles at the front for heavy groups like drinks and jars. Keep raw meat in a lidded bin on the lowest shelf, away from fresh food, following normal food safety habits.
Busy families gain most because children can pull out the snack bin instead of digging through the whole fridge. Meal planners also save money, since a quick bin check shows what needs eating before the next shop. Avoid packing bins to the brim though, because cold air needs room to move around stored food.
During a busy week, the dinner bin holds washed vegetables, cheese, and sauce together, ready to pull out in one trip. Skipping labels leads to the usual failure. Bins without a clear job slowly collect random leftovers and odd jars. Name each bin job on a small tag, and empty one bin fully each week.
Pull out tray inside a deep cabinet
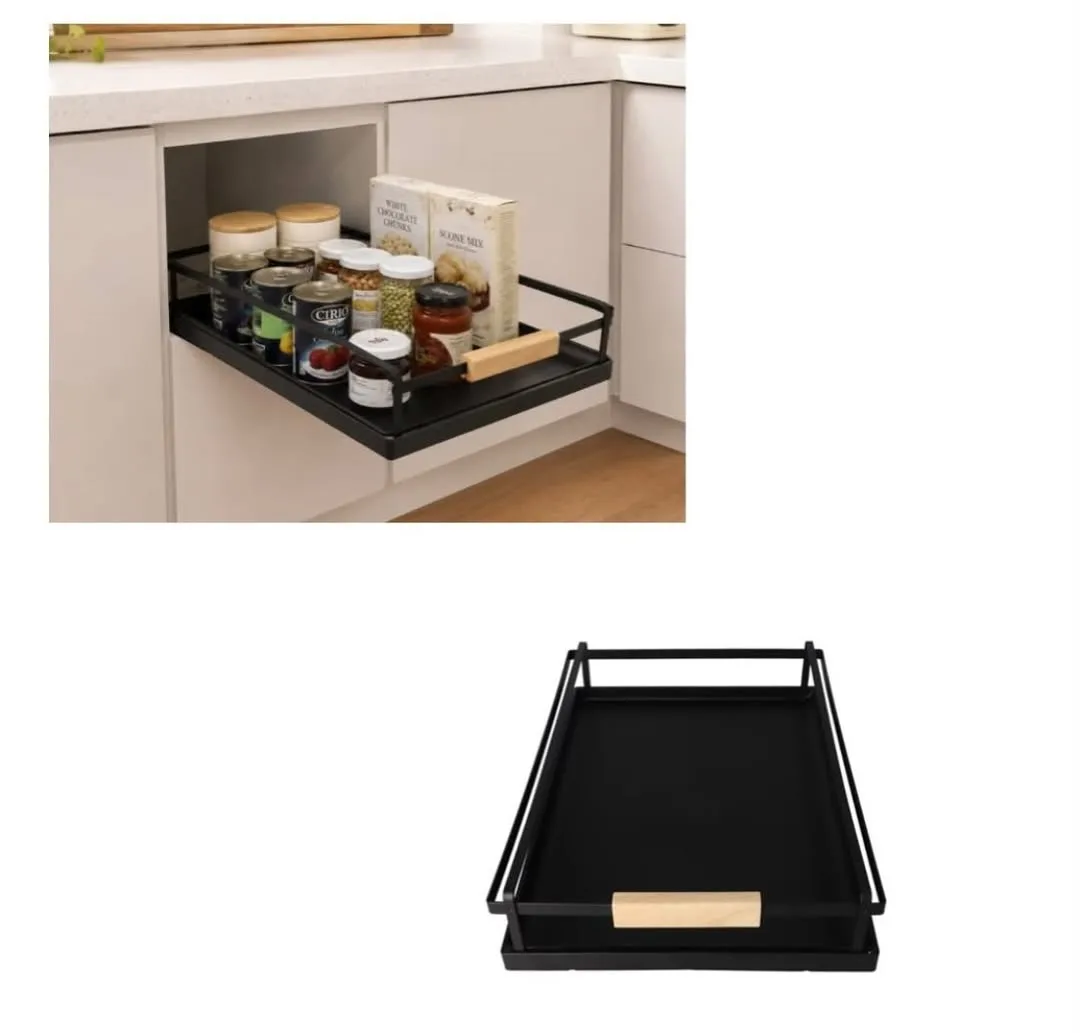
Pull out trays turn a deep dark cabinet into storage you can actually use, because the whole shelf glides toward you. Pots, appliances, and bulk food stop hiding at the back behind newer items. You also kneel less and lift less, since the tray brings heavy loads to the cabinet edge safely.
Choose a tray rated for the weight of your heaviest pots, and measure the cabinet opening before you order anything. Fix the rails level, test the glide with an empty tray, then load heavy items at the back for balance. Keep handles facing forward so you can grab pans quickly during busy cooking sessions.
Deep cabinets under counters suit pull out trays in almost every kitchen, especially for people with sore knees or backs. Stand mixers, slow cookers, and nesting pots all ride well on a sturdy tray. Leave space above tall items though, because lids and handles can catch the shelf above when the tray slides.
Imagine sliding out one tray to reveal the mixer, the big pot, and the blender in one calm row after months of digging. Installing a tray without checking door swing causes the common mistake. Hinges and handles can block the glide path completely. Open and close the door slowly during setup, and adjust rails before loading anything heavy.
Common Mistakes to Avoid in a Busy Kitchen
Overbuying storage before sorting your stuff leads the list of errors behind most failed kitchen organization ideas today. People shop first, declutter later, and end up with pretty boxes that fit nothing they own. Sort and measure before you spend, and let your real items decide the sizes, shapes, and counts you actually need.
Labels seem small, yet skipping them quietly undoes almost every system in this guide within a few busy weeks. Family members guess, guests guess, and items drift back into random spots after each meal. Clear labels turn good intentions into habits, because everyone can return items correctly without asking the person who set things up.
Forgetting maintenance ruins tidy kitchens slowly, one stray item at a time, until the mess feels normal again. Expired food creeps back, bins collect crumbs, and spare items pile onto clear counters after busy weekends. Add a ten minute reset to your weekly routine, and treat small drifts as signals to adjust the system early.
Budget Friendly Ways to Organize a Kitchen
Start with cleaning, sorting, and moving items before you spend a single coin on new storage products. Empty one zone, group similar items, and use boxes, jars, and trays you already own in new spots. Many strong kitchen organization ideas cost nothing, because better placement alone fixes the daily digging and stacking problems.
Clean glass food jars from pasta sauce and jam make fine storage for grains, spices, and snacks once labels come off. Shoe boxes and small cardboard boxes work as drawer dividers and pantry bins while you test a system. Testing with free containers first shows you the right sizes before real money leaves your pocket.
Spend slowly after testing, buying one helpful item at a time for the zone that still frustrates you most. Discount shops, secondhand stores, and sale weeks offer sturdy bins, trays, and turntables for far less than fancy sets. Simple pieces in plain colors age well, mix easily, and keep the whole project gentle on your wallet.
Kitchen Organization Tips That Save Time Every Day
Keep daily tools beside the stove. Store the spatula, tongs, and spoons you use most in the drawer or crock closest to where you cook. Short walks during cooking add up across a week, and hot pans should never wait while you hunt through distant drawers for one simple tool.
Put breakfast items in one zone. Group oats, honey, bowls, and mugs on one shelf or in one bin so mornings run without thinking. Children can help themselves sooner when breakfast lives in one low spot. Calmer mornings also mean fewer spills, less shouting, and a tidier counter before the school run begins.
Group items by task, not by type. Keep baking goods together, lunch packing supplies together, and coffee items together, even if that breaks traditional storage rules. Task groups match how you actually move through the kitchen during a busy day. You grab one zone, finish the job, and put everything back in one trip.
Use one in and one out rule. Bring a new mug, tool, or container home only when an old one leaves the kitchen for donation or recycling. Counters and drawers stay at a level your storage can handle without force. Small kitchens especially need this habit, because one extra gadget can crowd out three daily tools.
Leave one clear prep stretch. Protect one section of counter as a no storage zone where chopping and mixing always happen. Move mail, keys, and spare appliances off that stretch every evening without exception. Cooking feels easier the next day because your main work space greets you clean, open, and ready.
Reset the kitchen for ten minutes nightly. Return stray items, wipe counters, empty the sink area, and check tomorrow breakfast supplies before you switch off the lights. Short nightly resets stop weekend cleaning marathons and keep every system in this guide working. Waking up to a calm kitchen quietly improves the whole next day.
Small habits protect every system you build, so treat these routines as part of the storage plan rather than extra chores. Pick two habits this week, practice them until they feel normal, and add more later. Your future kitchen organization ideas will work better because the daily basics already run smoothly in your home.
FAQ
Where should a beginner start in a very messy kitchen?
Begin with one drawer or one shelf, finish it fully, and enjoy the win before touching the next spot. Small finished zones build confidence and show you what storage you truly need. Most beginners quit because they empty the whole kitchen at once, so protect your energy and work zone by zone each week.
How many containers should someone buy at the start?
Most kitchens need fewer containers than people expect, because sorting first reveals jars and boxes you already own. Buy only for one finished zone, test the sizes for two weeks, and add pieces slowly. Extra containers become clutter themselves, so keep receipts and avoid big matching sets until your system proves itself.
Do labels really matter for family kitchens?
Labels matter because they let every family member return items to the right home without asking questions. Guests, children, and partners sort correctly when words guide them, and systems survive busy weeks far longer. Plain labels with big clear letters work best, and you can update them in minutes when a zone changes.
Which areas give the fastest results for busy cooks?
You gain the fastest results from the cooking drawer, the spice storage, and the fridge, because you use them every day. Small wins in daily zones change how cooking feels within one week. Counters come next, since one clear prep stretch makes every meal easier from chopping to serving to cleaning up afterward.
How often should pantry storage get a full review?
Check pantry jars, bins, and shelves once a month for expired food, stale spices, and items drifting out of place. Monthly reviews take minutes when systems already work, and they stop small messes growing into a full weekend project. Tie the review to a regular event, such as the first grocery shop of each month.
Can a small kitchen still feel calm and organized?
Small kitchens often feel calmer than big ones once every item earns its place and storage uses vertical space well. Focus on daily items, keep counters mostly clear, and store rare items in one box elsewhere. Fewer choices on display means faster cooking, easier cleaning, and a room that feels bigger than its measurements suggest.
Conclusion
Calm kitchens grow from simple homes for everyday items, not from expensive remodels or perfect matching sets. Jars, bins, trays, and dividers each solve one small problem, and together they remove the daily digging that makes cooking feel tiring. Start where frustration lives, and let one tidy zone inspire the next one.
Your kitchen already holds most of what you need for a calmer setup, including jars, boxes, and items ready to move. Sorting first, measuring second, and buying slowly will protect your budget while the system takes shape. Family habits then keep the calm alive, because everyone can find things and return them without help.
Pick one idea from this guide tonight, set a timer for twenty minutes, and finish that single spot completely. Photograph the result, enjoy cooking in the calmer space tomorrow, and choose the next zone next week. Steady small steps will turn your kitchen into a place that helps you every day.